Network Connection
Method 1: Connect to the Internet via Ethernet Cable
Connect one end of the Ethernet cable to the external internet.

Insert the other end of the Ethernet cable into the Variable IP port of the Telebox.
This completes the network connection, allowing you to upload and browse the collected data on the cloud.
Method 2: Connect to the Internet via WiFi
Device Connection
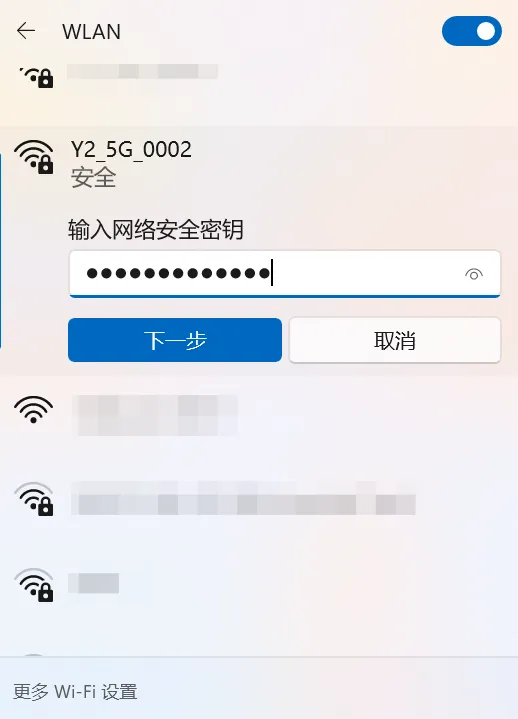
Option 1: Laptop Connects to Telesuit via WiFi
Router WiFi Name: Check the sticker on the bottom of the Telebox
Router WiFi Password: minnanoIO2023
Connect the laptop to the corresponding router WiFi.
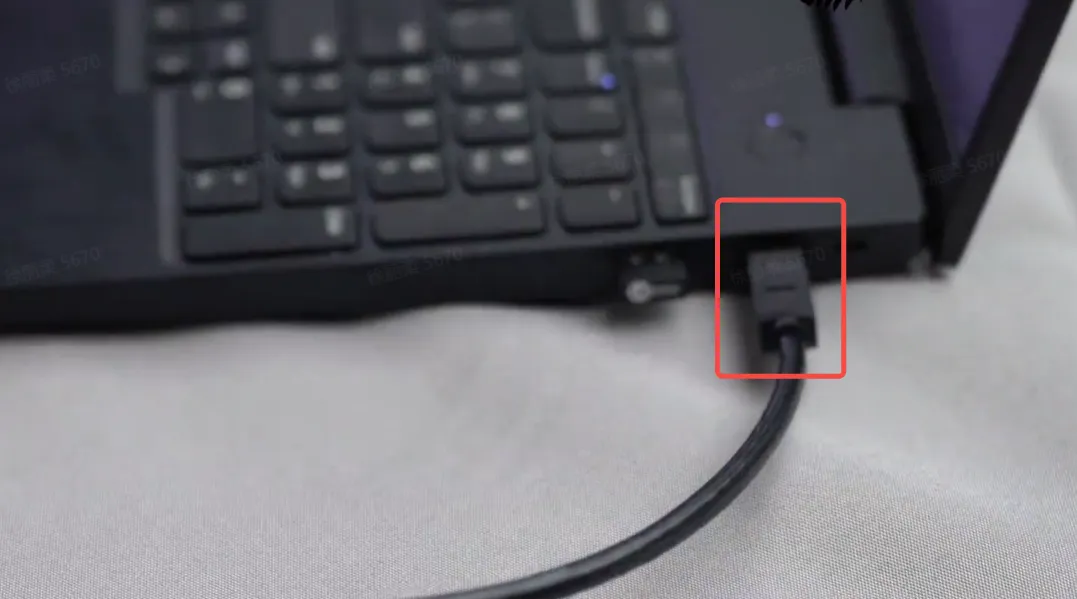
Option 2: Desktop or Laptop Connects to Telesuit via Ethernet Cable
Insert one end of the Ethernet cable into the rectangular slot above the main control, ensuring a secure connection.
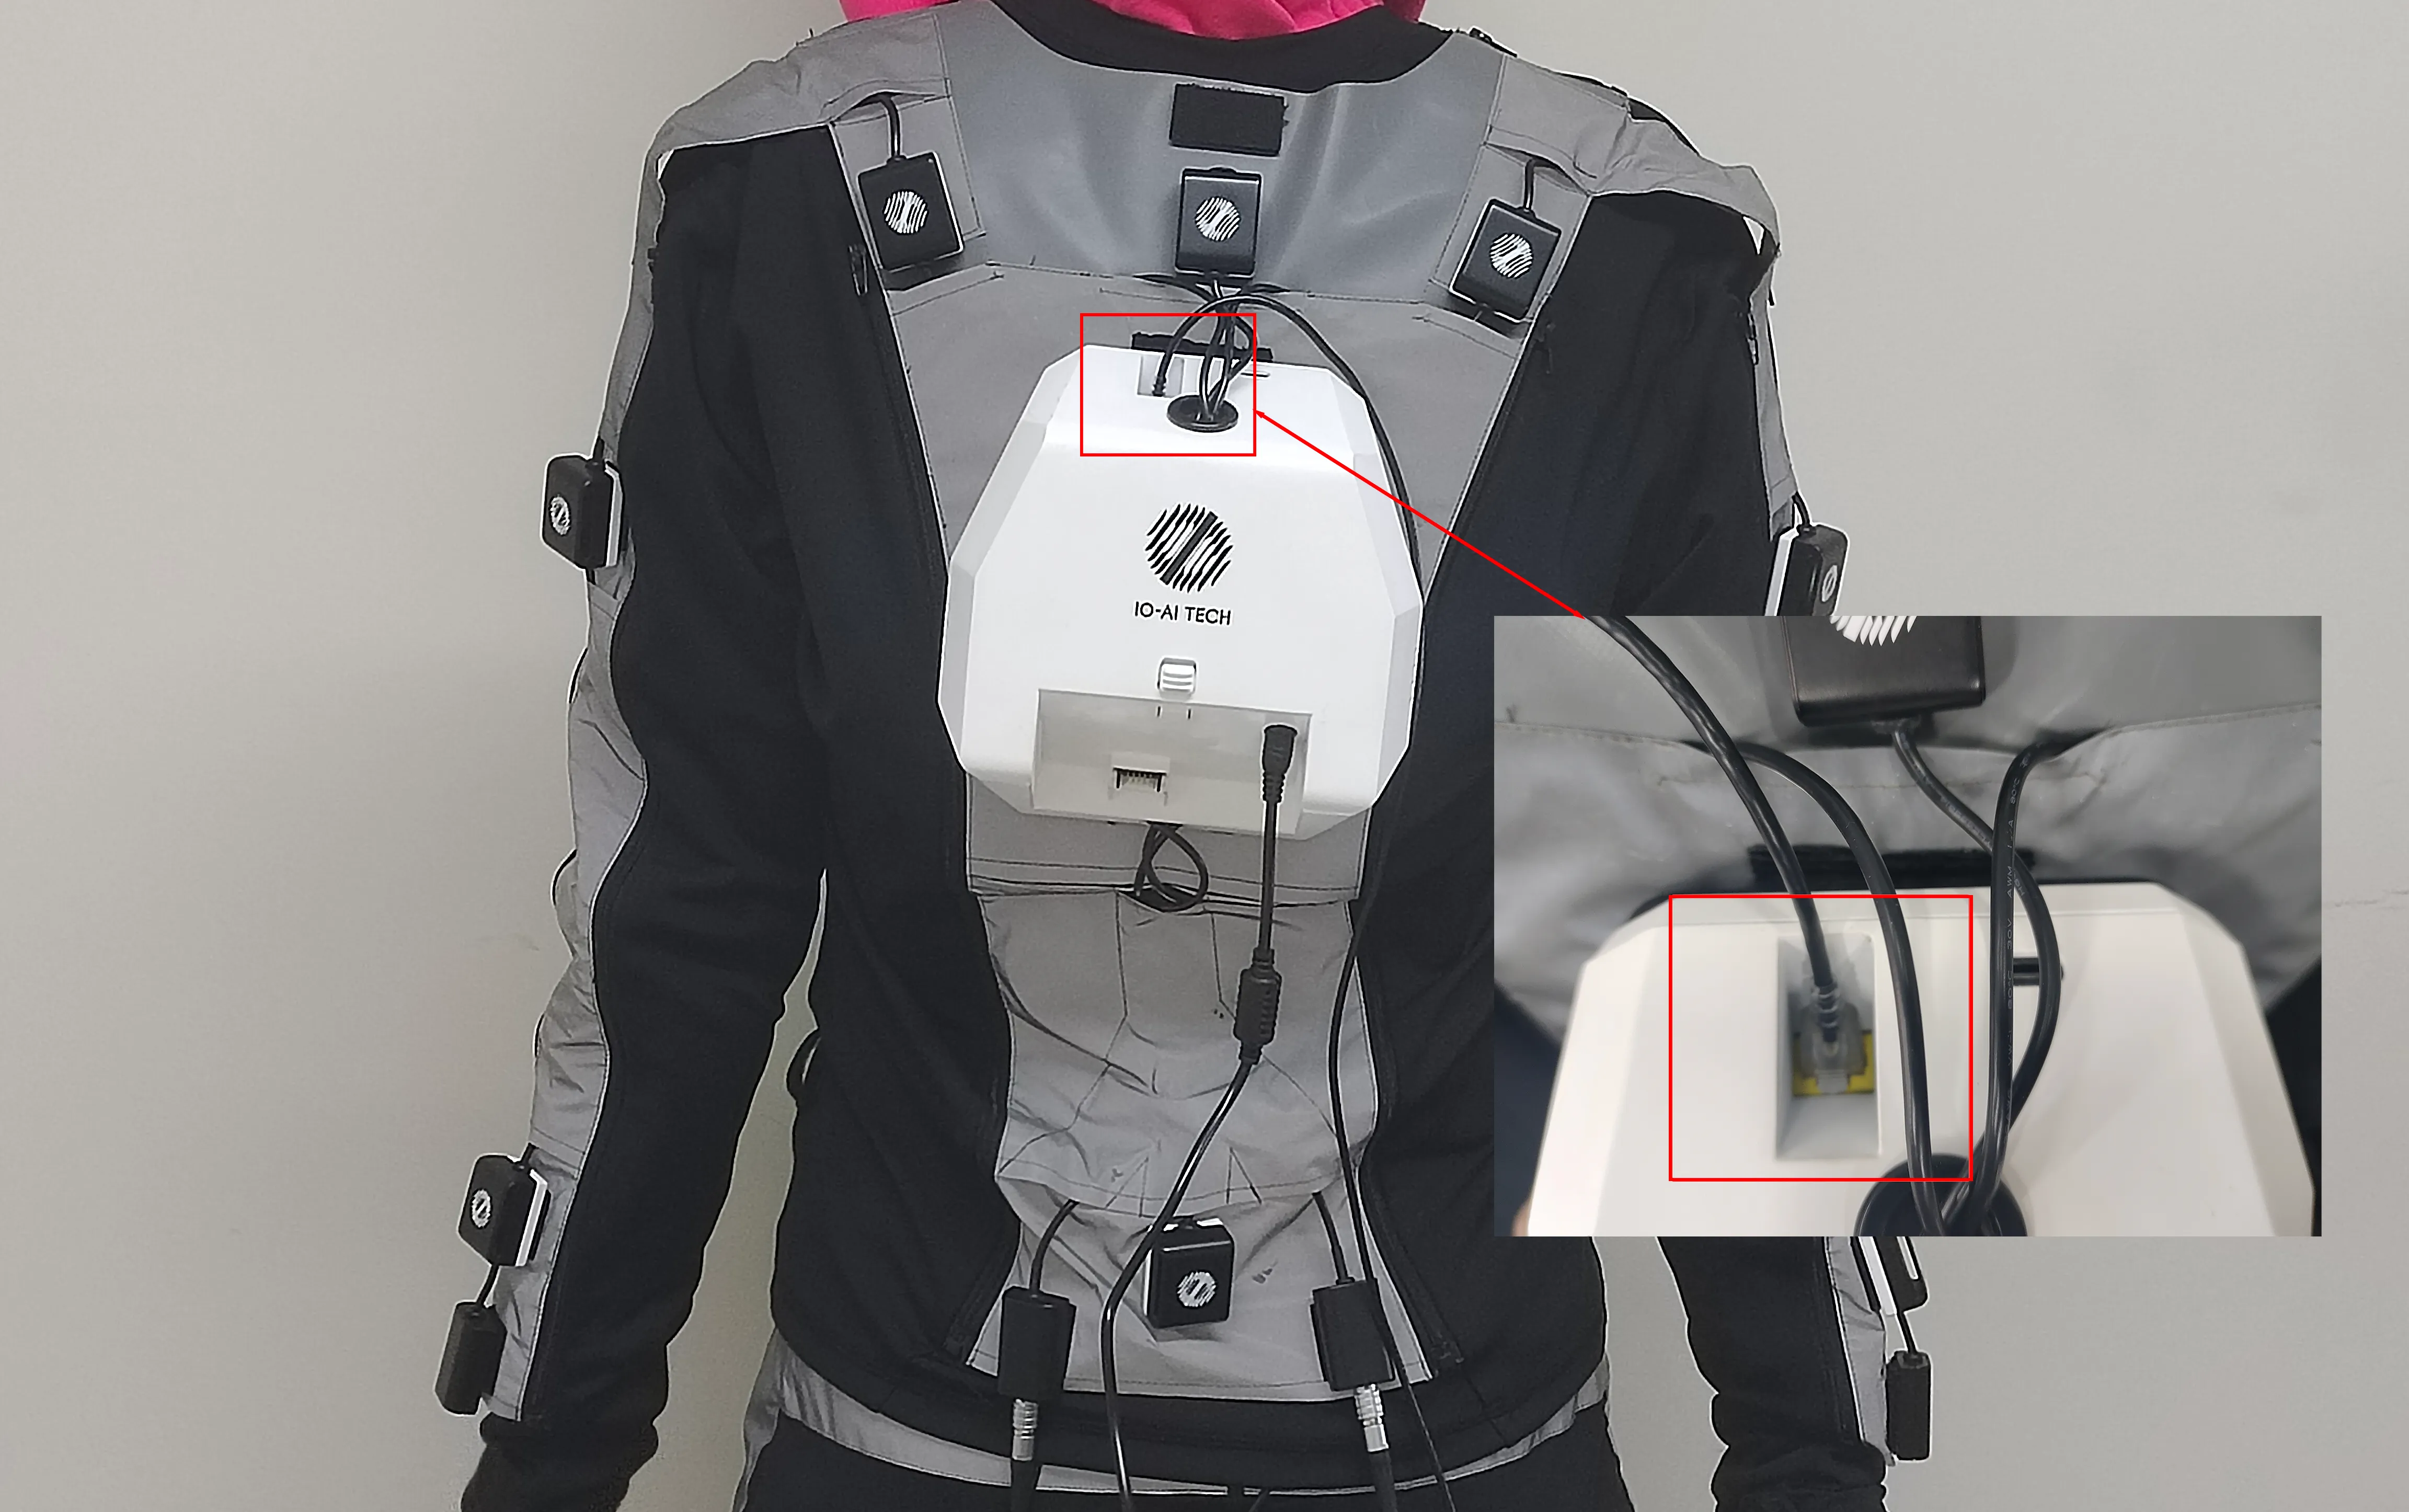
Insert the other end of the Ethernet cable into the laptop's Ethernet port.
Configuration Steps
Open a browser and enter the URL http://10.42.0.1 and navigate to it.

Enter the password admin in the white input box in the center of the page.
Click the yellow LOGIN button to log in.

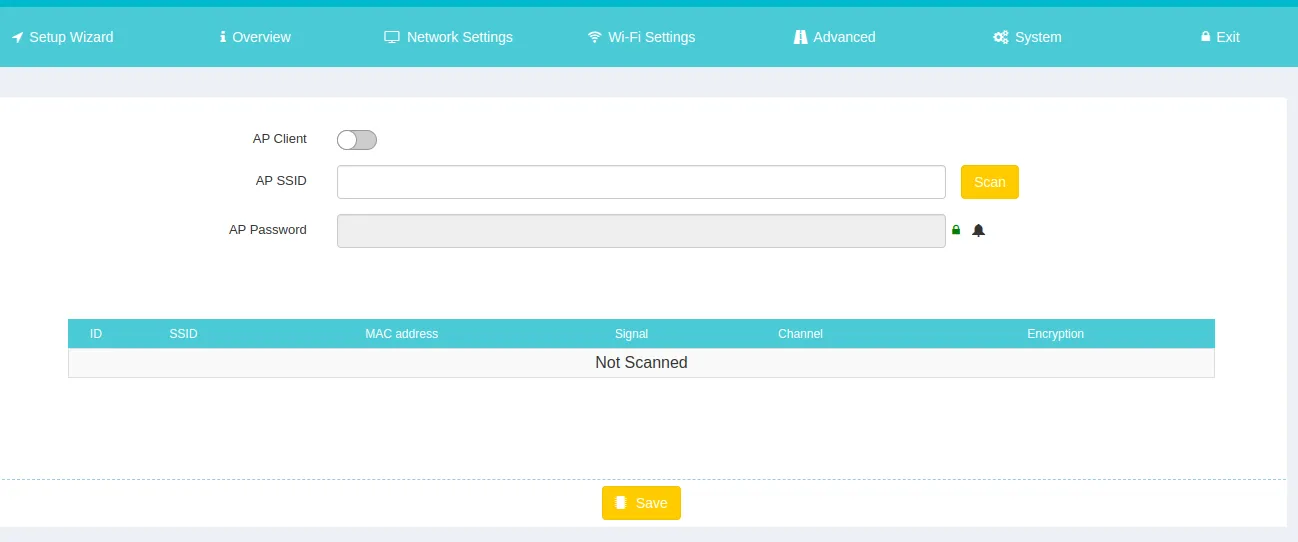
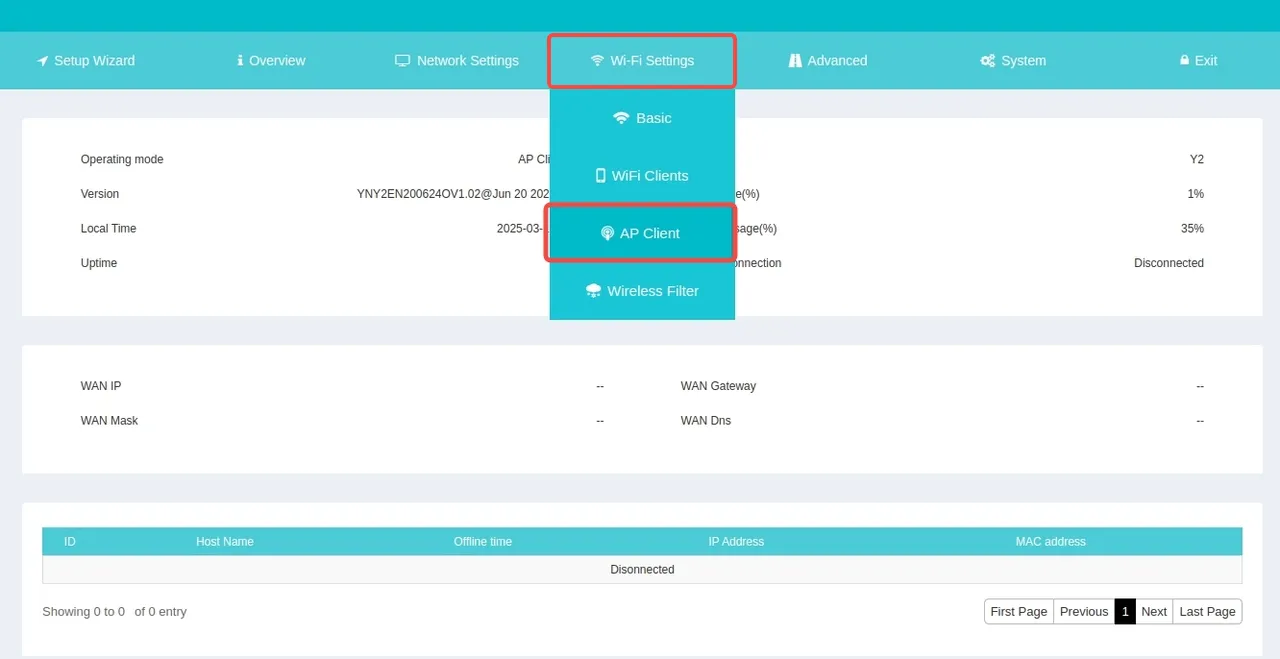
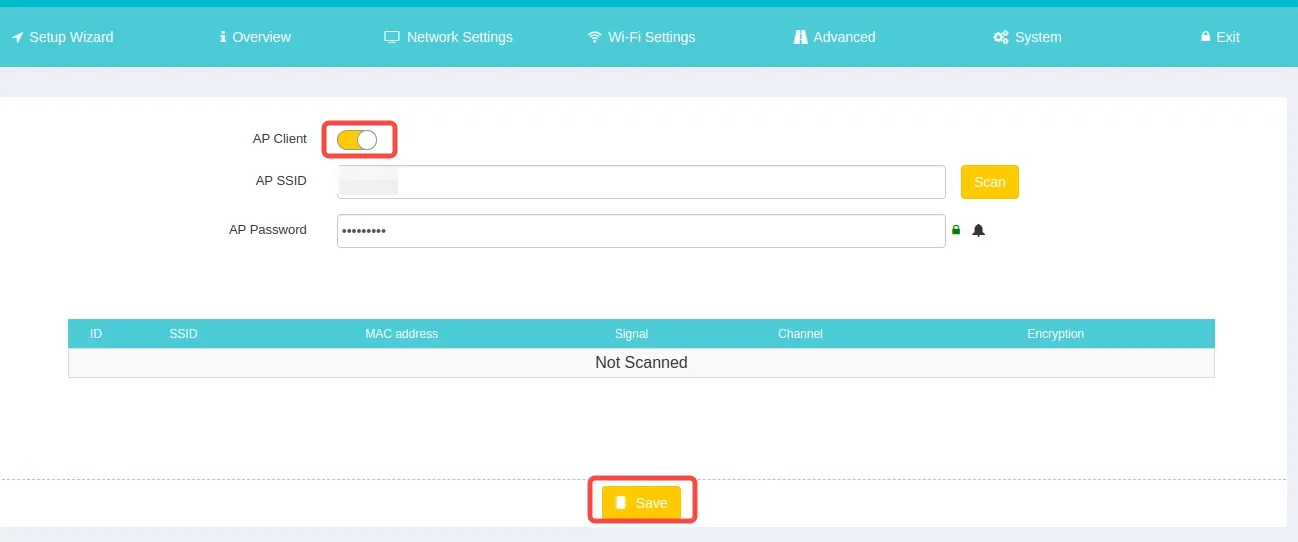
Hover the mouse over Wi-Fi Settings in the top menu to reveal a dropdown menu.
Click the "AP Client" option to enter.
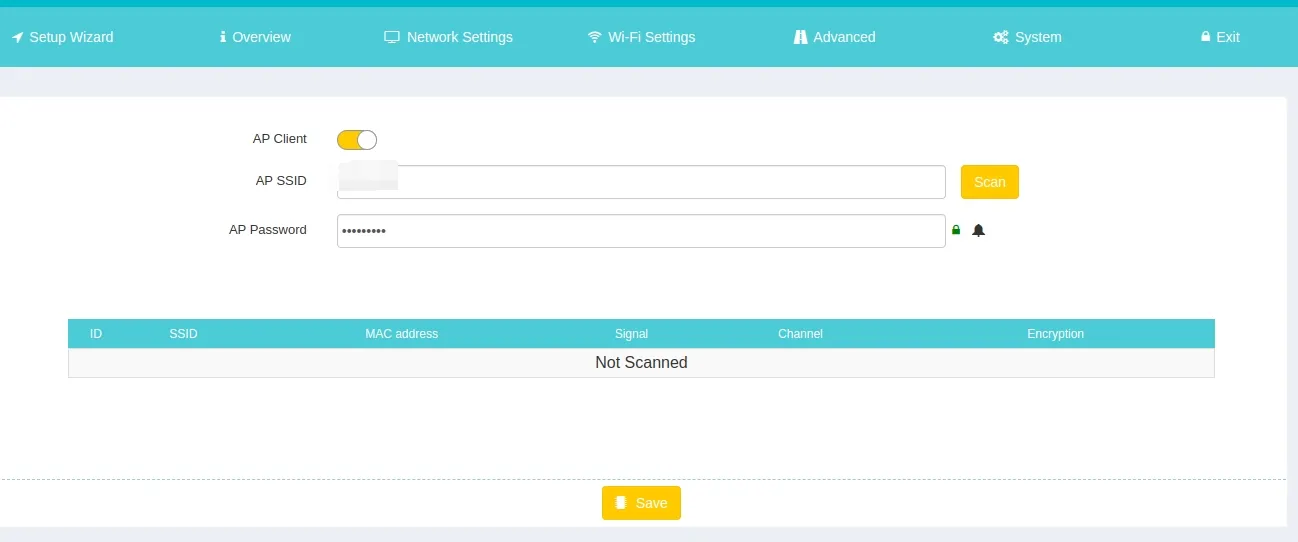
Turn on the "AP Client" switch and click "Scan" to start scanning.
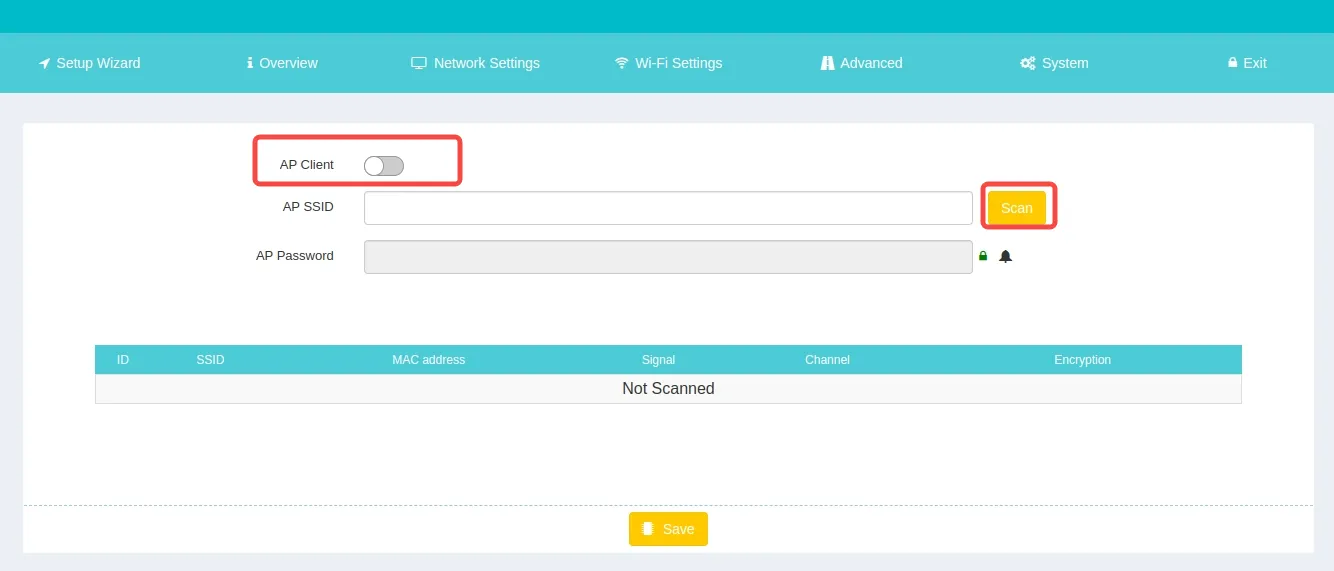
Wait for the scan results.

In the list below, find the WiFi you want to connect to and enter the password.
⚠️ Note:
Make sure the password is correct. If the password is incorrect, there will be no error prompt!!

Click the "Save" button at the bottom of the page to save.

Wait for the page to display Save Completed.
Keep refreshing the page until the network connection is re-established.
Once the network connection is re-established, refresh again. If the input fields for account and password are still present, the save was successful.
⚠️ Note:
When connecting the device, if using [Option 1: Laptop Connects to Telesuit via WiFi], the WiFi will disconnect. Please wait patiently for the WiFi to reappear and reconnect, then refresh the page.
Configuration is complete.
Verify Network Connection
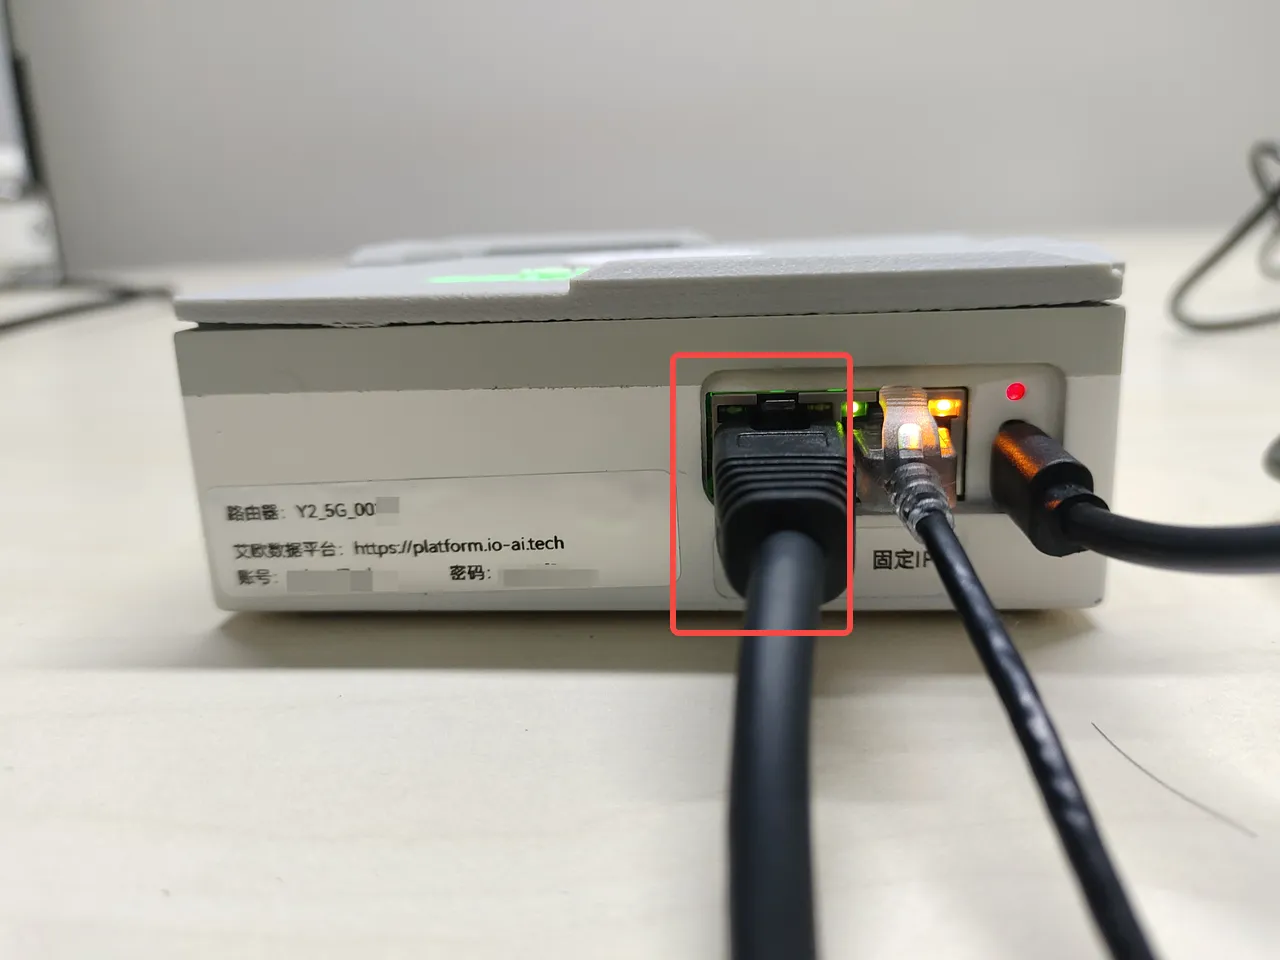
Connect the Main Control to the Telebox
Insert one end of the Ethernet cable into the rectangular slot above the main control, ensuring a secure connection.
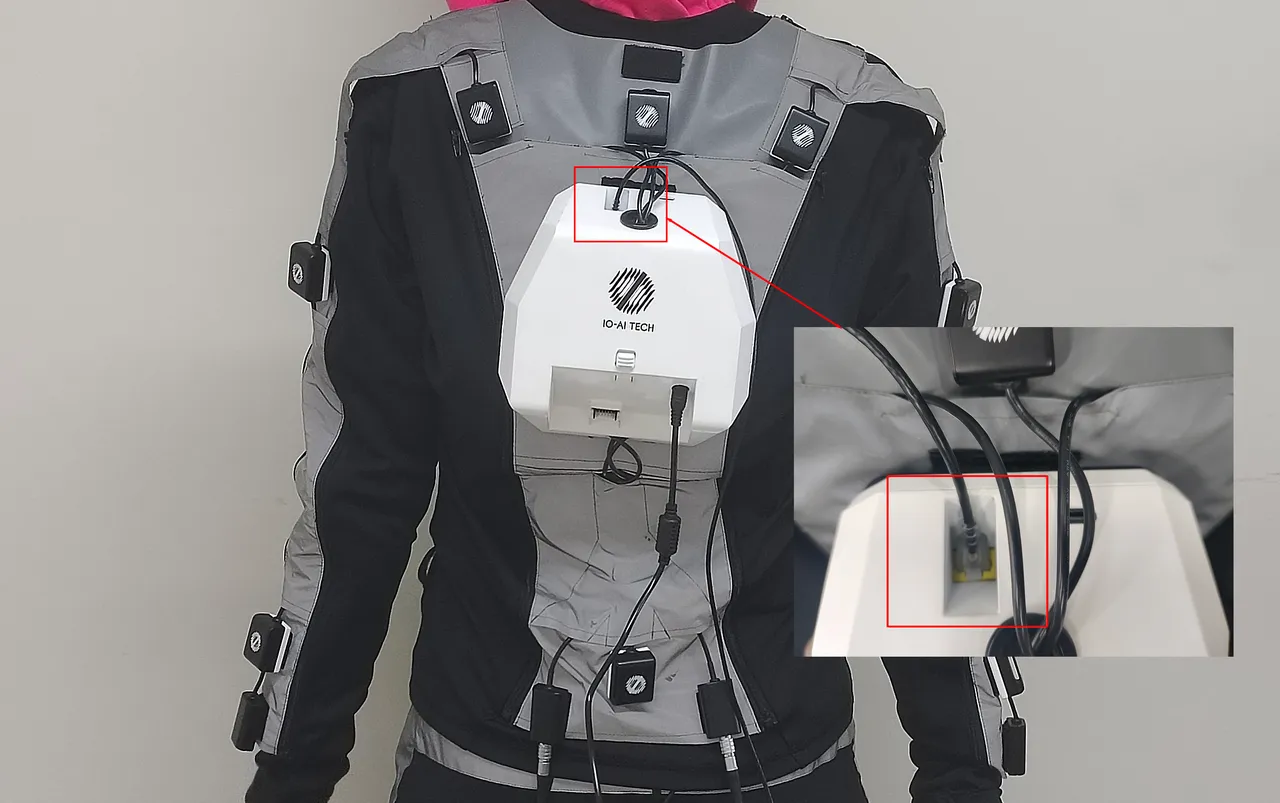
Insert the other end of the Ethernet cable into the Fixed IP port on the Telebox. The port indicator light should be flashing orange, indicating a successful connection.

Leave the Variable IP port of the Telebox empty.
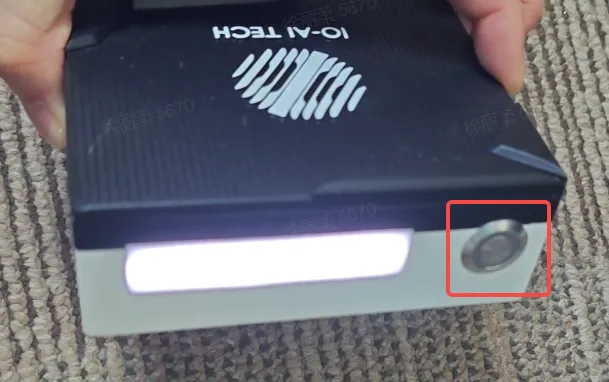
Switch Telebox Mode
Press and hold the round button on the side of the Telebox. When the light strip next to the button turns completely white, it switches to data upload mode, indicating a successful network connection.
Verify Network
At this point, both the Telesuit and Telebox can access the internet.
Disconnect Network Connection
Open a browser and enter the URL http://10.42.0.1 and navigate to it.
Enter the password admin in the white input box in the center of the page.
Click the yellow LOGIN button to log in.
Hover the mouse over Wi-Fi Settings in the top menu to reveal a dropdown menu.
Click the "AP Client" option to enter.
Turn off the "AP Client" switch and click the "Save" button at the bottom of the page to save.
Wait for the page to display Save Completed.
Keep refreshing the page until the network connection is re-established.
Once the network connection is re-established, refresh again. If the input fields for account and password are empty, the network disconnection was successful.
⚠️ Note:
When connecting the device, if using [Option 1: Laptop Connects to Telesuit via WiFi], the WiFi will disconnect. Please wait patiently for the WiFi to reappear and reconnect, then refresh the page.