Data Management
This section explains how to upload teleoperation data to the IO Data Platform. For more details about the platform, see the IO Data Platform Documentation.
Data collected via teleoperation is initially stored on the local TeleBox hard drive.
You can access this data locally by connecting your computer to the TeleXperience Wi-Fi.
Alternatively, upload the data to the IO Data Platform for review, annotation, and management.
Browse Local Data
Steps
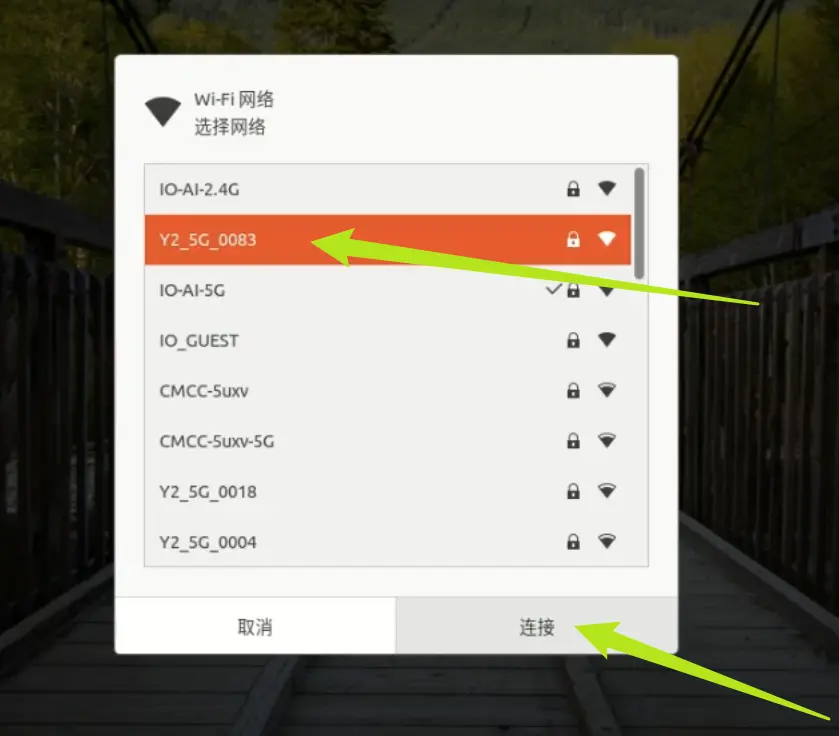
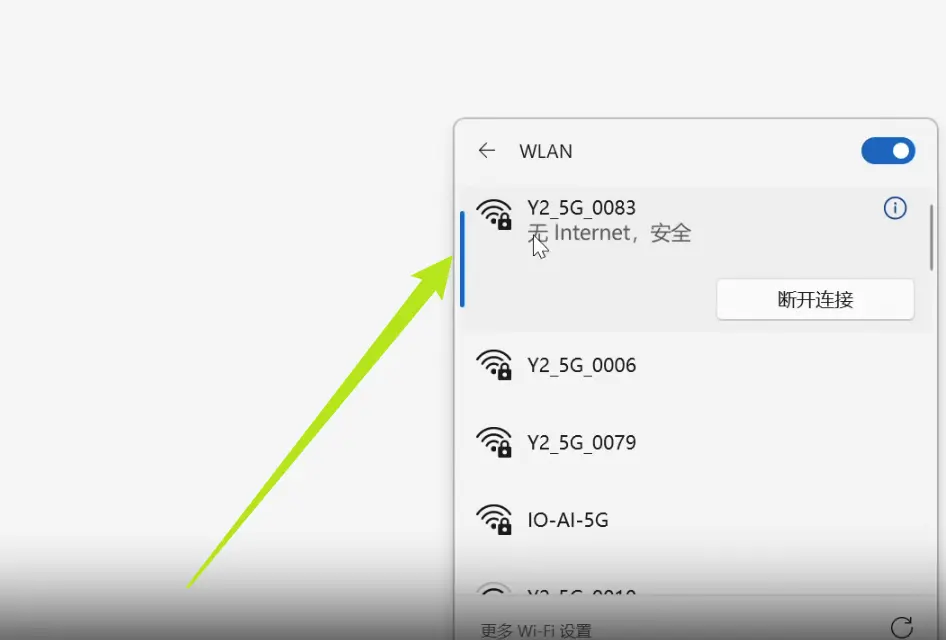
Connect your laptop to the TeleSuit Wi-Fi. Wi-Fi name is shown on the device label.

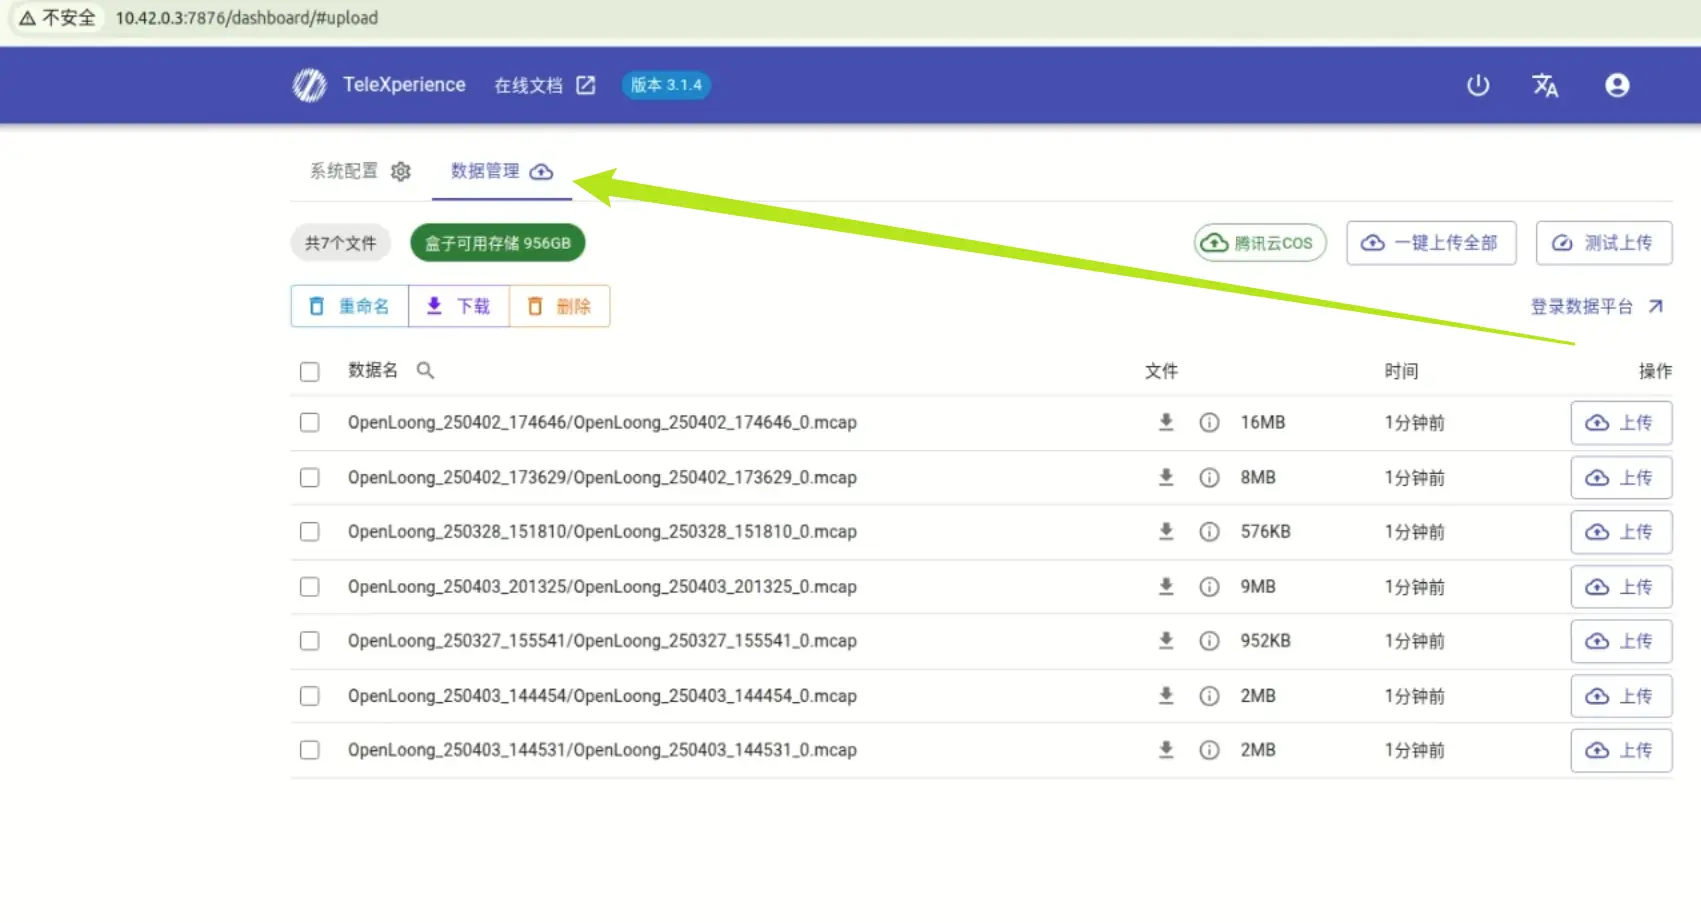
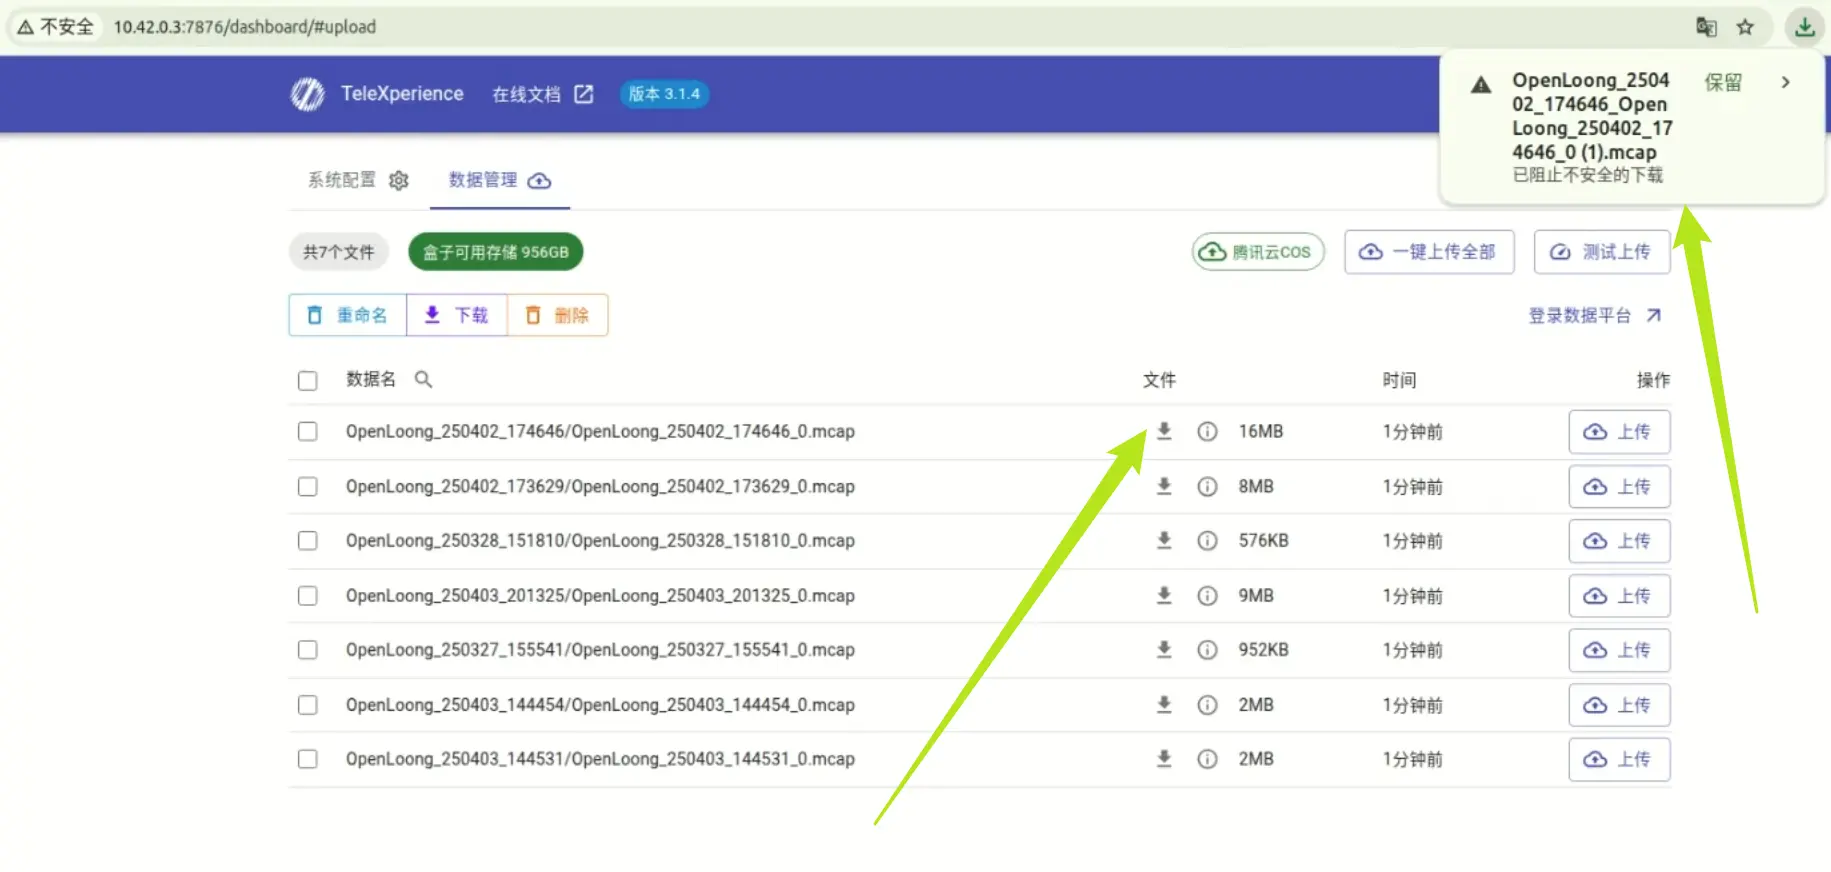
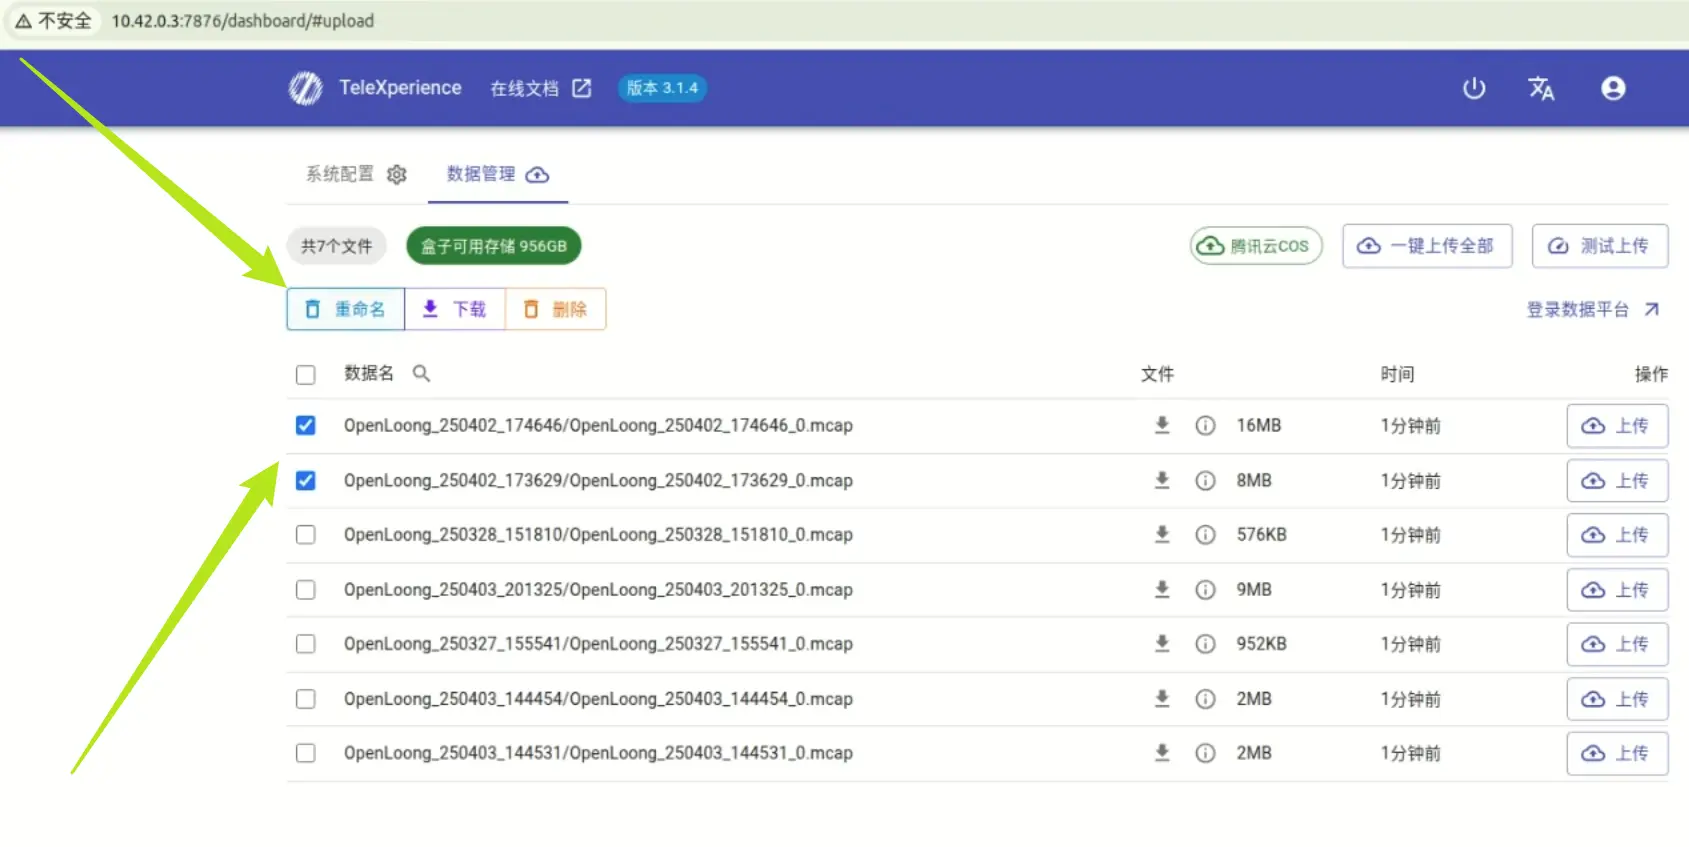
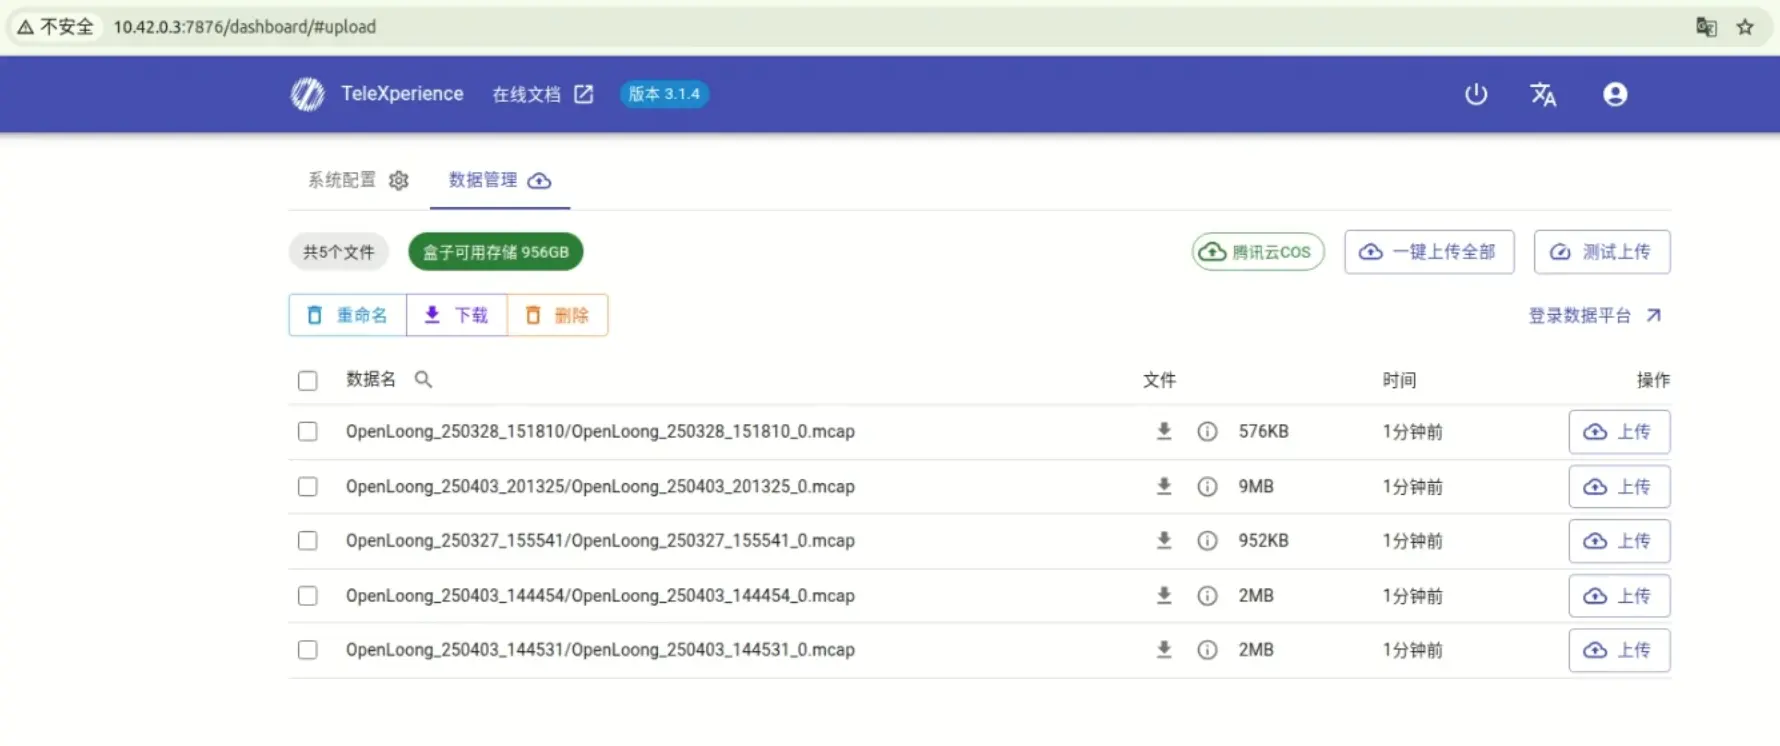
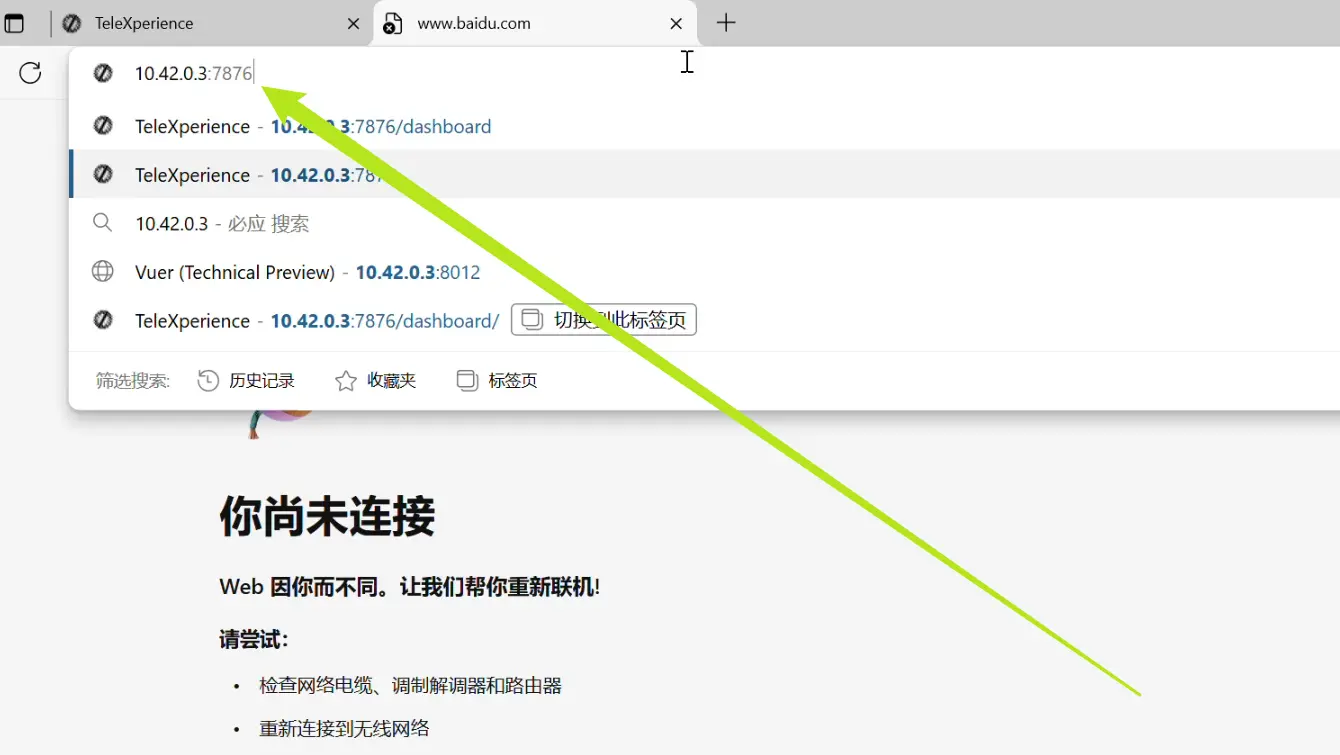
Open your browser and go to 10.42.0.3:7876. On the main page, click Data Management to view the data list. Select any data entry to download.
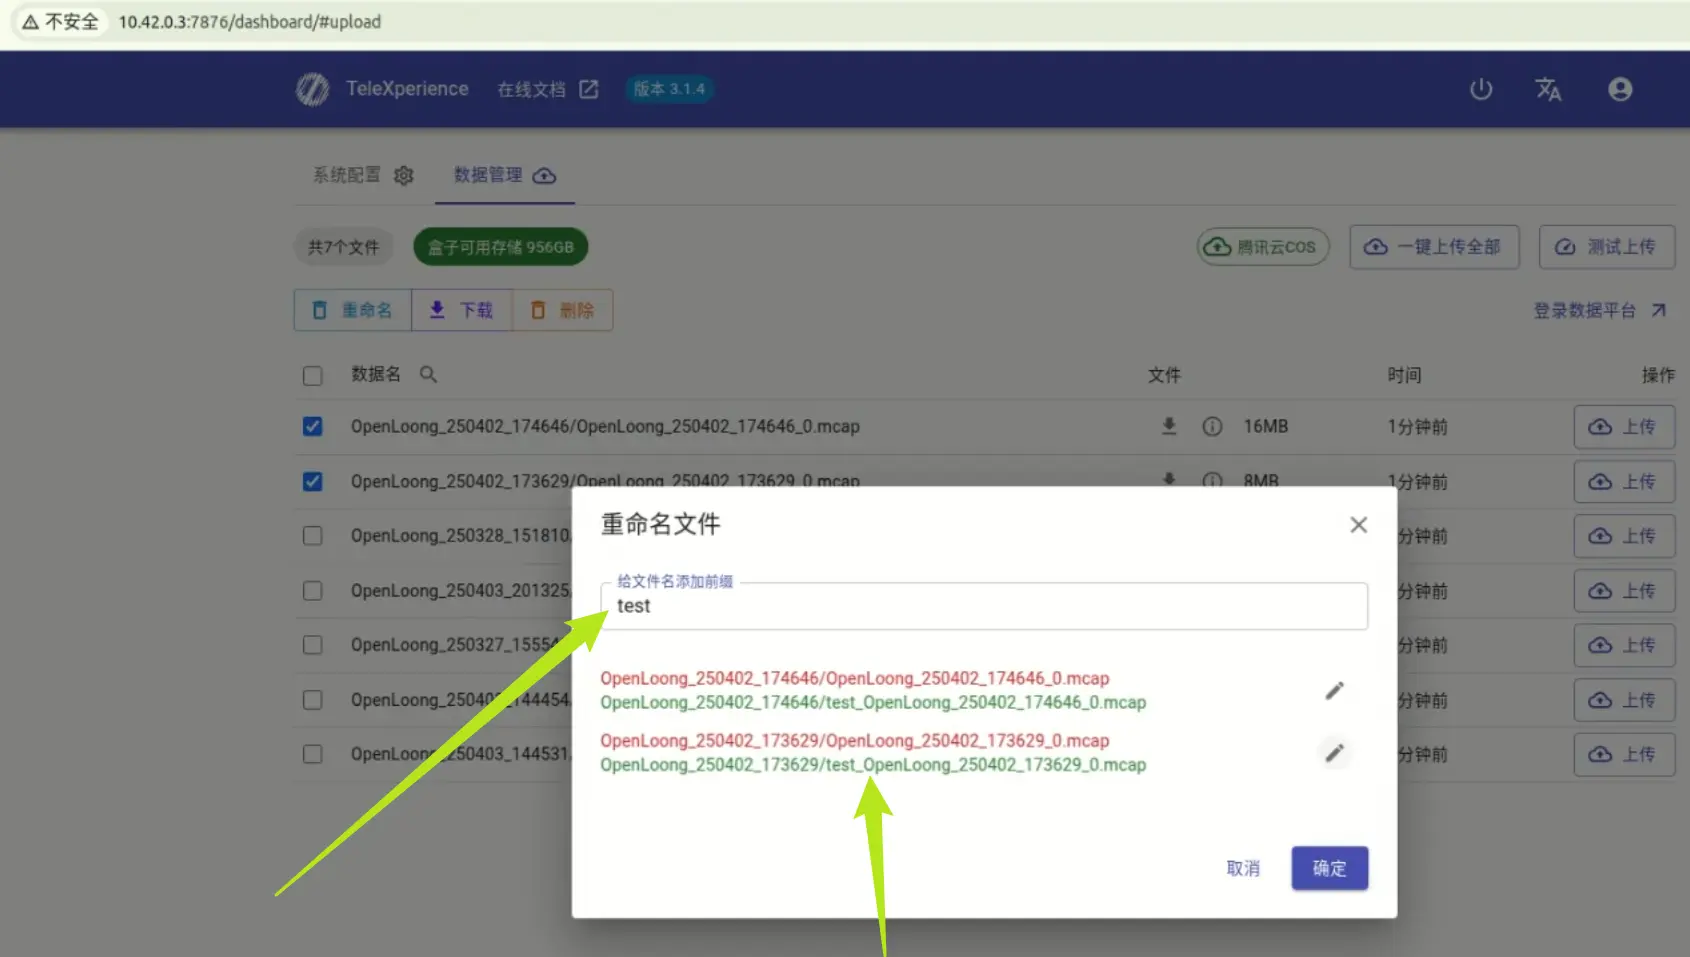
To batch rename files, select two or more entries and click Rename. Two options:
- Add a prefix: For example, if using OpenLoong, the default format is robot_date_number. After adding a prefix: test_OpenLoong_date_number.
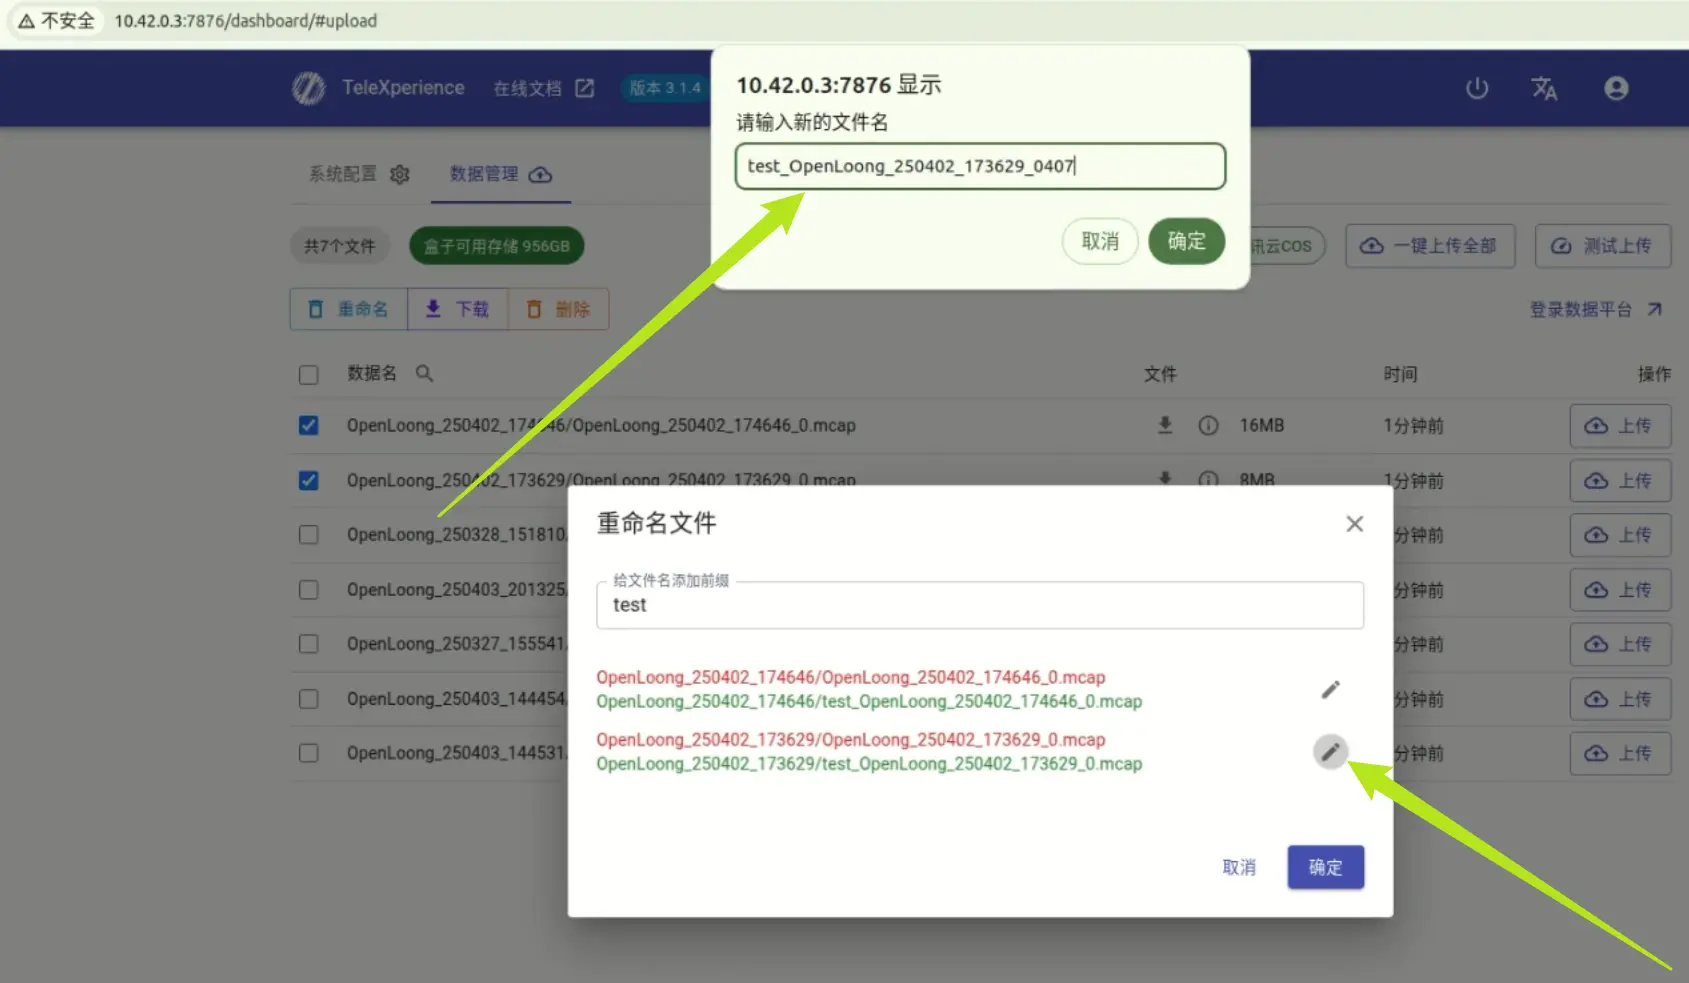
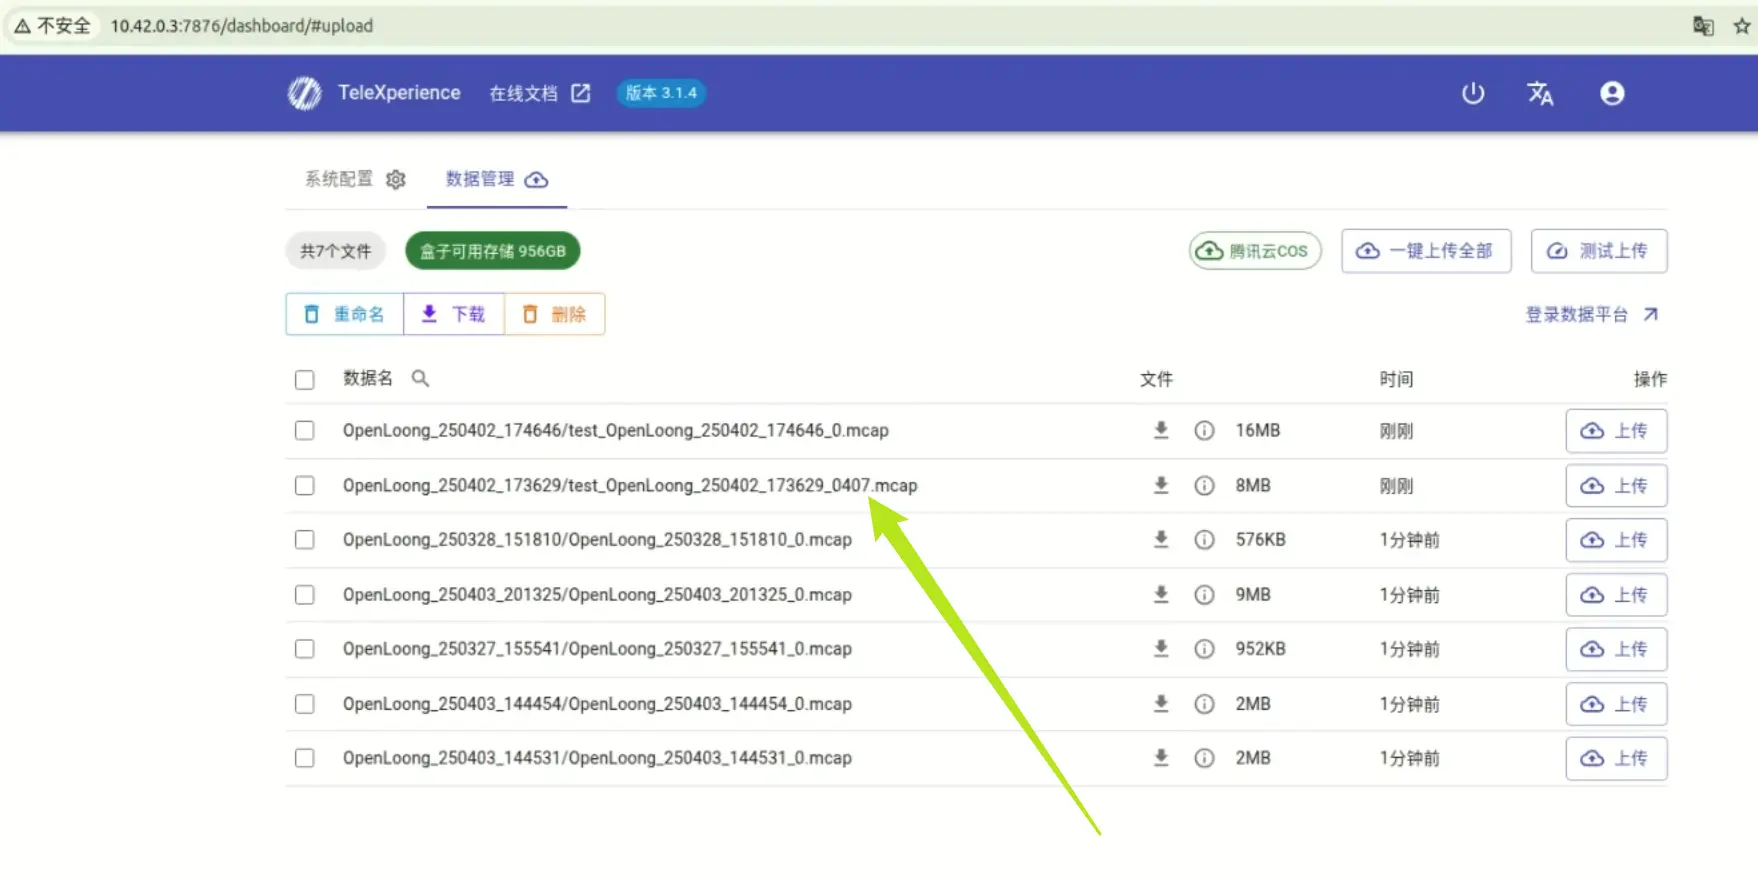
- Custom rename: Edit a single file name ("/" and "" are not allowed).
To delete files, select them and click Delete. A confirmation dialog will appear. If files are already uploaded to the cloud, you must delete them there as well.

Upload Data to IO Data Platform
Network Connection
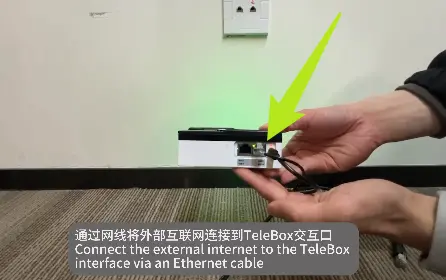
To upload data, connect TeleBox to the internet.
Wired connection is recommended. For wireless setup, contact your sales representative.
Steps
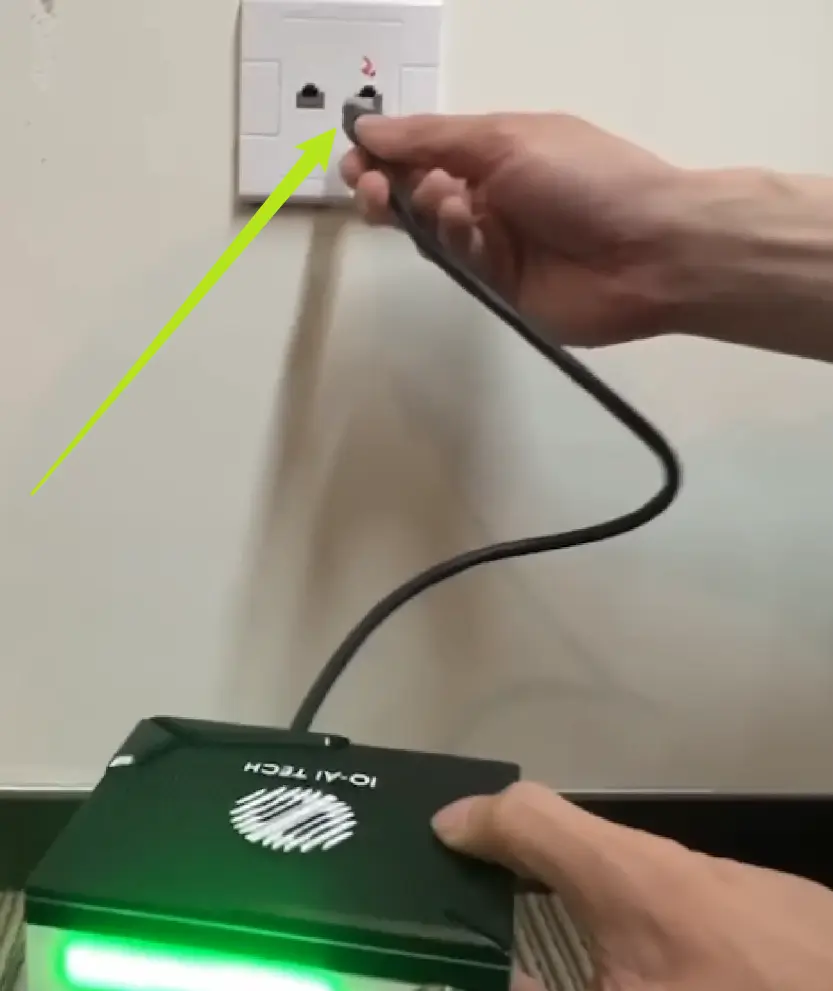
- Connect an Ethernet cable from TeleBox to your network.

Switch to Upload Mode
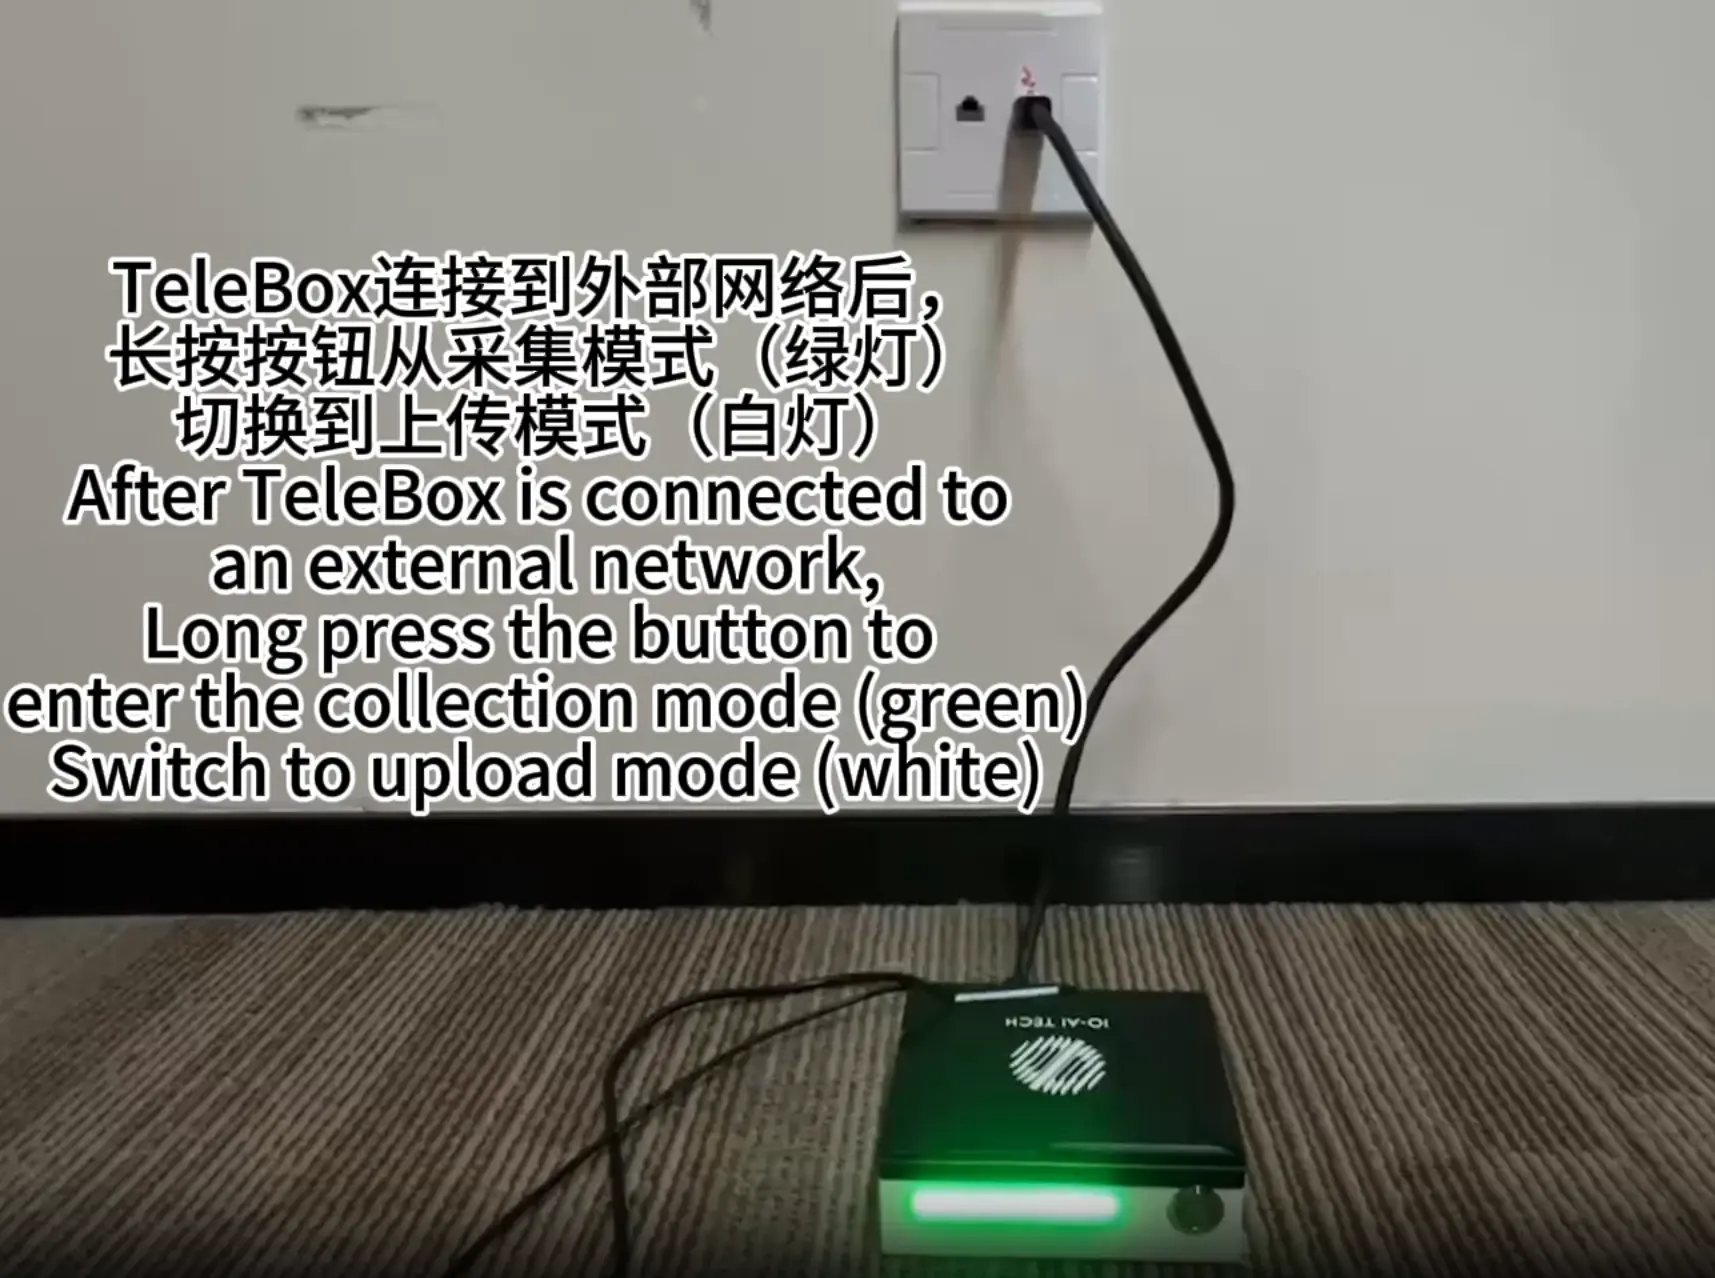
After connecting to the internet, switch TeleXperience to upload mode.
| Via TeleBox Button (Recommended) | Via Web Interface |
|---|---|
Steps
-
Via TeleBox Button (Recommended)
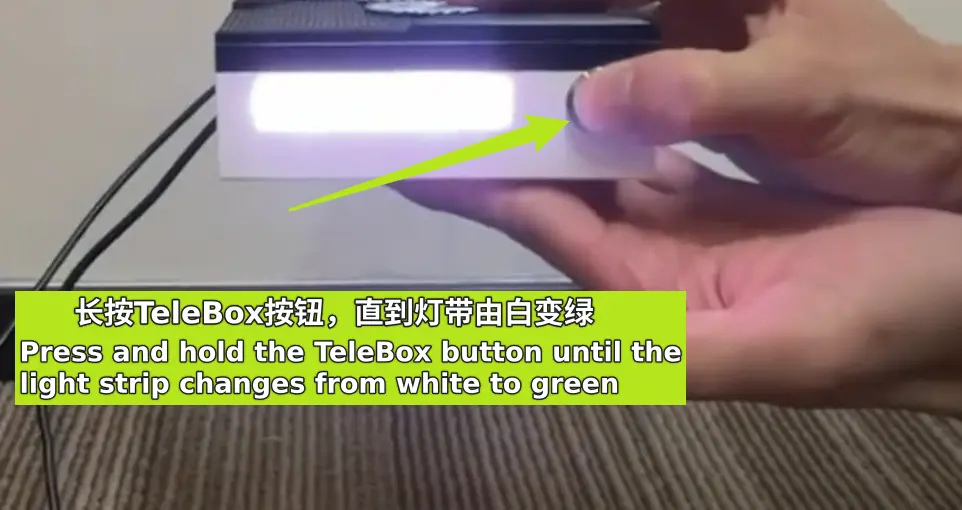
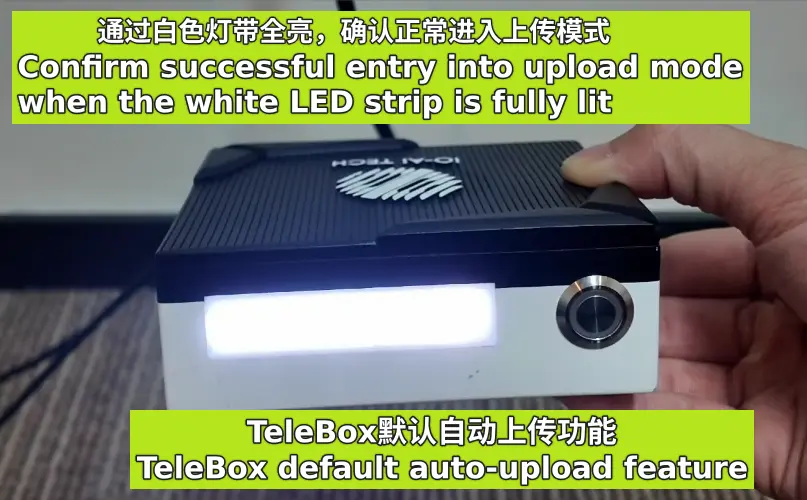
After connecting, press and hold the button to switch from Collection Mode (green light) to Upload Mode (white light). Hold for ~2s until the light turns fully white. If red appears, check the network.

-
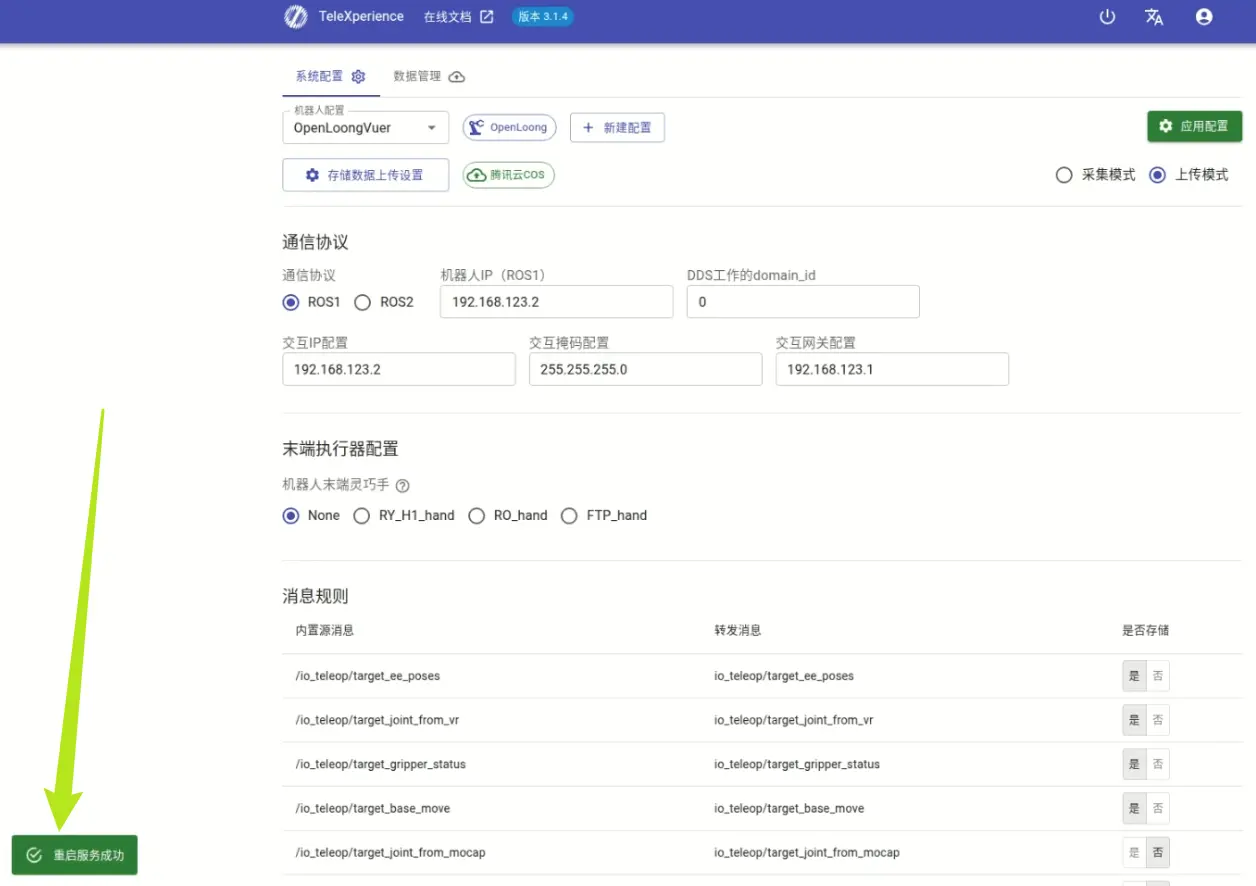
Via Web Interface
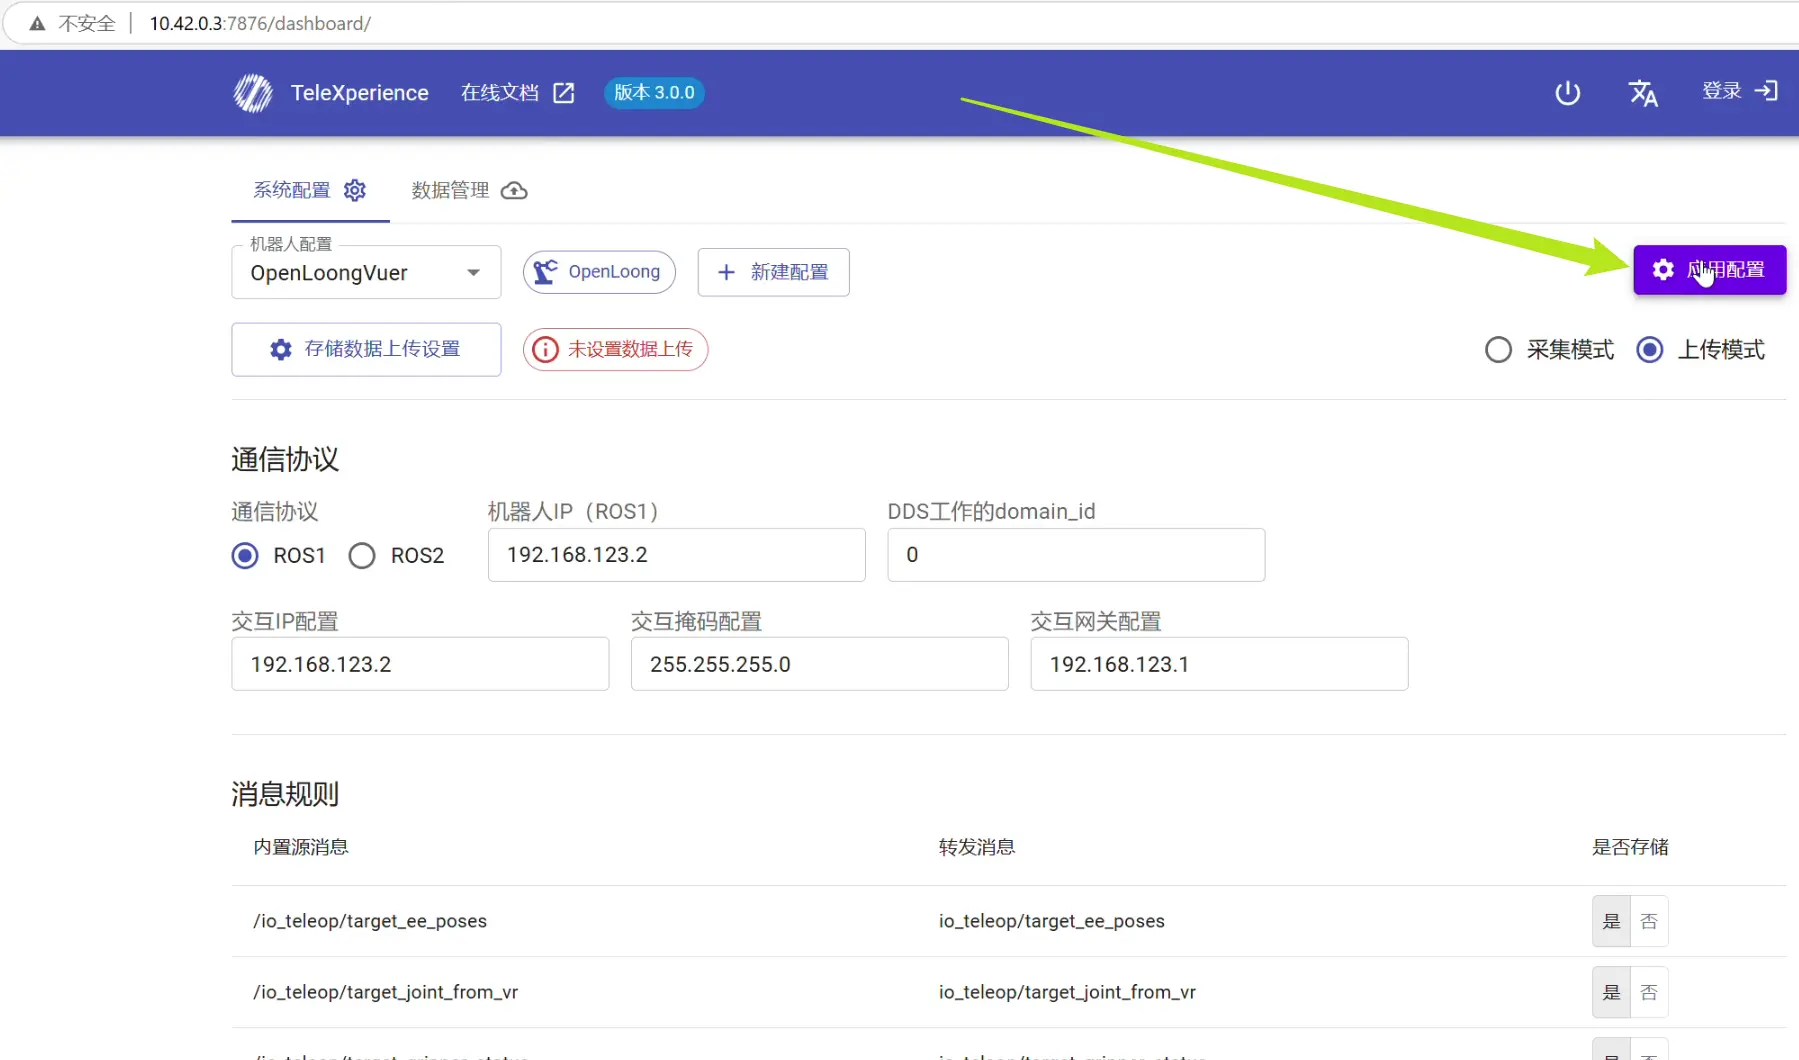
Connect your laptop to TeleSuit Wi-Fi (see label), open 10.42.0.3:7876 in your browser.
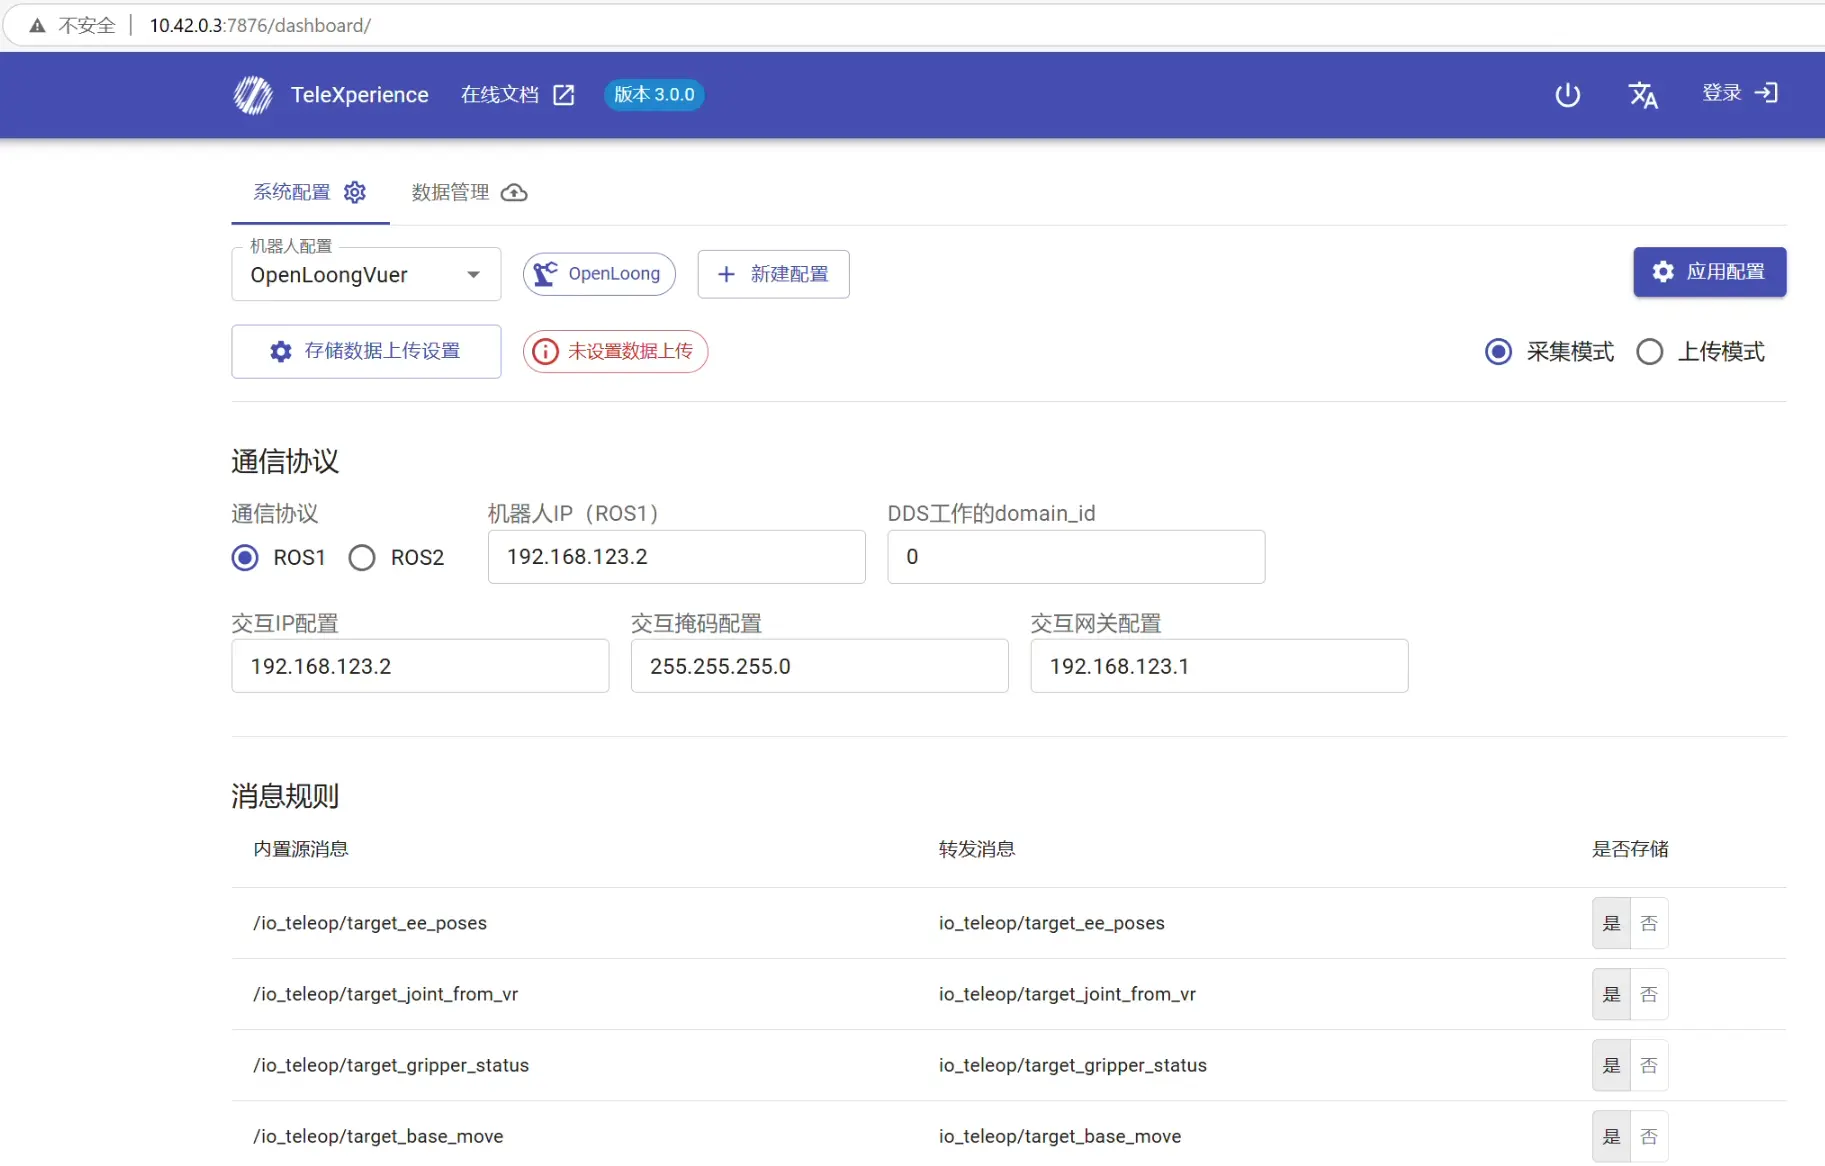
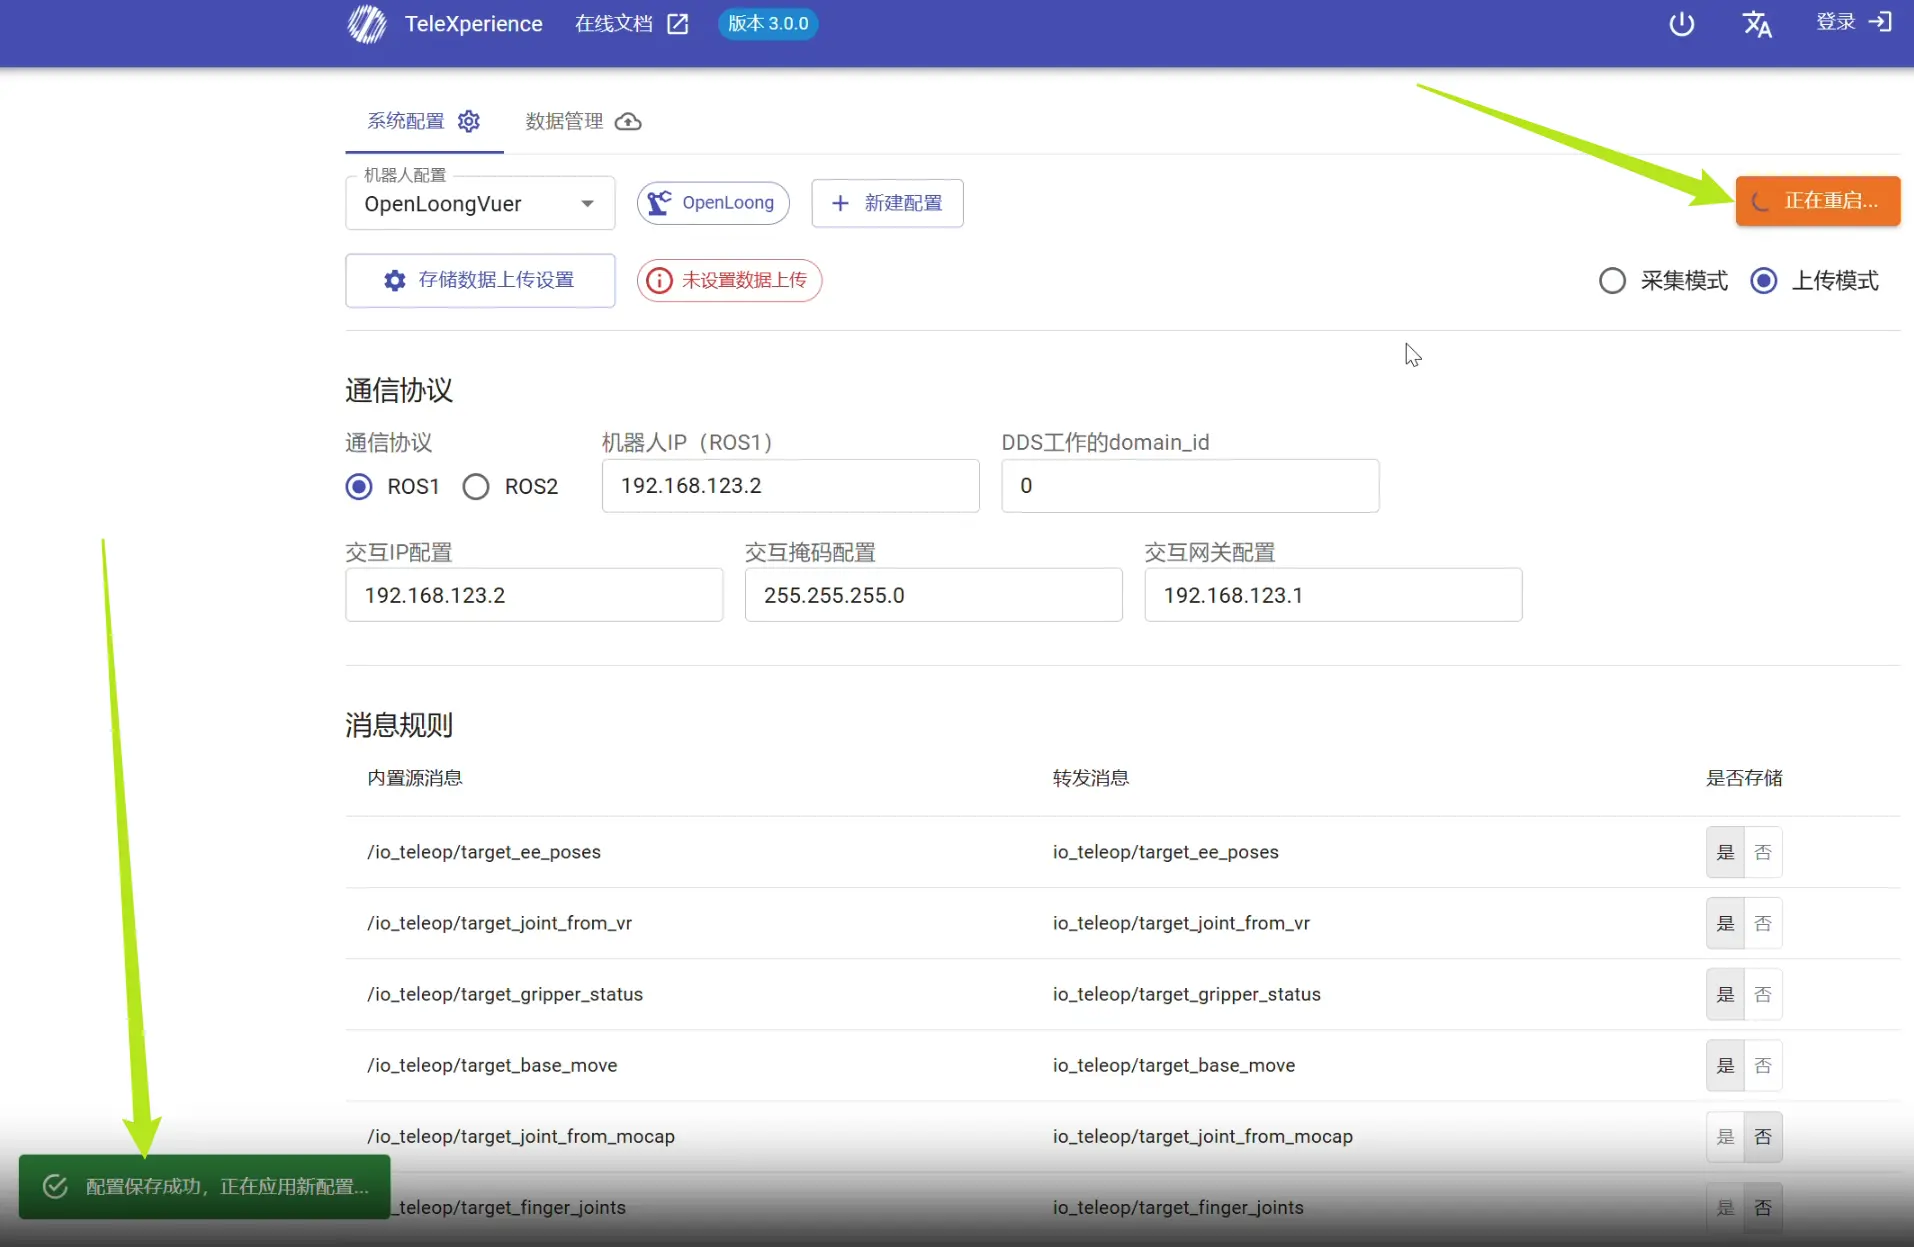
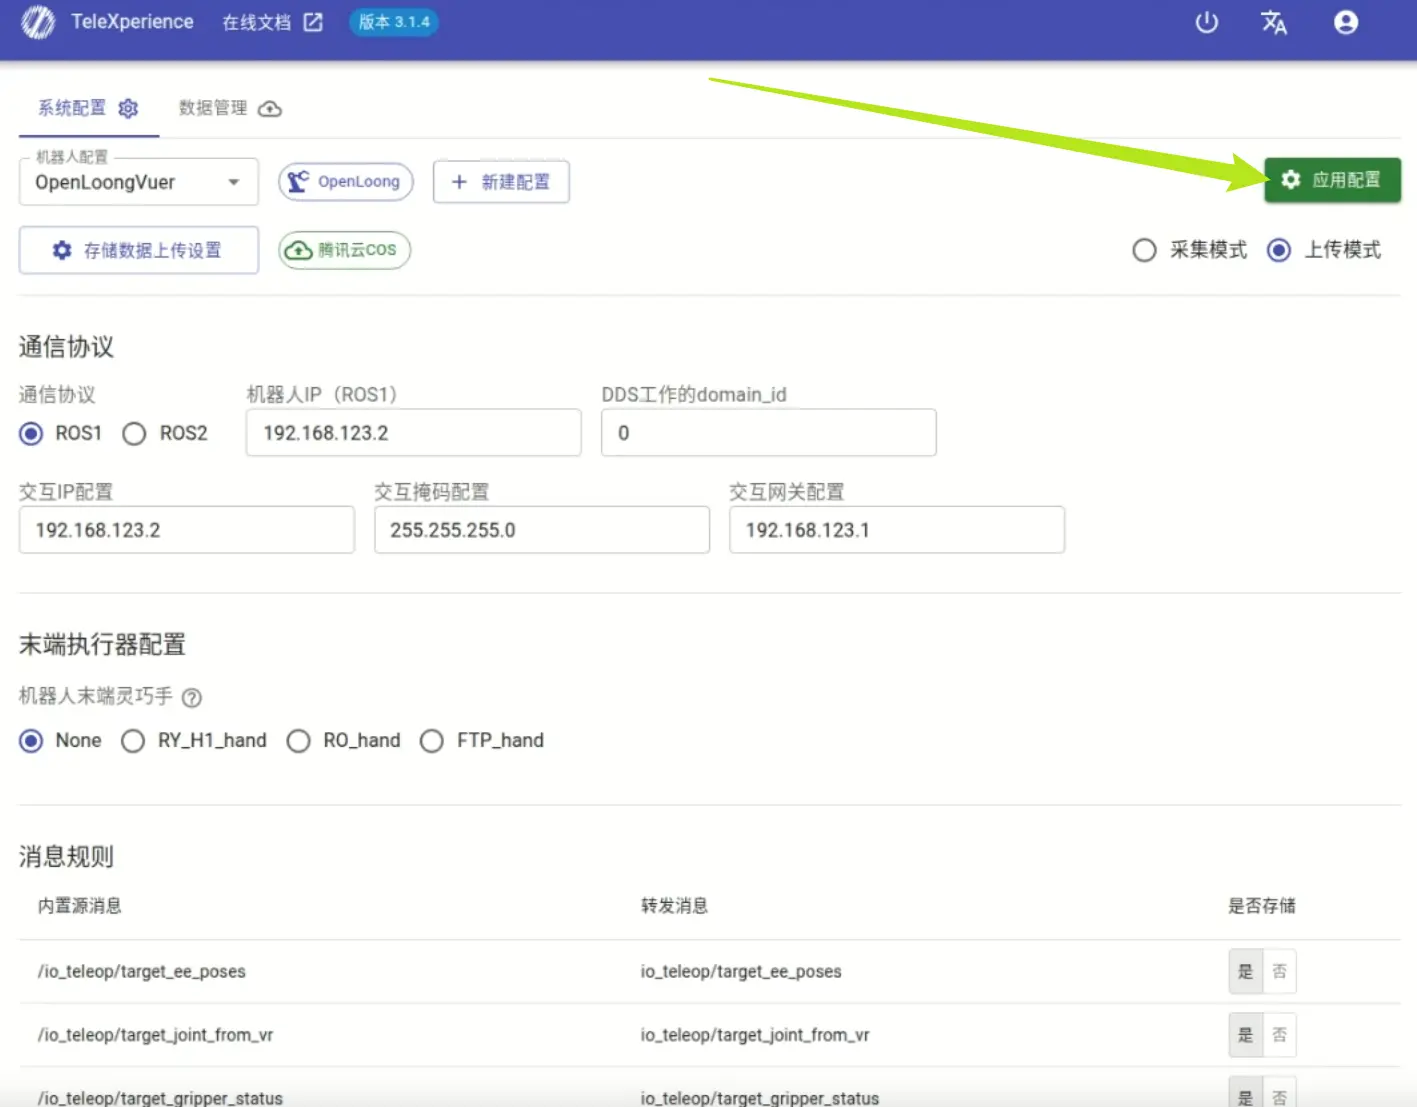
Select upload mode and click Apply Configuration.
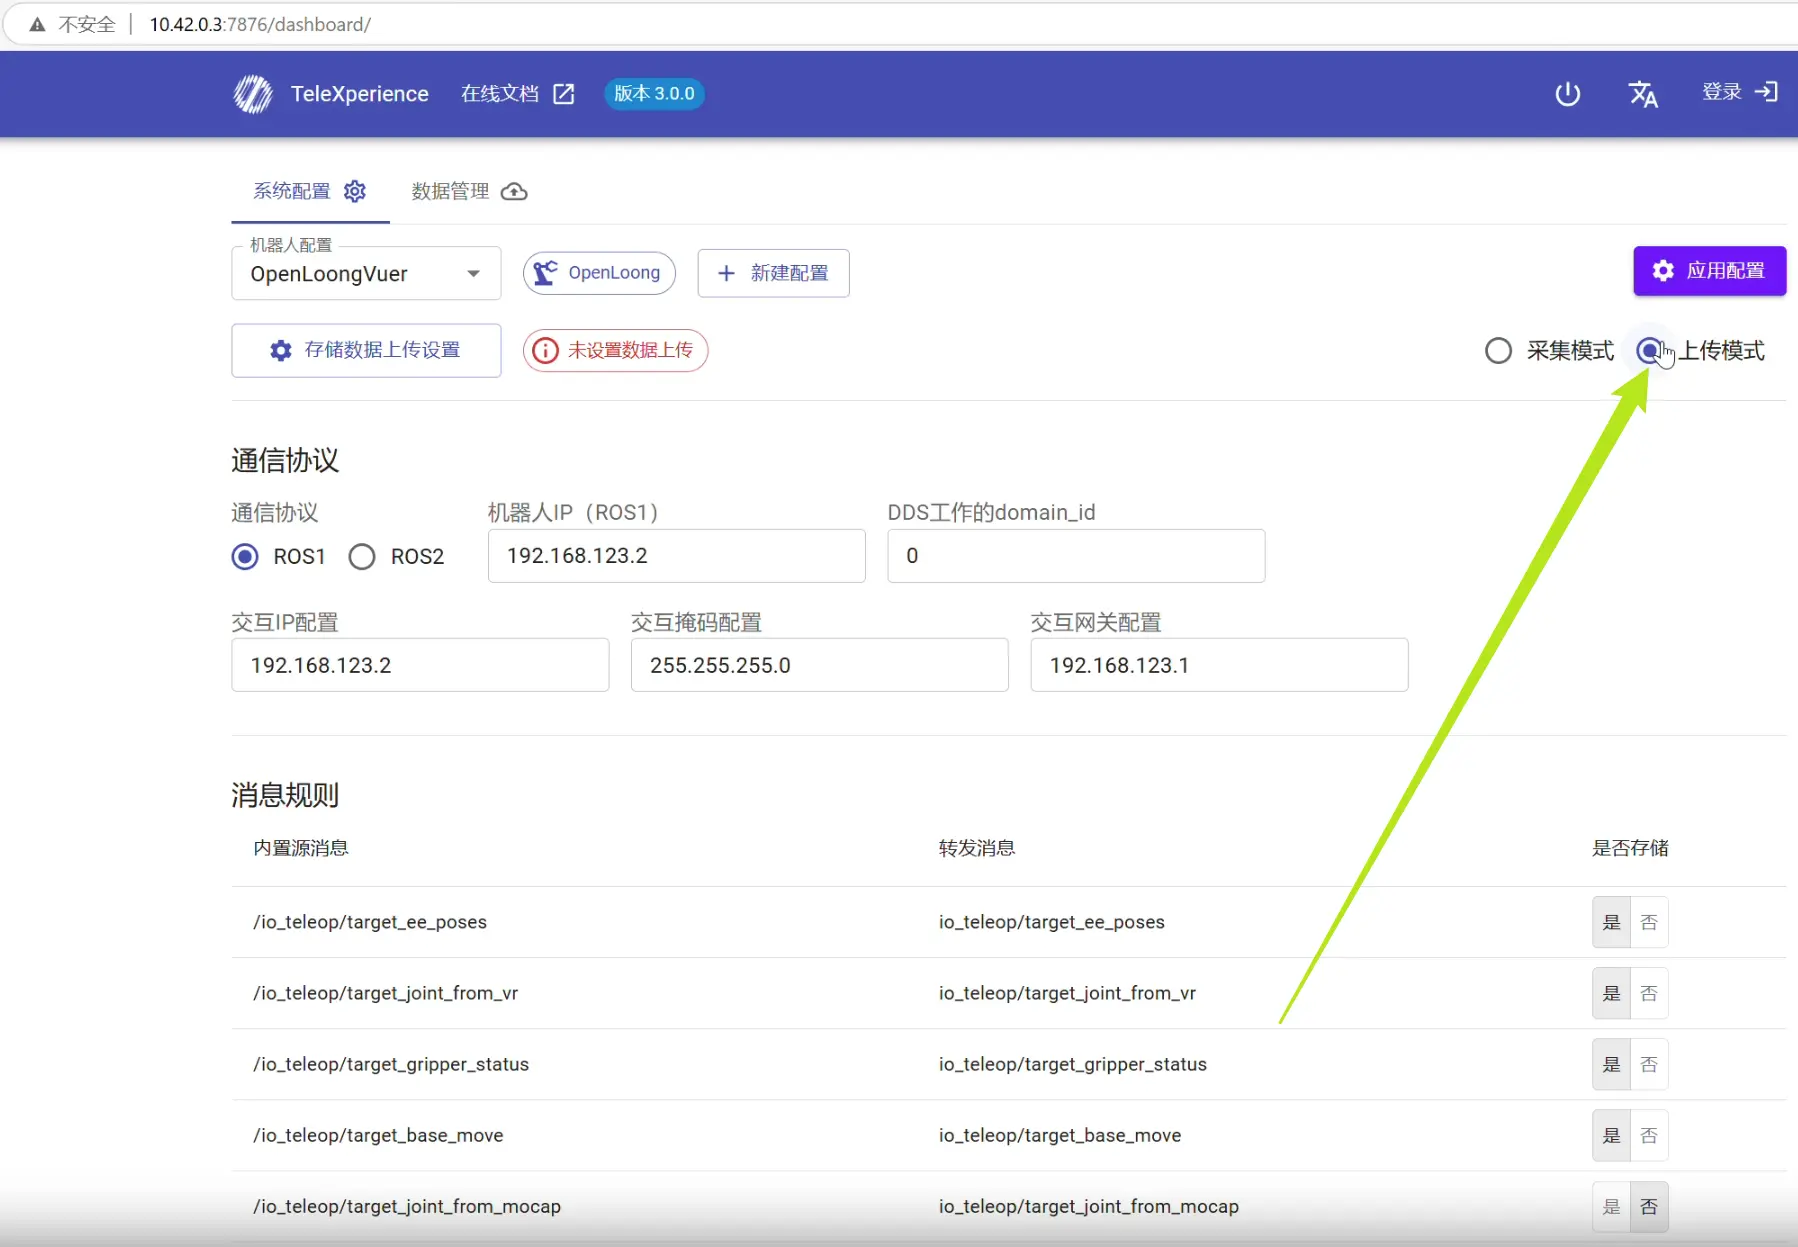
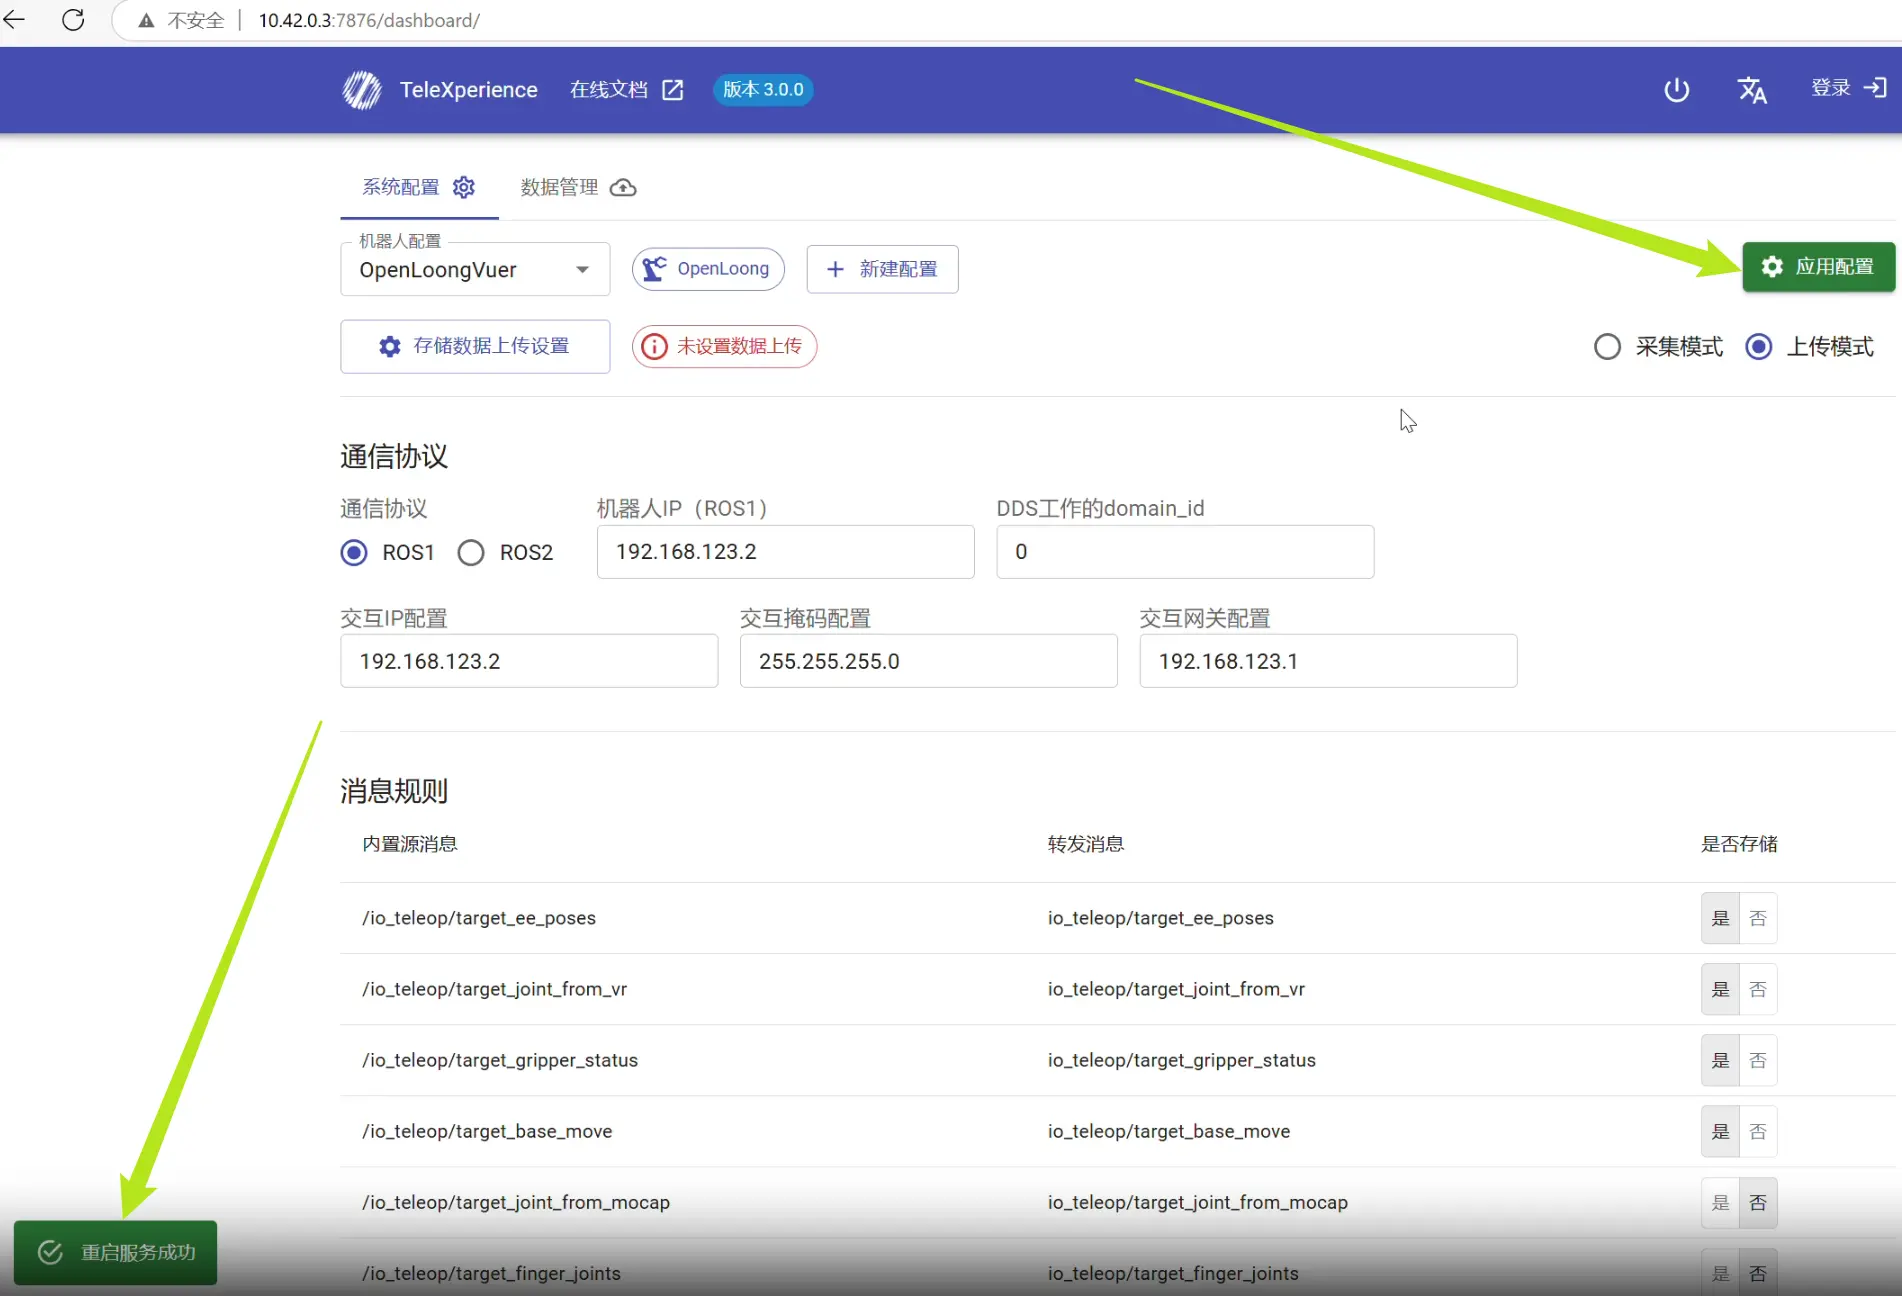
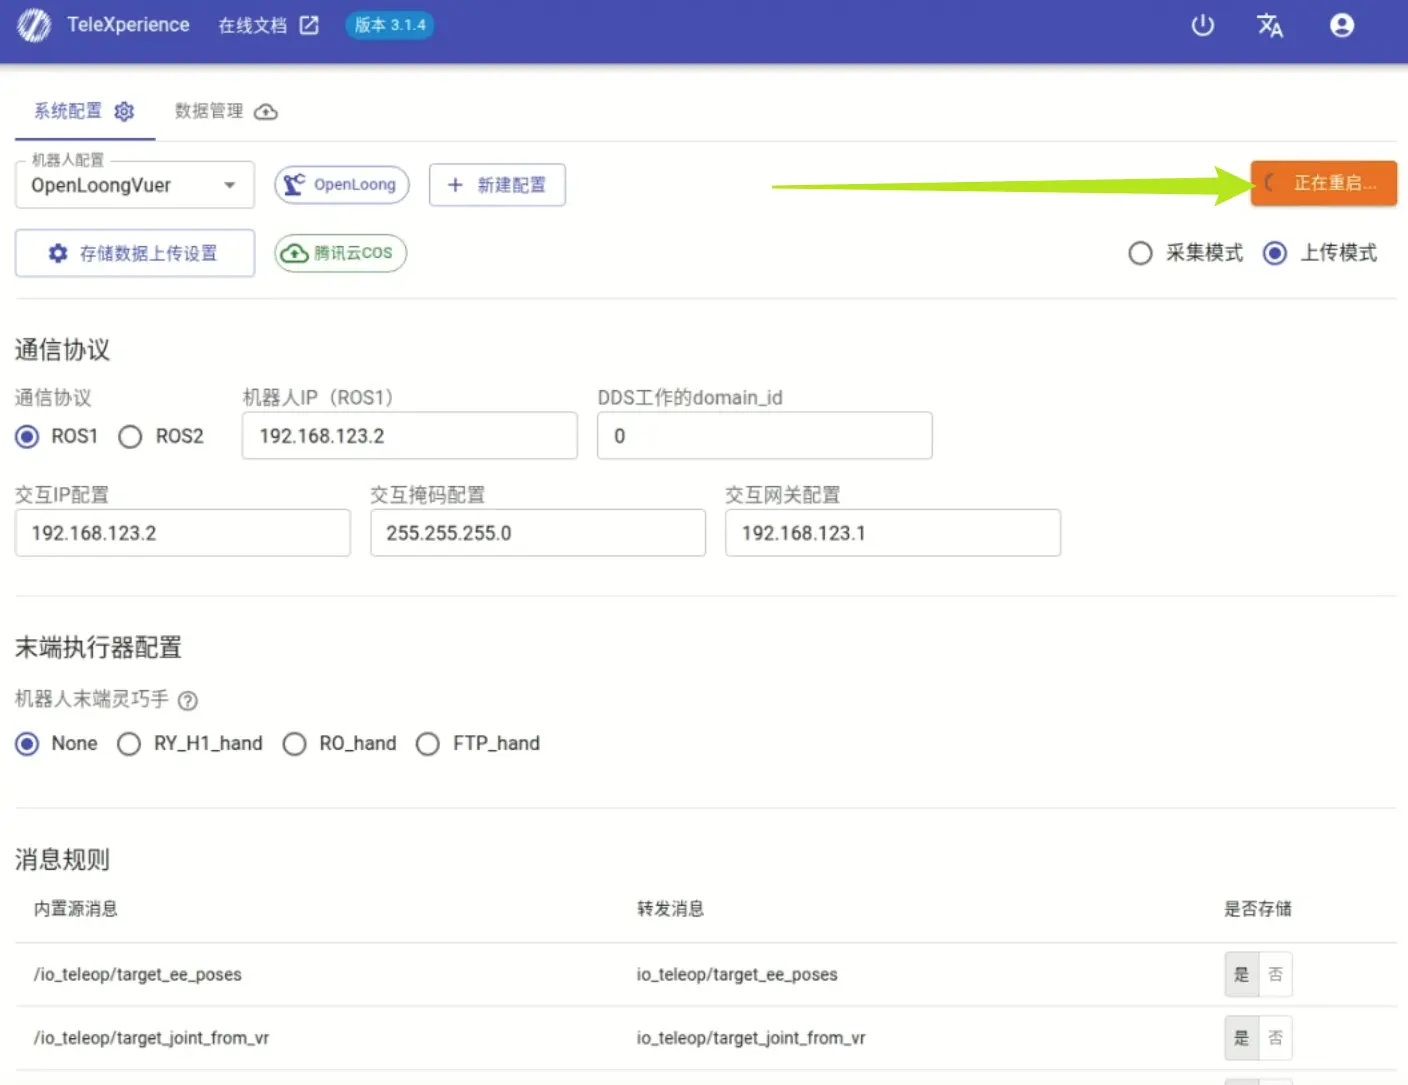
Wait for the system to restart and apply the new configuration.
Upload Data
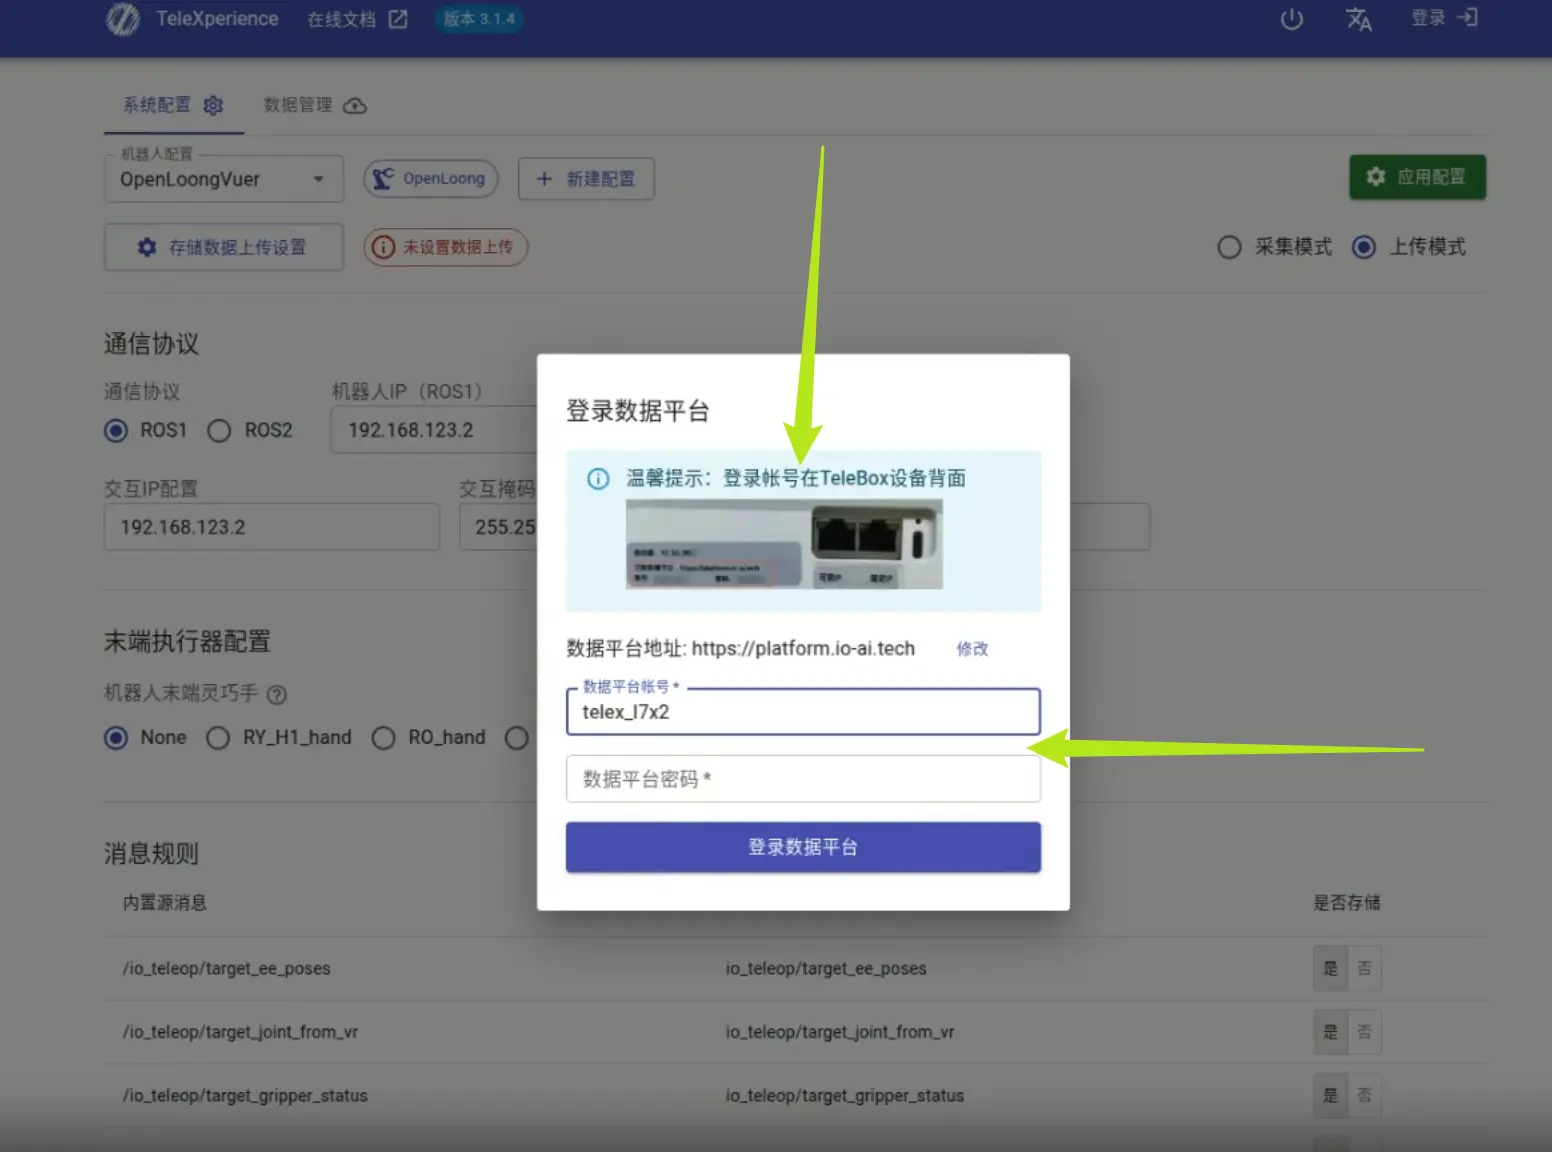
For the first upload, log in to the IO Data Platform in upload mode. The account will be remembered and bound to TeleBox.
Afterwards, uploading data requires no extra setup. Follow the videos below.
| Auto Upload All Data (Recommended) | Selective Upload |
|---|---|
Steps
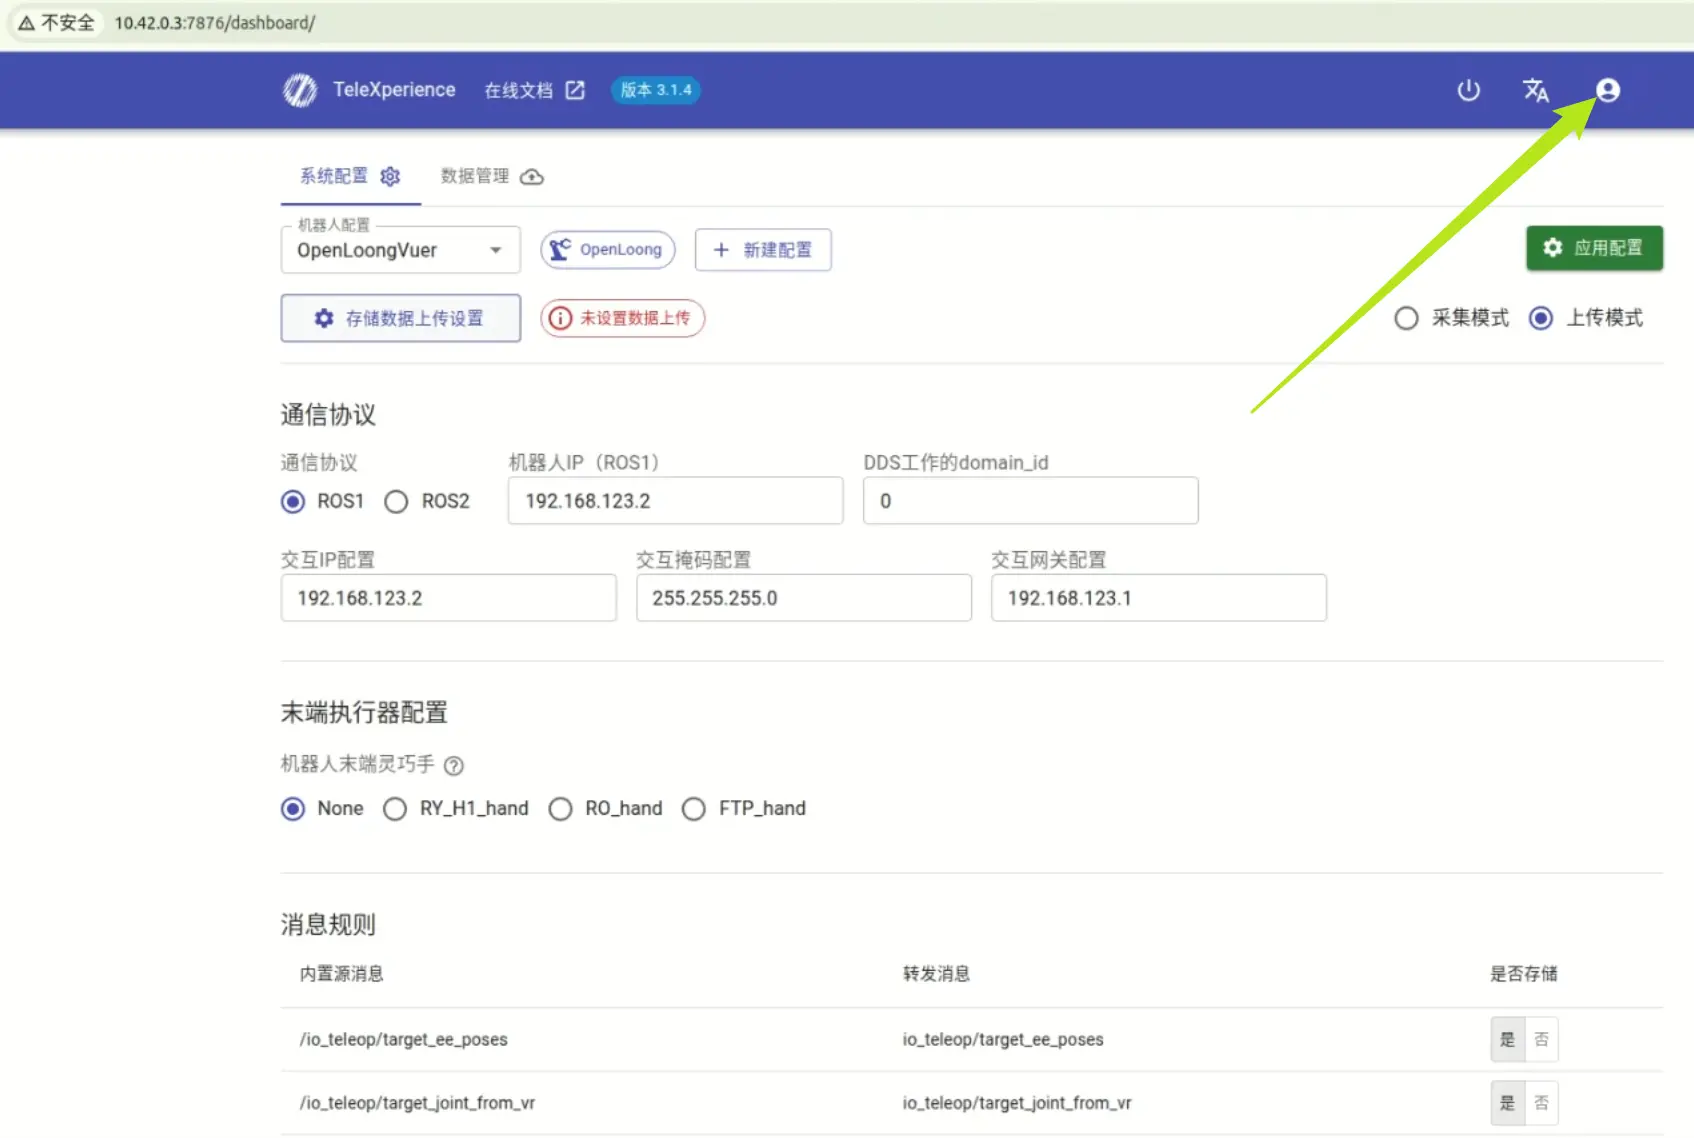
Click Login and enter your account (see TeleBox label). Successful login shows your avatar.
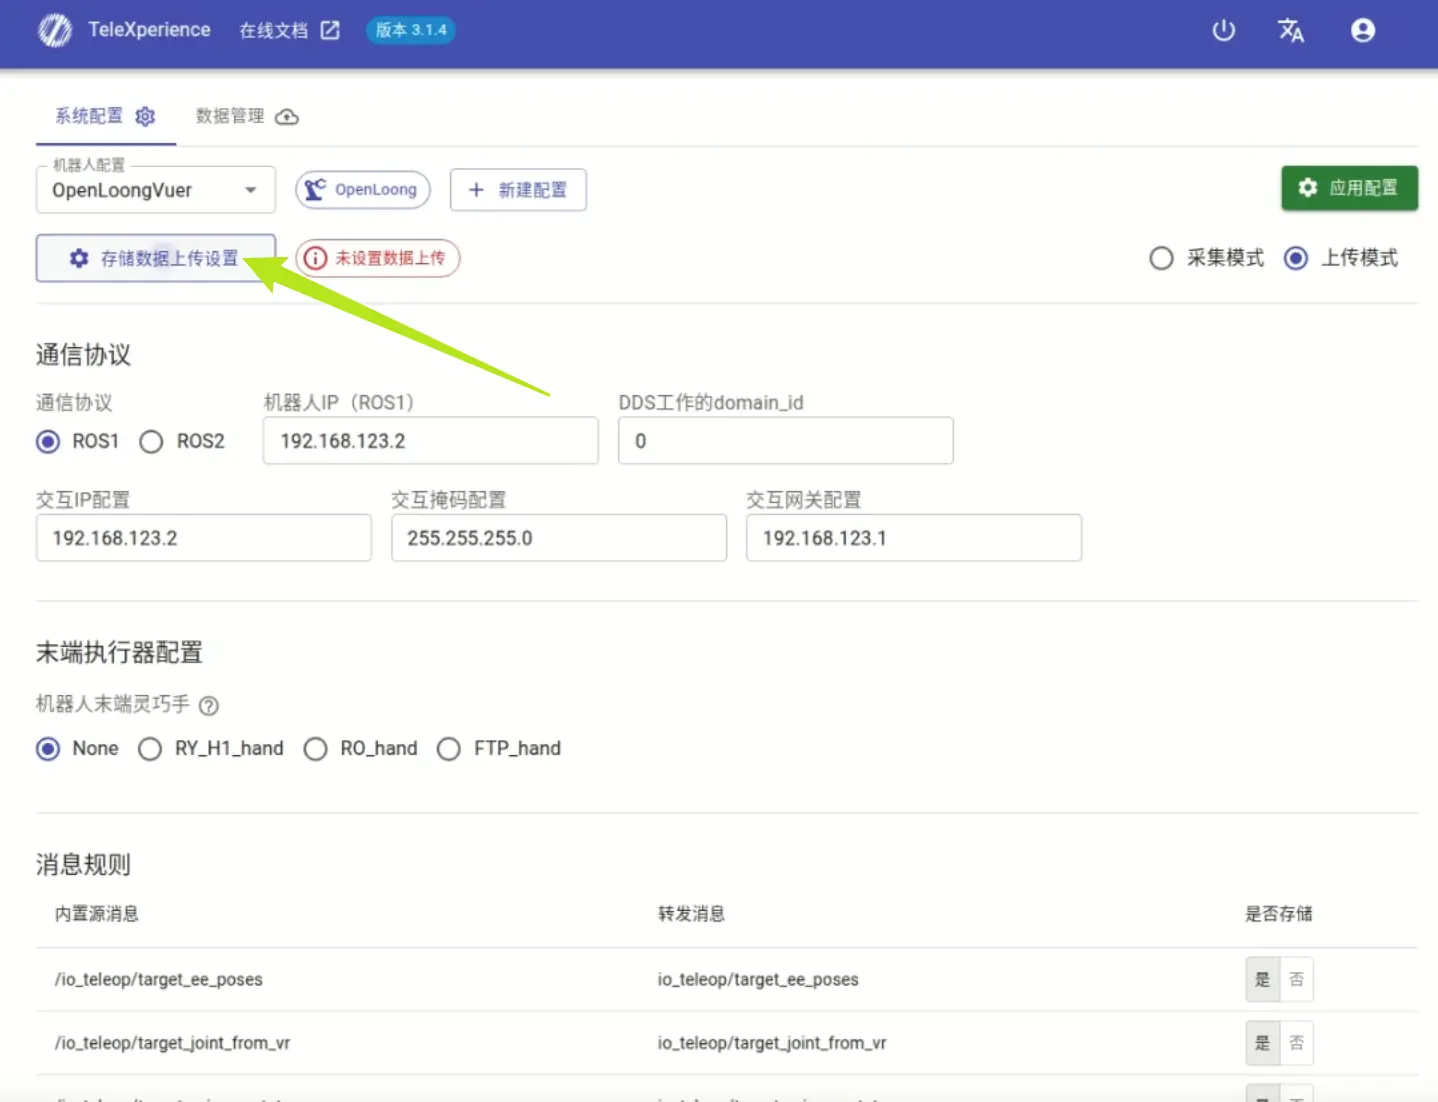
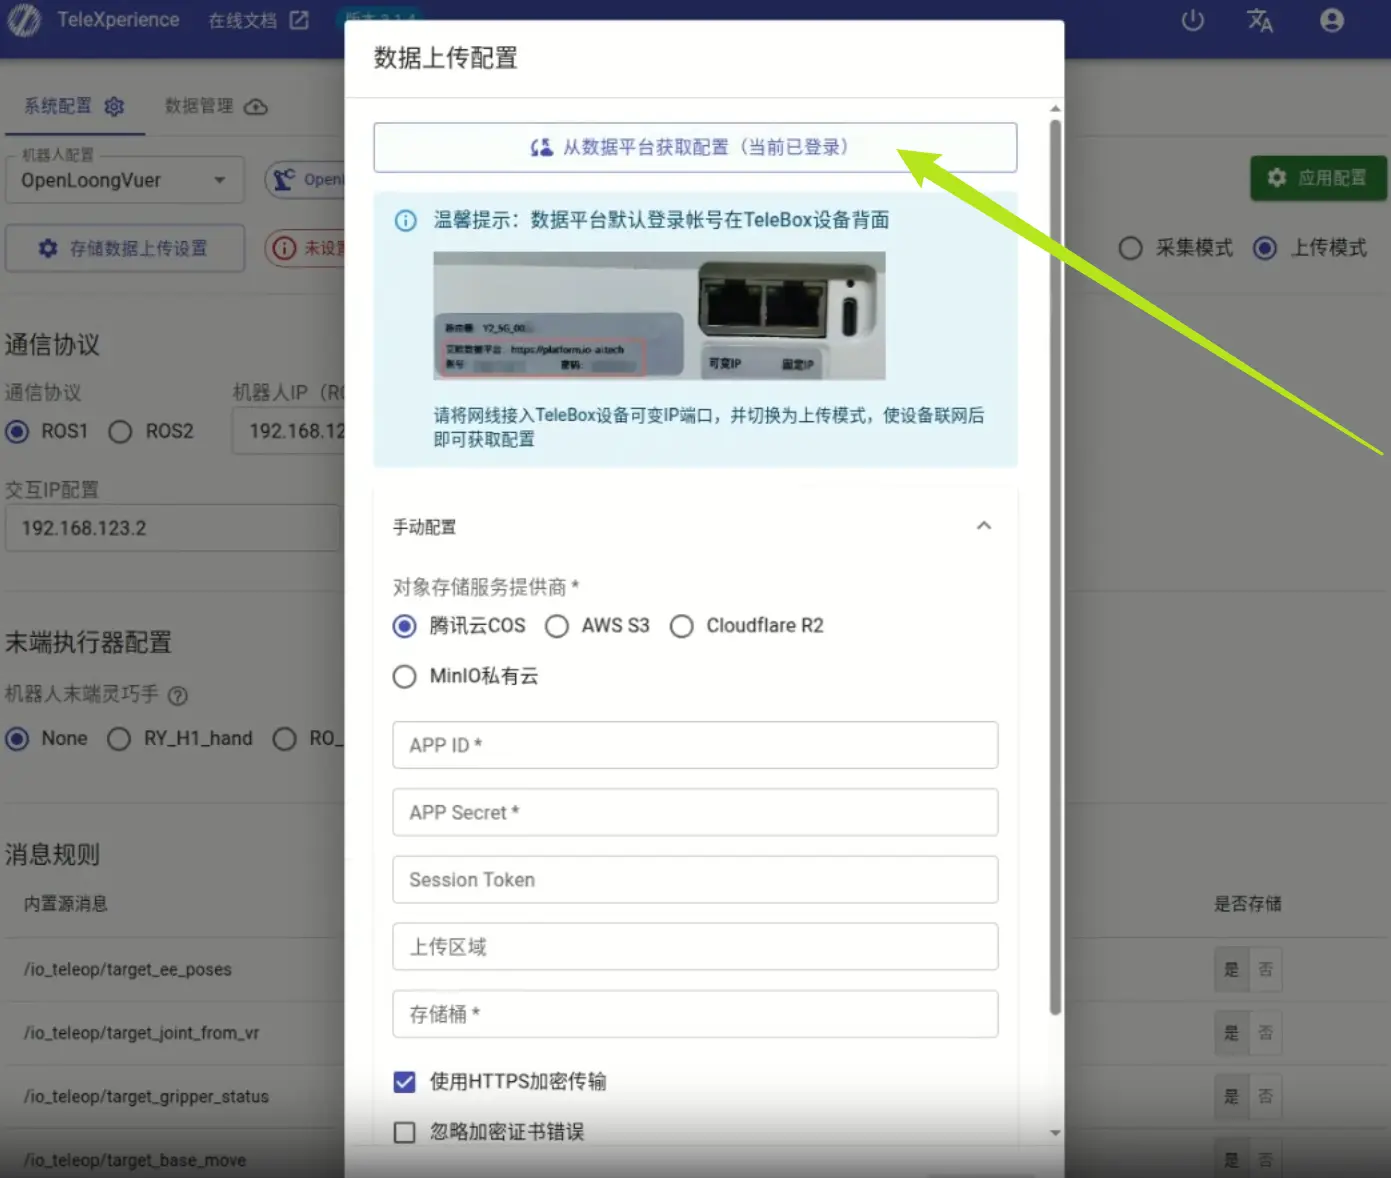
Click Upload Settings and open the configuration window. Click Manual Configuration.
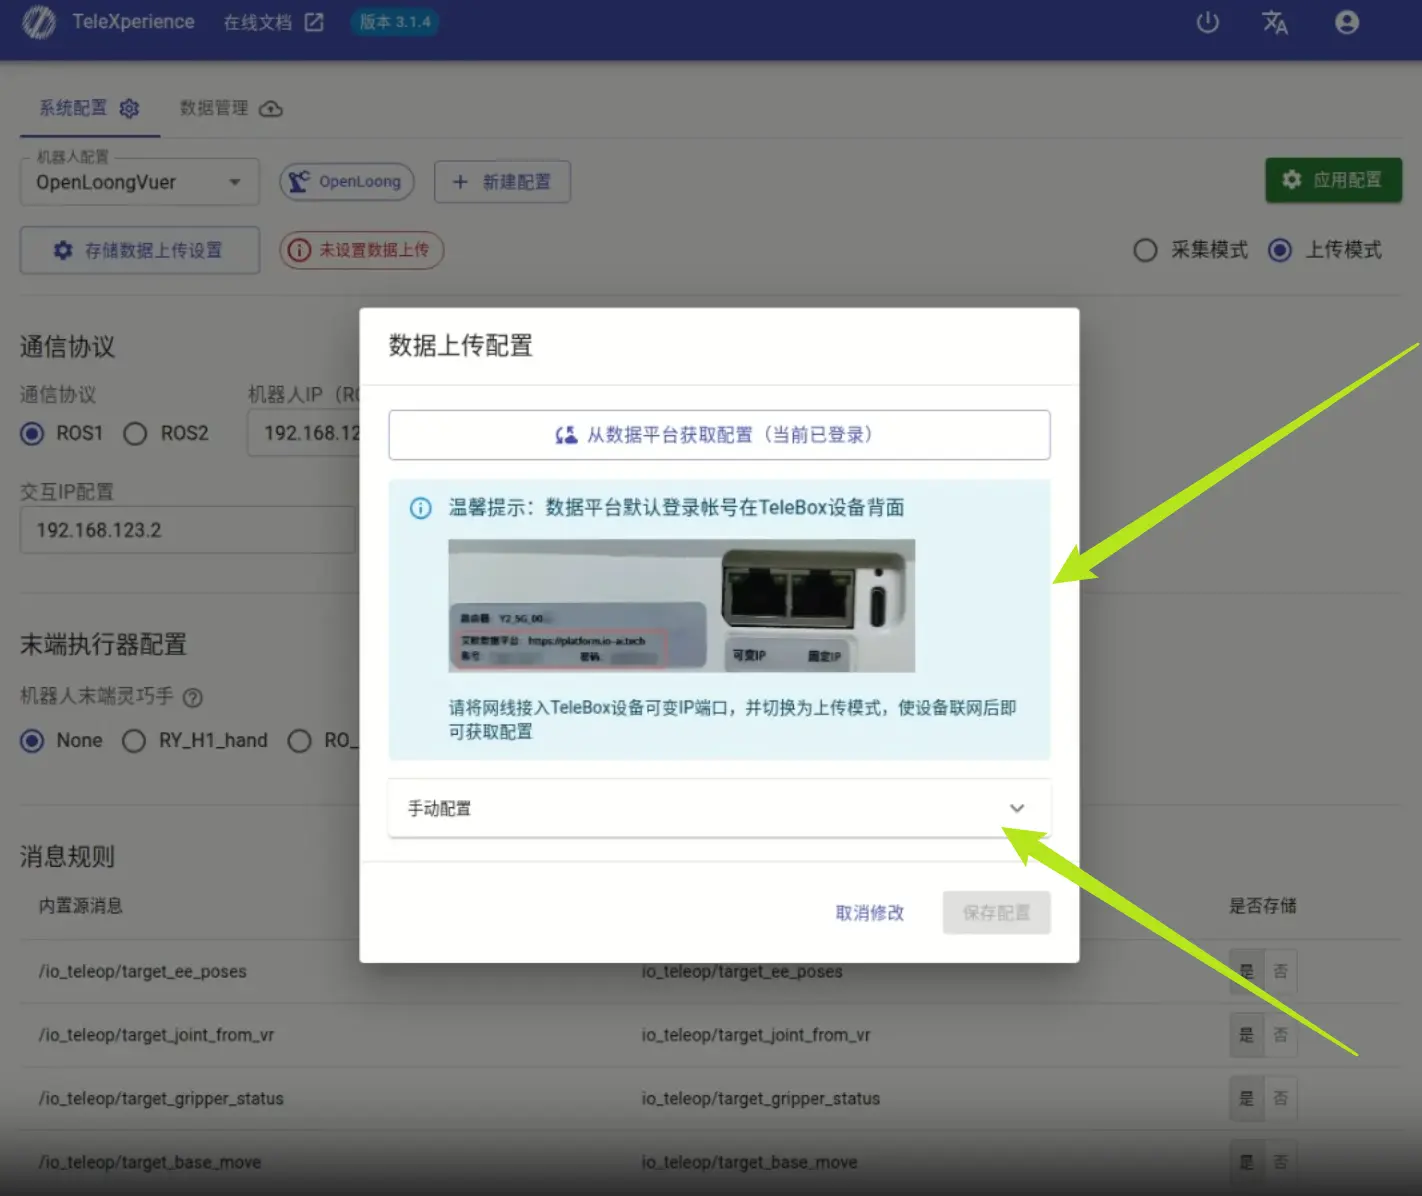
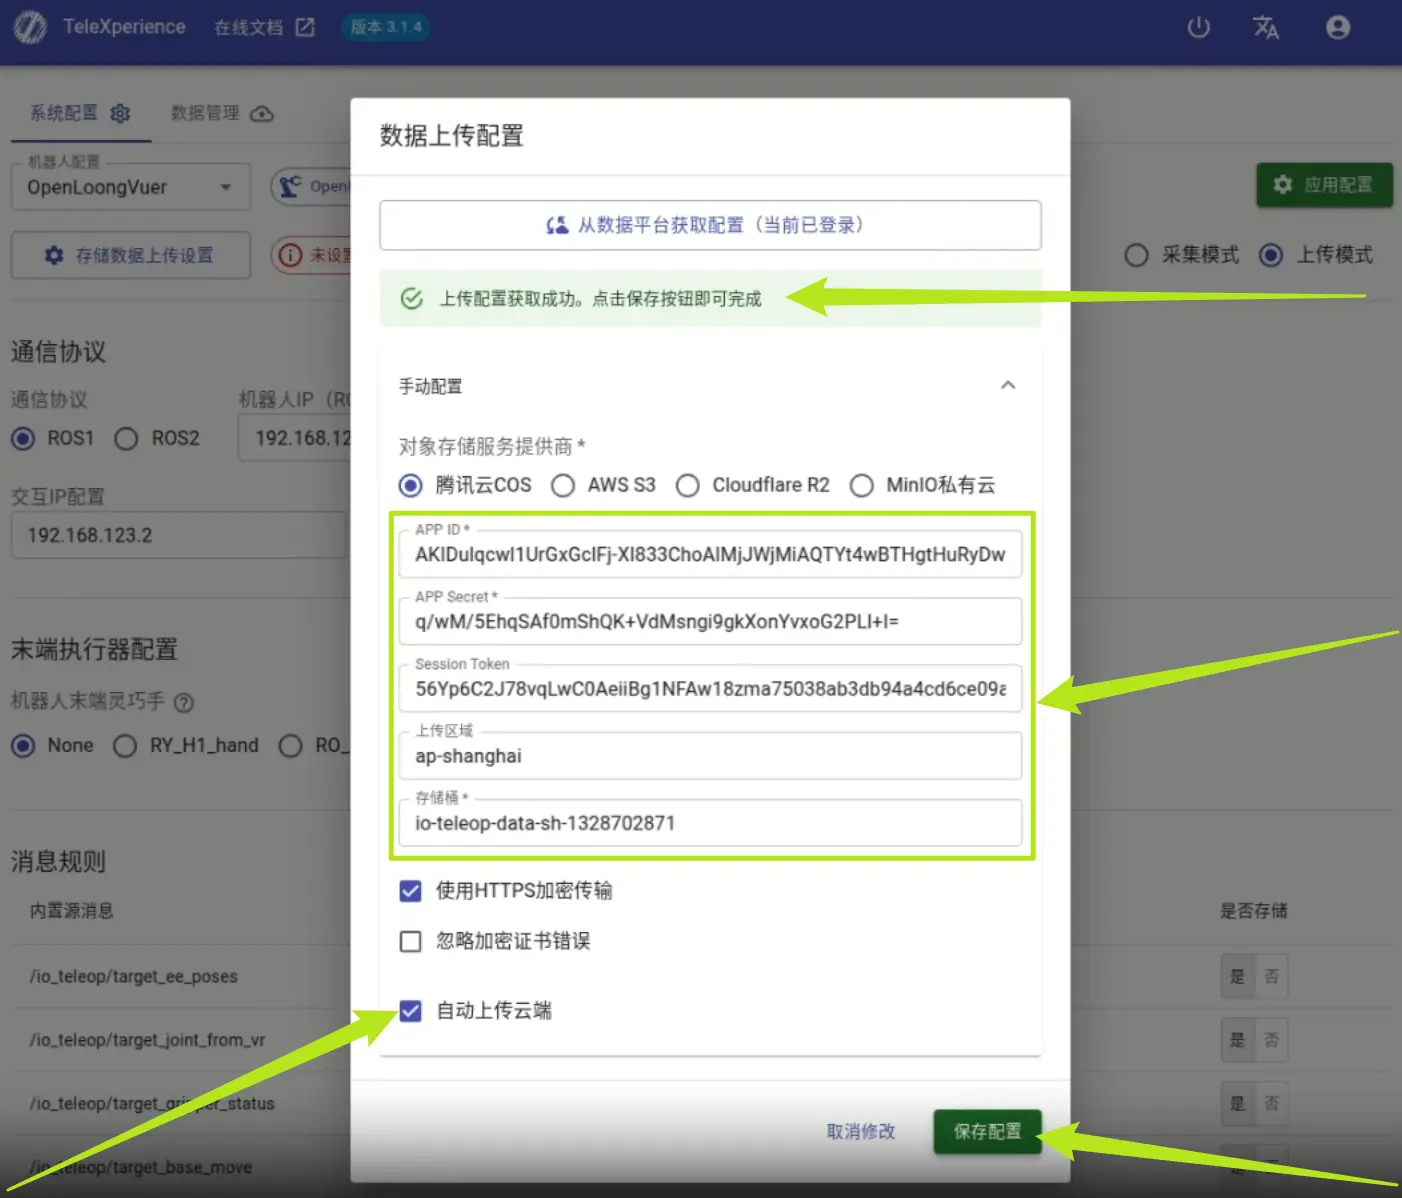
Click Get Config from Platform to auto-fill required fields:
- APP ID
- APP Secret
- Session Token
- Upload Region
- Bucket
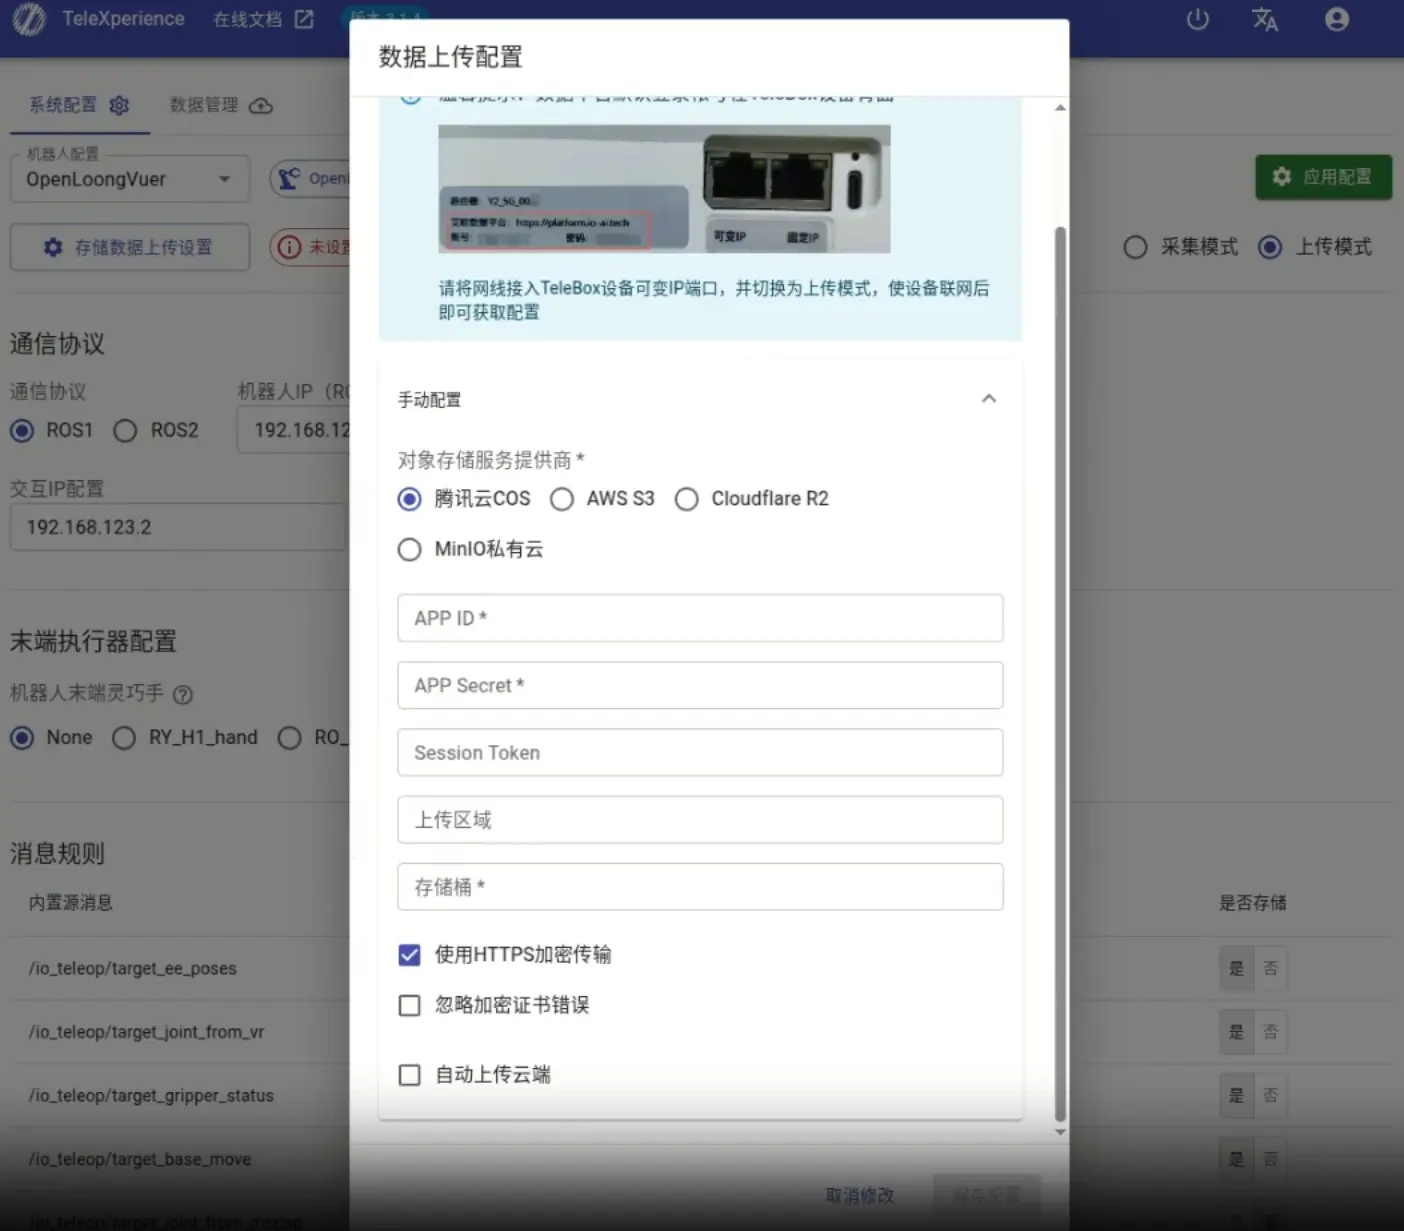
Enable Auto Upload to Cloud if needed, then click Save Configuration.
After saving, click Apply Configuration and wait for the service to restart.
For future uploads, follow these steps:
-
Auto Upload All Data (Recommended)
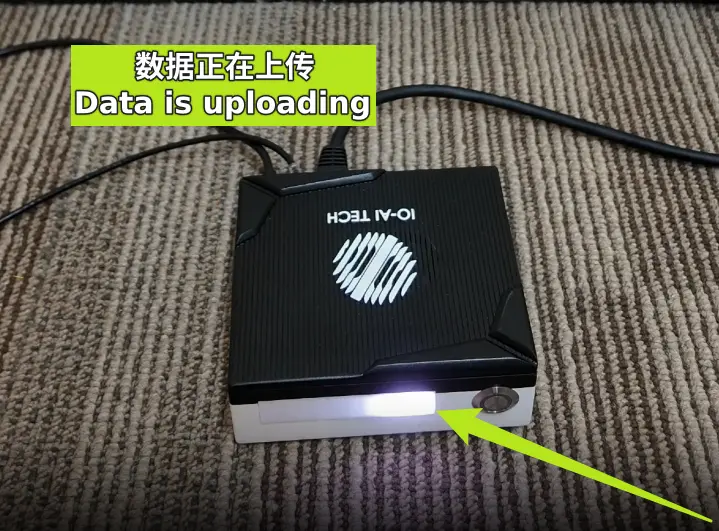
When the white light is fully on, upload mode is active. During upload, the light will gradually turn on. Fully lit means upload is complete.
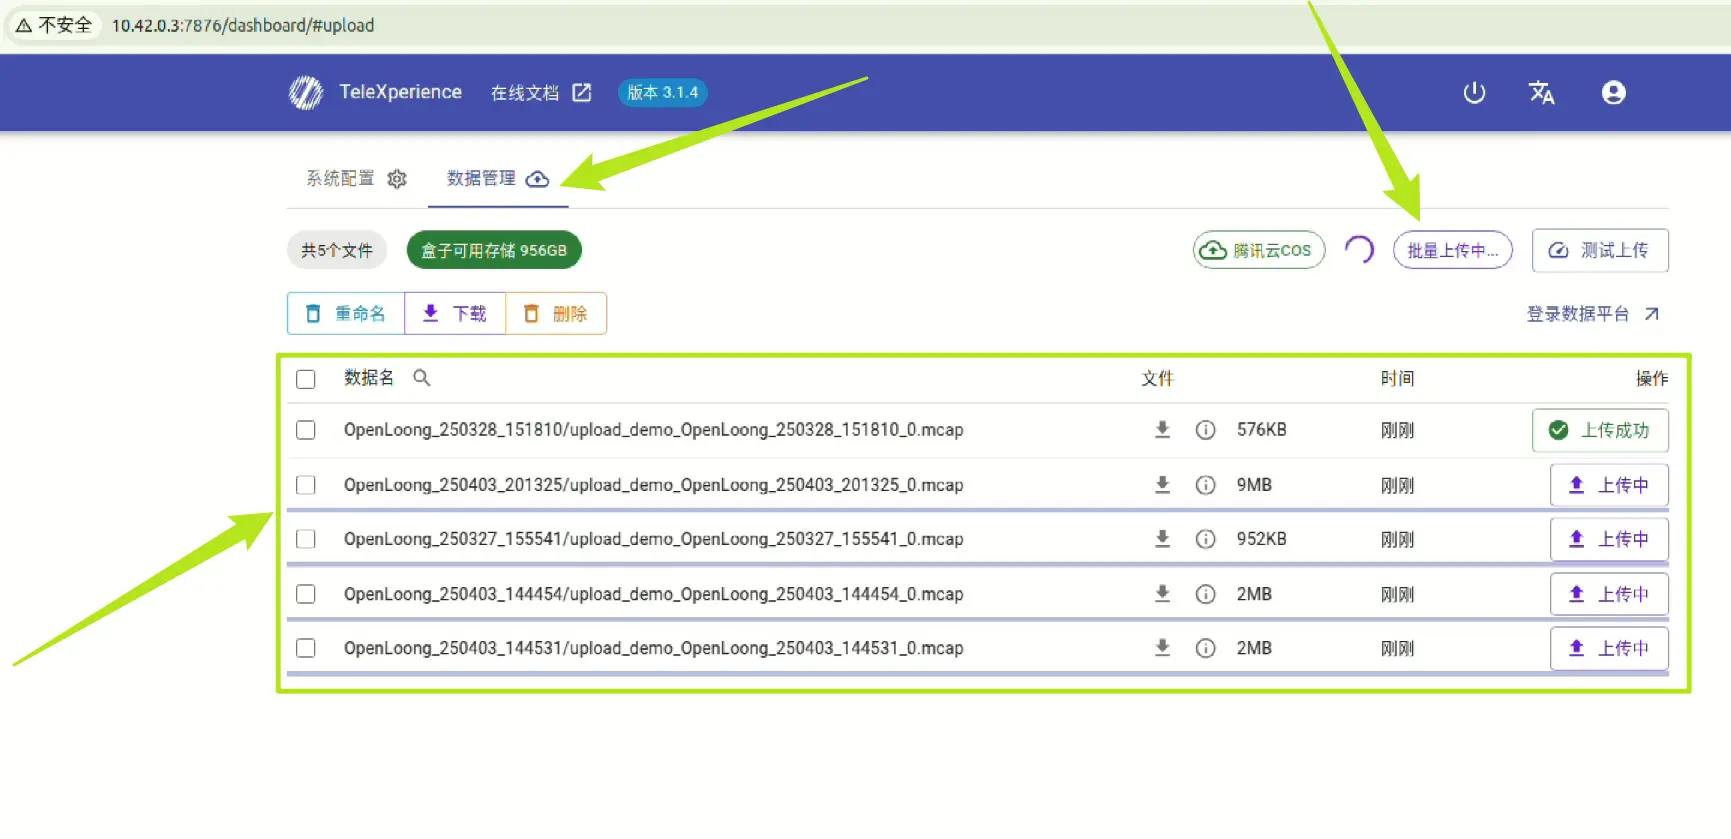
You can also check upload progress via the web interface.
Connect your laptop to TeleSuit Wi-Fi (see label).
Open 10.42.0.3:7876, go to Data Management to view upload progress.

-
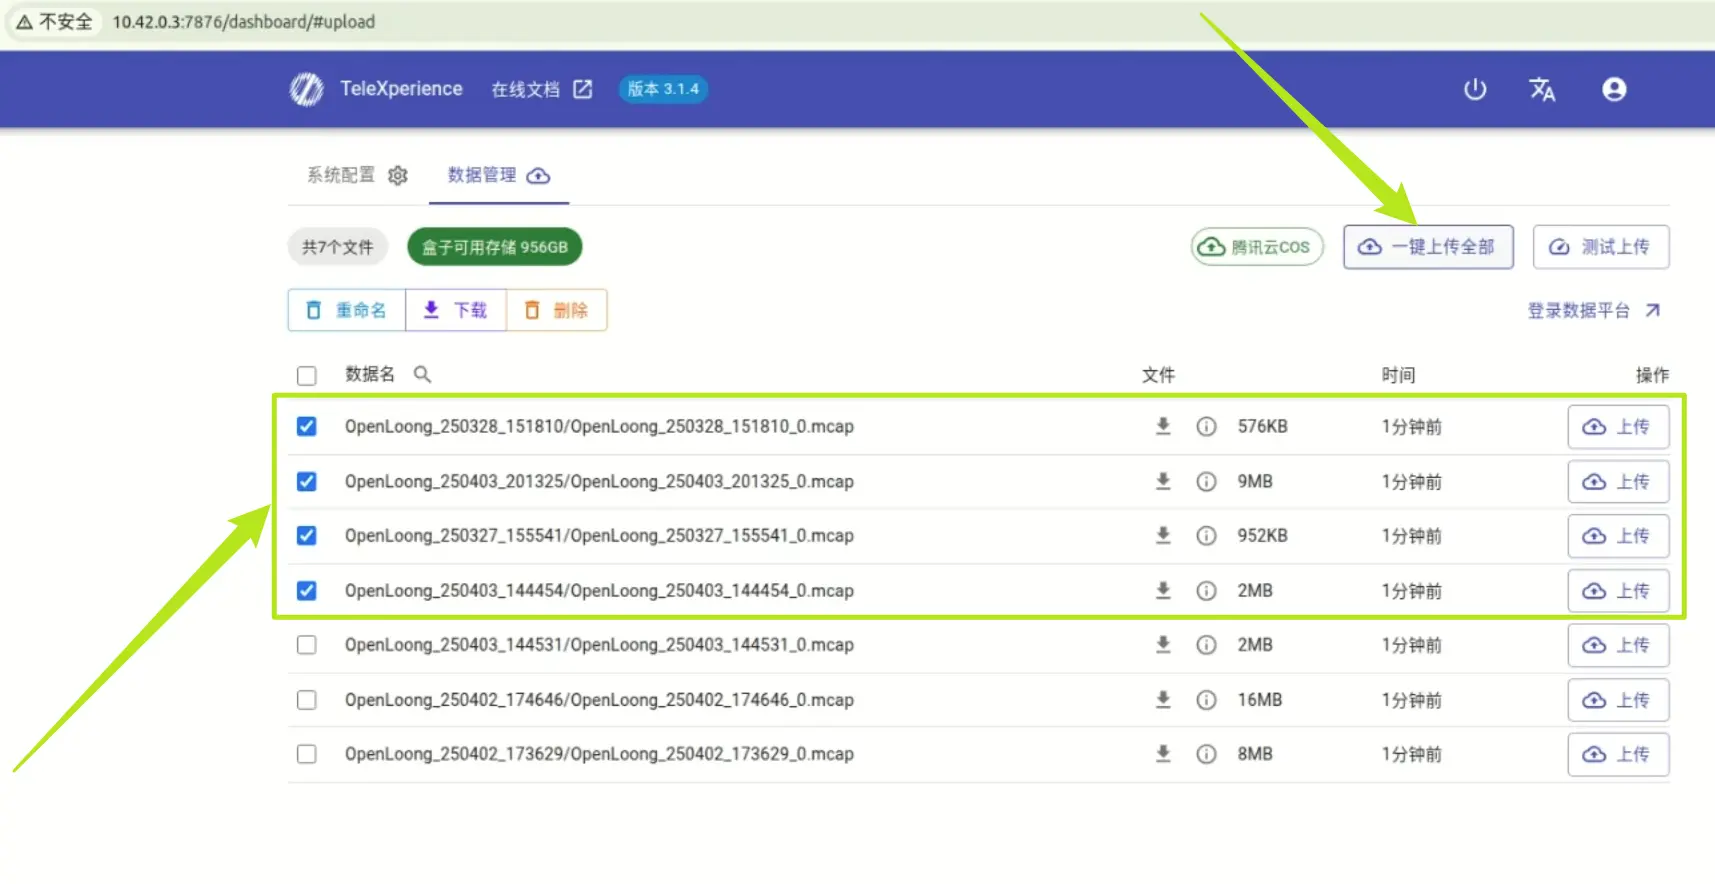
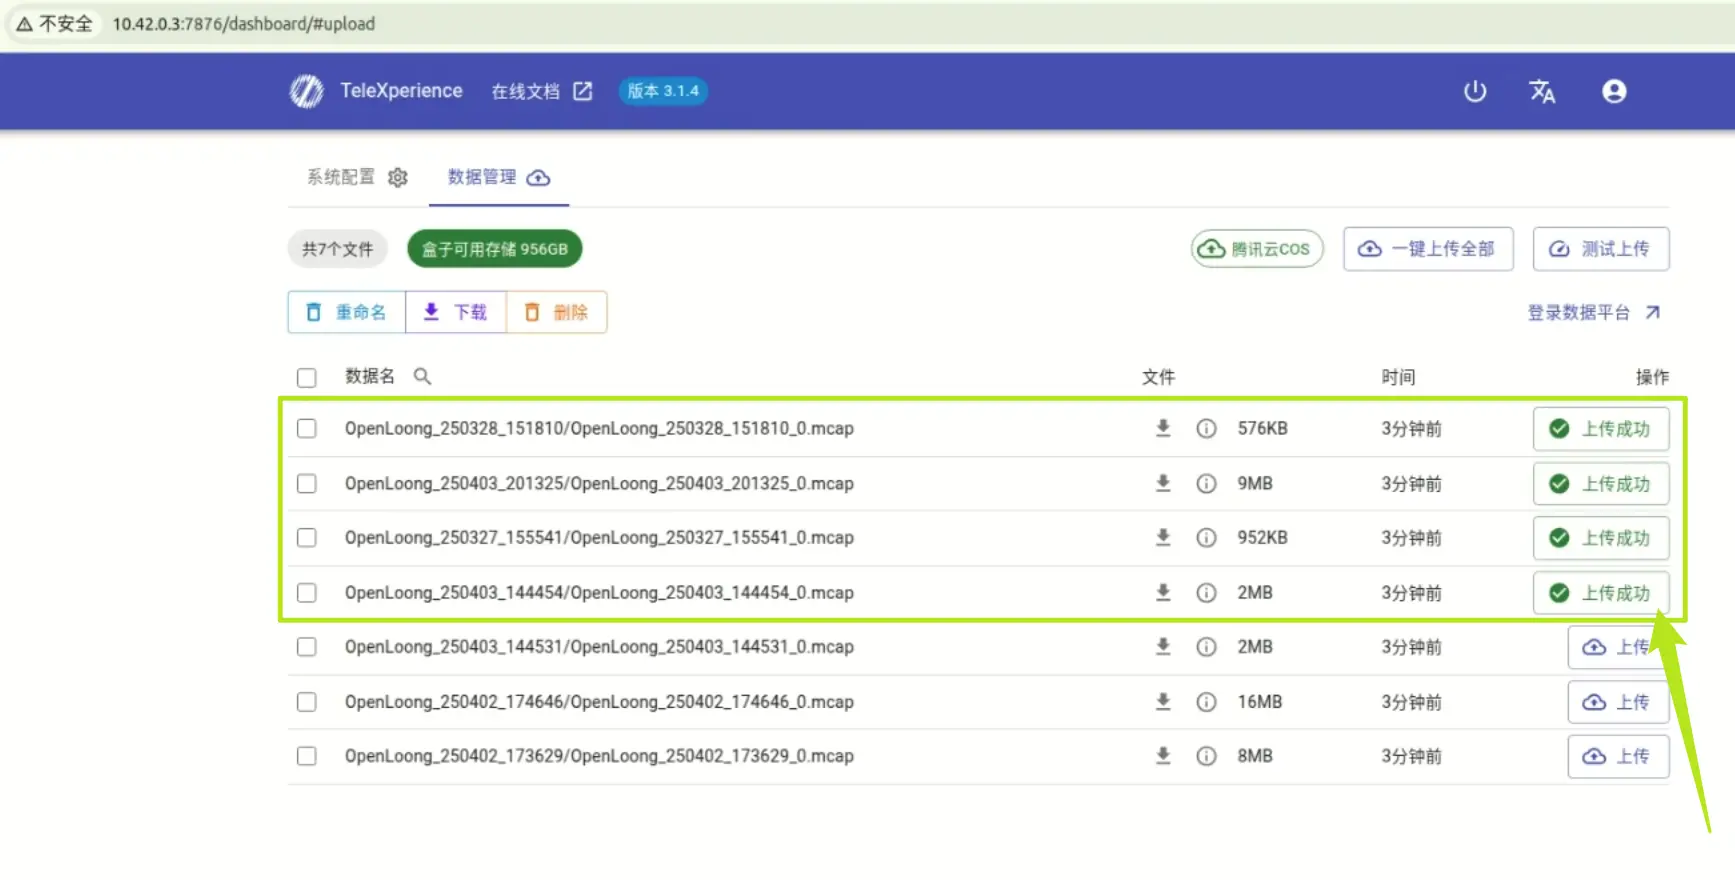
Selective Upload
Select the data you want to upload and click Upload All. Wait for the upload to finish.
Switch Back to Data Collection Mode
After uploading, switch back to collection mode to resume teleoperation data collection.
Steps
-
Press and hold the TeleBox button until the light changes from white to green.