Hardware Connection
If you encounter any issues running the out-of-box demo in this section, please contact your sales representative for after-sales support. We will assist you through all the steps in this chapter.
- Never unplug the power cable or battery while the device is powered on. Please perform a software shutdown from the frontend interface before disconnecting the power.
- Do not pull the cables or connectors forcefully while using the gloves to avoid damage.
Follow the steps below to power on each device, connect them for communication, and learn how to wear the VR headset and motion capture suit.
Device Power Supply
TeleSuit Main Controller
Detailed Steps
-
Check if the power plug is intact
-
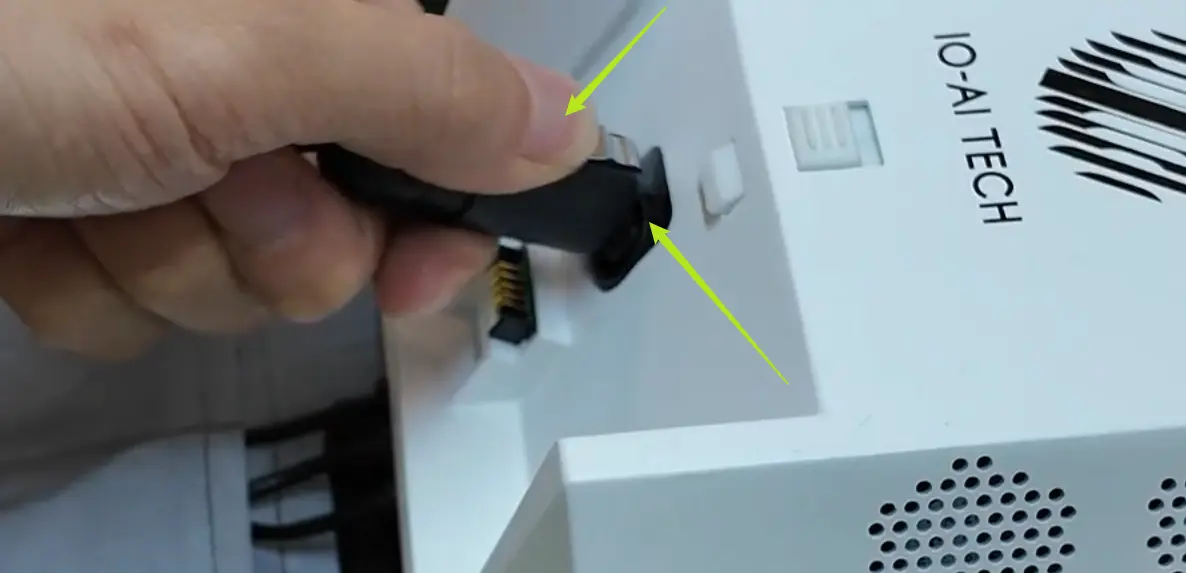
Press the silver latch repeatedly to check its elasticity. Keep it pressed down, align the plug with the socket, insert it, and release after hearing a click.

-
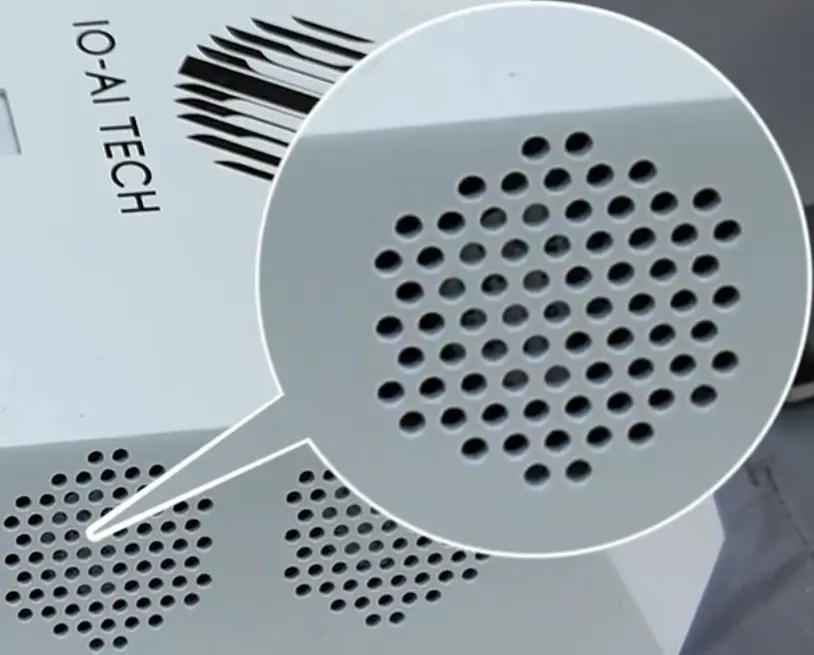
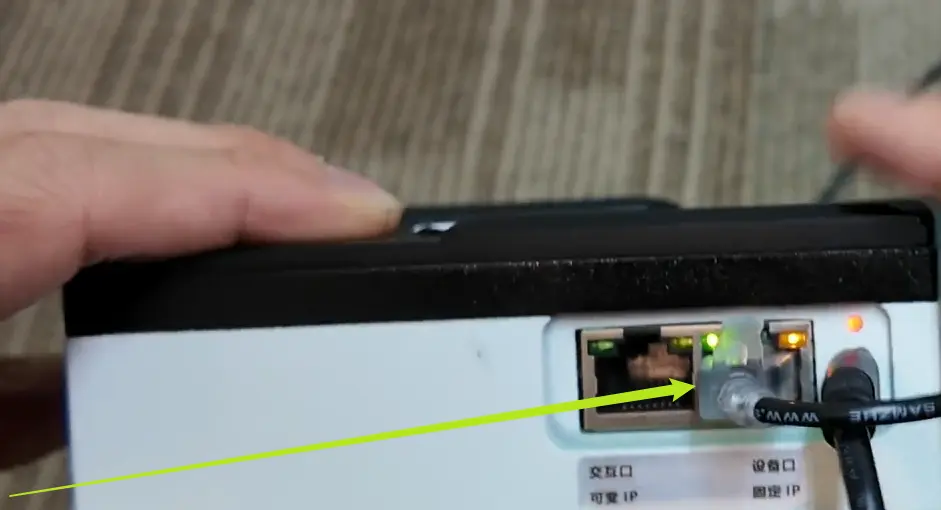
The main controller shows a steady green light when powered on. Check the router status through the cooling vent: green light at startup, turns red after 1-2 minutes when ready.


TeleSuit Wireless Power (Pro Version)
-
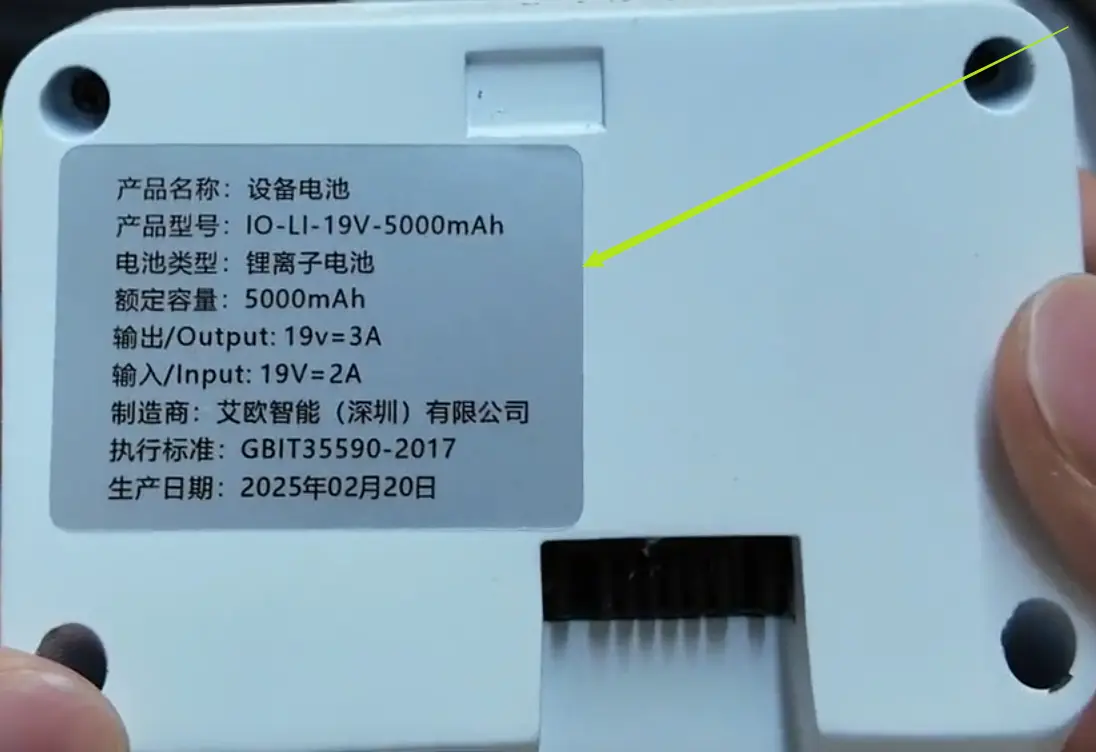
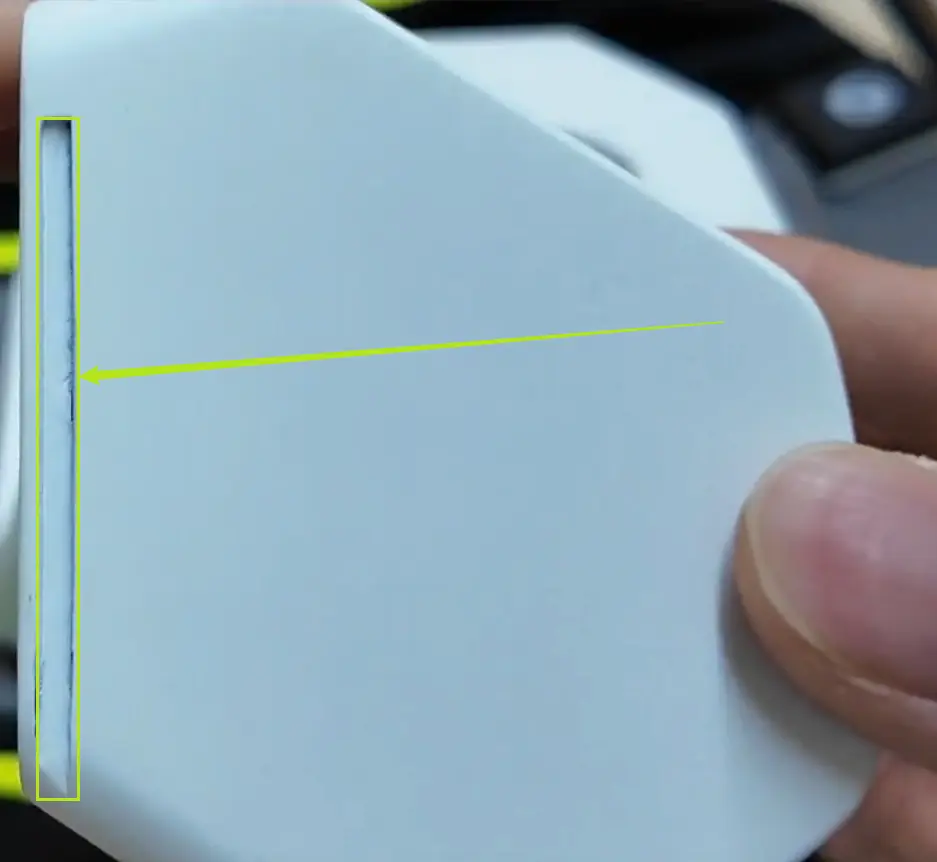
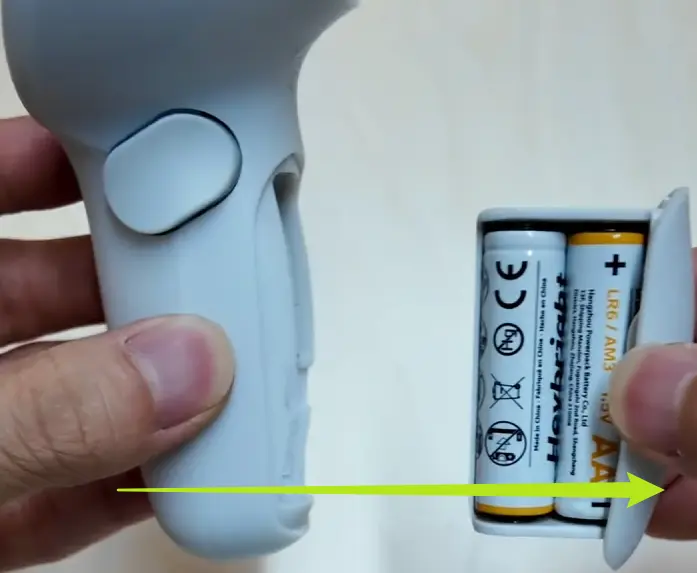
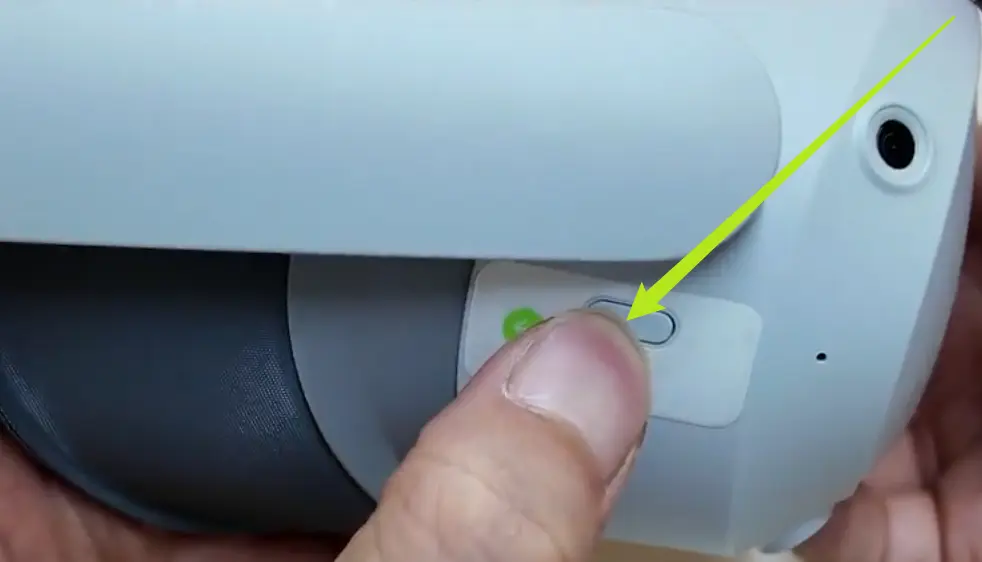
Check the battery appearance, label, and side slots.
-
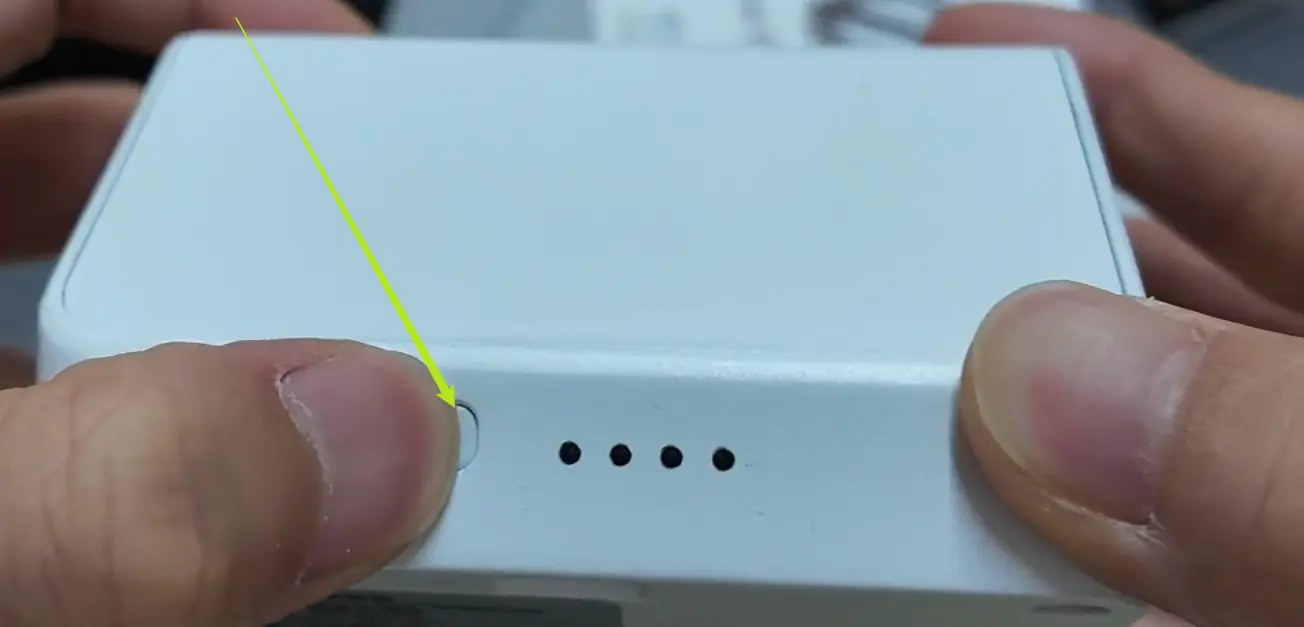
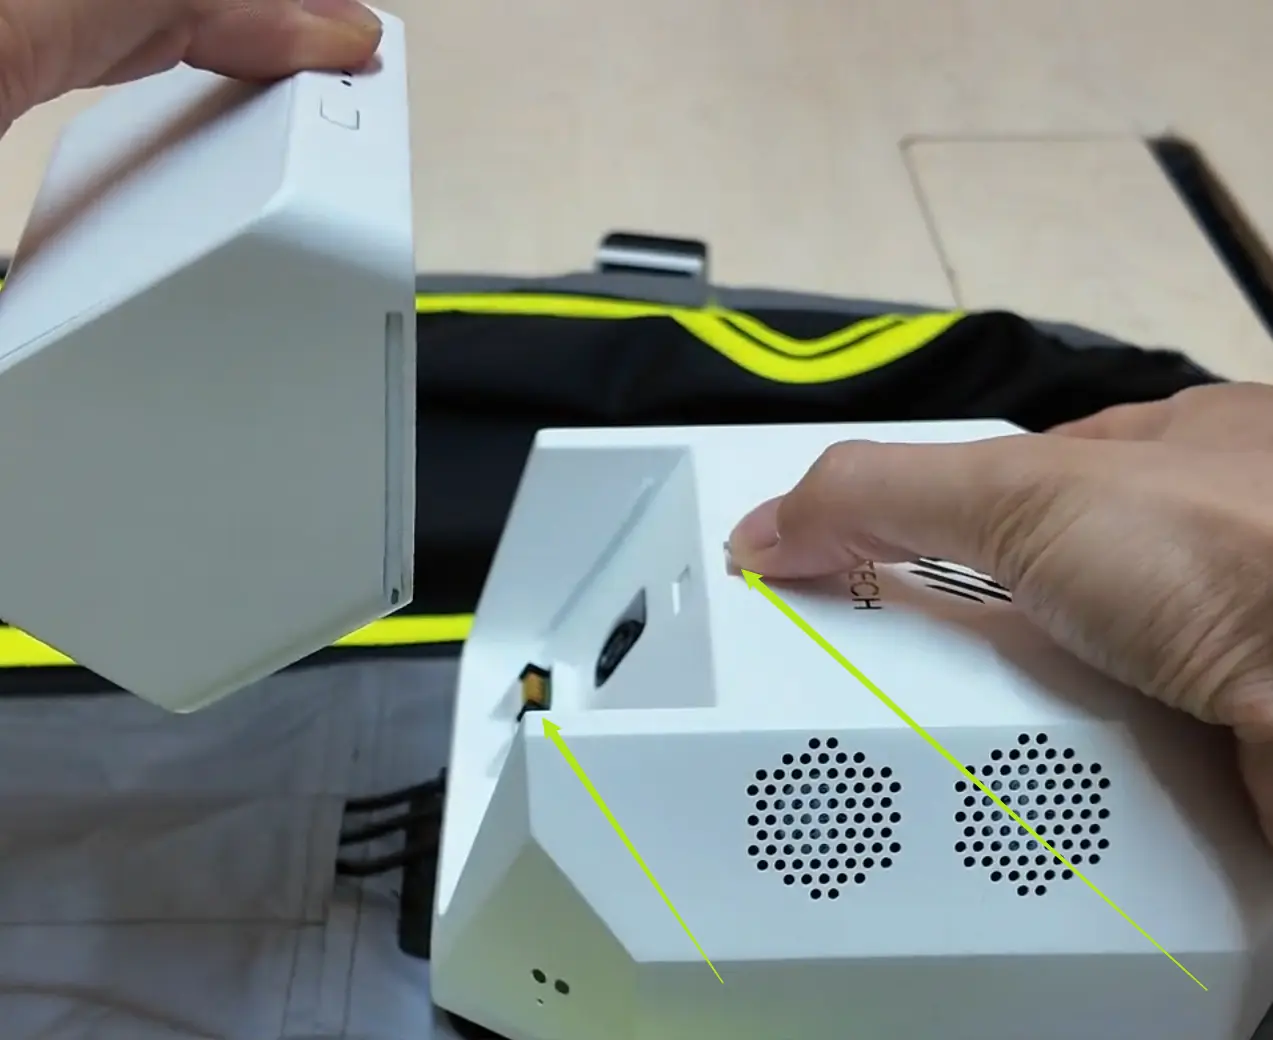
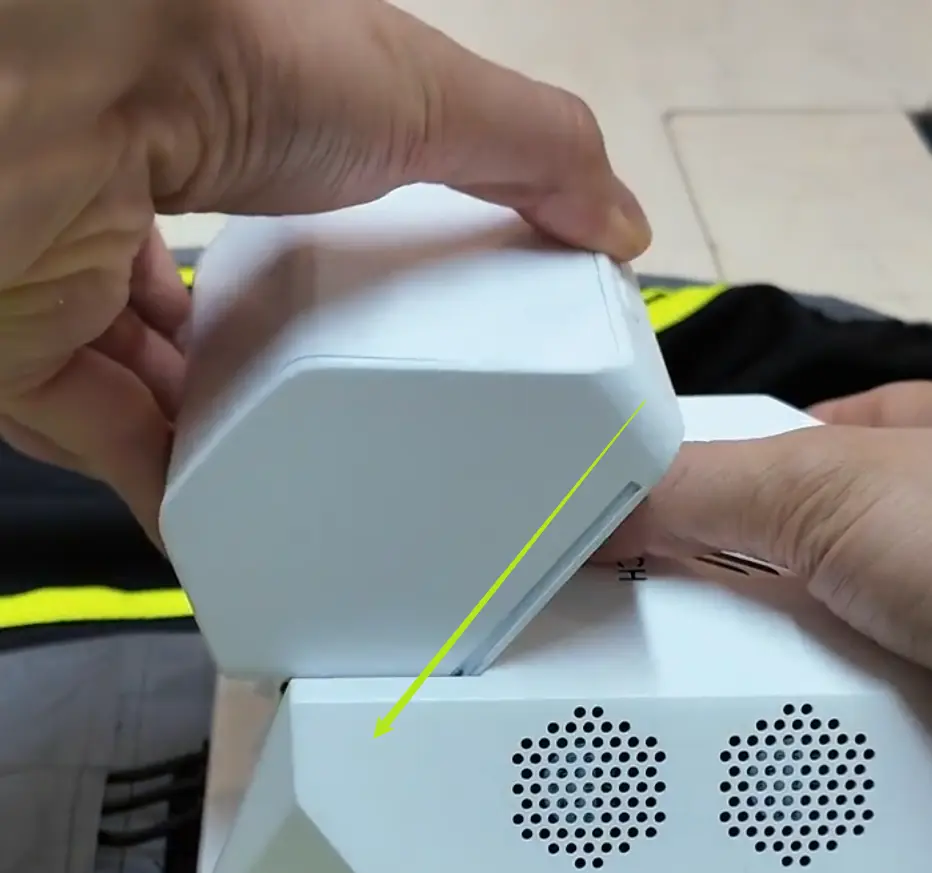
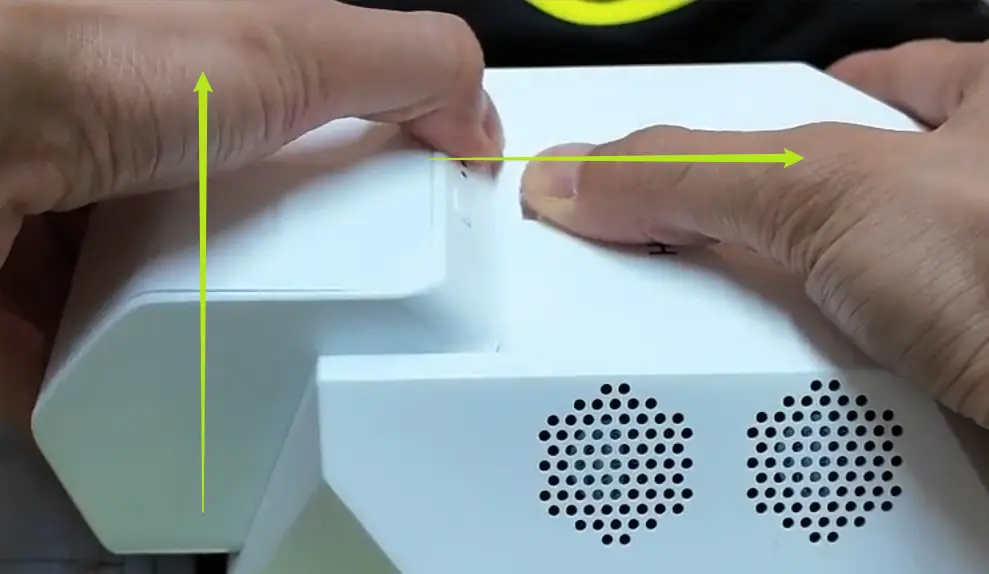
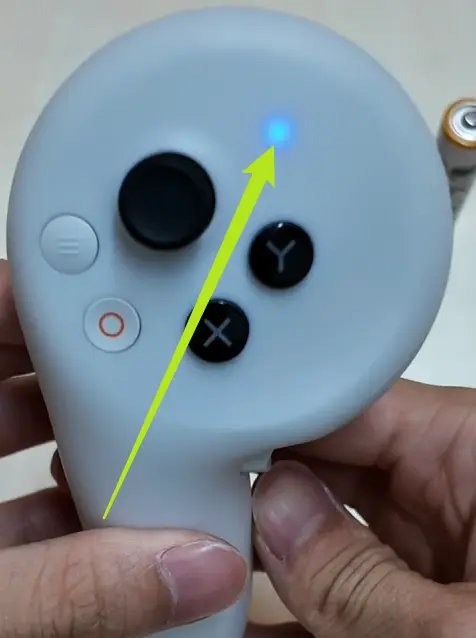
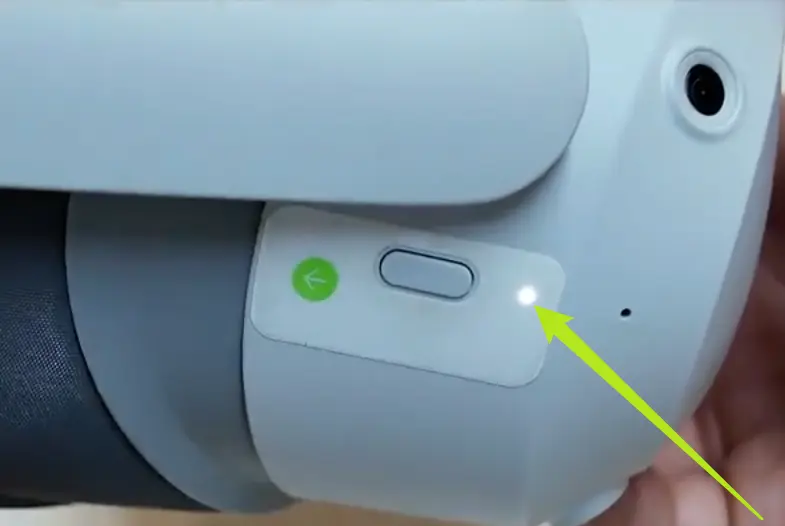
Press the battery button for 2-3s to check the power level. Replace if low. Slide the battery into the slot, keep it parallel, and ensure it's firmly installed. Long press the button for 3-5s to power on.

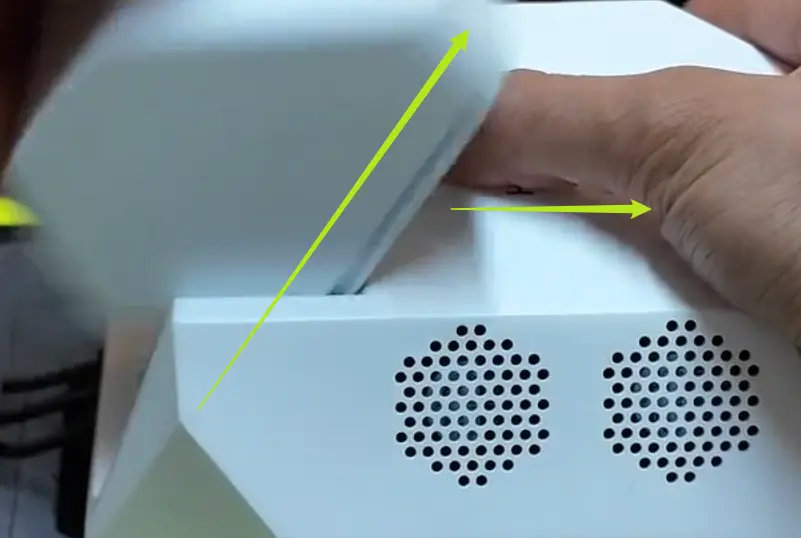
Remove Battery
-
Power off first, then slide and remove the battery.
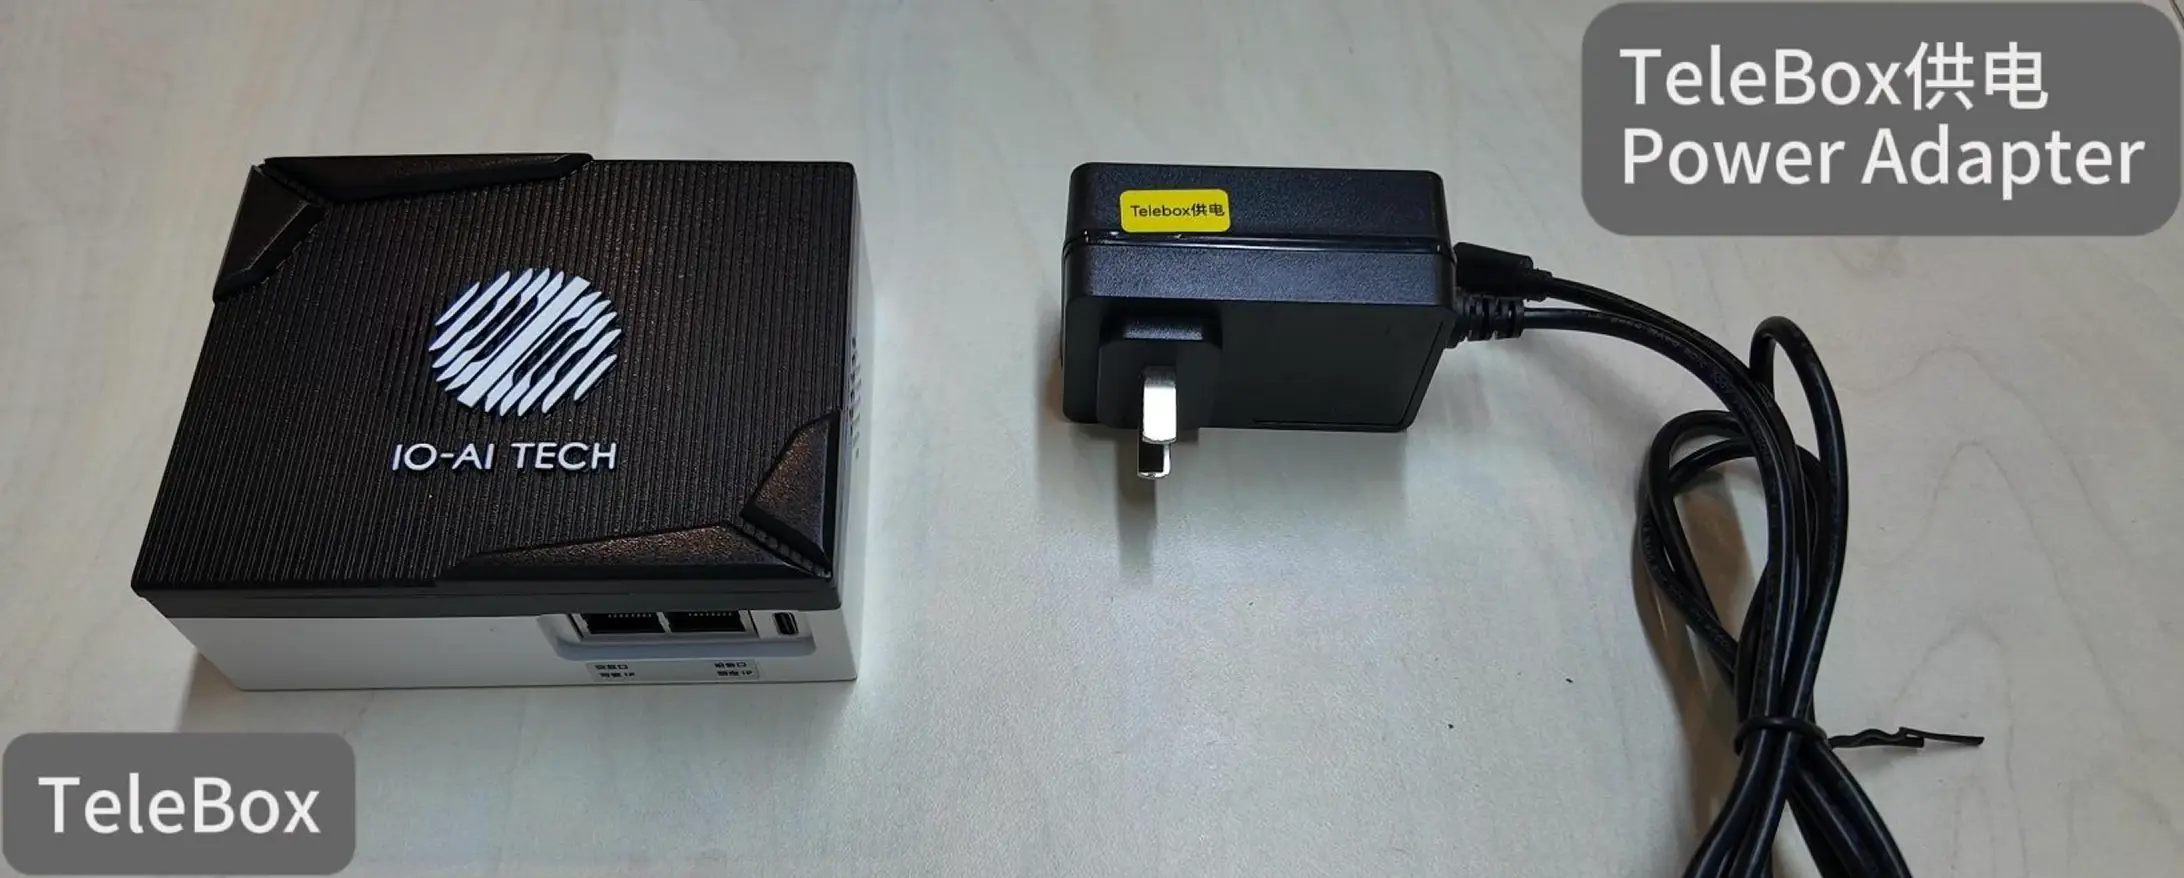
TeleBox
Detailed Steps
-
Check the items: TeleBox, TeleBox power adapter
-
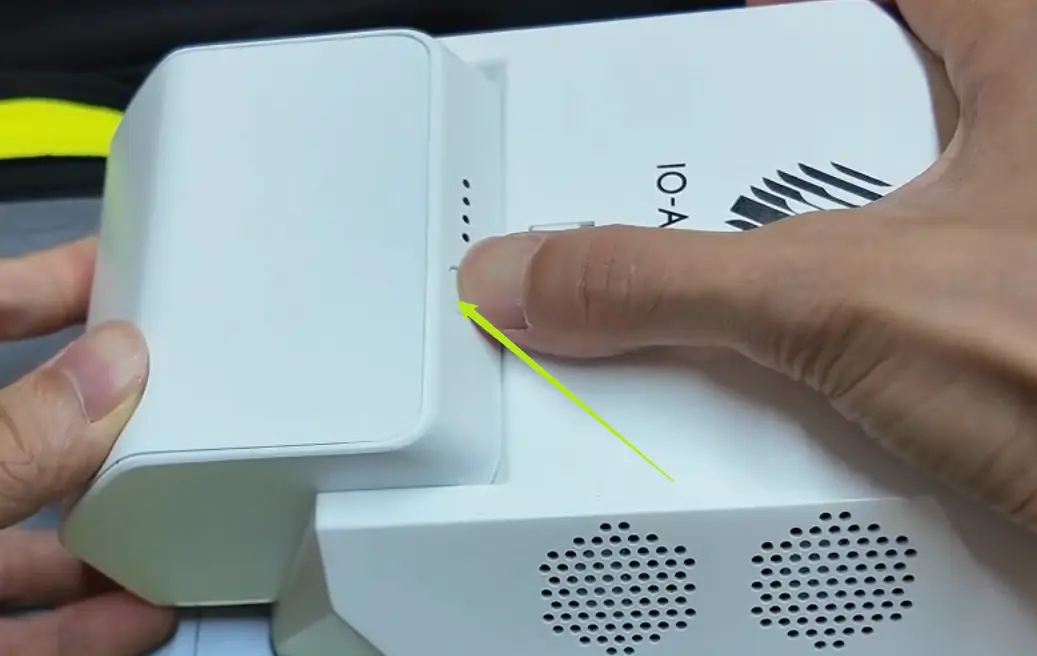
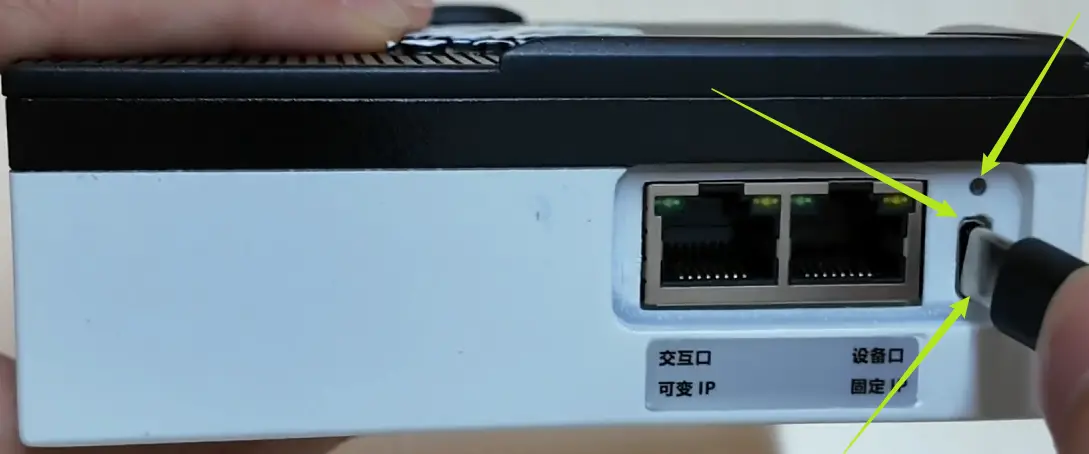
Plug the power adapter into the Type-C port to power on TeleBox.
-
Check the indicator light above the Type-C port:
Indicator TeleBox Status 
Red: Power on, normal 
Purple: Initializing (about 5s) 
Red & Blue flashing: Ready after ~5s
VR Headset
Detailed Steps
-
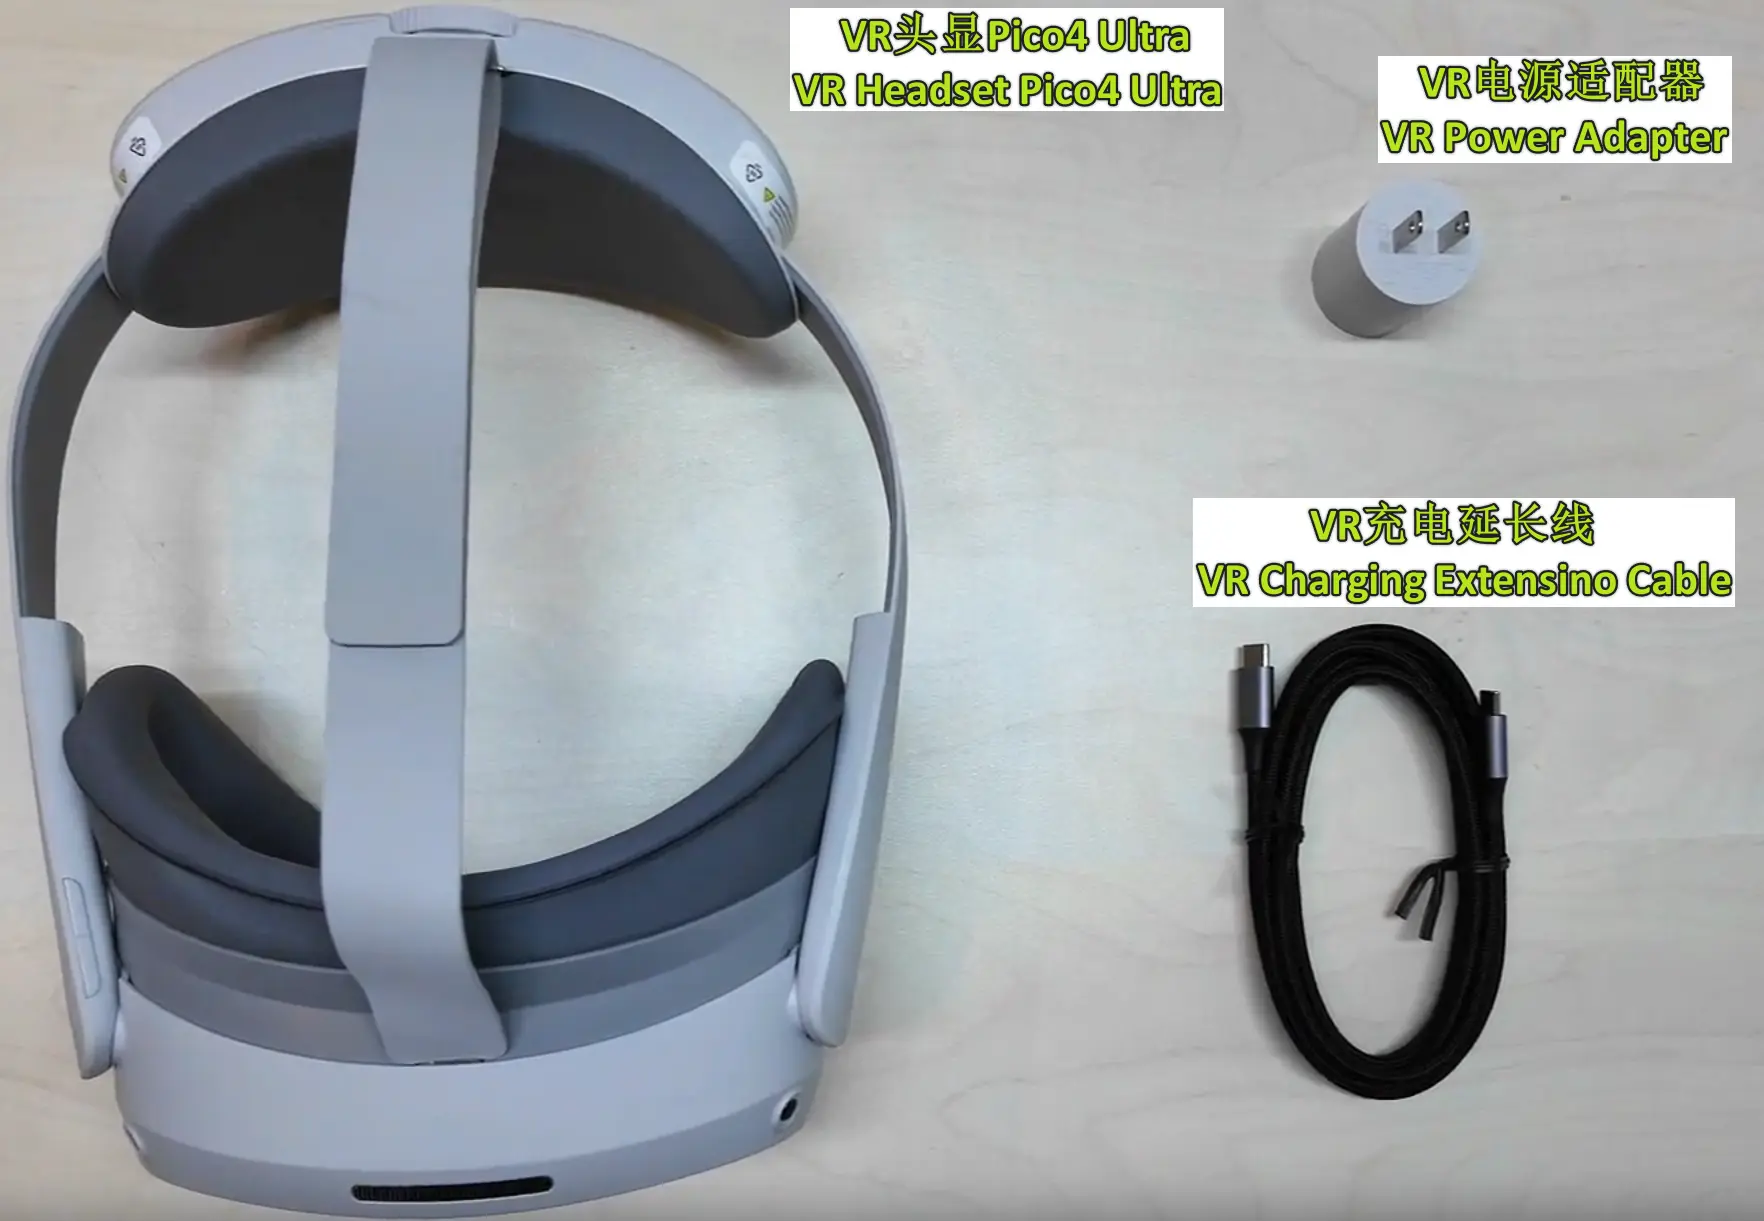
Items:
-
VR Headset Pico4 Ultra, charging extension cable, power adapter (Note: Pico does not provide a power adapter. Please prepare one under 45W.)
-
-
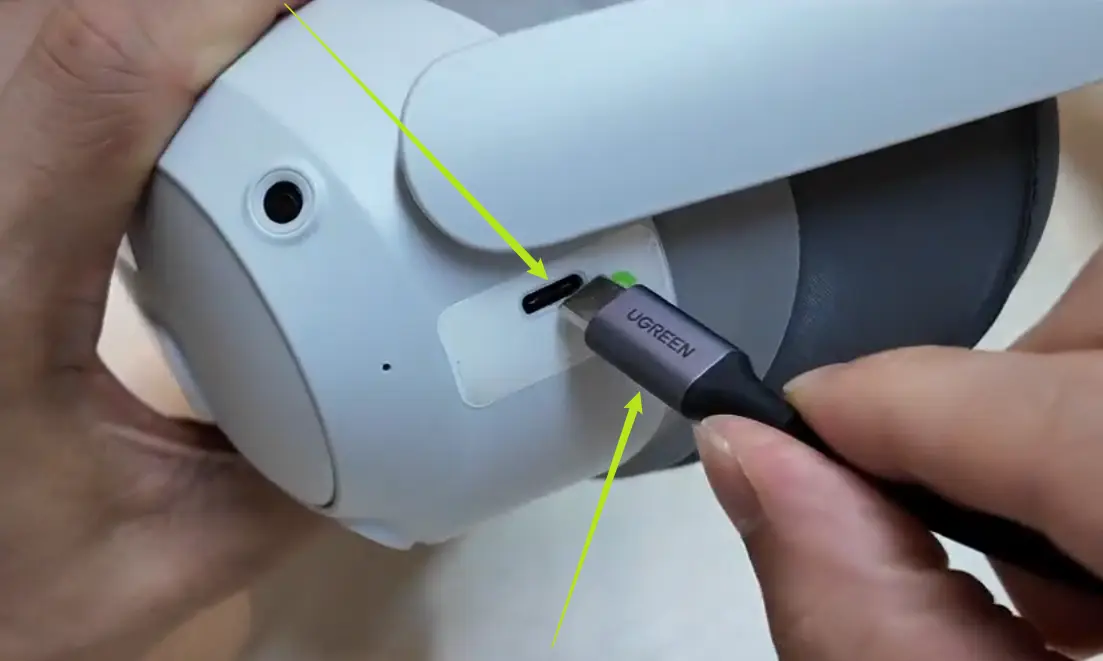
Charging Method 1:
-
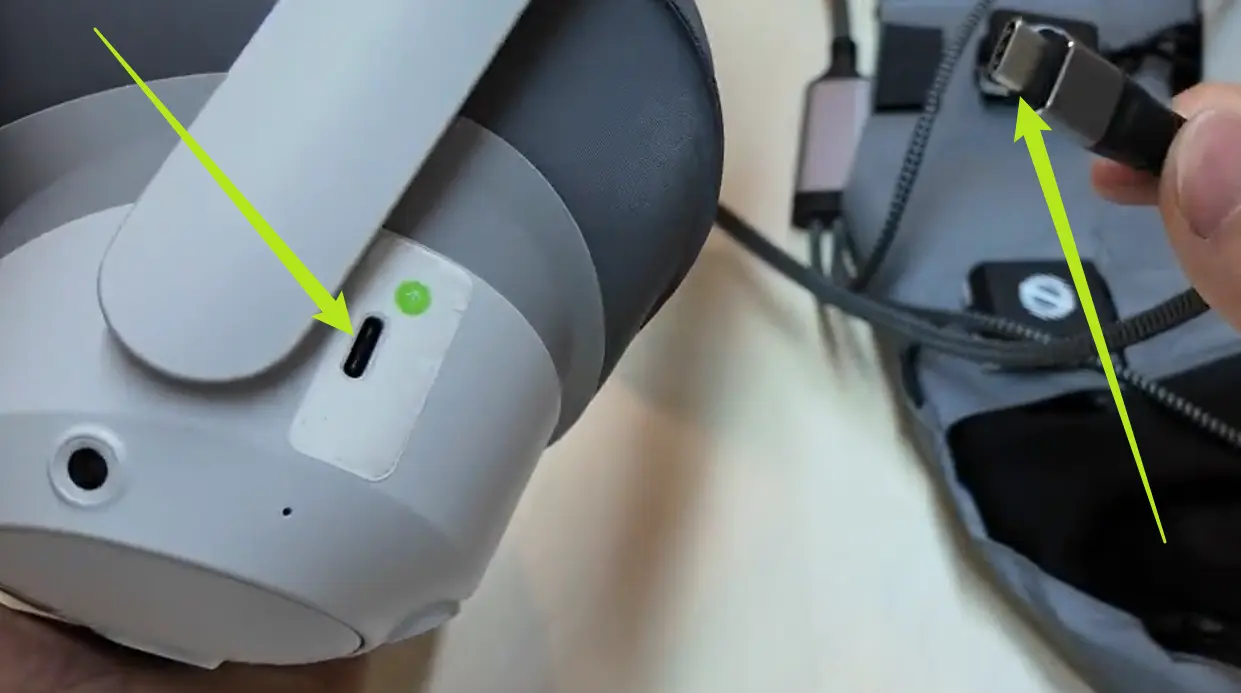
Use the adapter and extension cable to charge the headset. The indicator light on the right side will turn on.

-
-
Charging Method 2 (Pro Version Only):
-
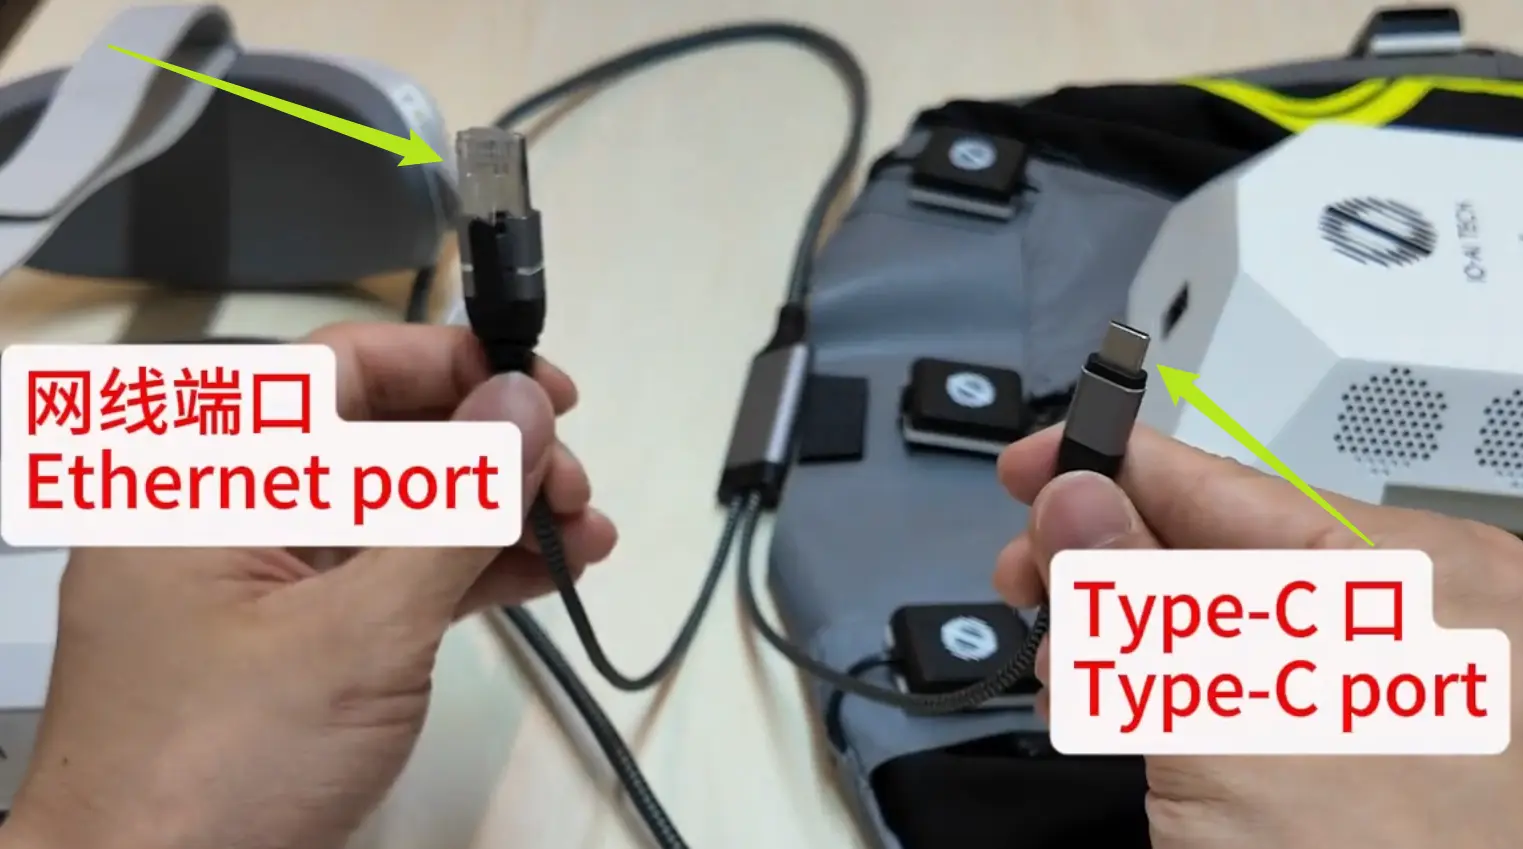
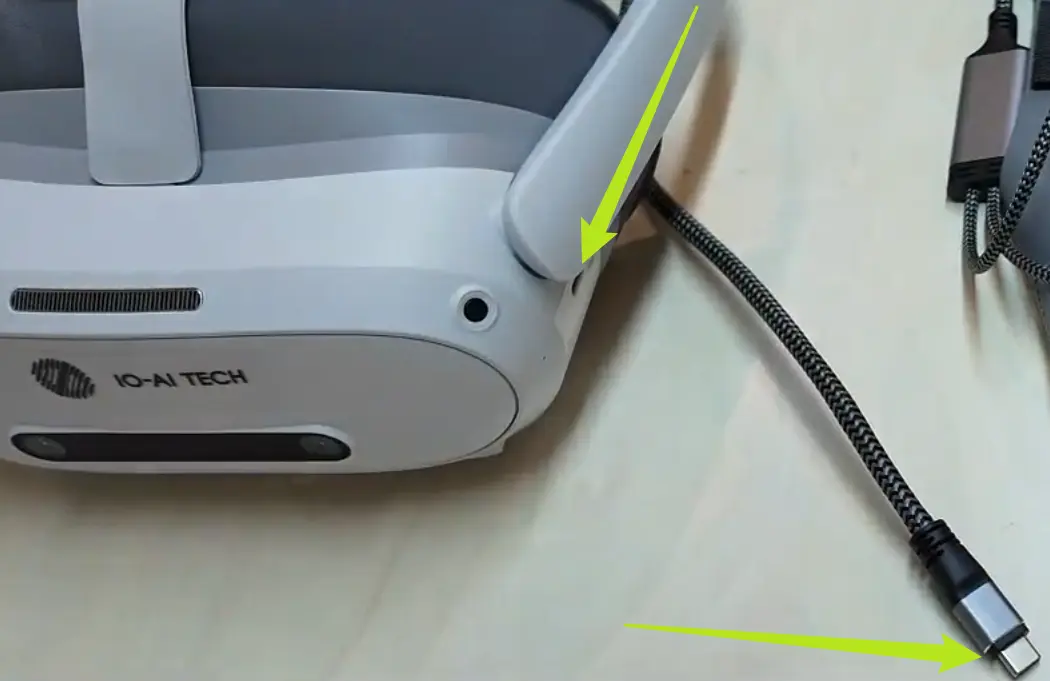
Power VR via TeleSuit main controller:
Connect the network cable to the main controller, plug the Type-C into the controller and headset. The indicator light will turn on, and you can check the battery status in the headset.


-
VR Controllers
Detailed Steps
-
Controller Power
-
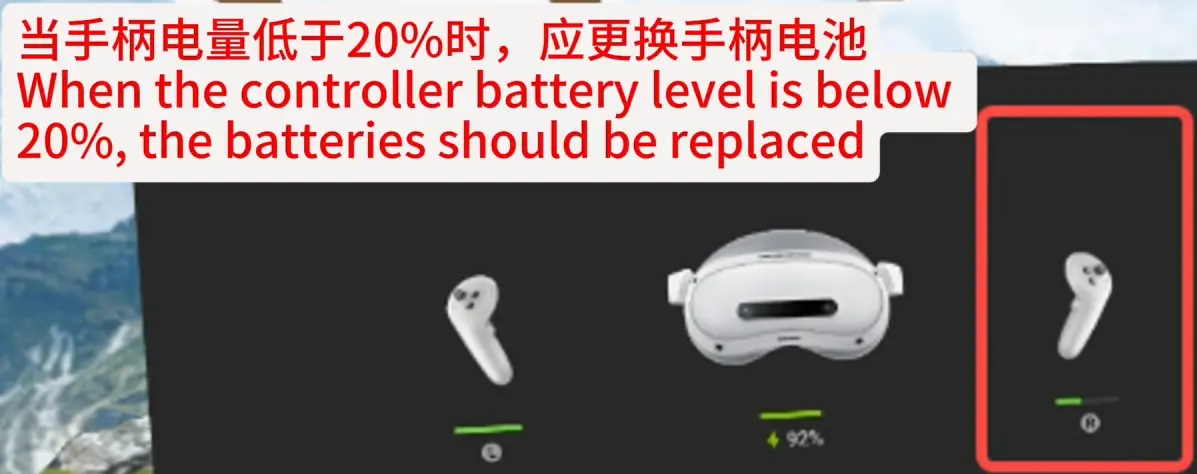
Check controller battery in the VR headset. Replace batteries when below 20%.
-
Open the battery cover, replace the battery, and check again in the headset.


-
Communication Connection
TeleSuit & TeleBox
Detailed Steps
-
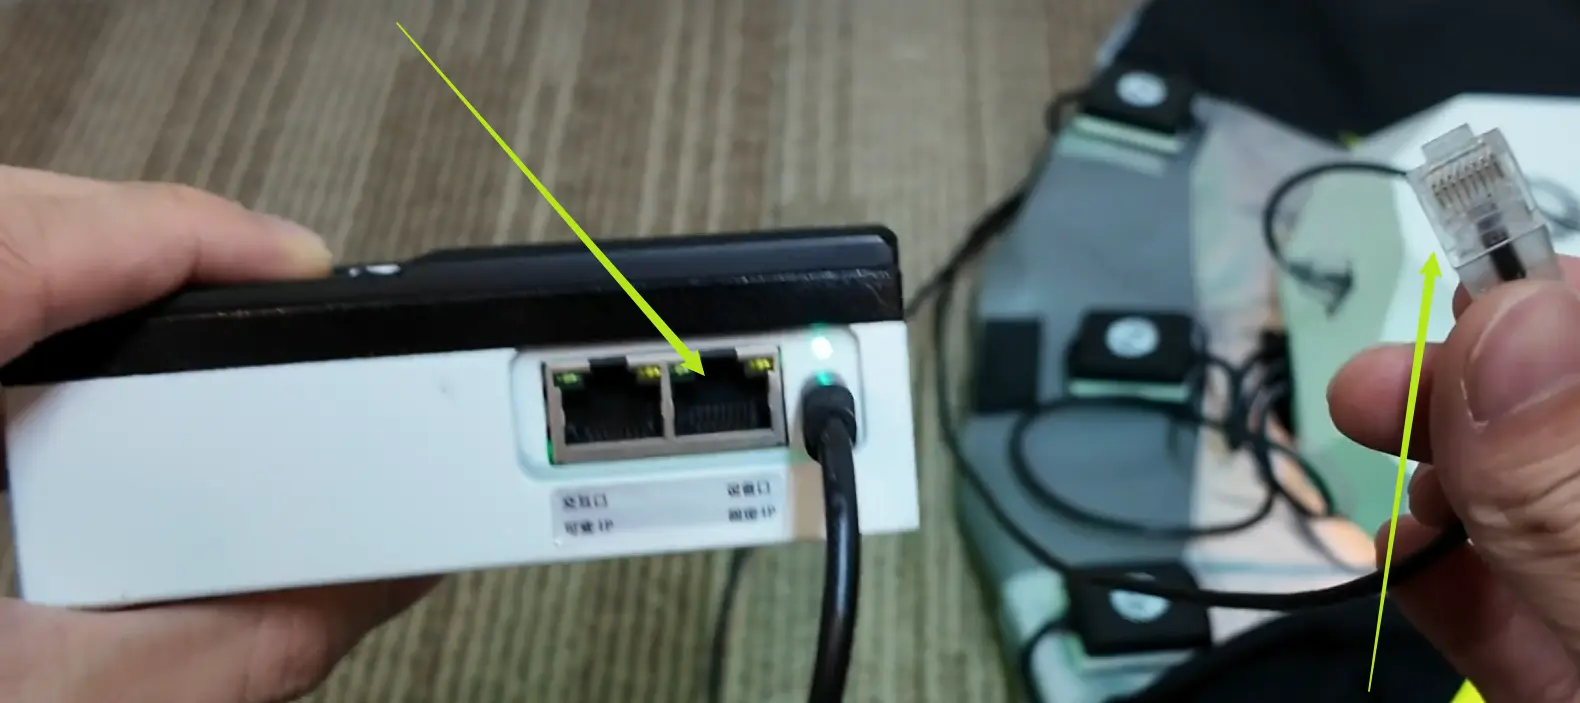
Wired Connection
-
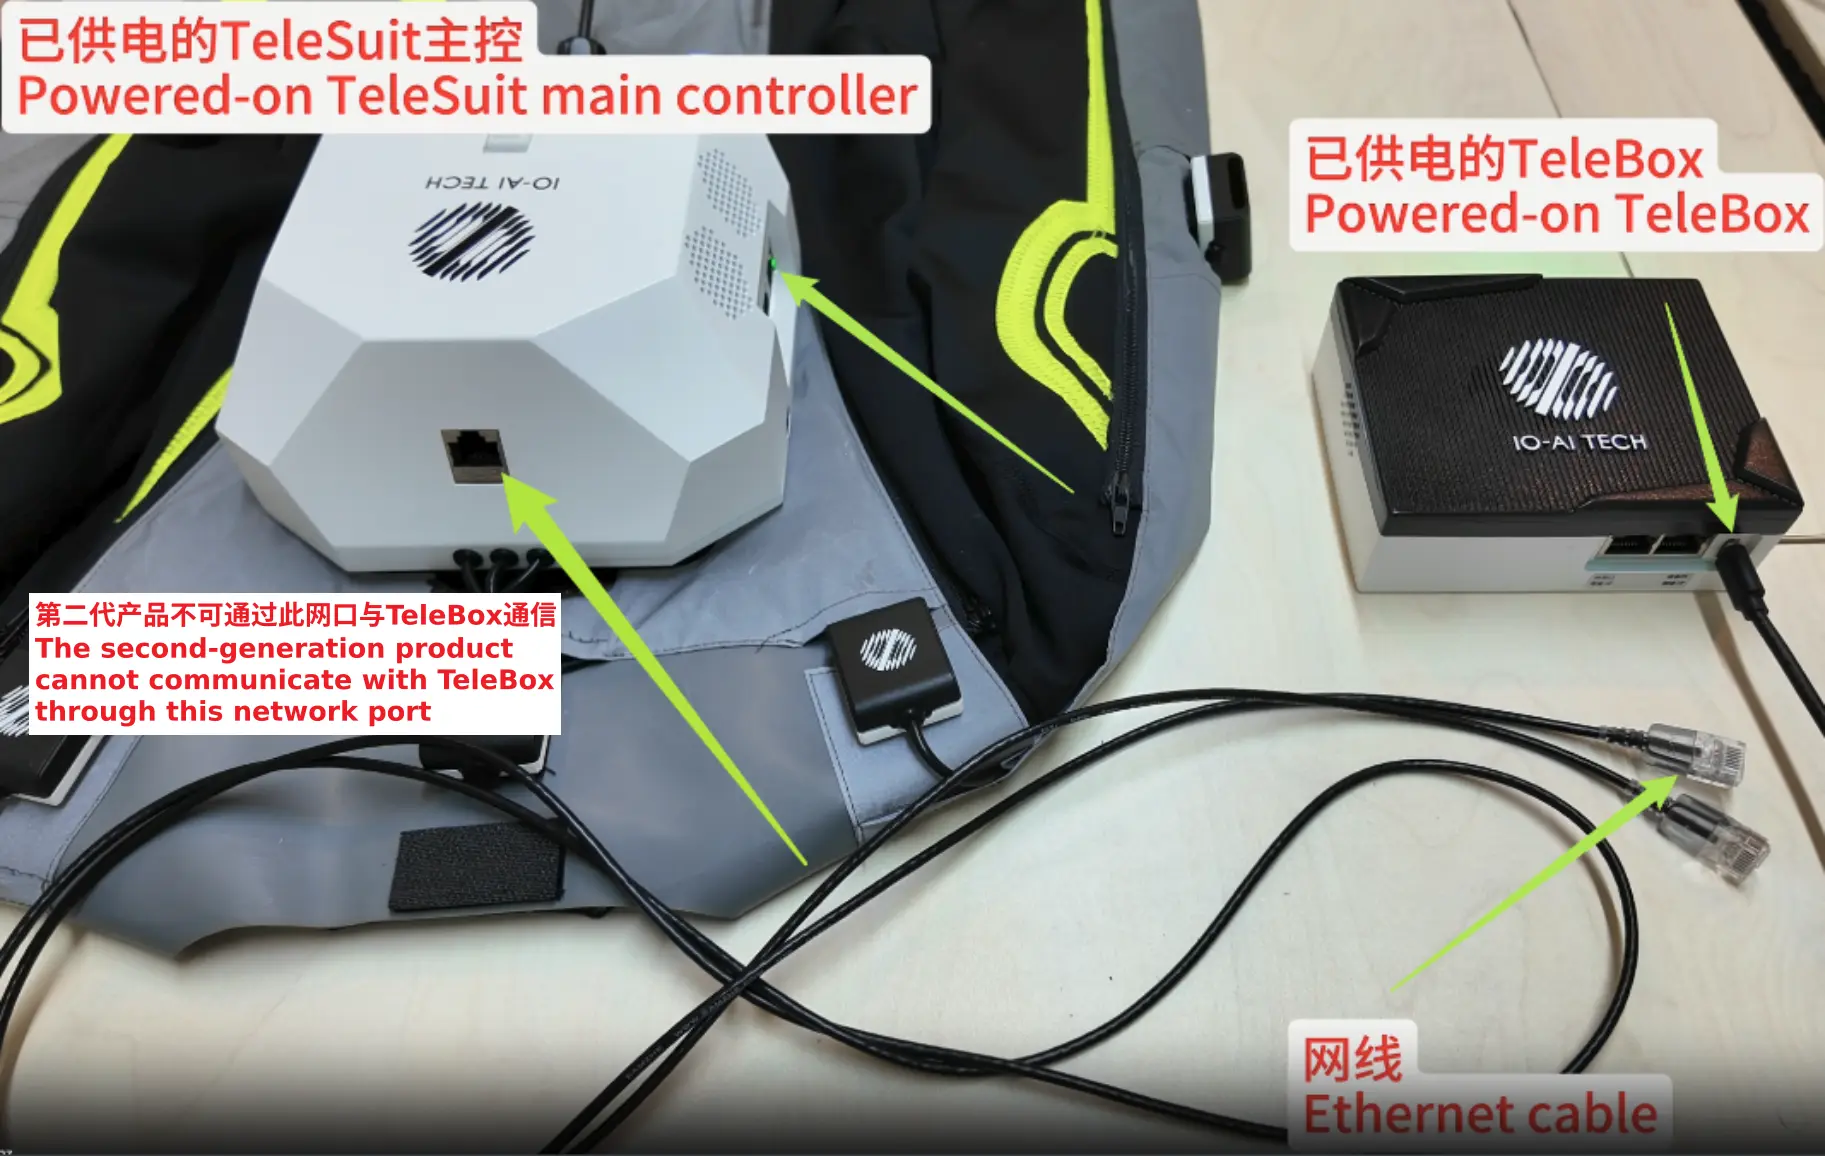
Ensure: Powered TeleSuit main controller, powered TeleBox, network cable
-
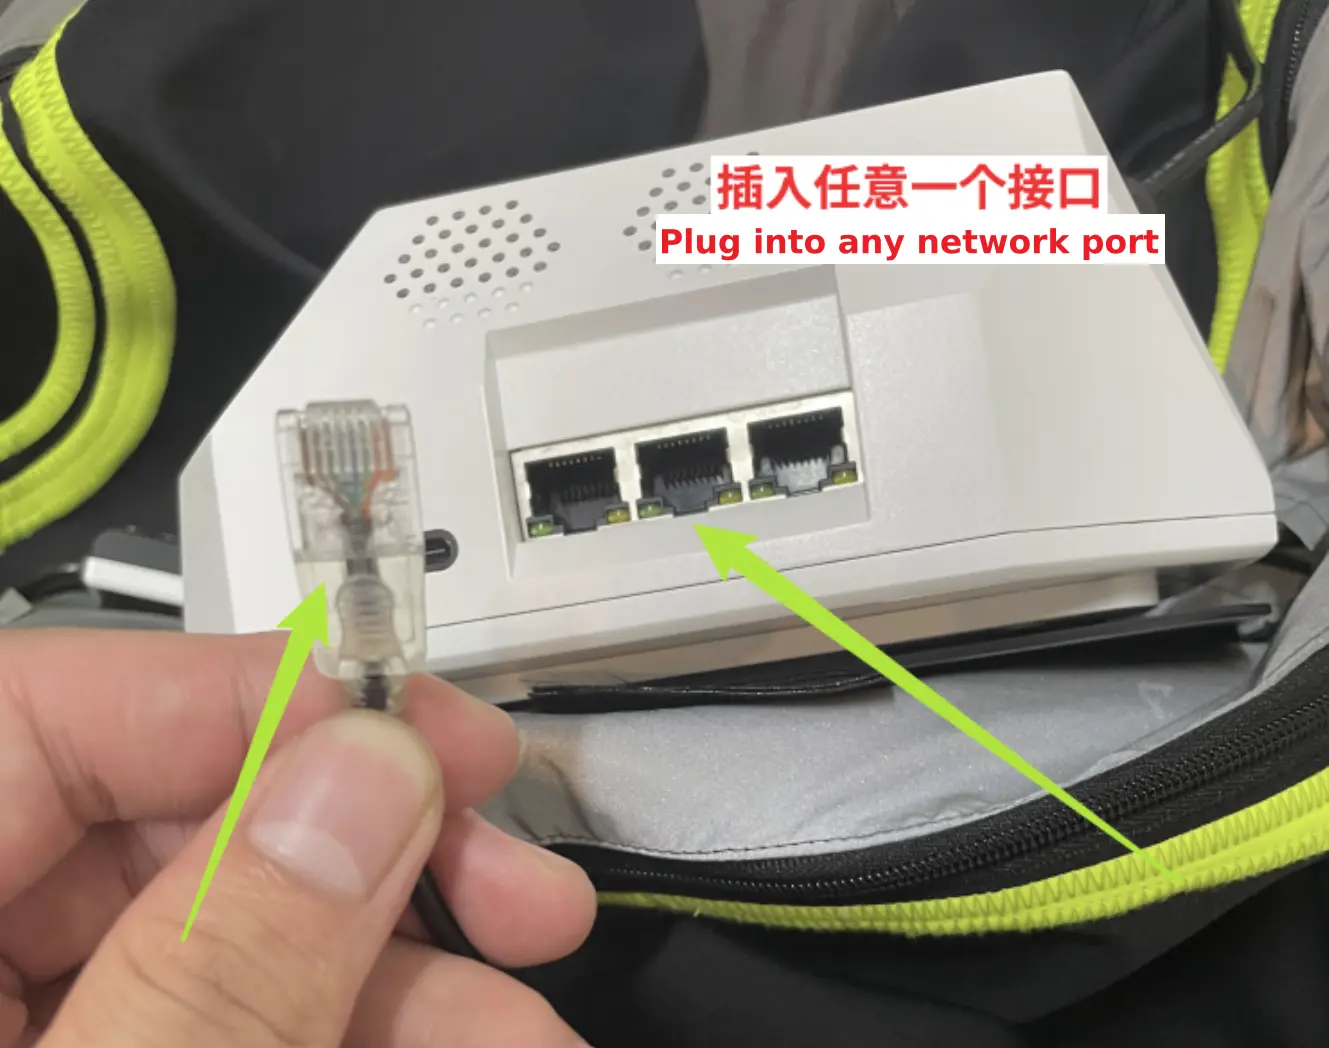
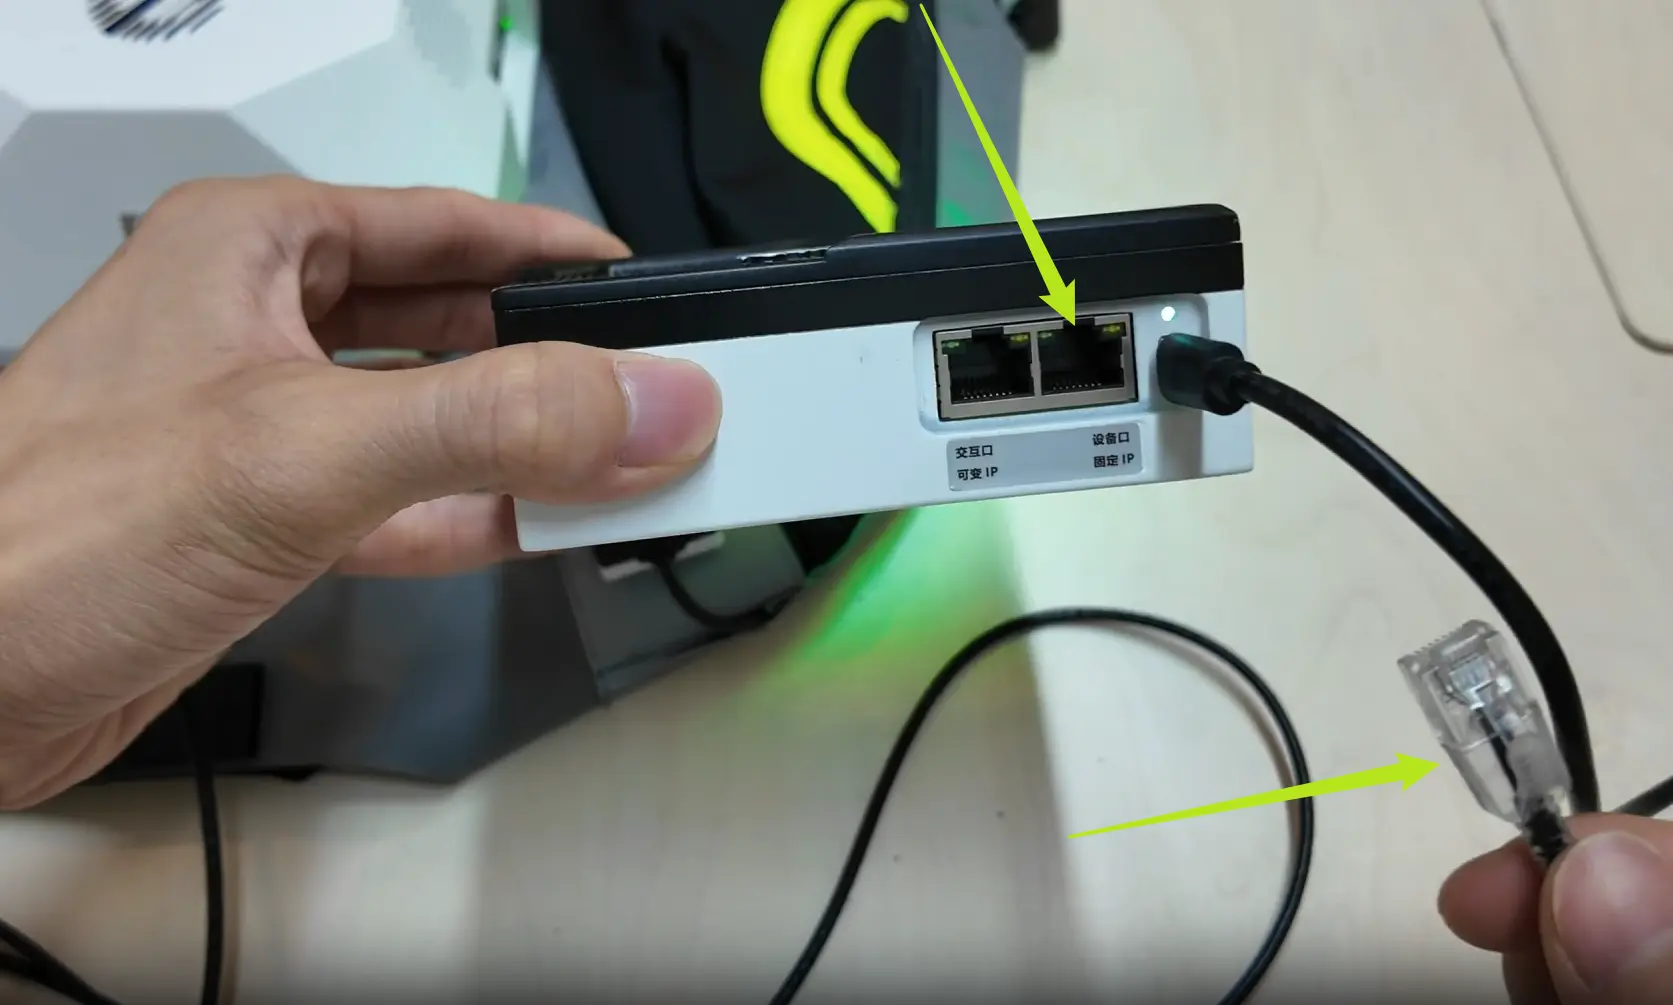
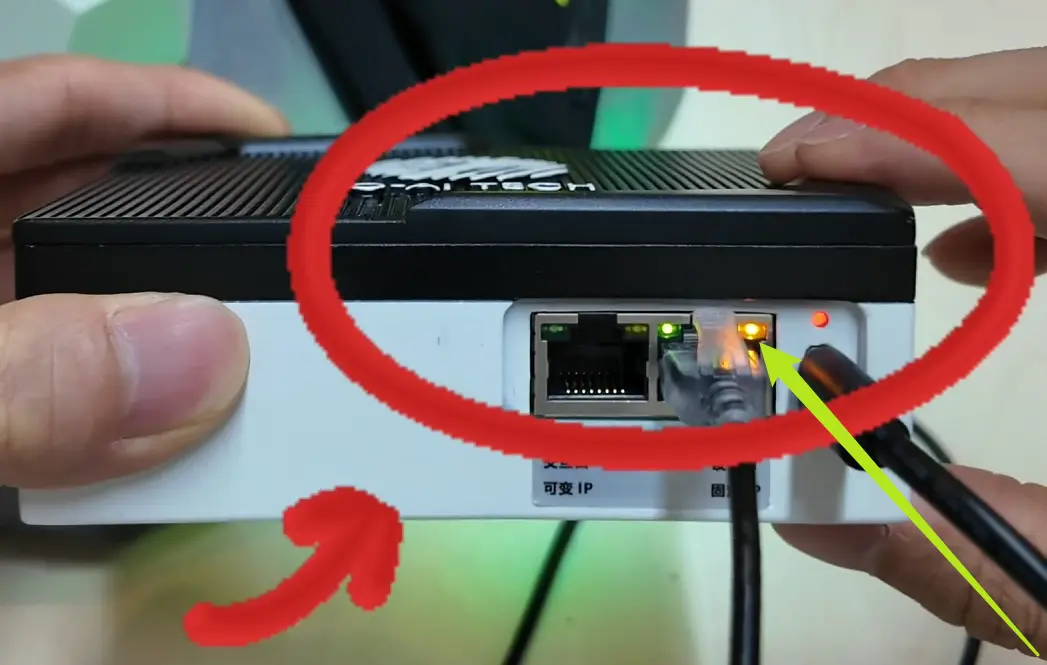
Connect the "Fixed IP" ports of TeleSuit and TeleBox with the network cable. The port indicator should flash orange. All TeleBox indicators should turn green when connected.

-
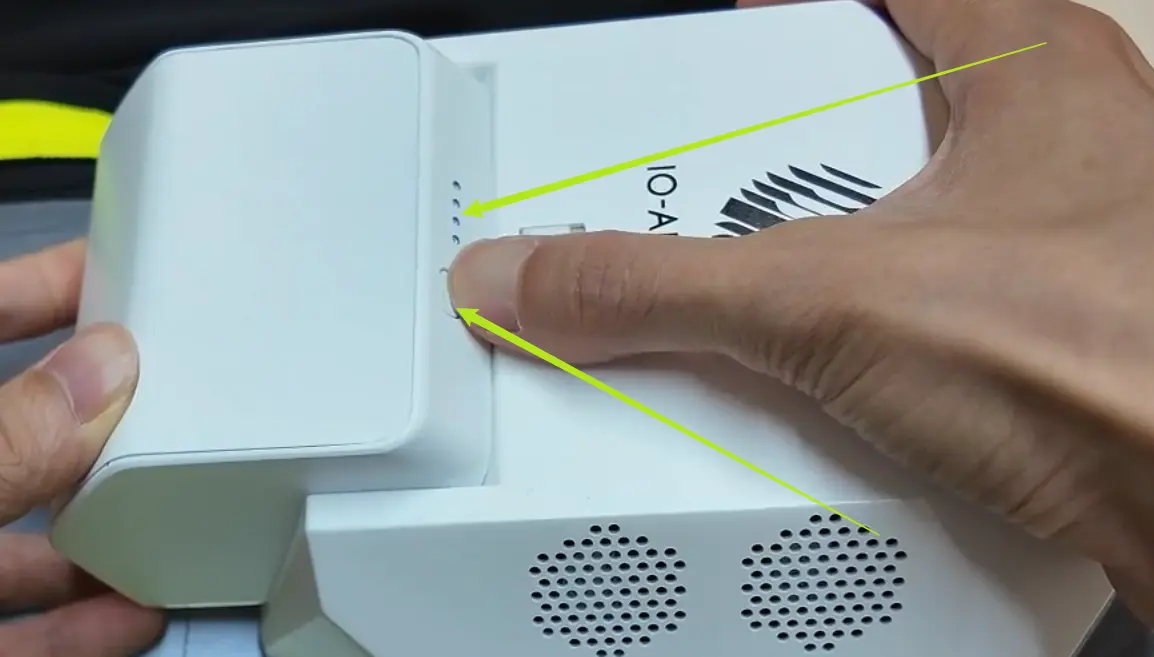
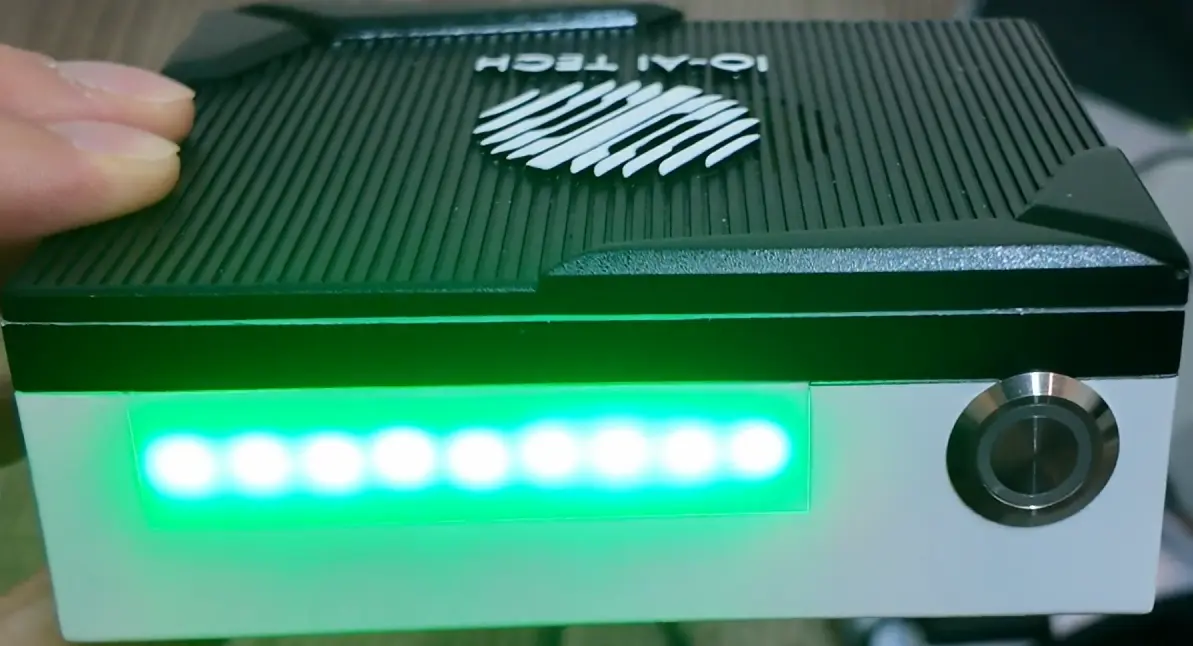
TeleBox Status Panel
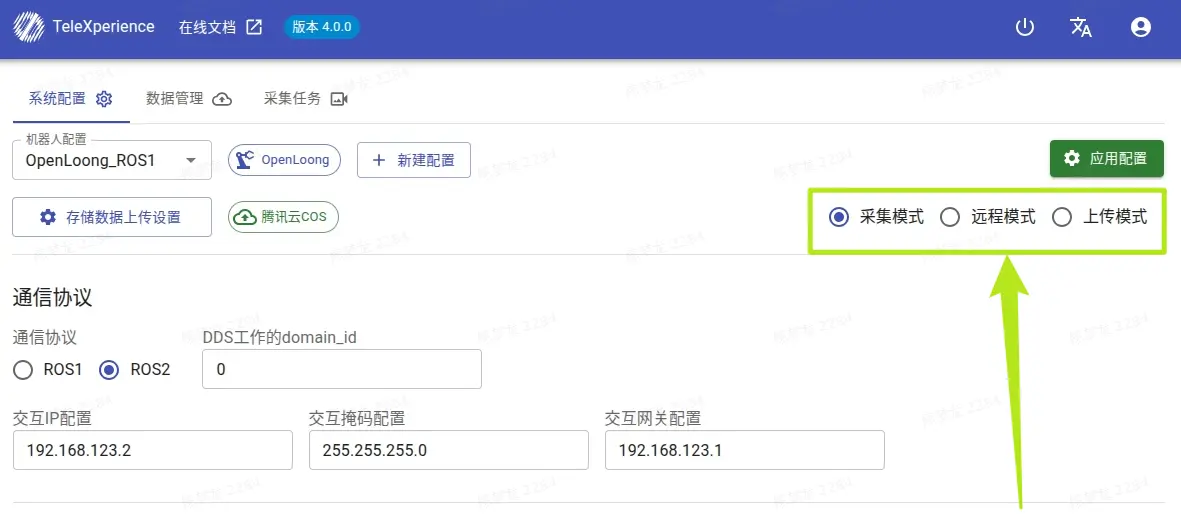
The indicator lights show different colors in different modes. See the table below:
- Panel is left of the power button:
Indicator Position Status Collection Mode 
First from right Green: Connected to IPC/robot; Red: Not connected Second from right Green: Connected to TeleSuit; Red: Not connected Remote Mode First from right Blue: Connected to IPC/robot; Red: Not connected Second from right Blue: Connected to TeleSuit; Red: Not connected Upload Mode 
First from right White: Network OK; uploading, white bar lights up gradually;
All white: Upload complete; Red: Not connected or upload failed
-
-
Wireless Connection
-
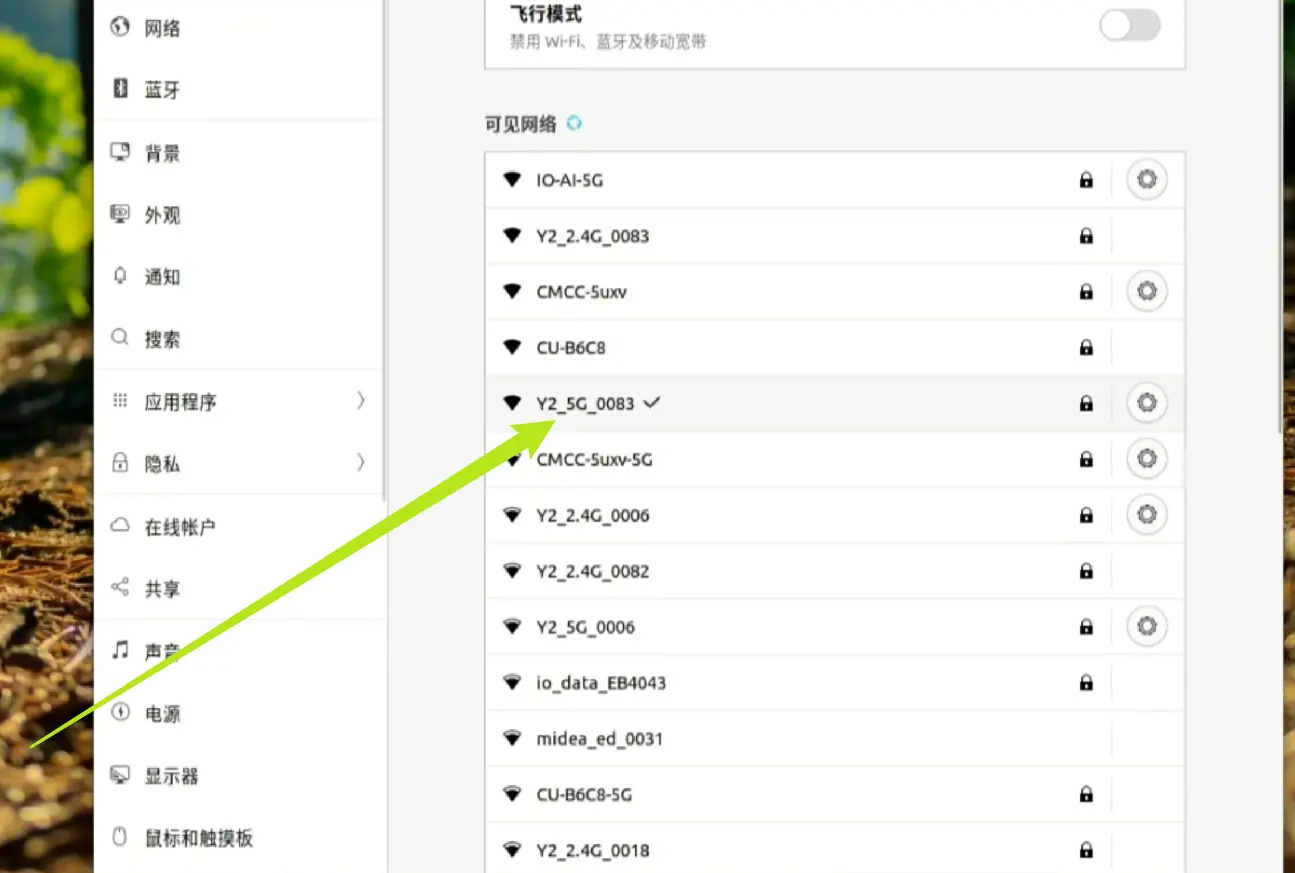
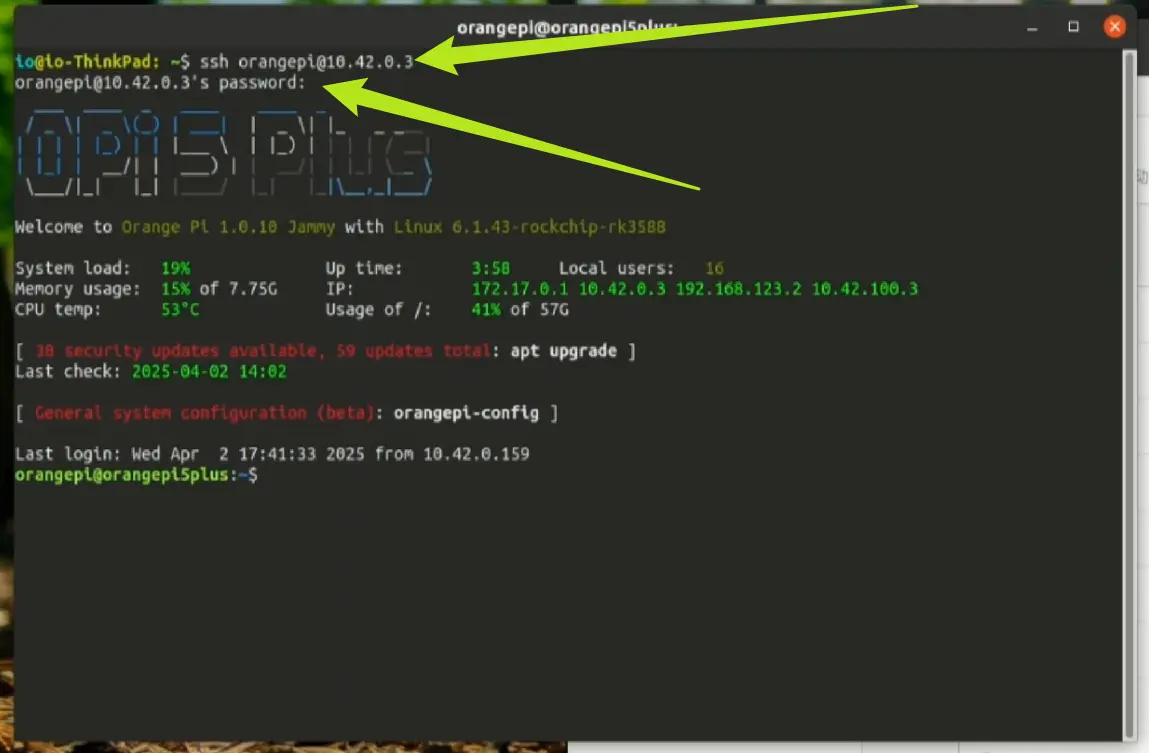
Connect your laptop to TeleSuit Wi-Fi (SSID is on the label near the network port).

-
Open terminal (Ctrl+Alt+T), enter: ssh orangepi@10.42.0.3, password: 123456. After login, enter nmtui to configure Wi-Fi.

-
Select "Activate a connection", choose TeleSuit Wi-Fi, enter password: minnanoIO2023. A "*" means connected.


-
-
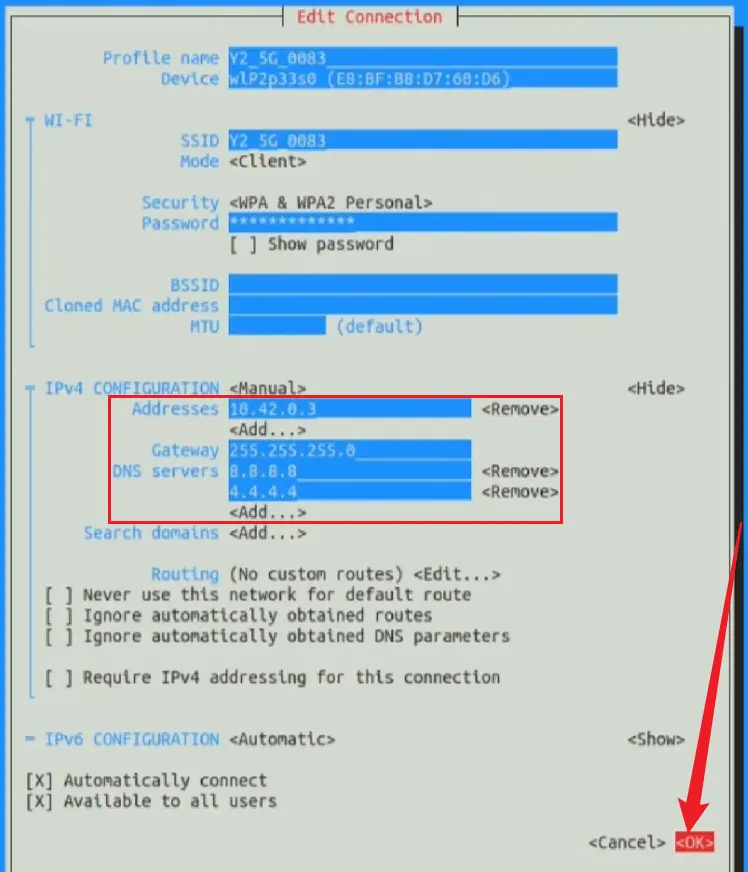
Manual IP Configuration (Wireless)
-
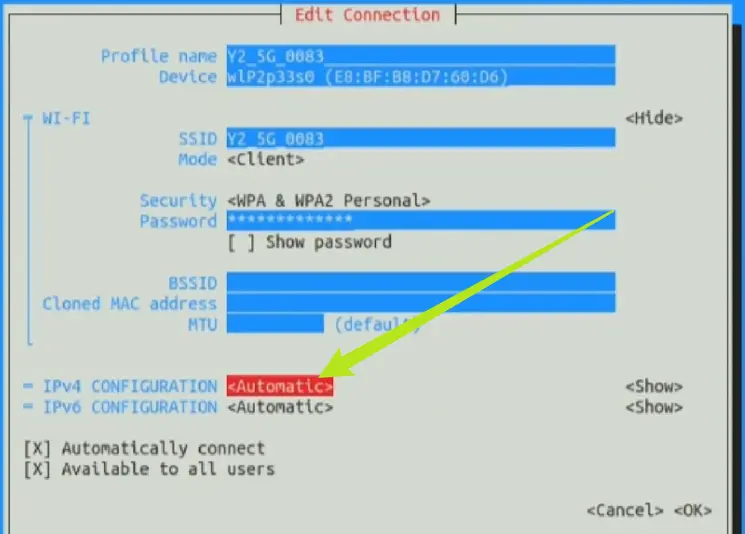
Select "Edit a connection", choose TeleSuit Wi-Fi, then "Edit..." to set IPv4 manually.


-
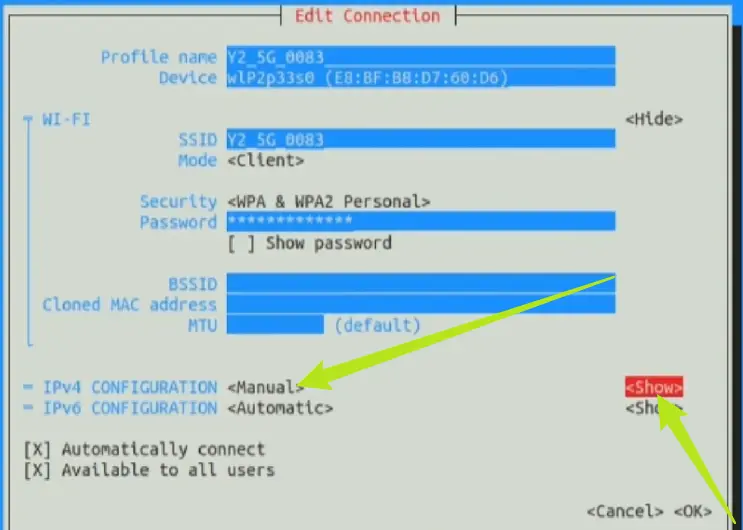
Set "IPv4 CONFIGURATION" to "Manual", then go to "Show" for more options.

-
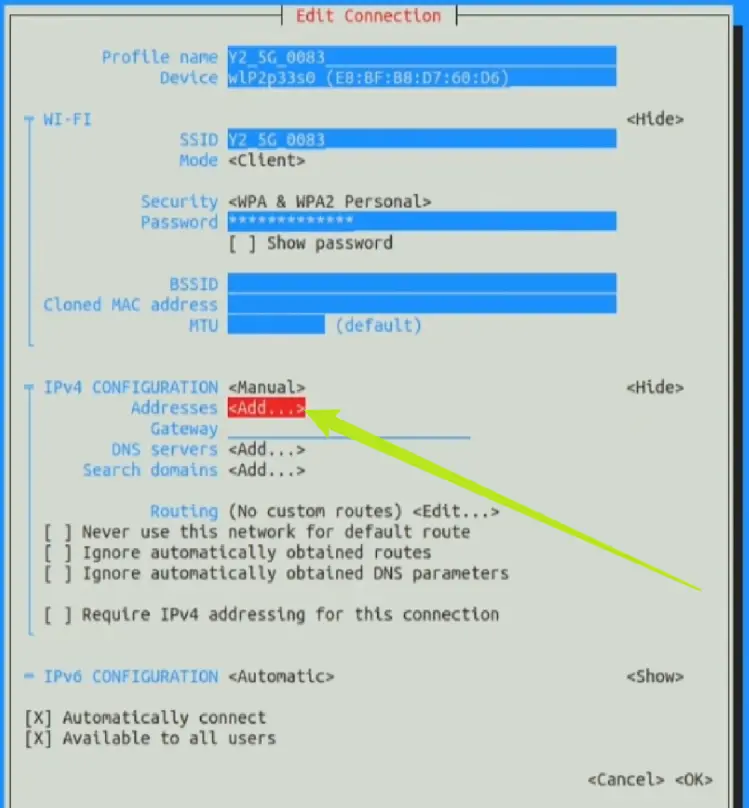
Add the following:
- Addresses: 10.42.0.3
- Gateway: 10.42.0.1
- DNS servers:
- 8.8.8.8
- 4.4.4.4
-
-
Check Wireless Connection
-
Restart the computer. After restart, check if the configuration was successful. Unplug the network cable and wait a moment. If the TeleBox indicators are all green, it means wireless connection configuration succeeded.
-
TeleSuit & VR Connection
Detailed Steps
-
TeleSuit & VR Connection
-
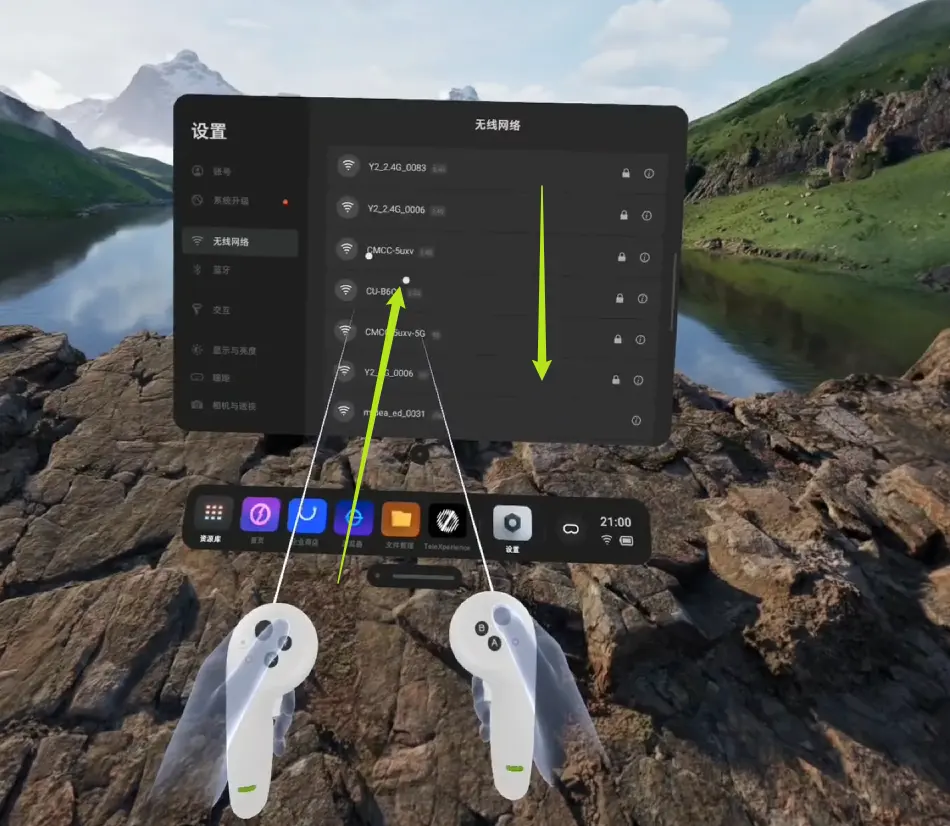
Long press the VR headset power button to turn on. In VR, connect to Wi-Fi (password: "minnanoIO2023").

-
Device Wearing
VR
If you are new to VR, refer to the video below or the official guide.
Detailed Steps
-
VR & Controllers
-
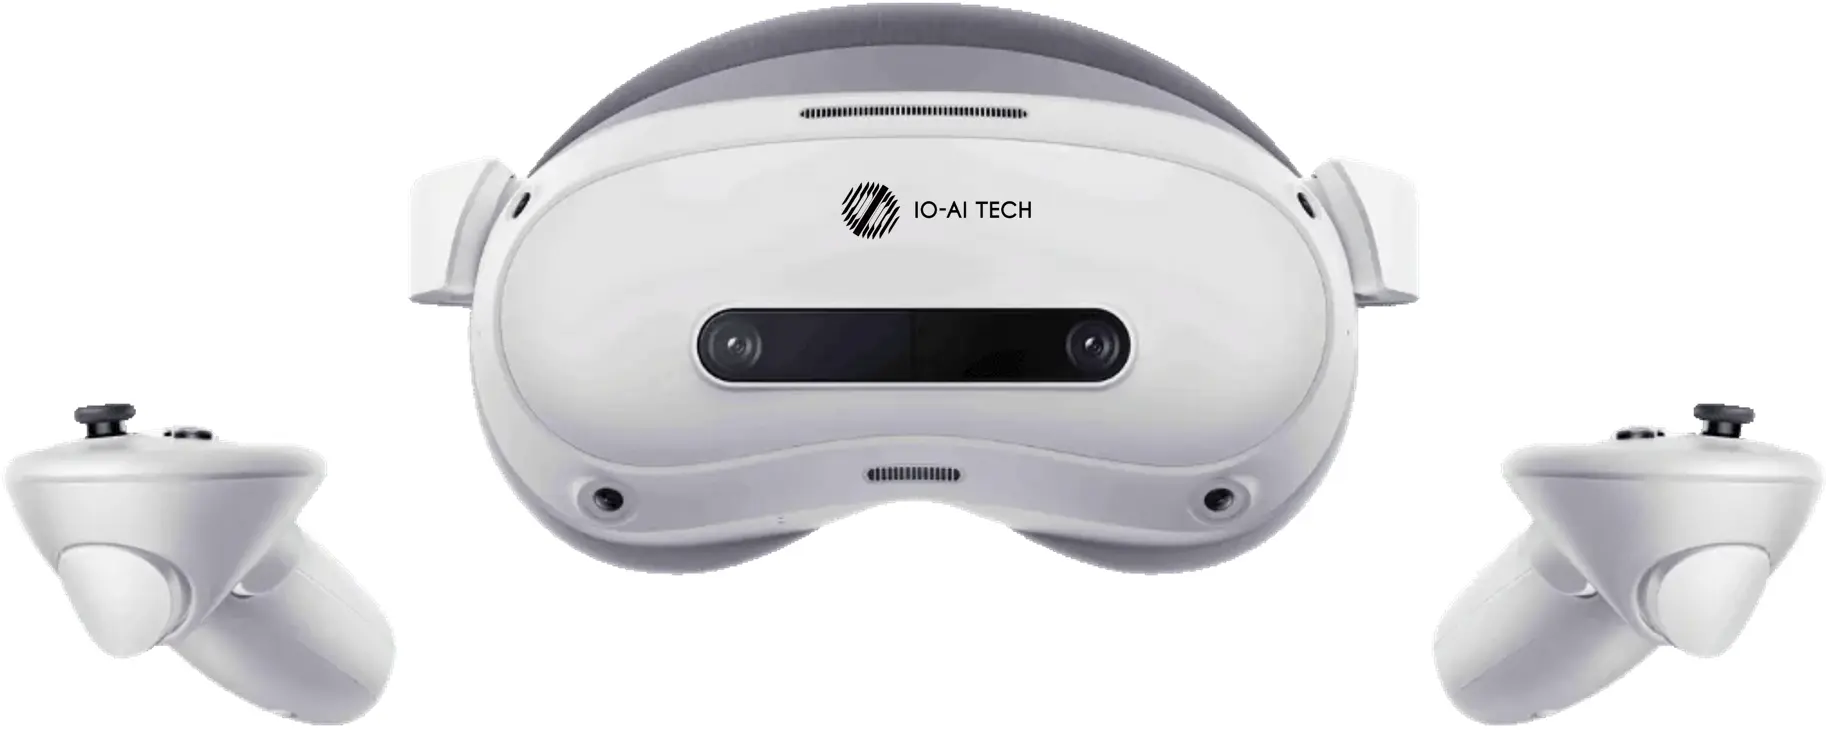
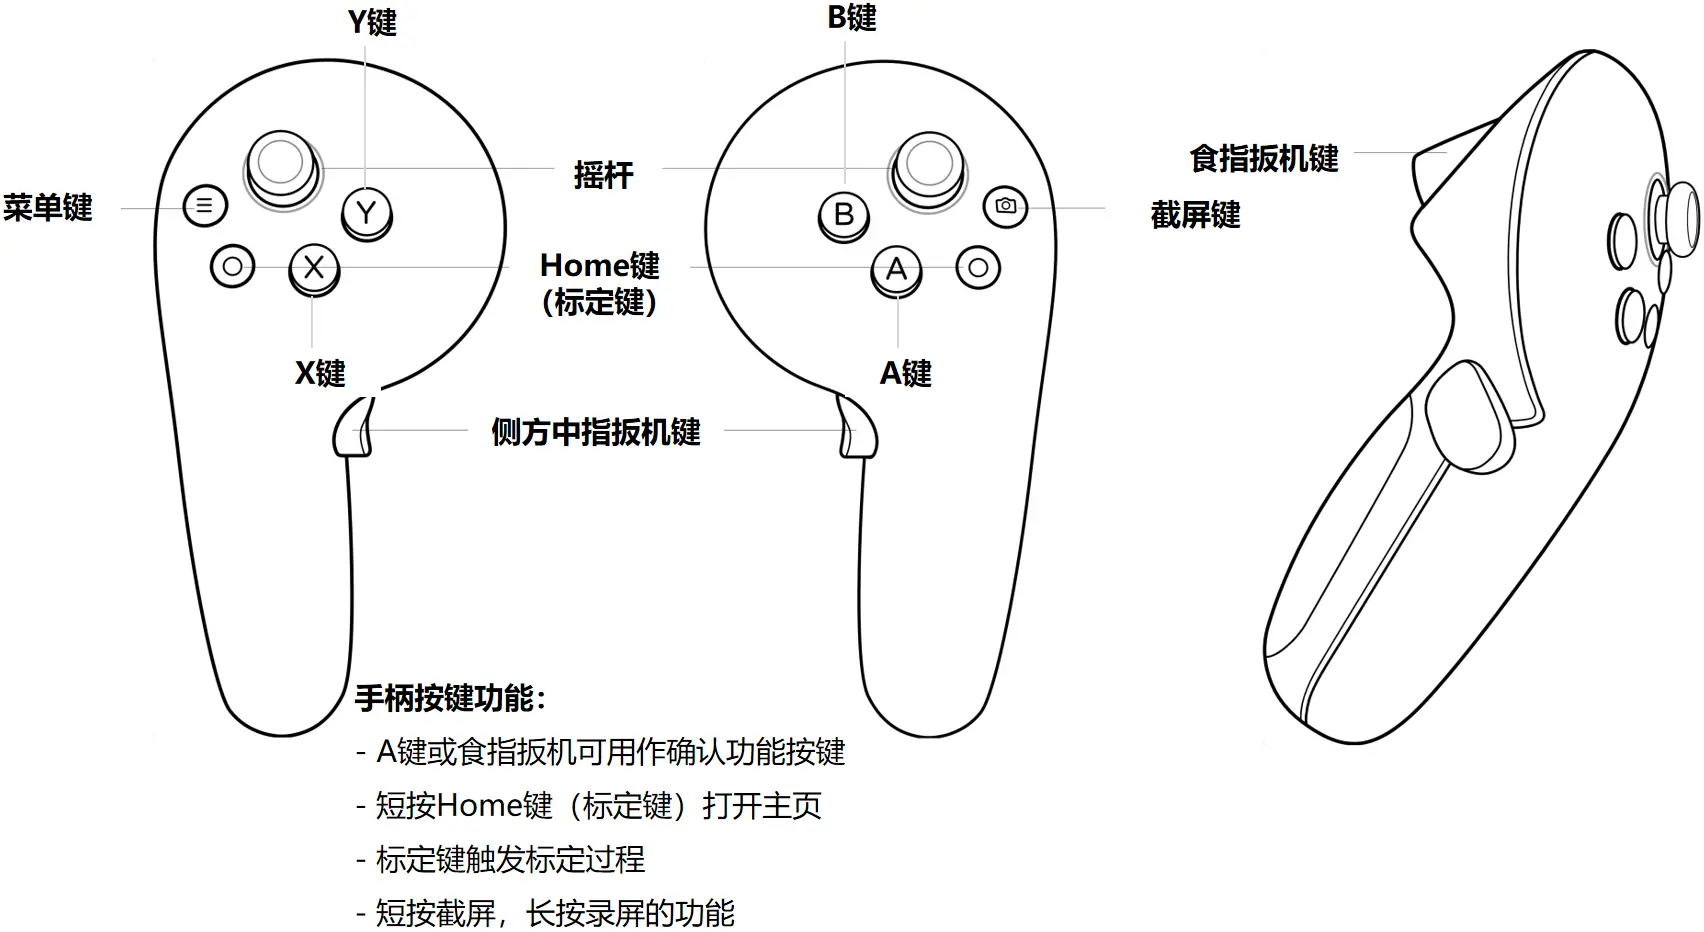
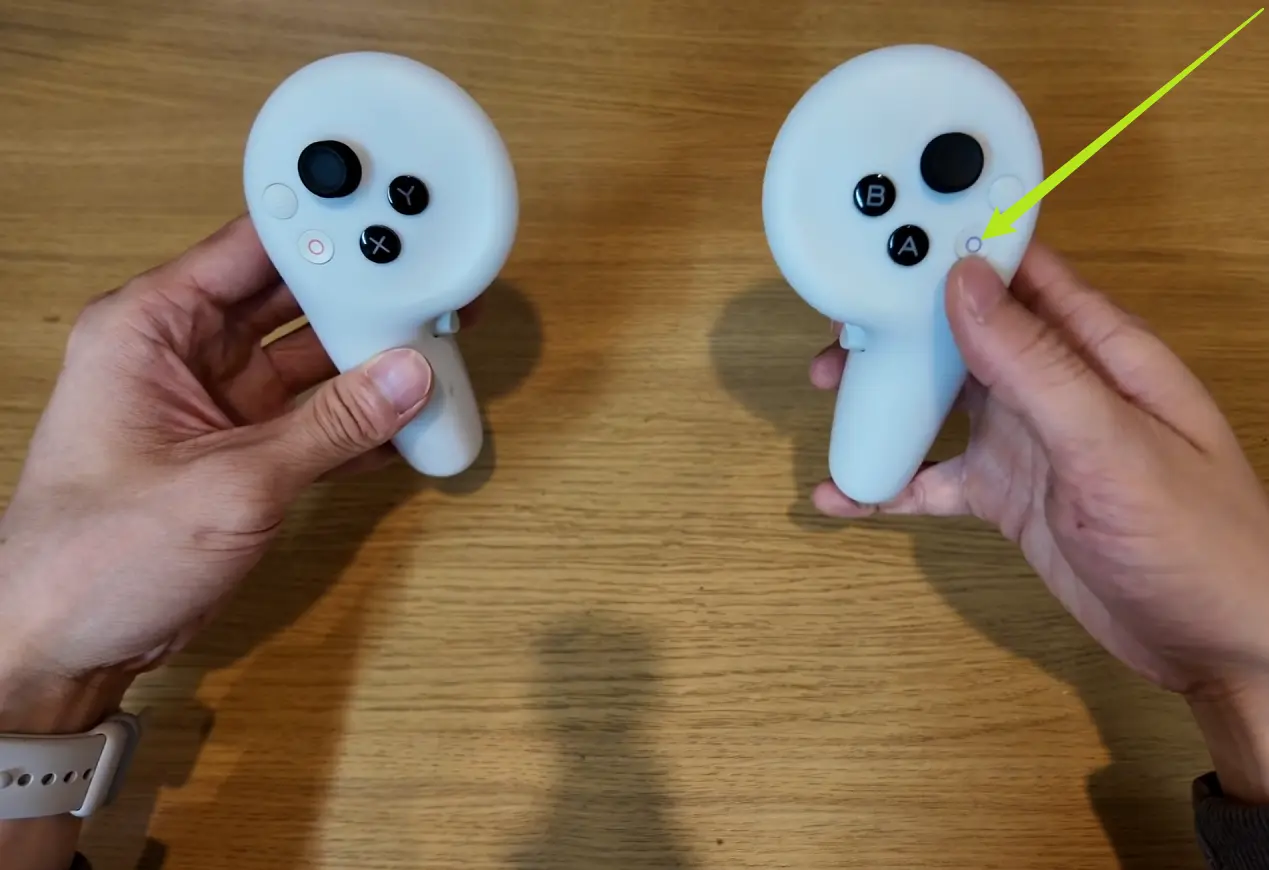
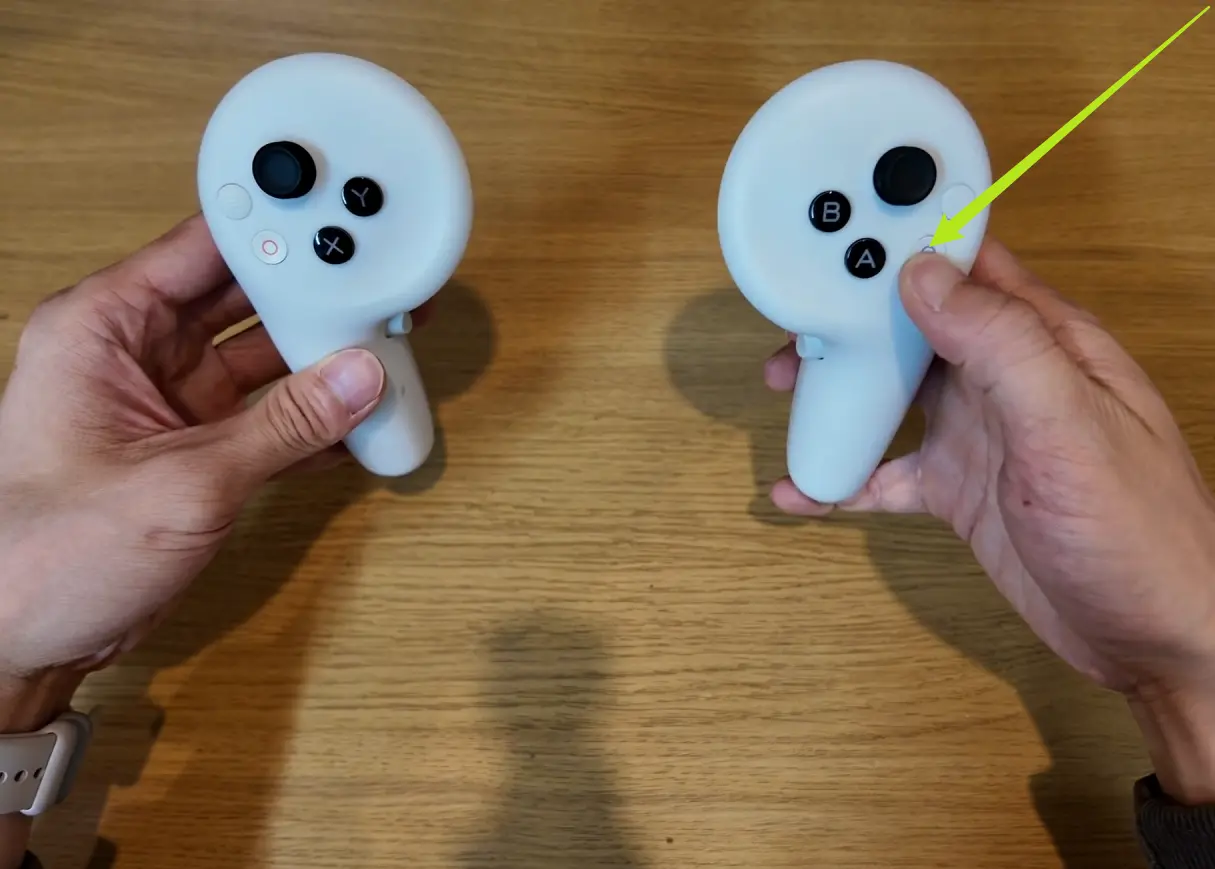
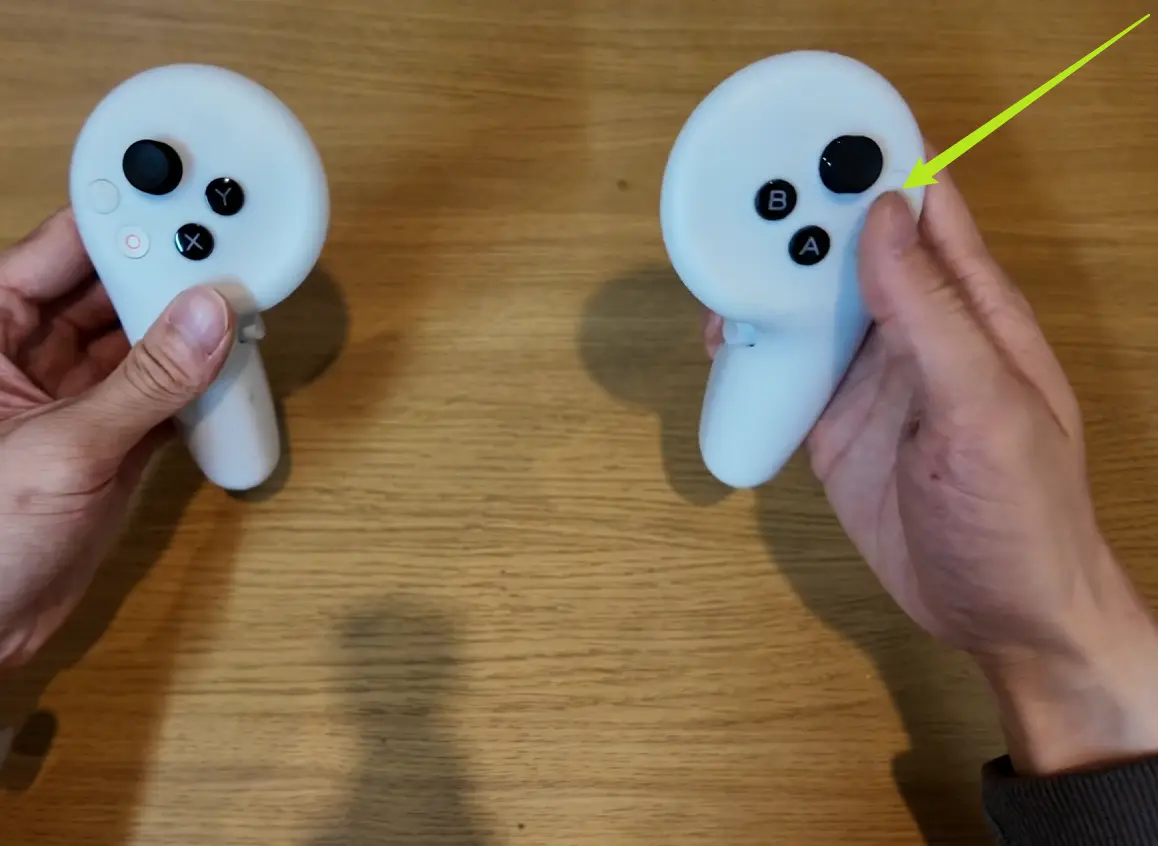
VR headset and controllers overview
-
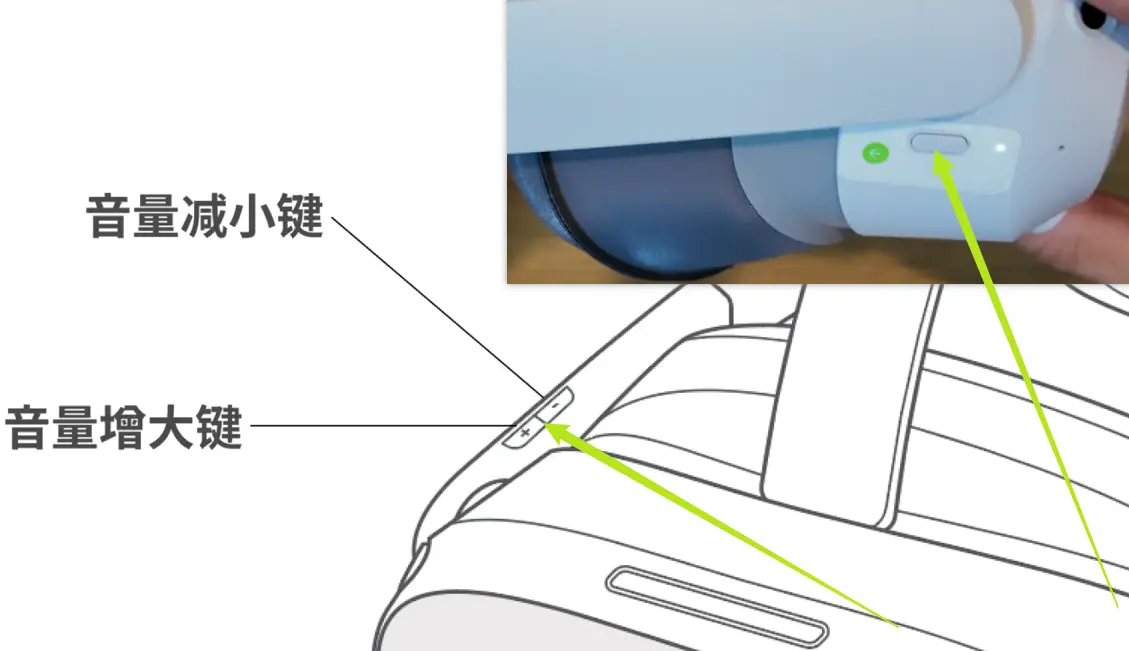
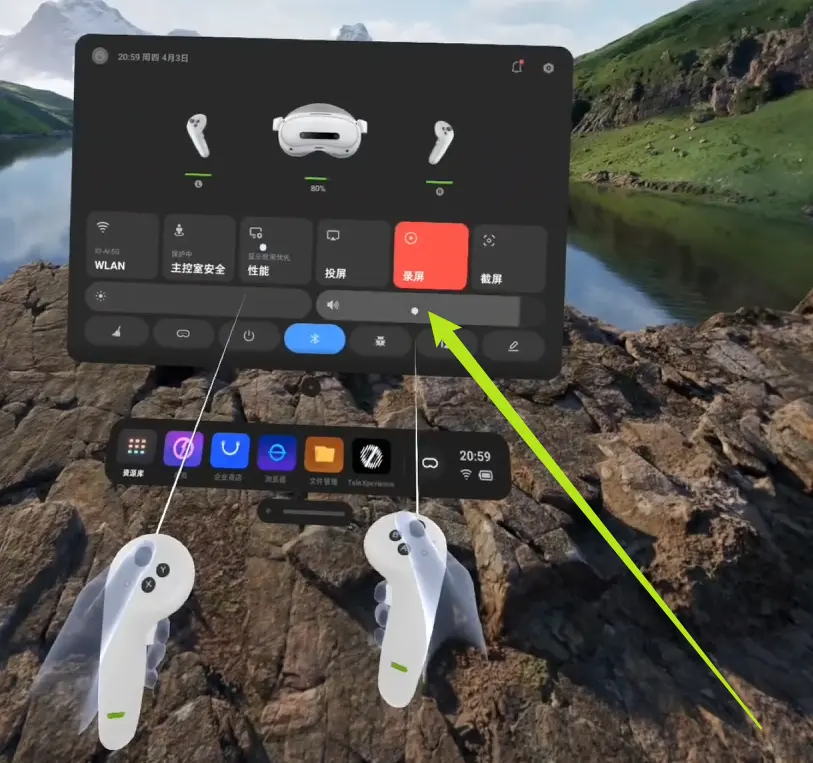
VR volume buttons
-
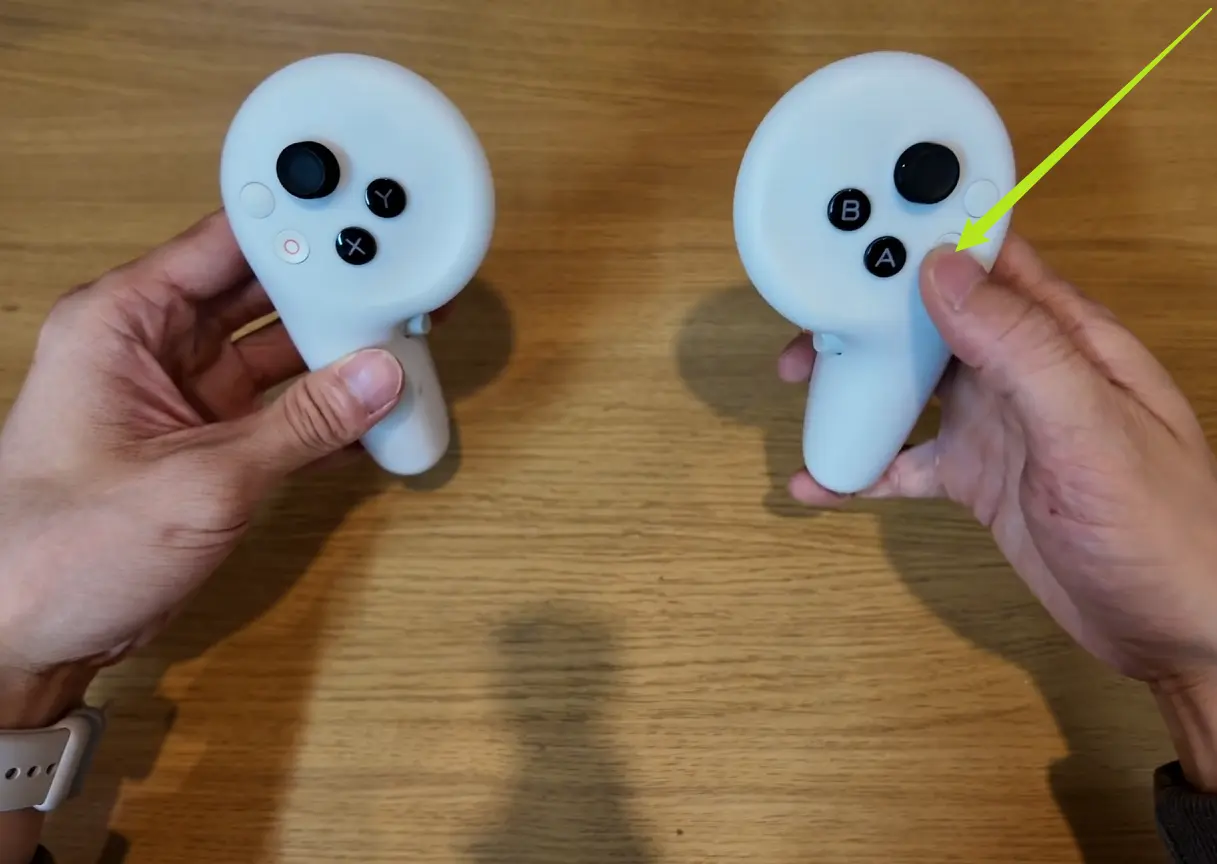
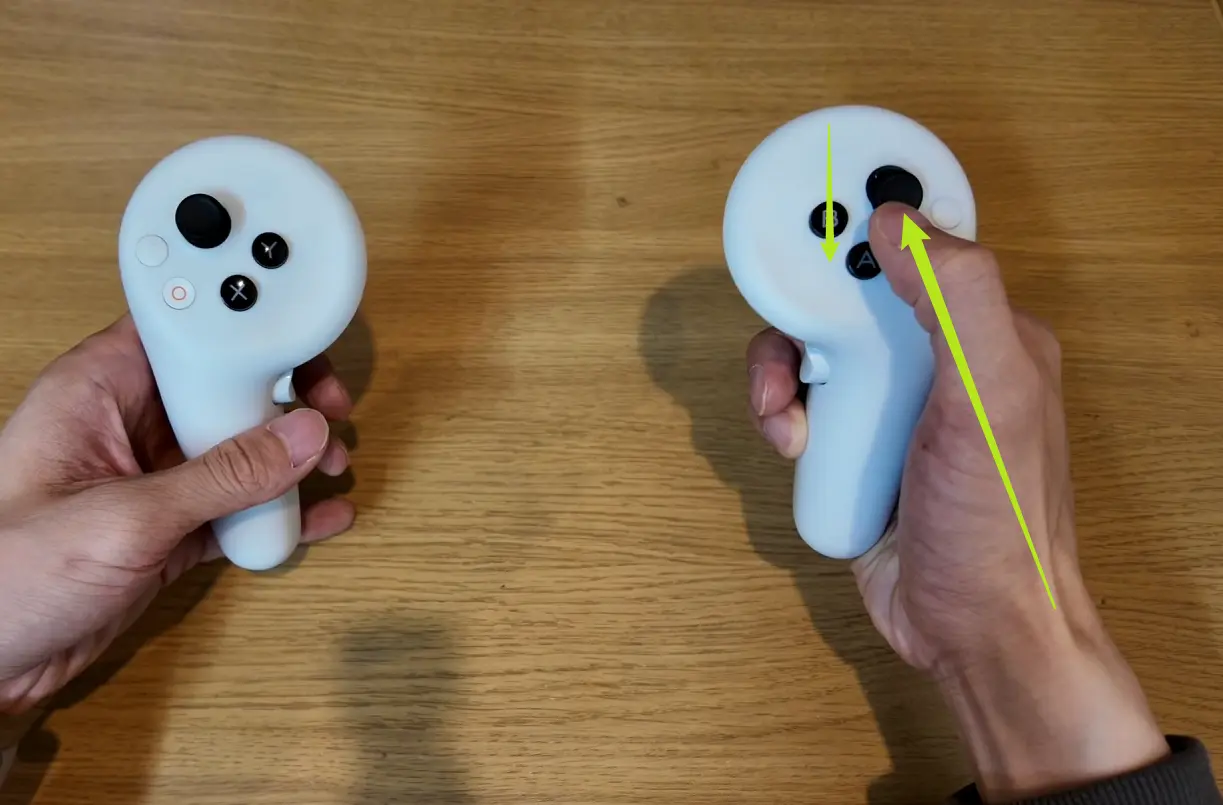
Controller button functions
-
Long press Home to reset view

-
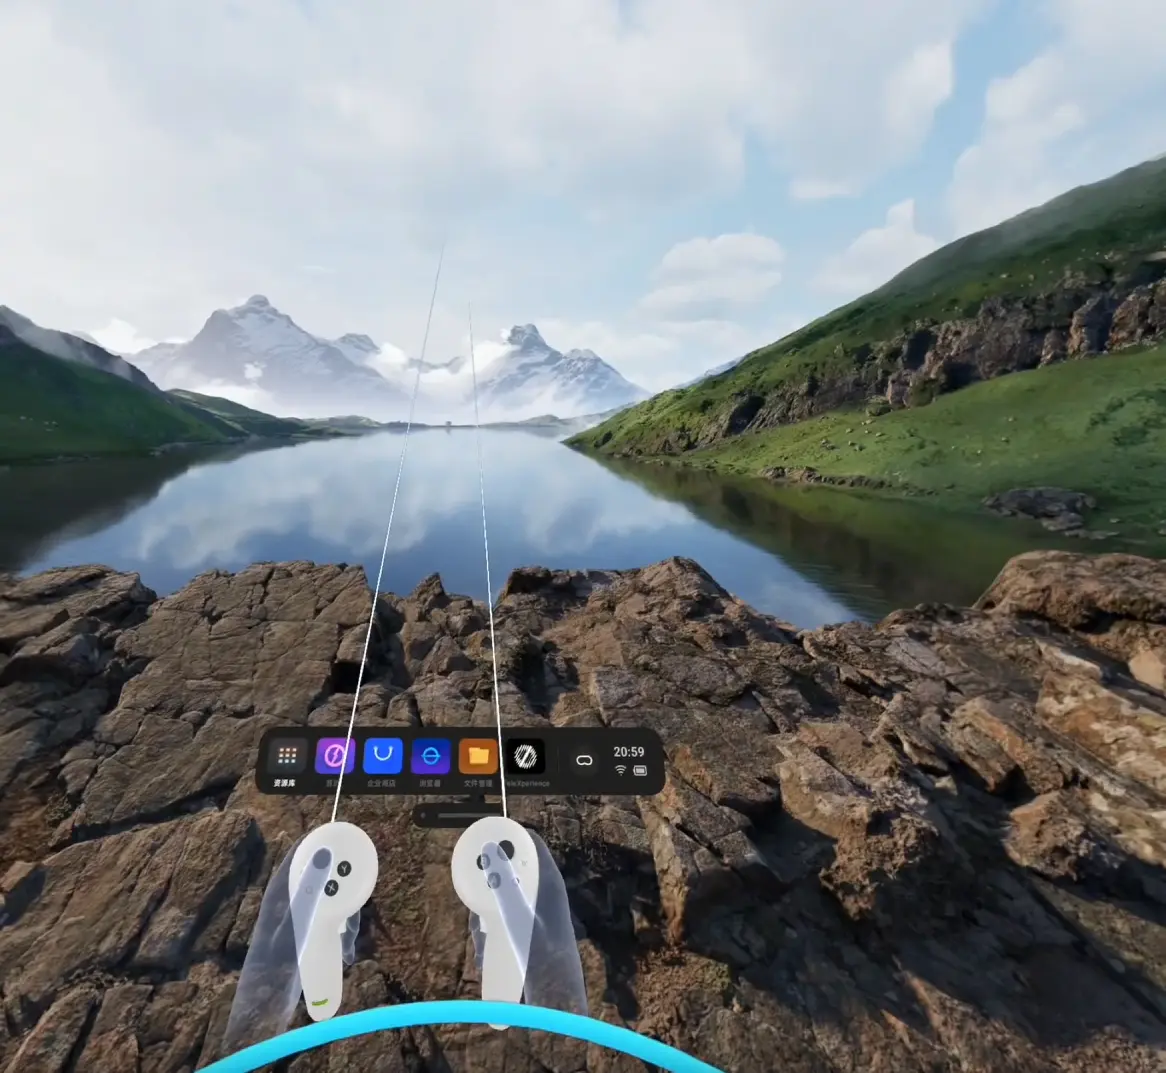
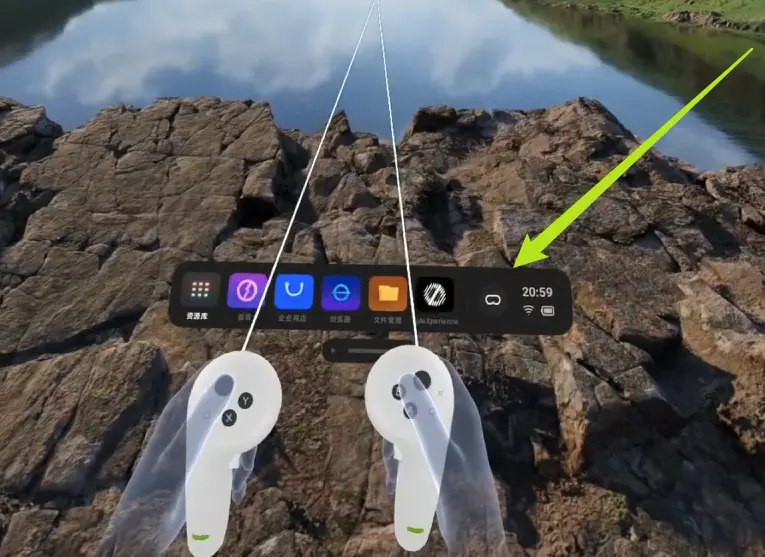
Short press Home to open main menu
-
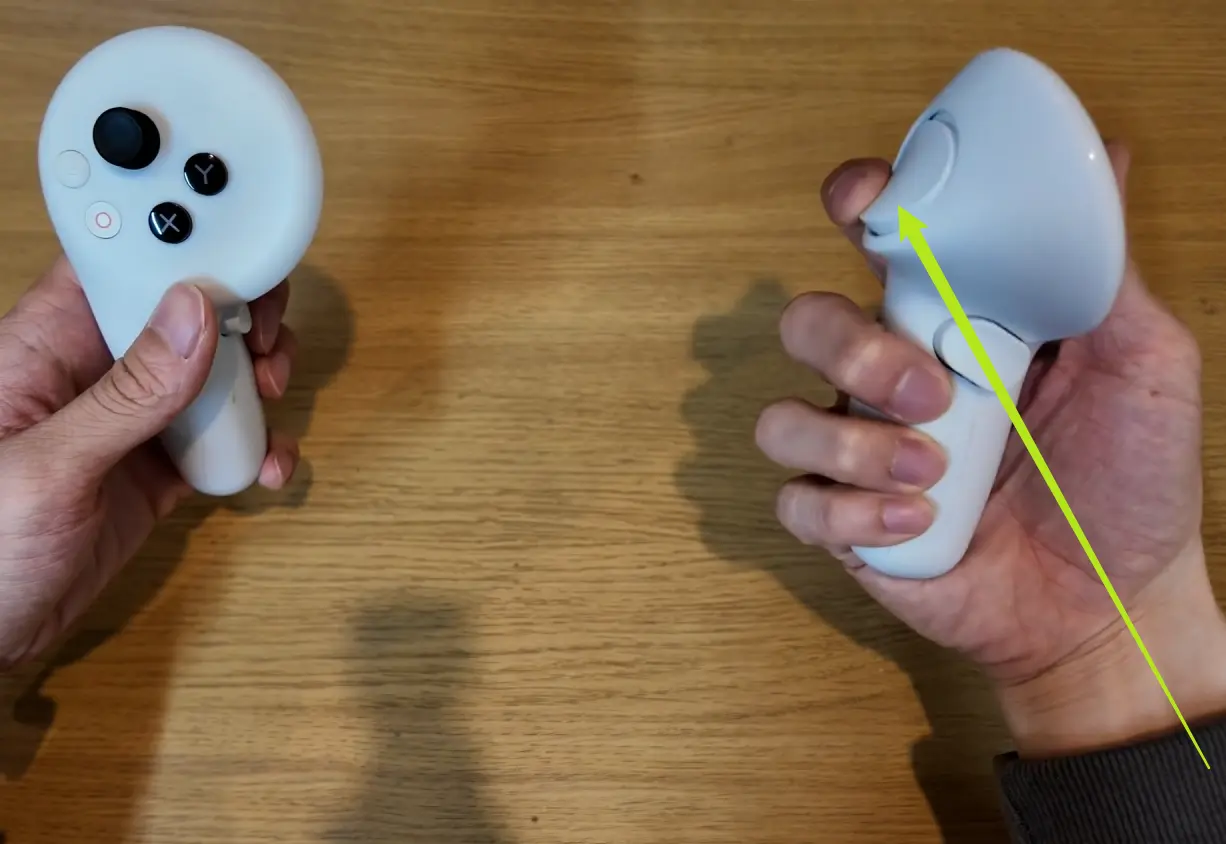
Use the controller ray to point and short press the trigger or A button to select, B to exit
-
Move the joystick up/down to scroll pages
-
Short press screenshot button to take a screenshot, long press to record
-
Motion Capture Suit
Detailed Steps
-
Wearing the Pro Teleoperation Suit
-
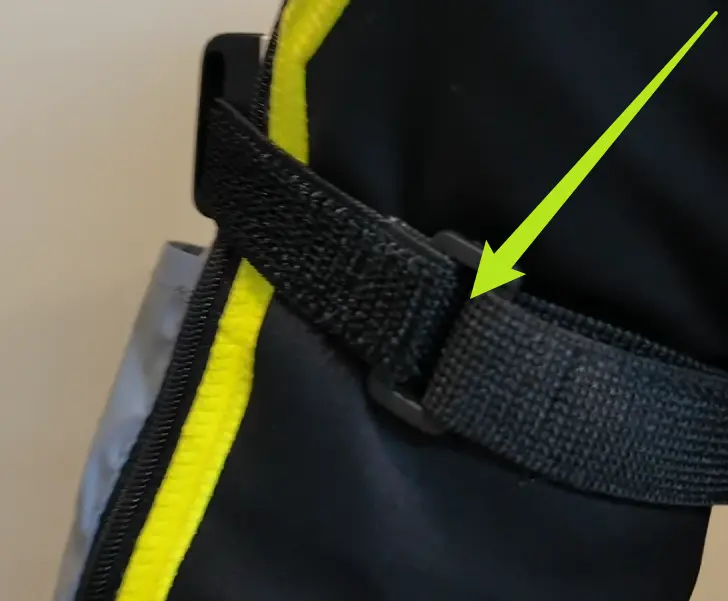
Use straps to fit the suit to your body
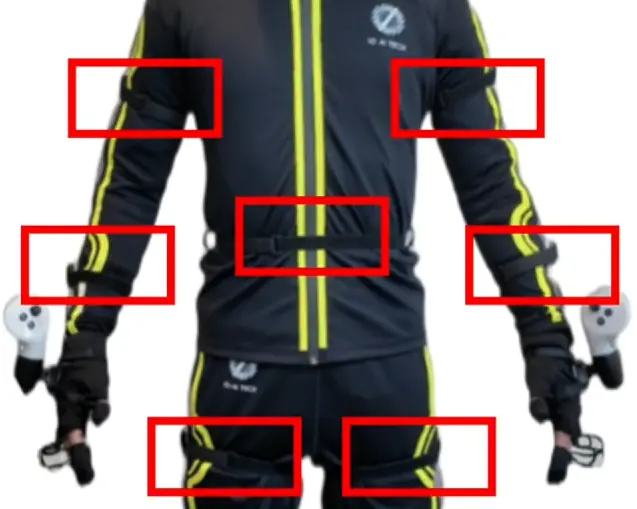

-
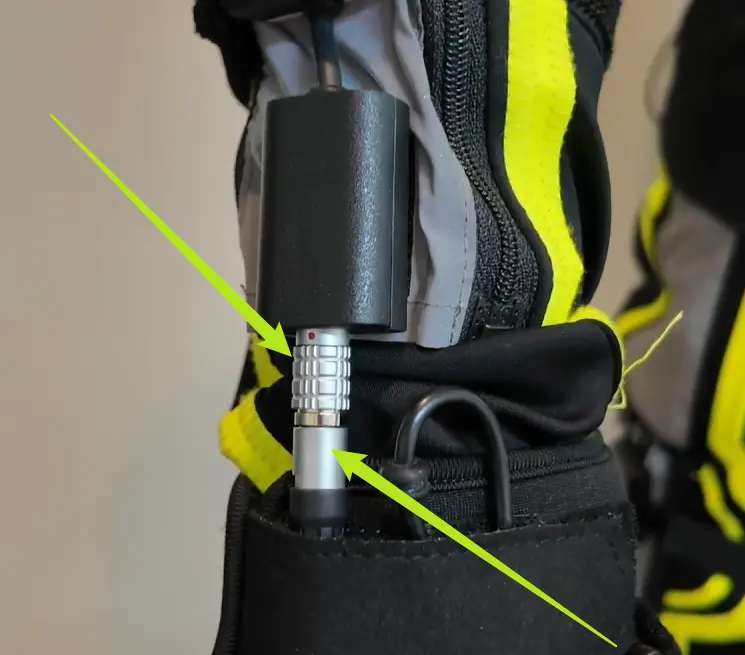
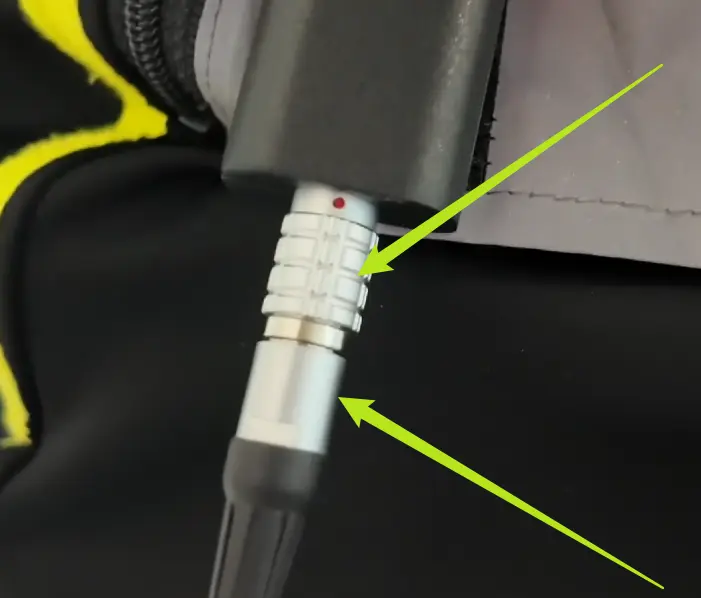
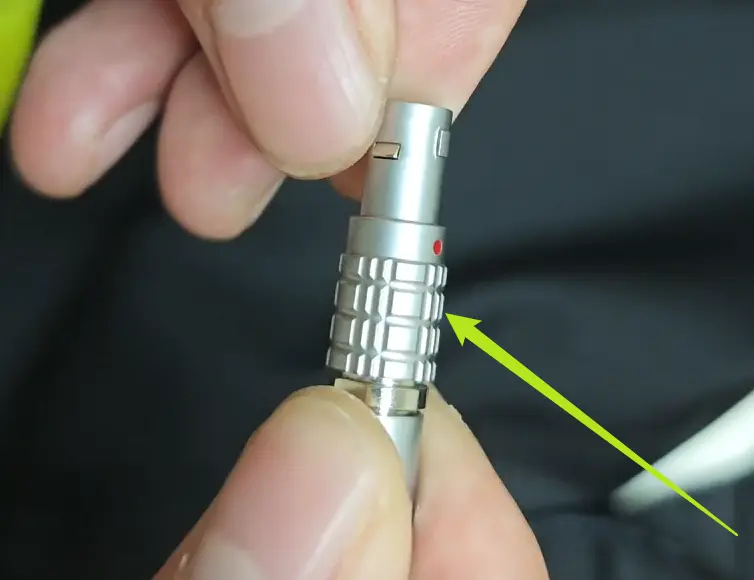
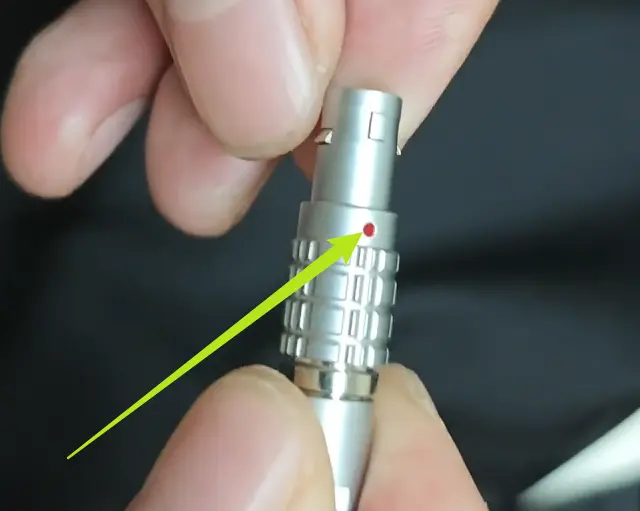
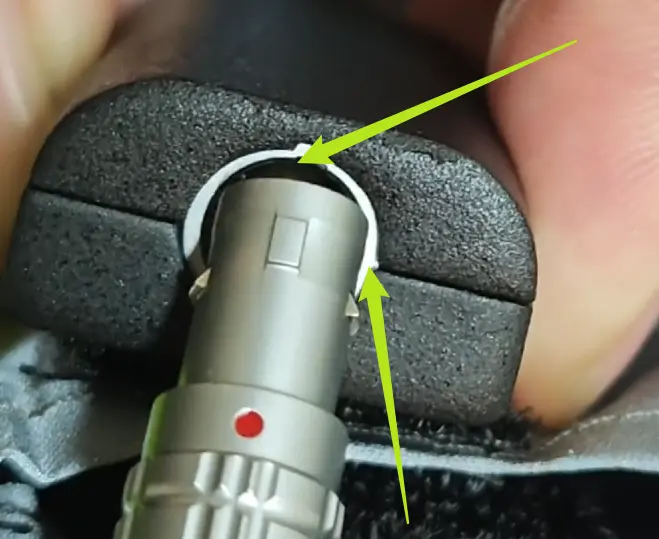
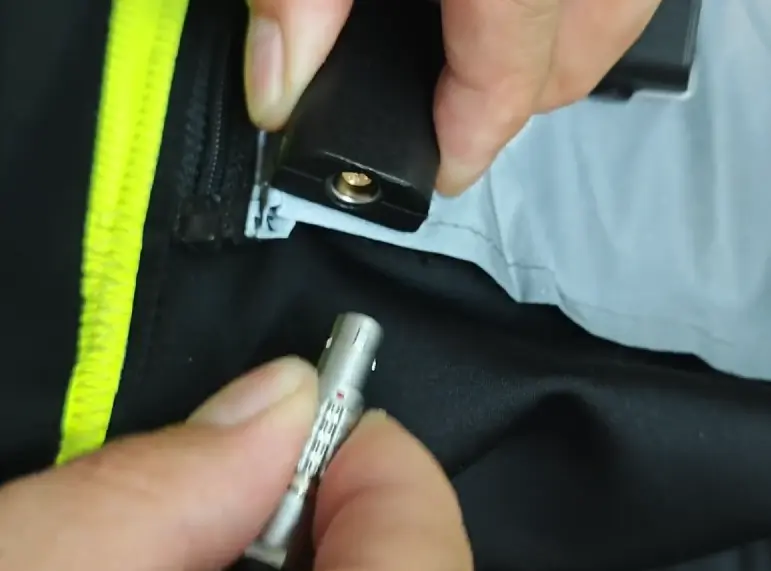
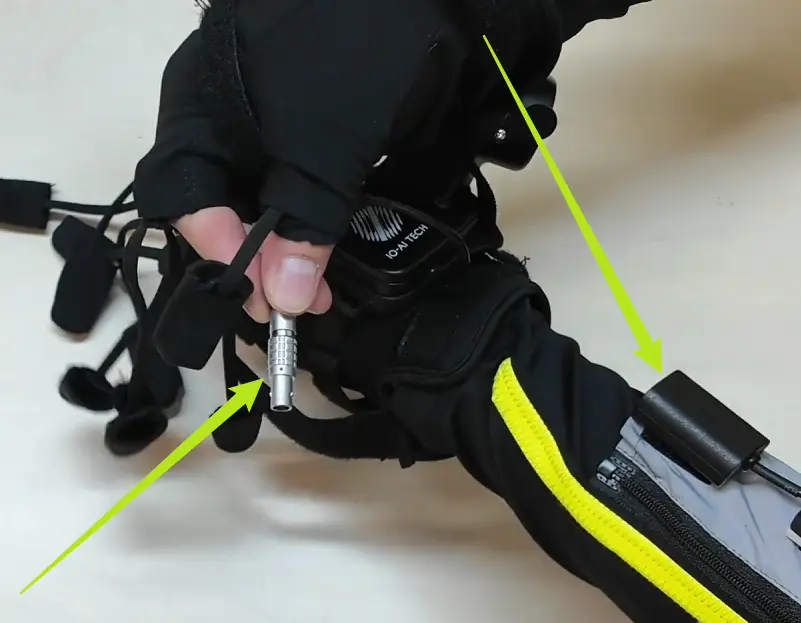
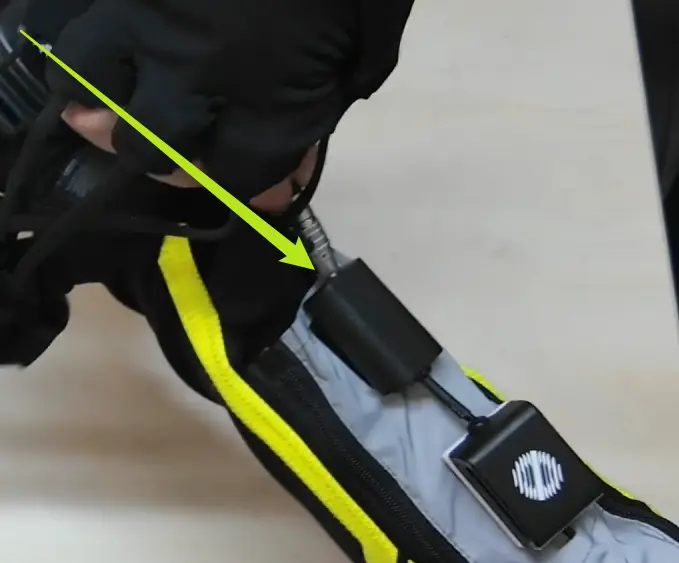
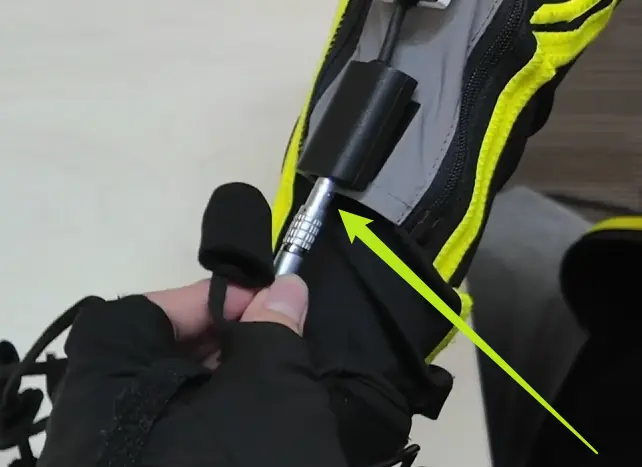
Connect gloves and jacket, pants and jacket using aviation plugs. Align the red dot with the groove, insert, and check for secure connection.

-
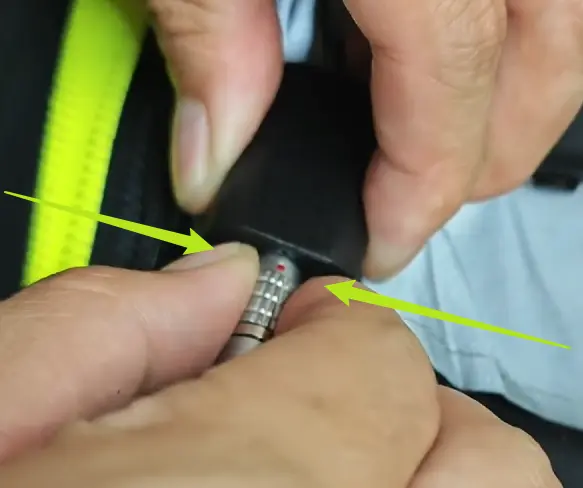
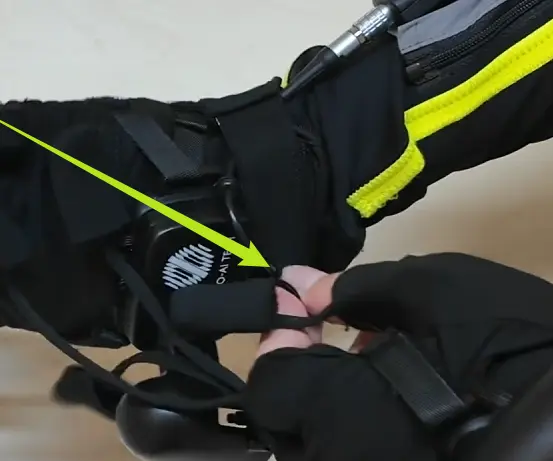
To unplug, pinch both sides and pull out
-
Pro Controller & Glove Connection
Detailed Steps
-
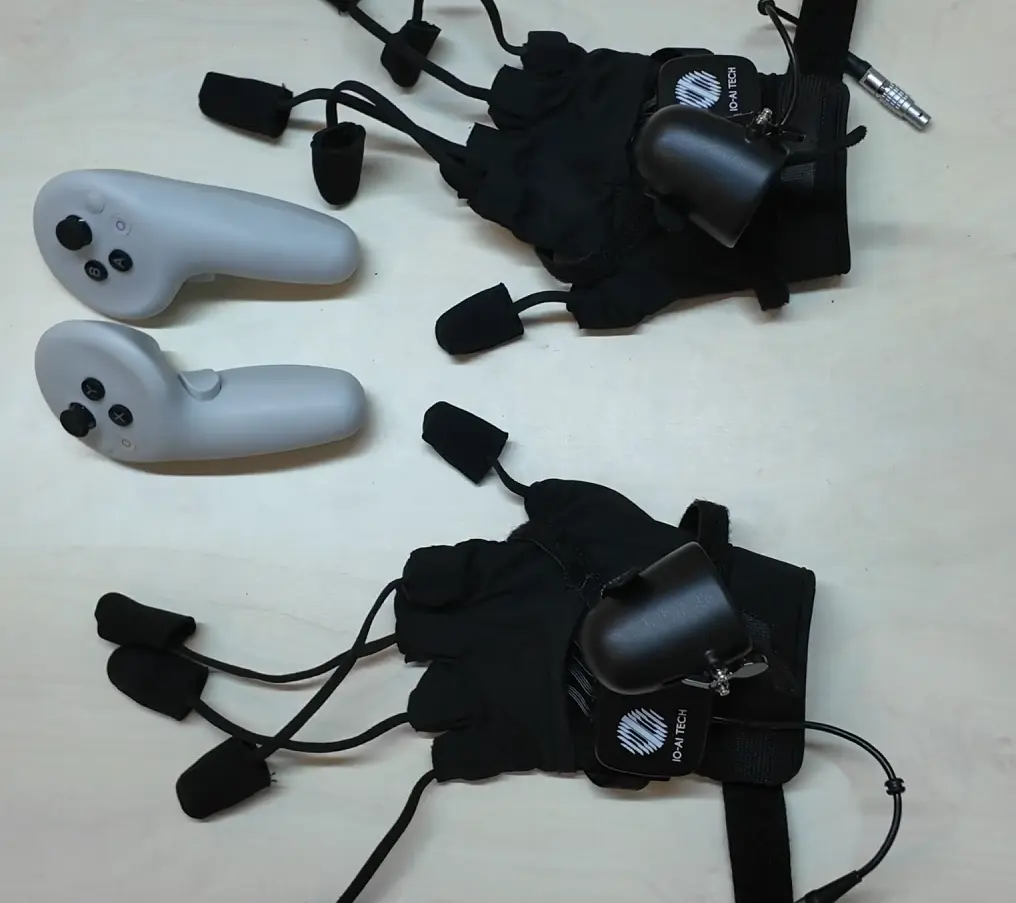
Pro Controller & Glove Connection
-
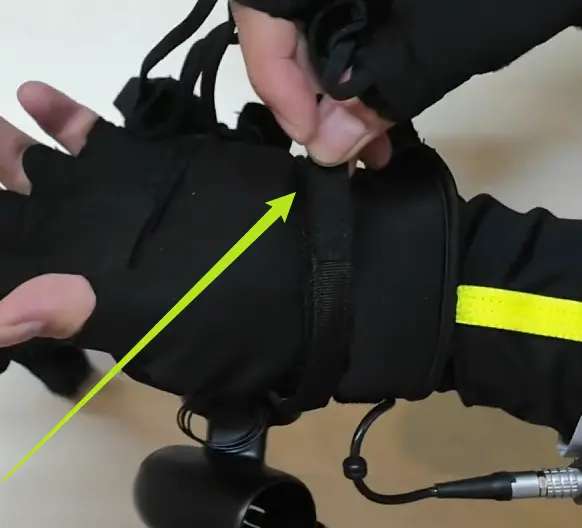
Wear gloves, connect to the jacket, fasten straps, and wear finger sleeves for a snug fit.

-
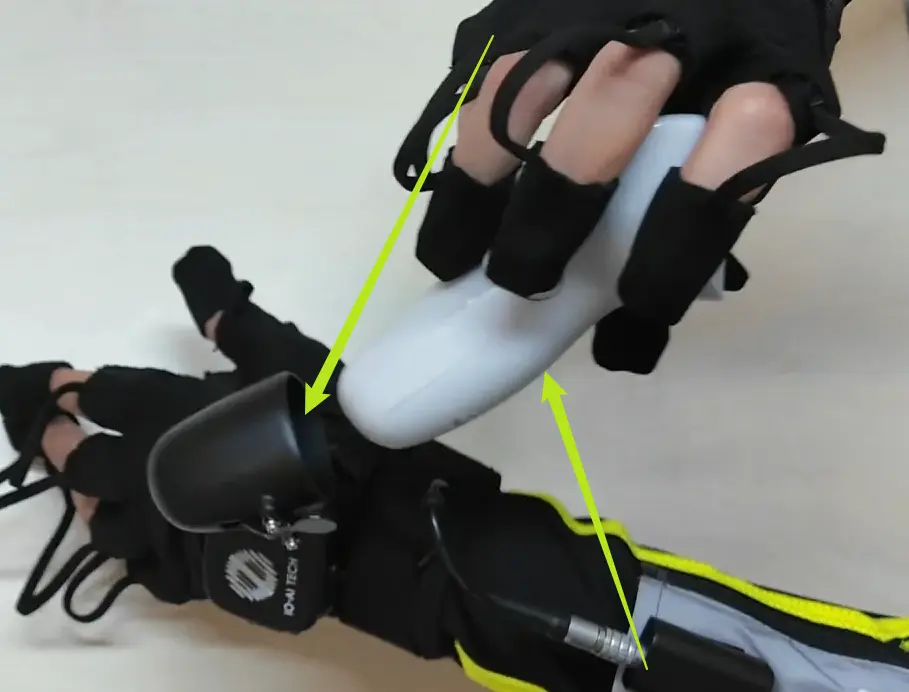
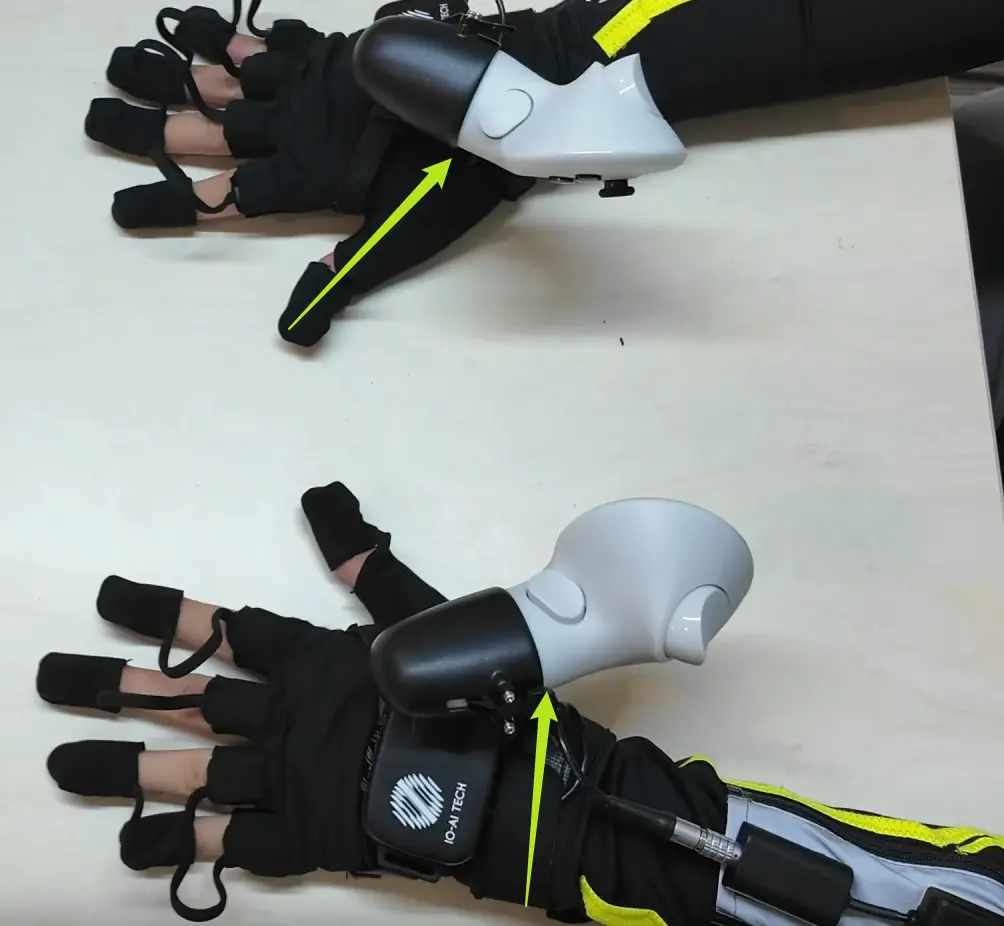
Install VR controllers into the glove holders
-
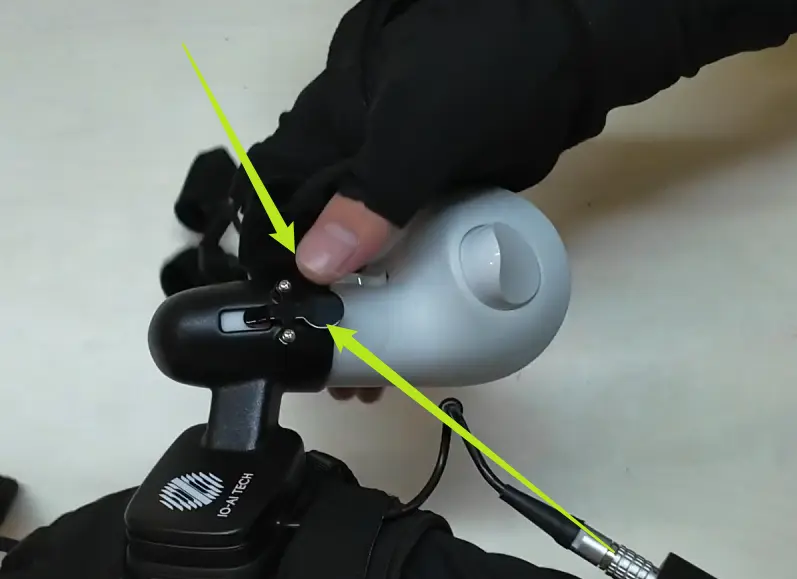
To remove, take off finger sleeves, press the button on the holder, remove the controller, unfasten straps, unplug the aviation connector, and remove the glove

-
Device Shutdown
After use, please perform a software shutdown on the TeleSuit main controller and TeleBox via their web interfaces before unplugging the power.
This helps protect the devices and prevents storage or file system damage.
TeleBox Shutdown
- Connect to TeleXperience Wi-Fi, visit http://10.42.0.3:7876
- Click the power icon and then Shutdown

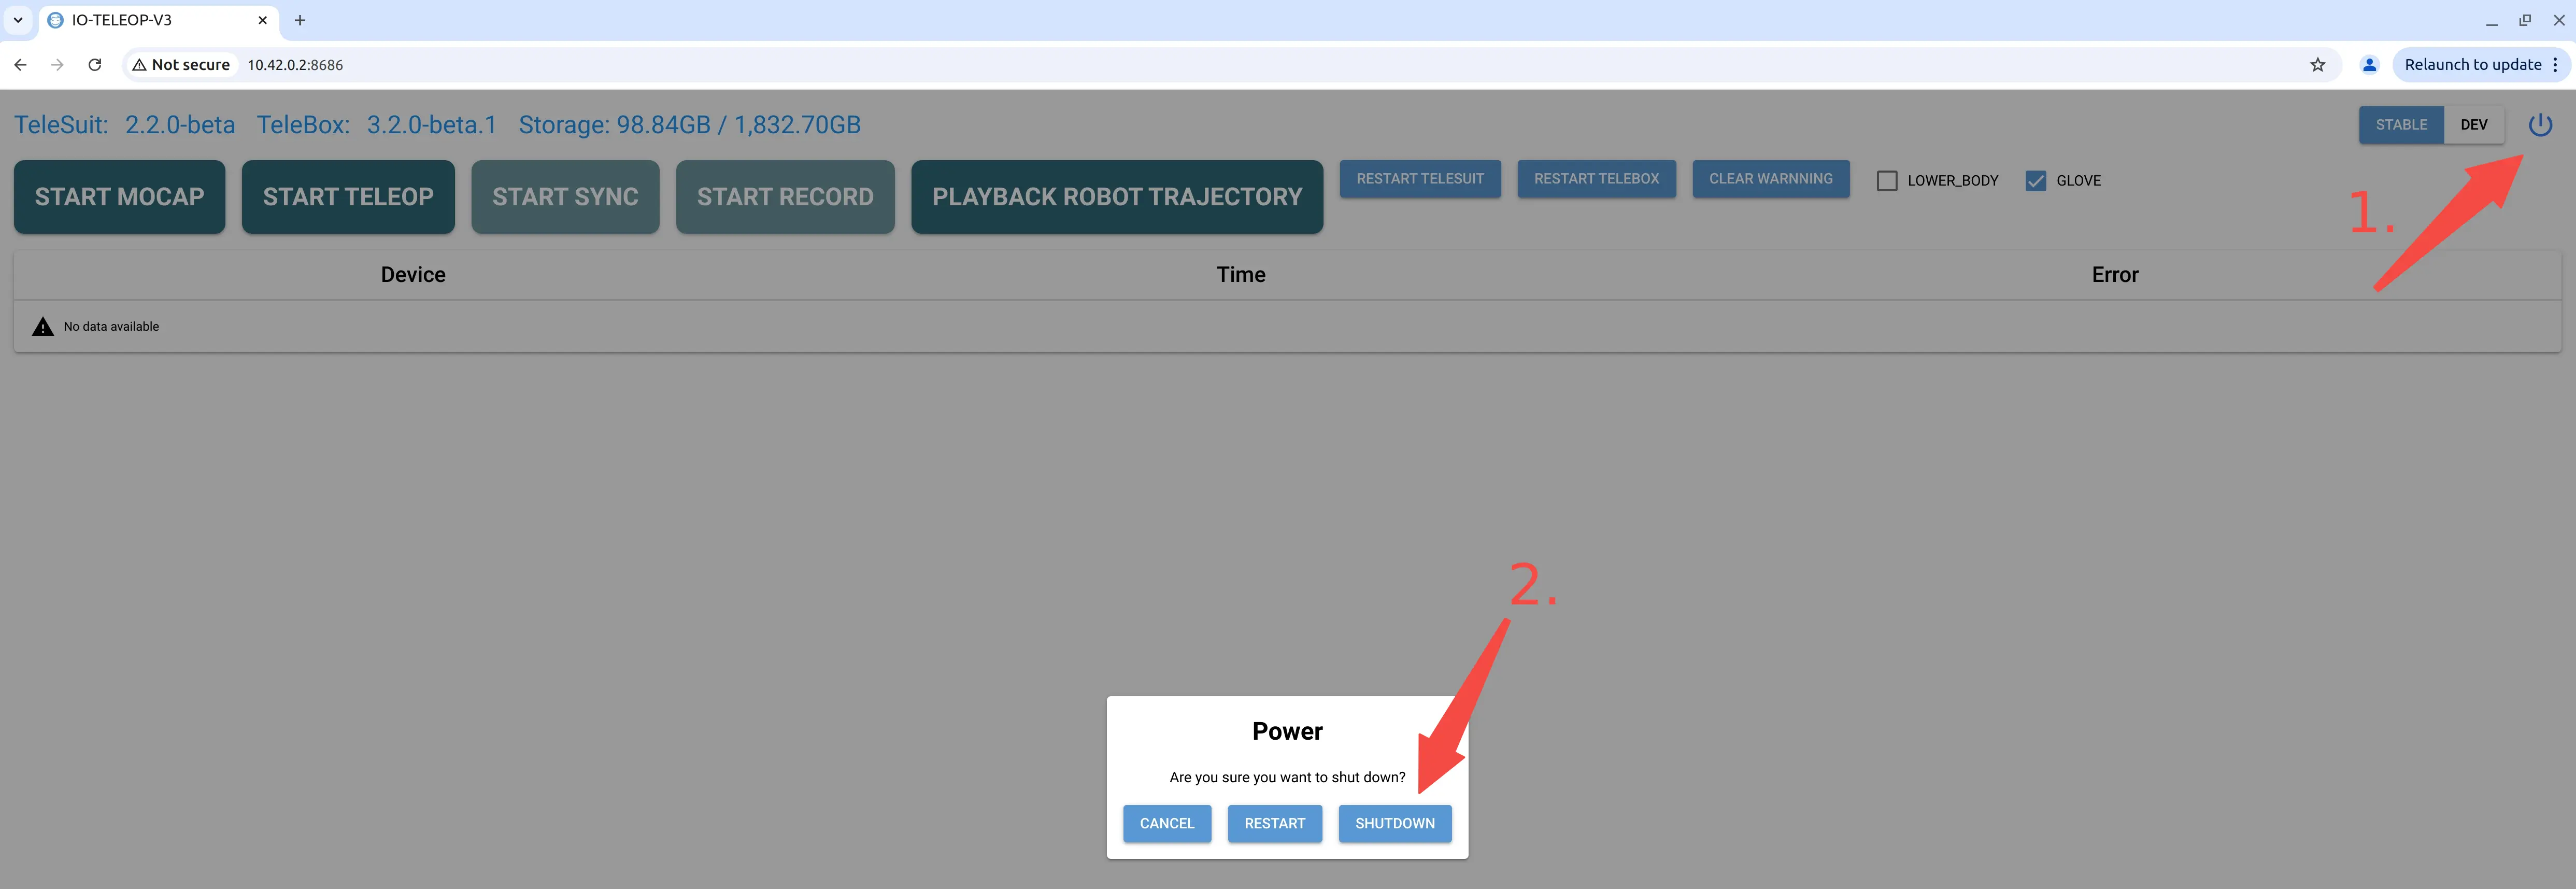
TeleSuit Main Controller Shutdown
- Connect to TeleXperience Wi-Fi, visit http://10.42.0.2:8686, or use the shutdown button in the VR app.
- Click the power icon and then SHUTDOWN