Software Usage
This section details how to use the TeleXperience VR APP, the motion capture suit, and guides you through the built-in demo for teleoperation and data collection.
Please read and watch all tutorials in this section before your first use.
Once familiar, refer to the CheatSheet for quick reference.
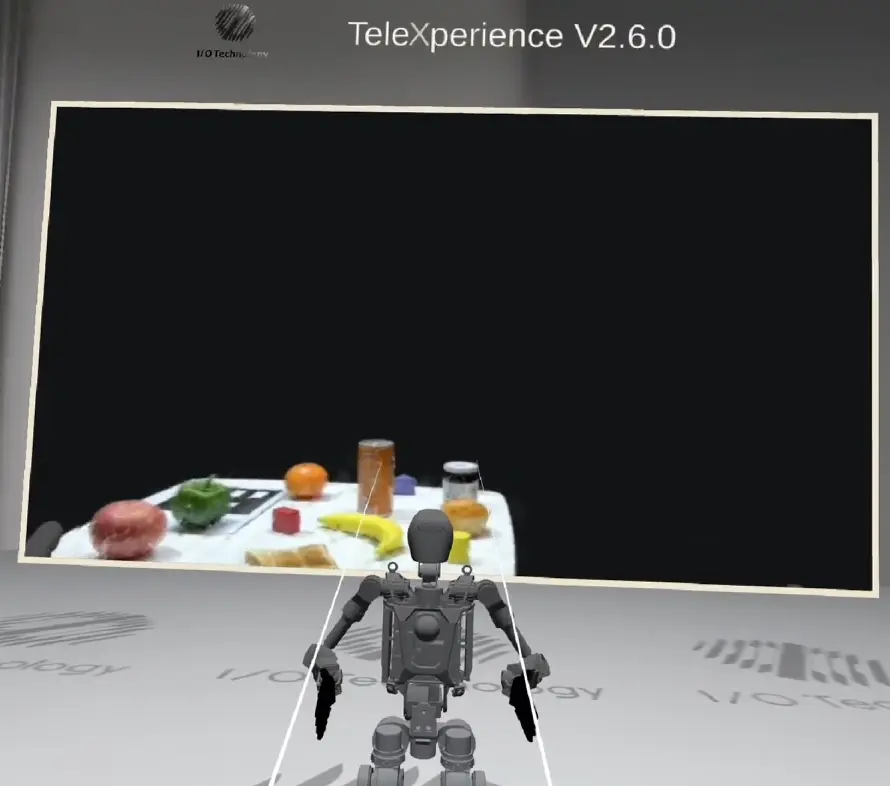
IO TeleXperience APP Overview
Watch the following video to get familiar with the VR TeleXperience APP interface and interactions.
Step-by-step Guide
-
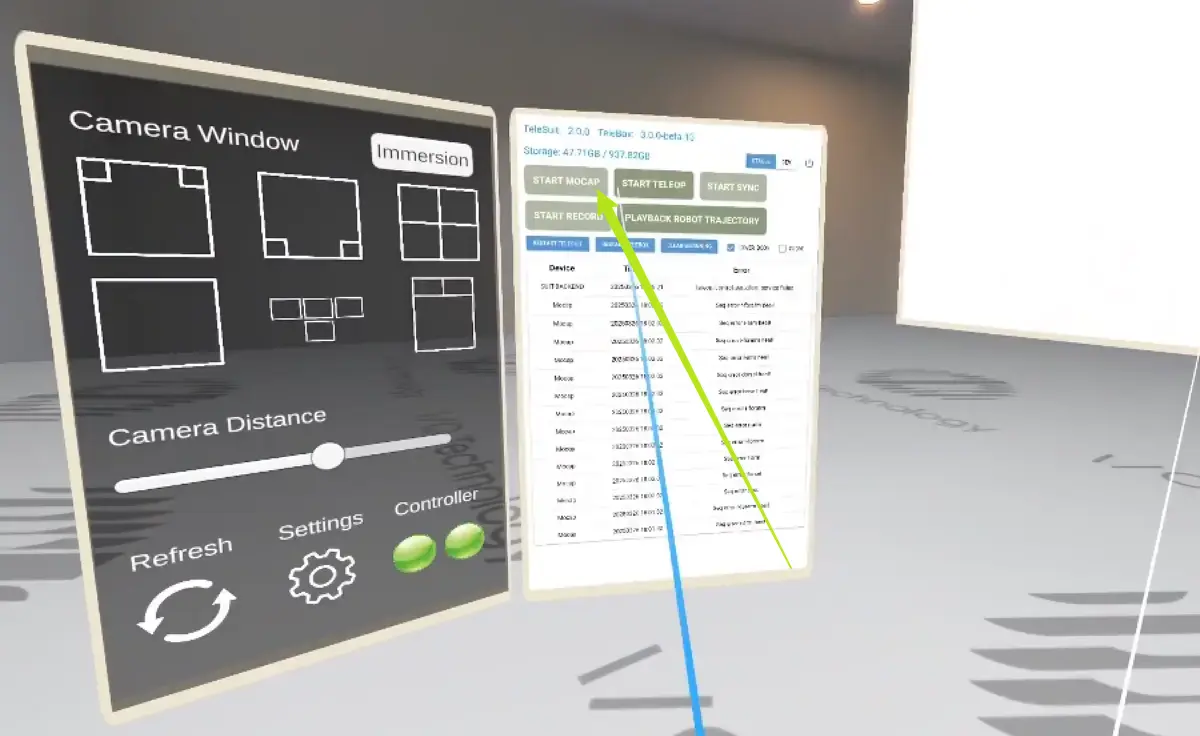
APP Interface & Interactions
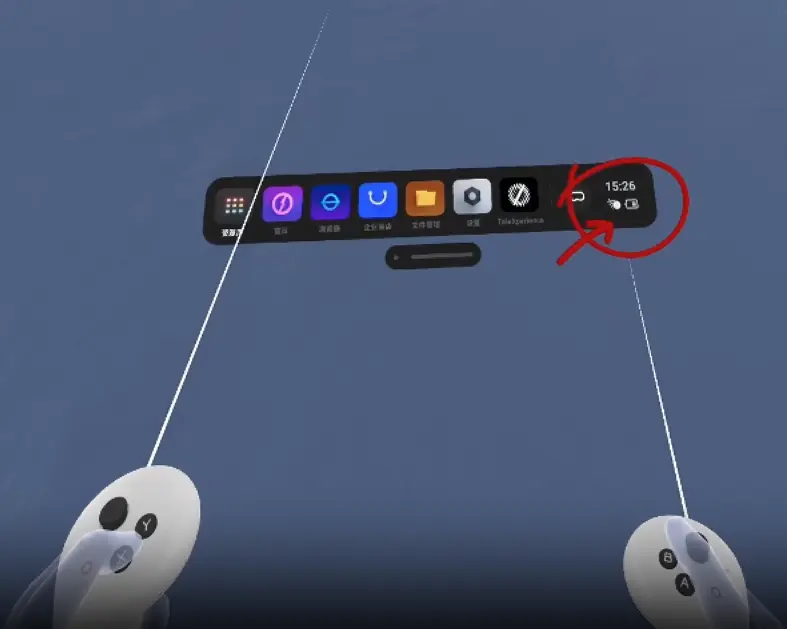
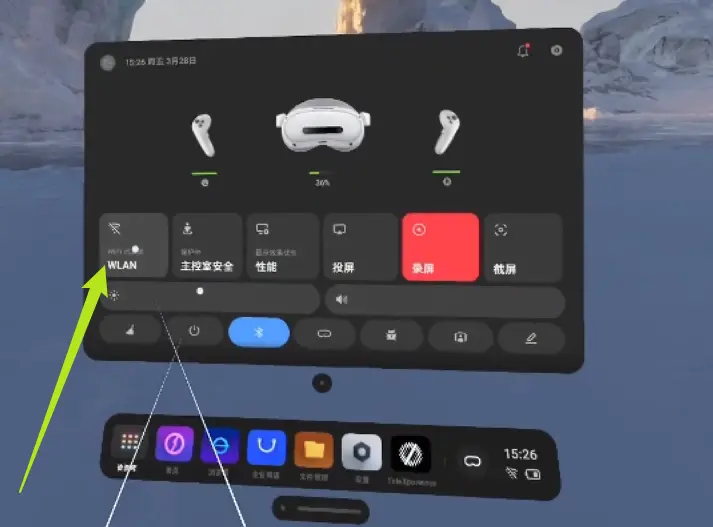
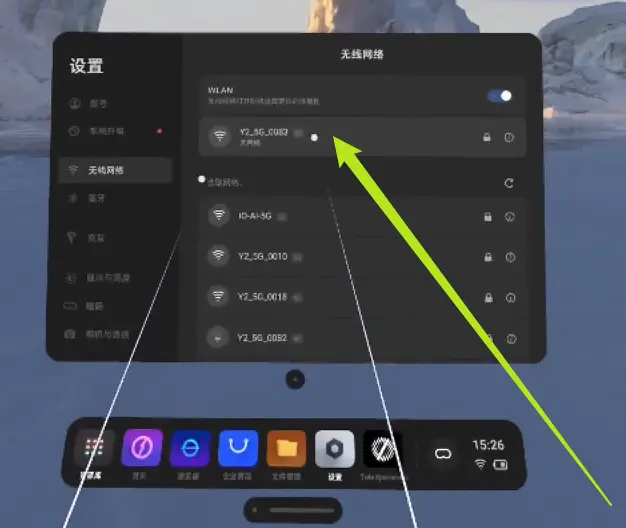
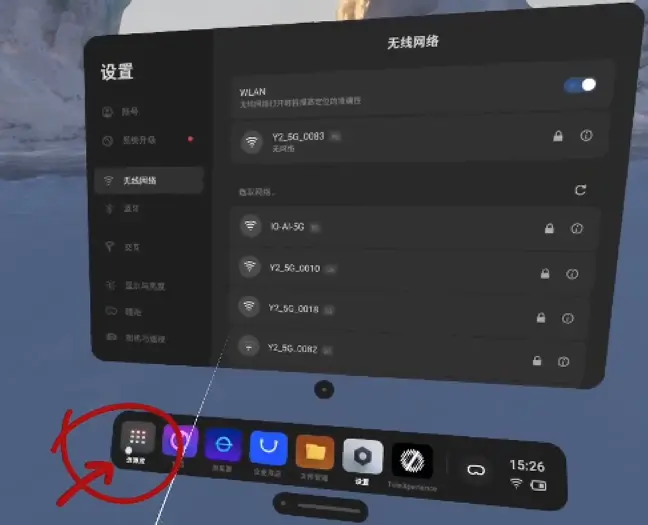
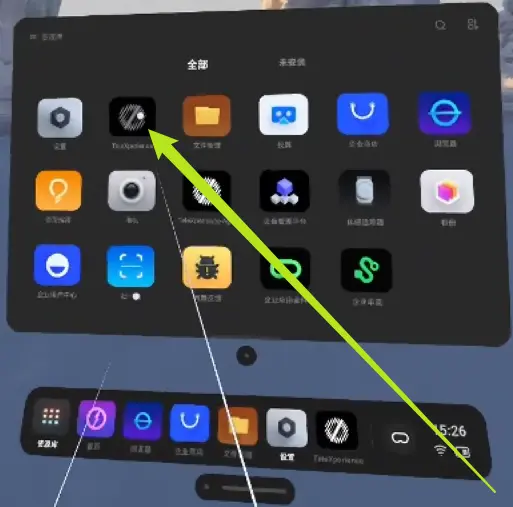
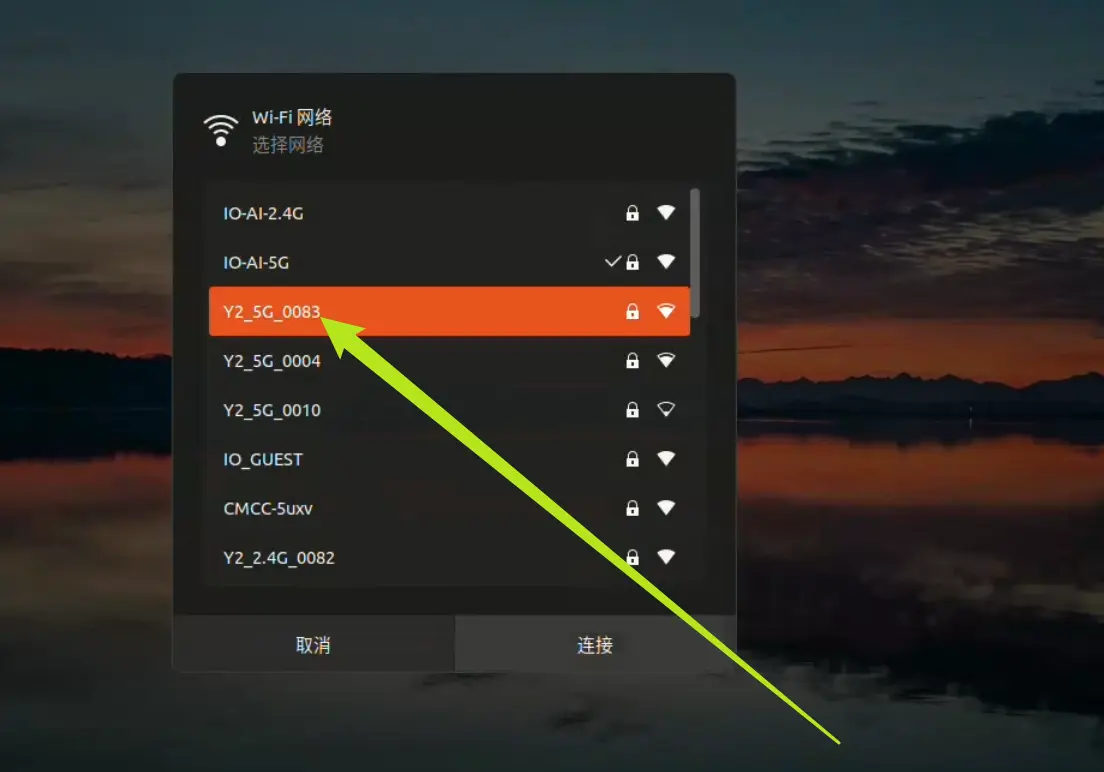
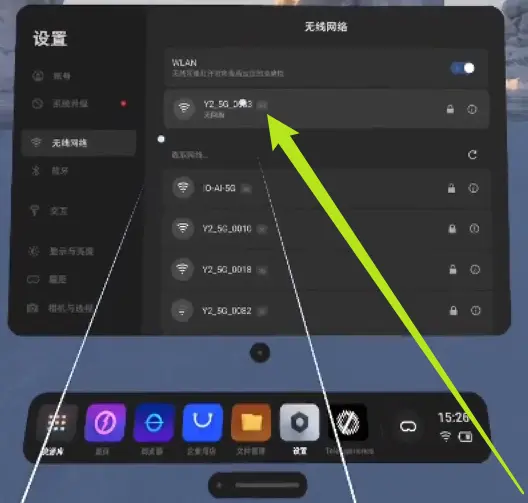
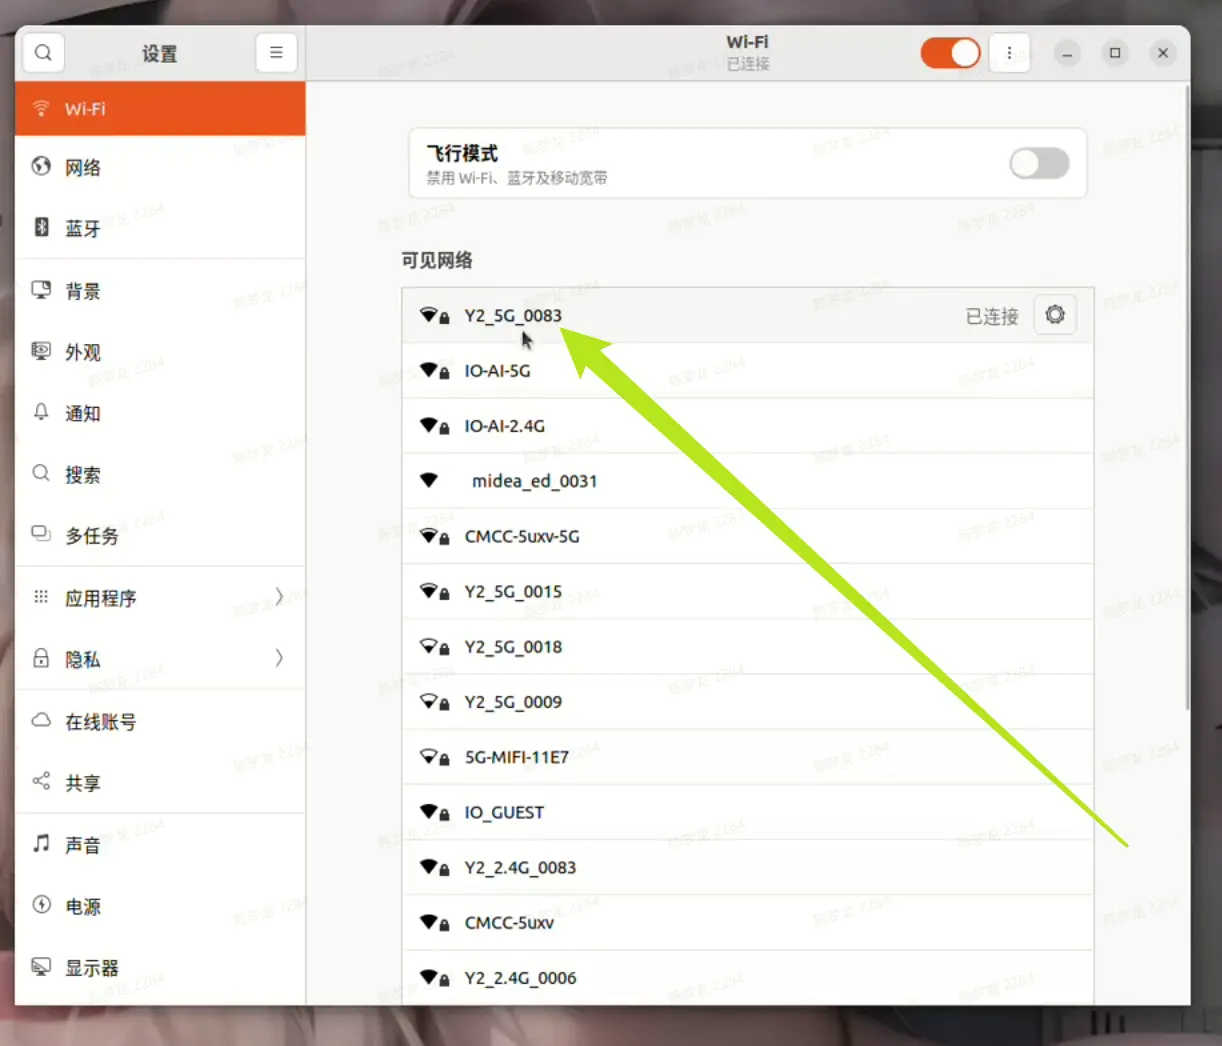
- Click the Wi-Fi icon in the bottom right in VR to enter network settings and connect to the TeleSuit Wi-Fi.
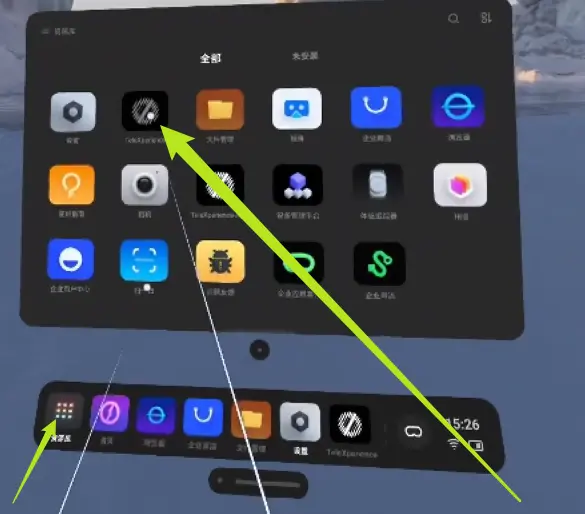
- Click the library icon in the bottom left, select IO TeleXperience APP to enter the app.

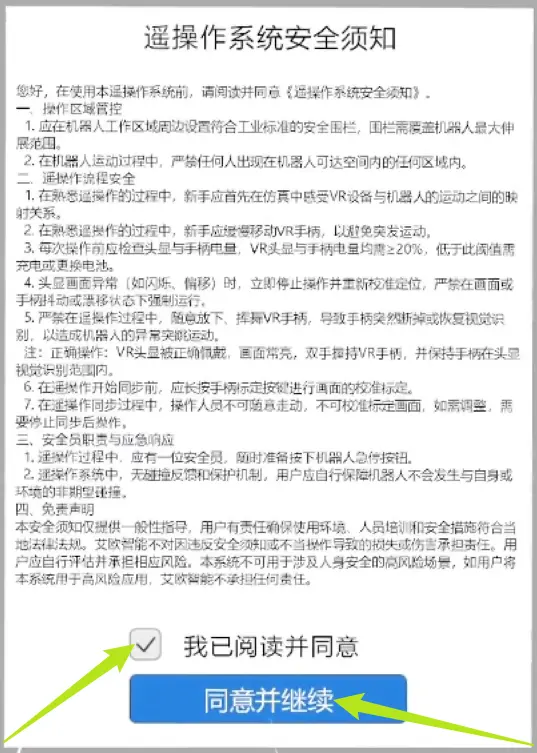
- Carefully read the "Teleoperation System Safety Notice", check "I have read and agree", then click to continue to the main interface.
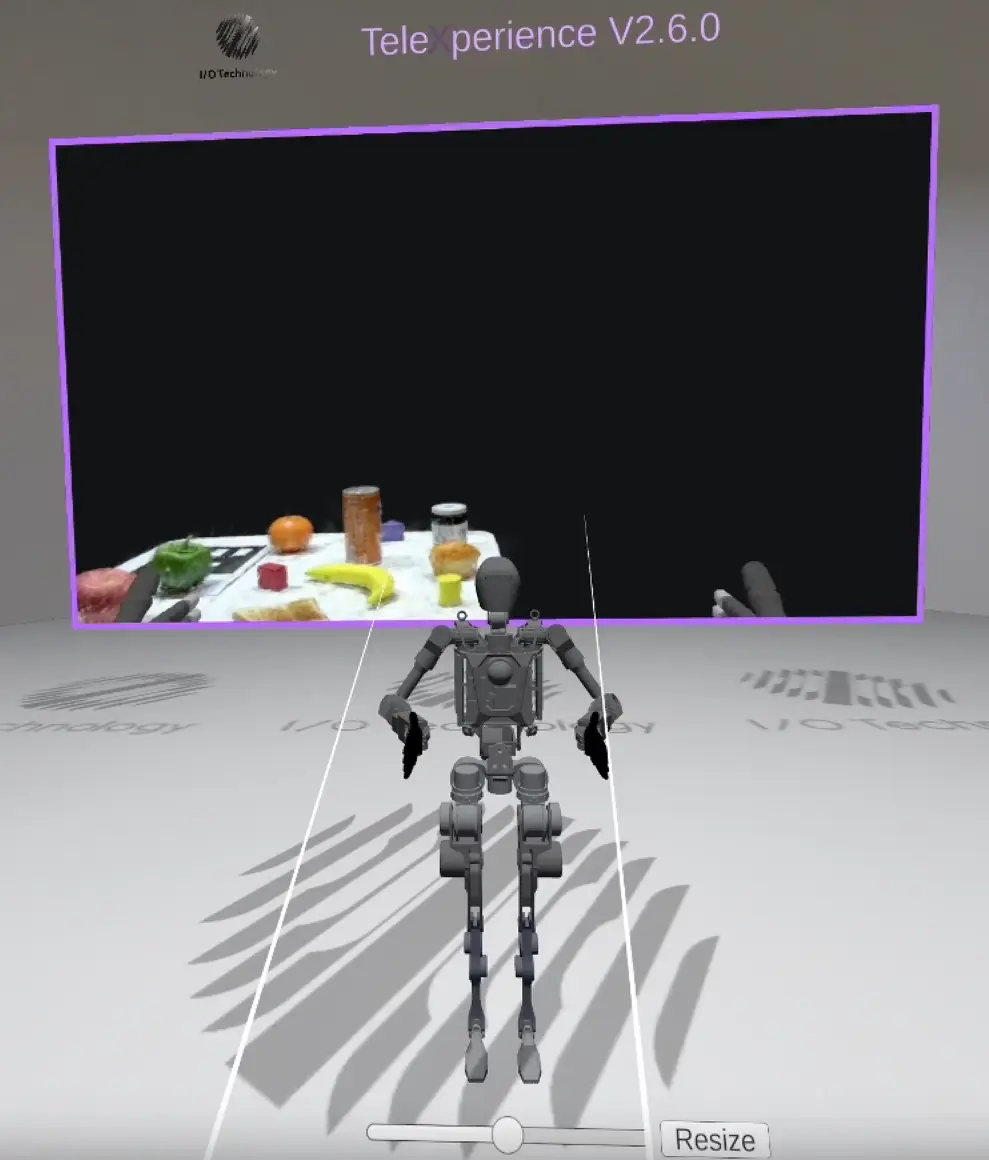
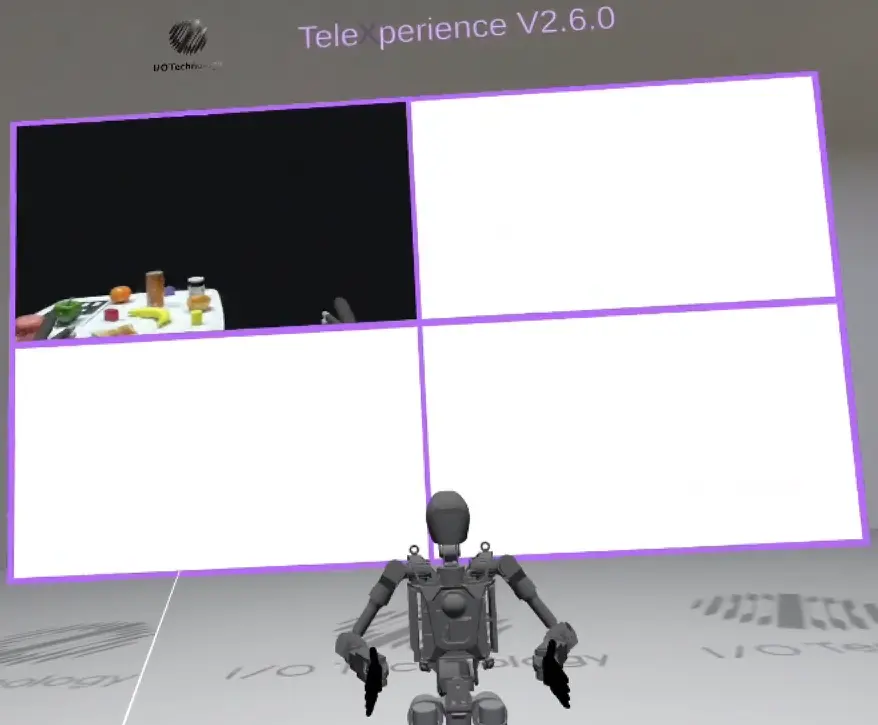
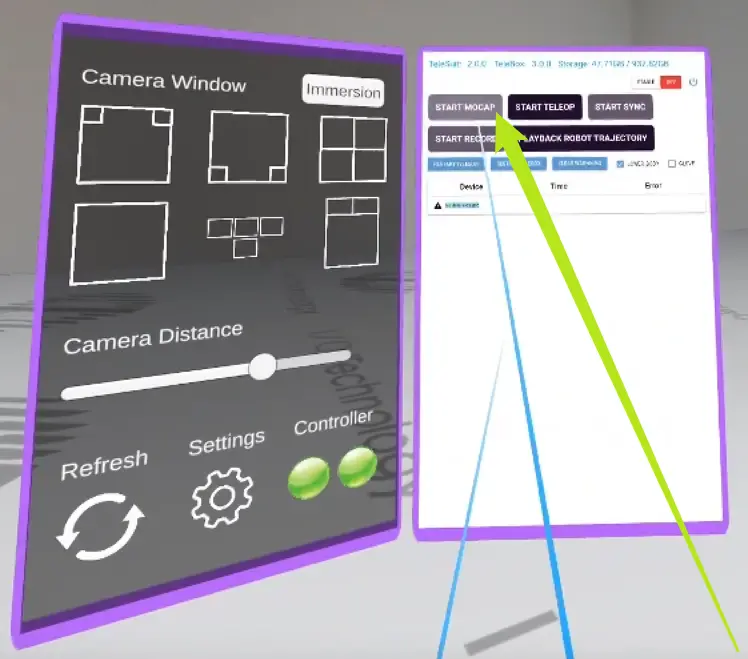
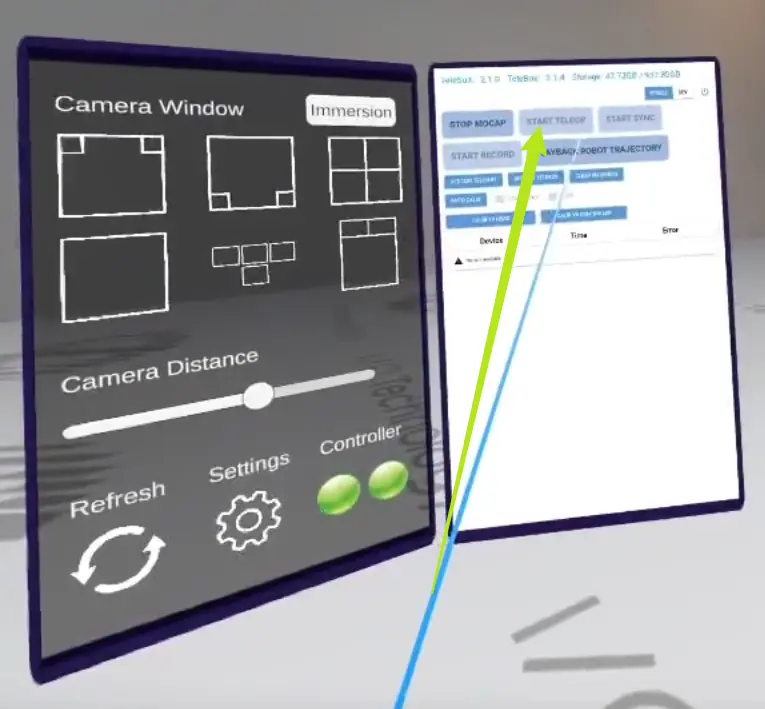
- Adjust window layouts under "Camera Window".

- Click "immersion" for immersive mode, adjust window distance, click "Exit" to leave.
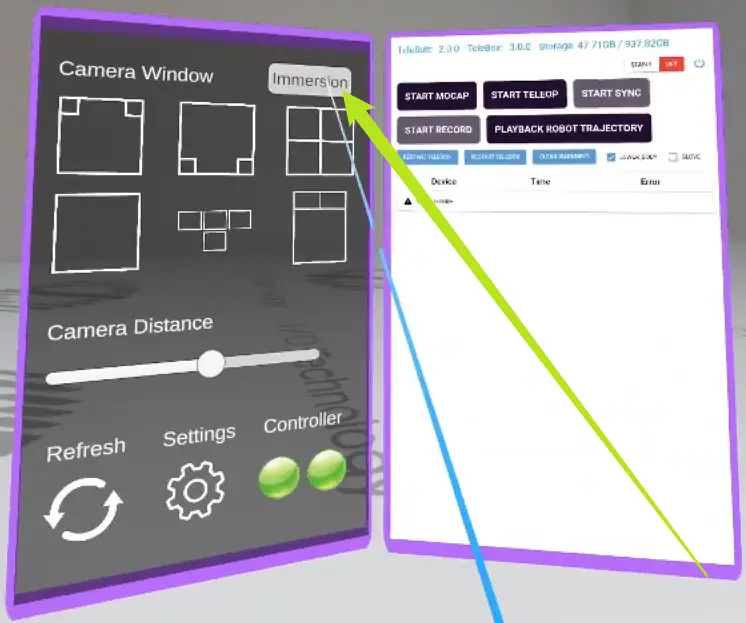

- Adjust main view window size under "Camera Distance".
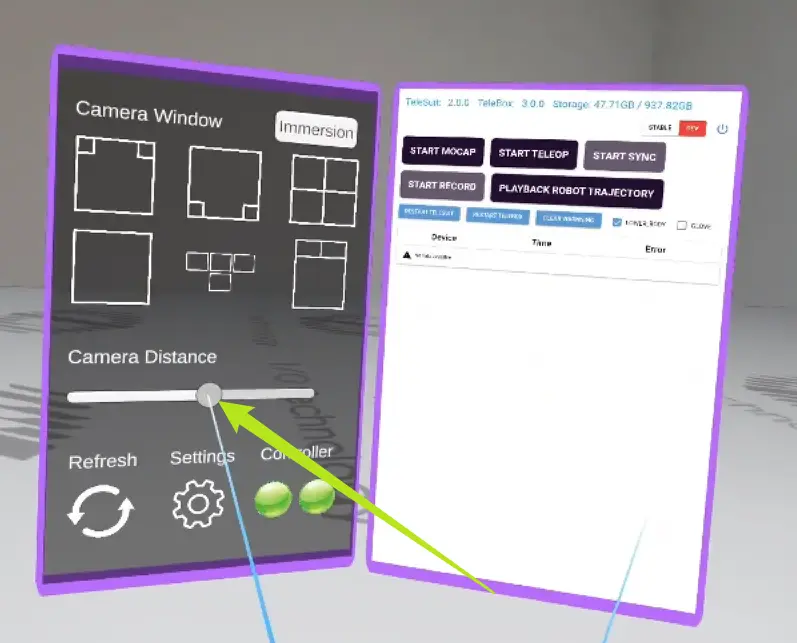
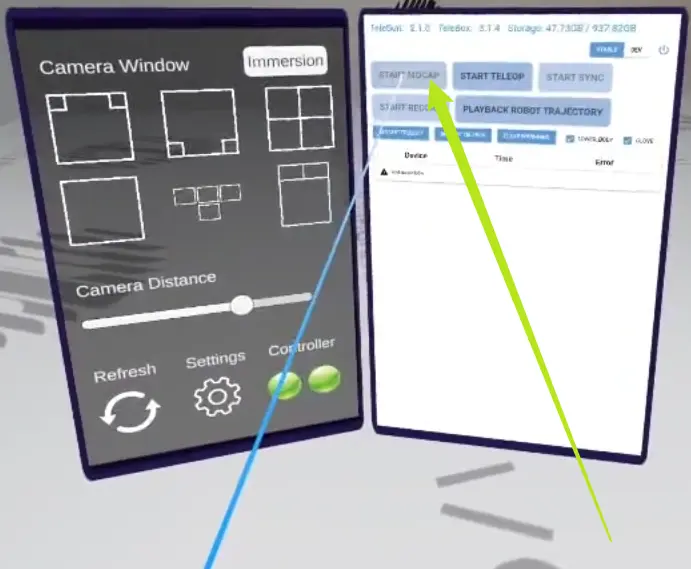
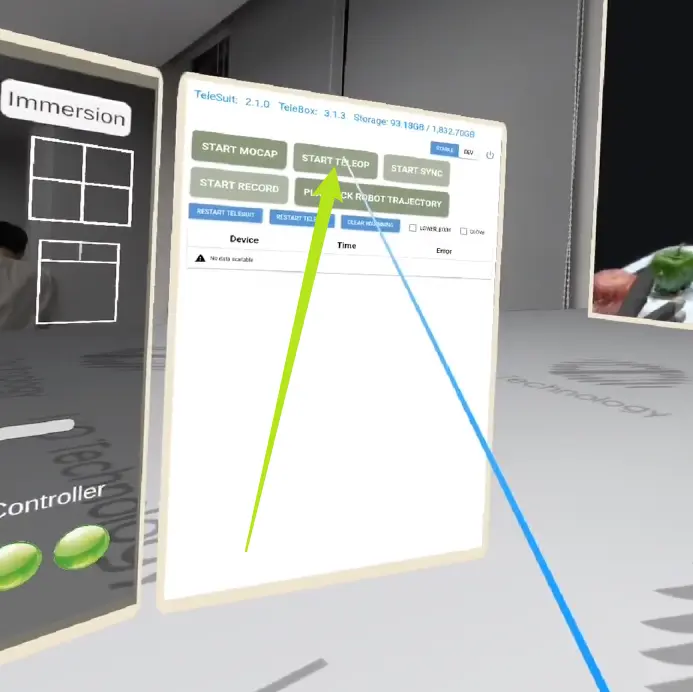
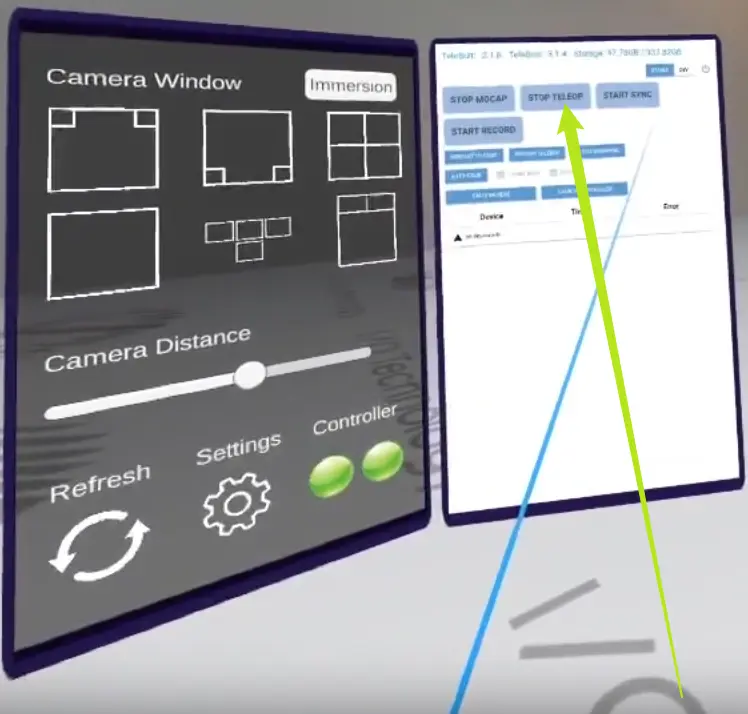
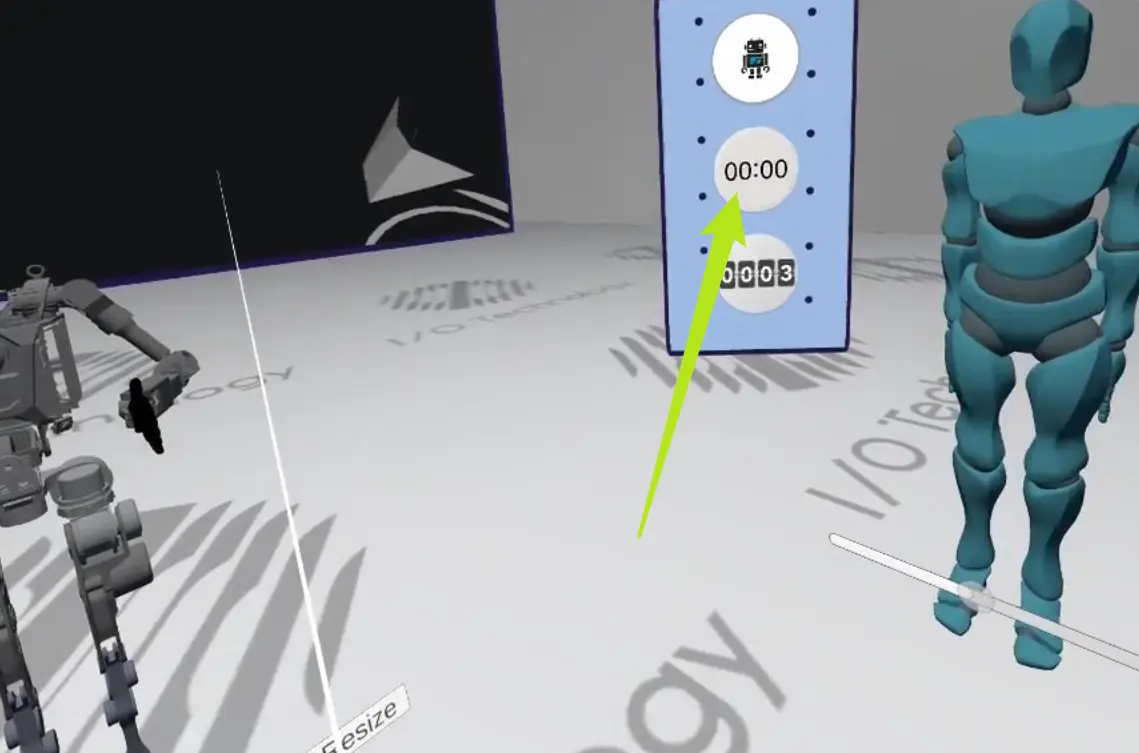
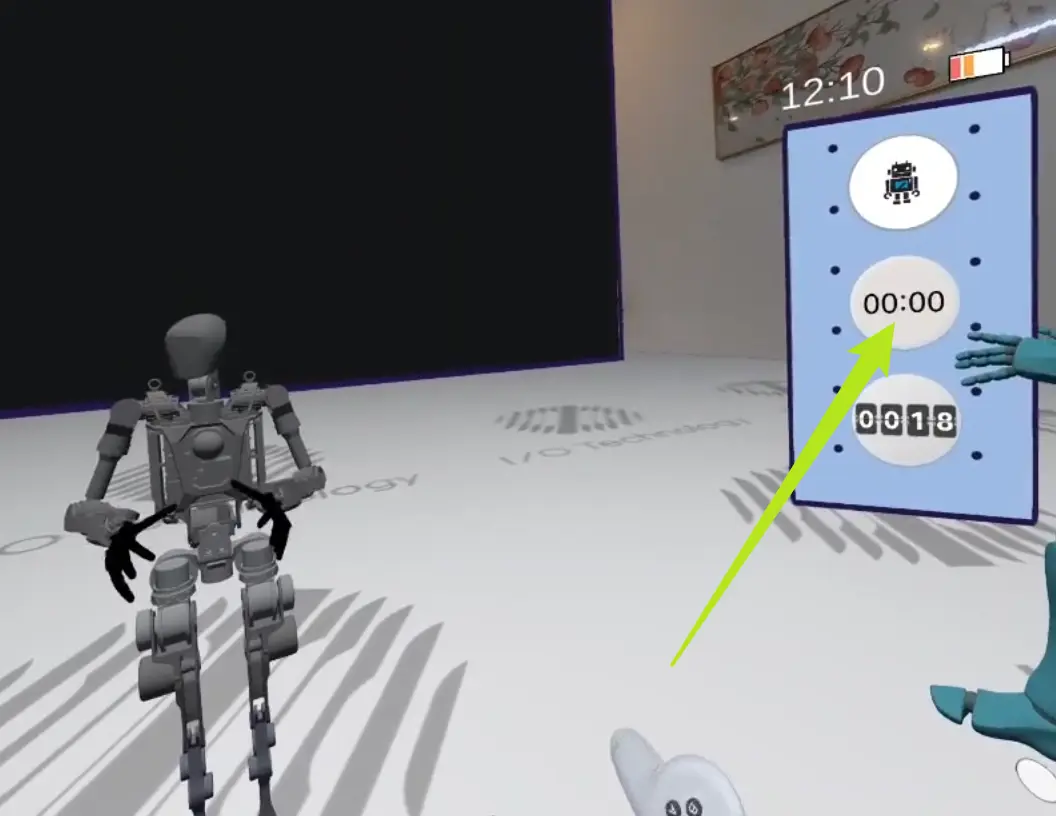
- Main function buttons:
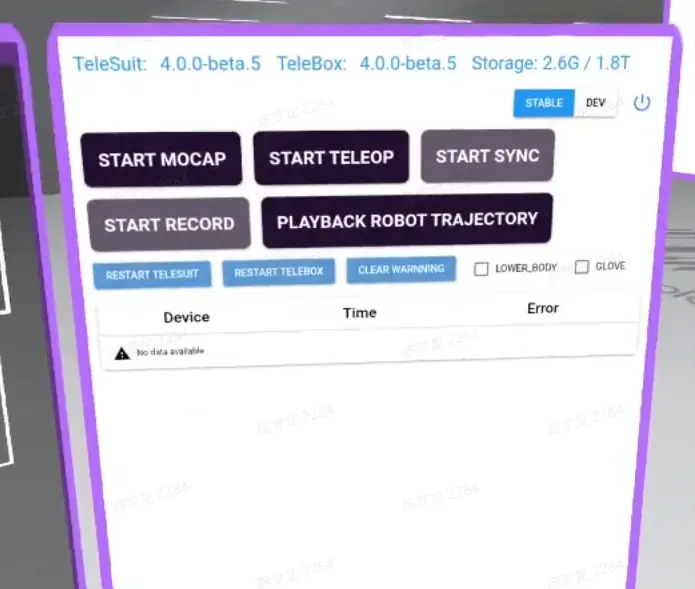
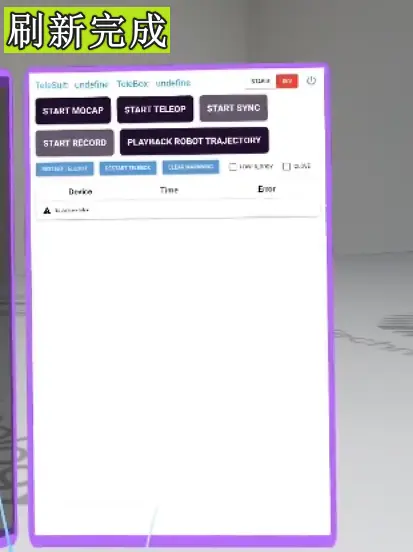
Button Description Function START SYNC / STOP SYNC Start/Stop SYNC Synchronization START MOCAP / STOP MOCAP Start/Stop MOCAP Motion capture control START TELEOP / STOP TELEOP Start/Stop TELEOP Teleoperation control START RECORD / STOP RECORD Start/Stop RECORD Video recording LOWER_BODY Sync/Unsync lower body Sync lower body mocap data GLOVE Sync/Unsync gloves Sync glove data PLAYBACK ROBOT TRAJECTORY Playback Playback recorded data - Click "Refresh" to update button status.
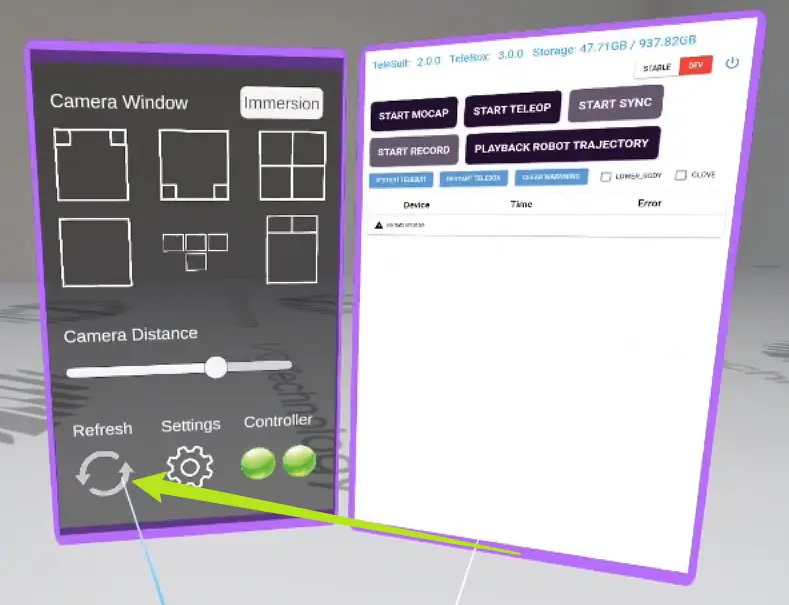
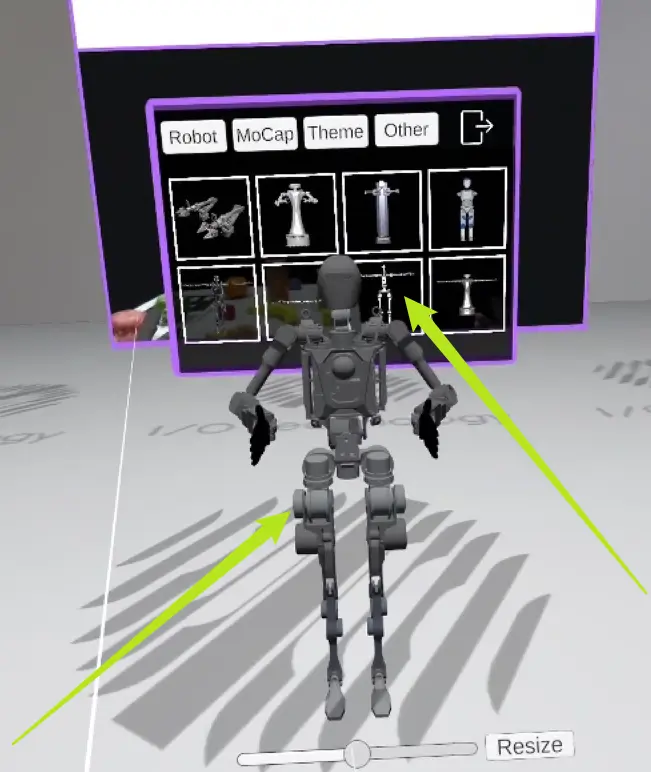
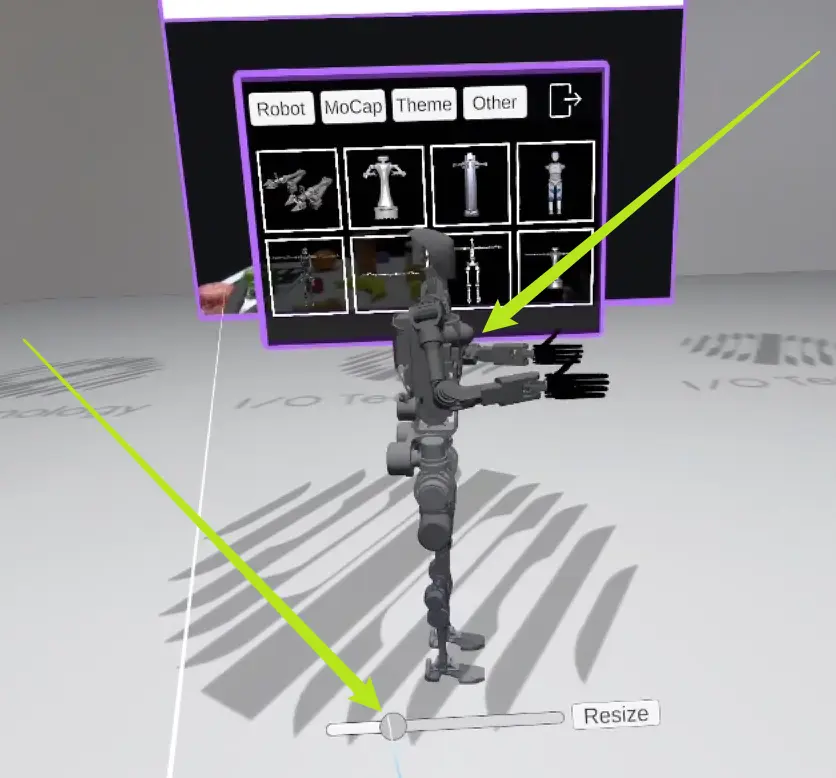
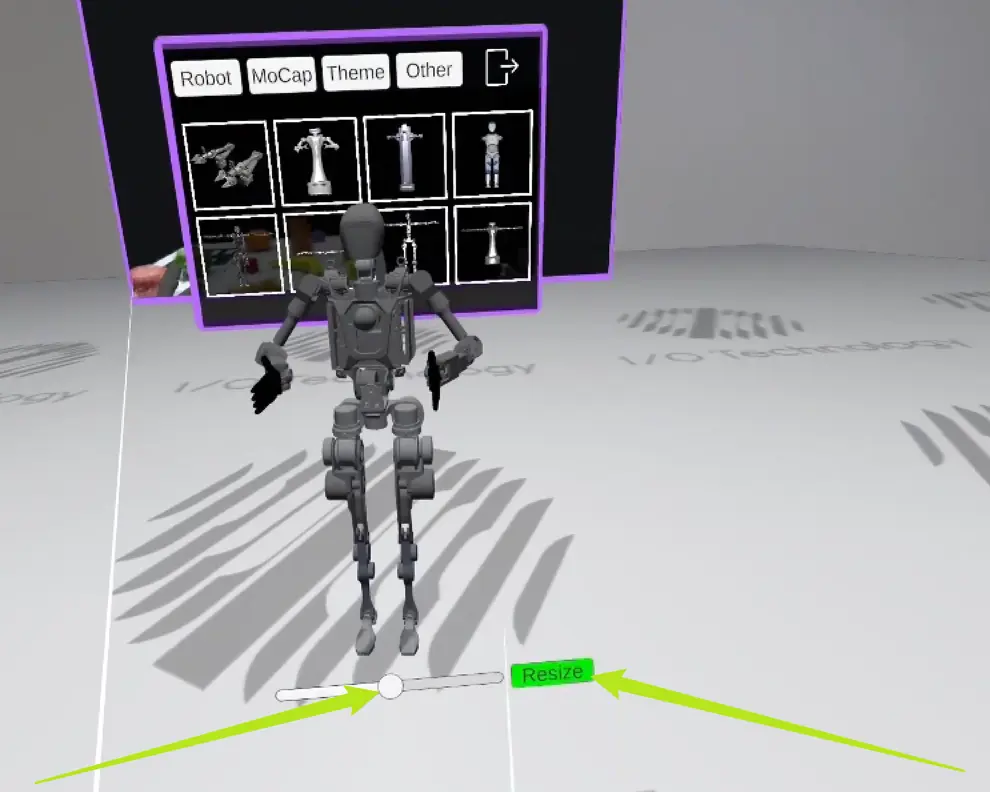
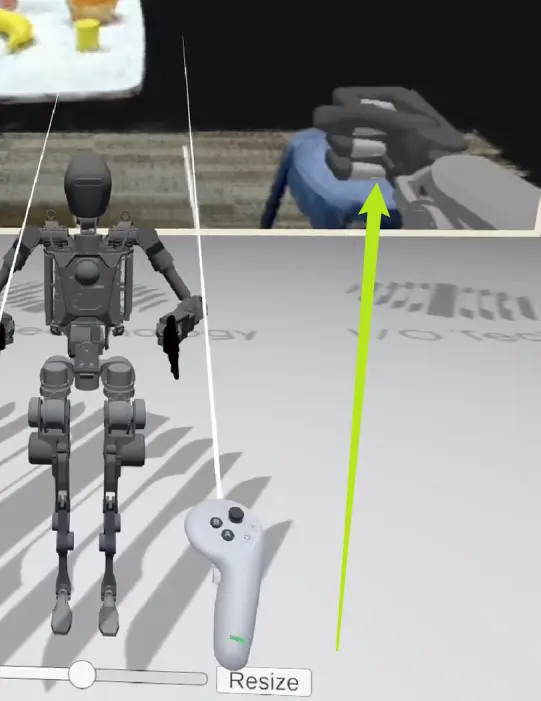
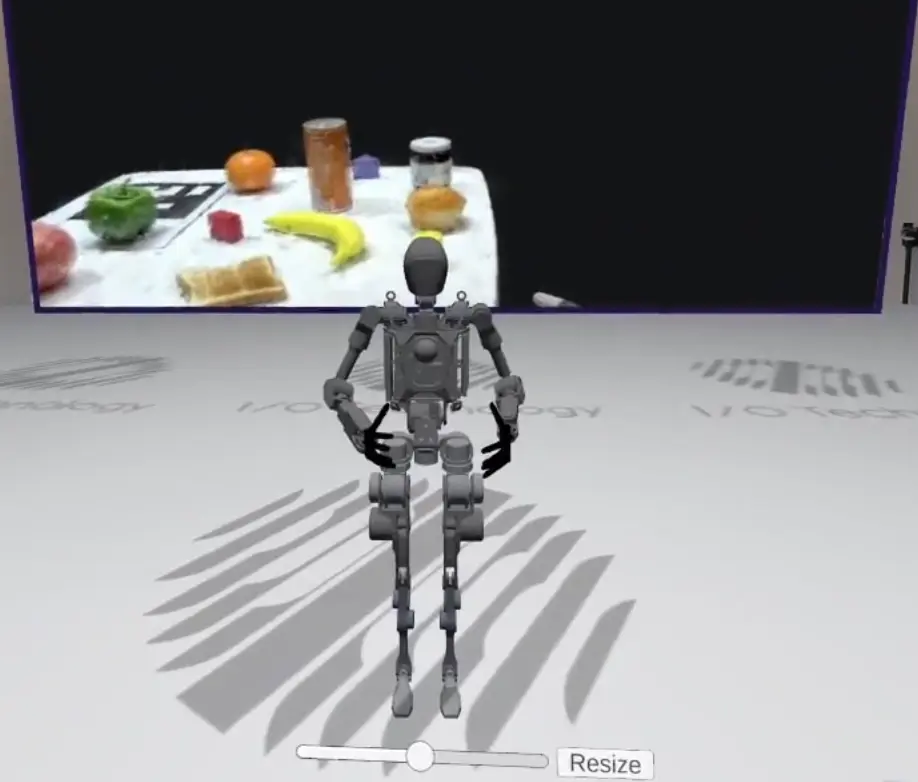
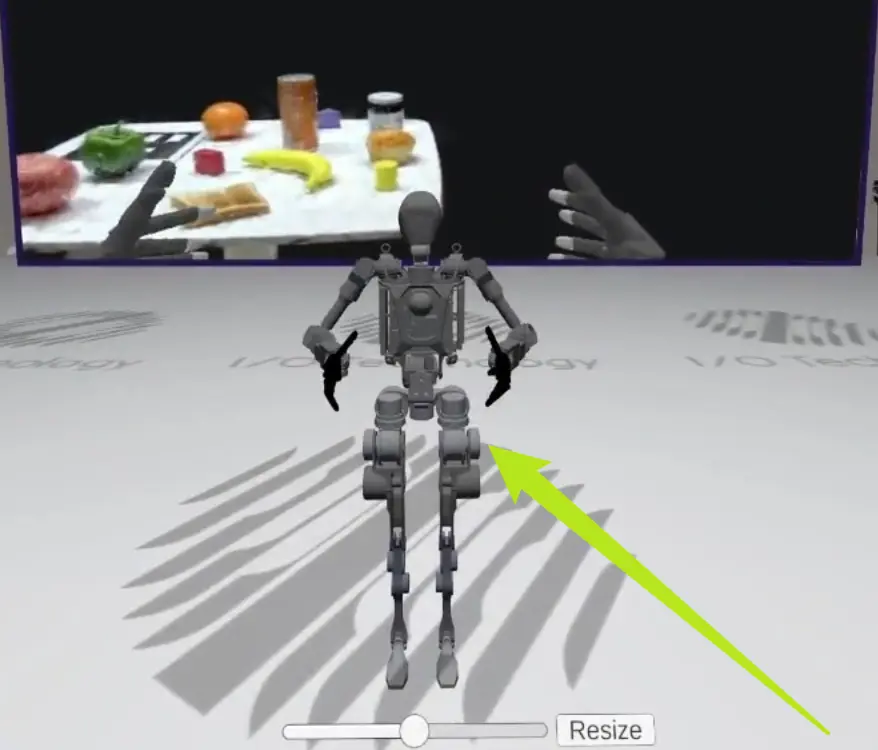
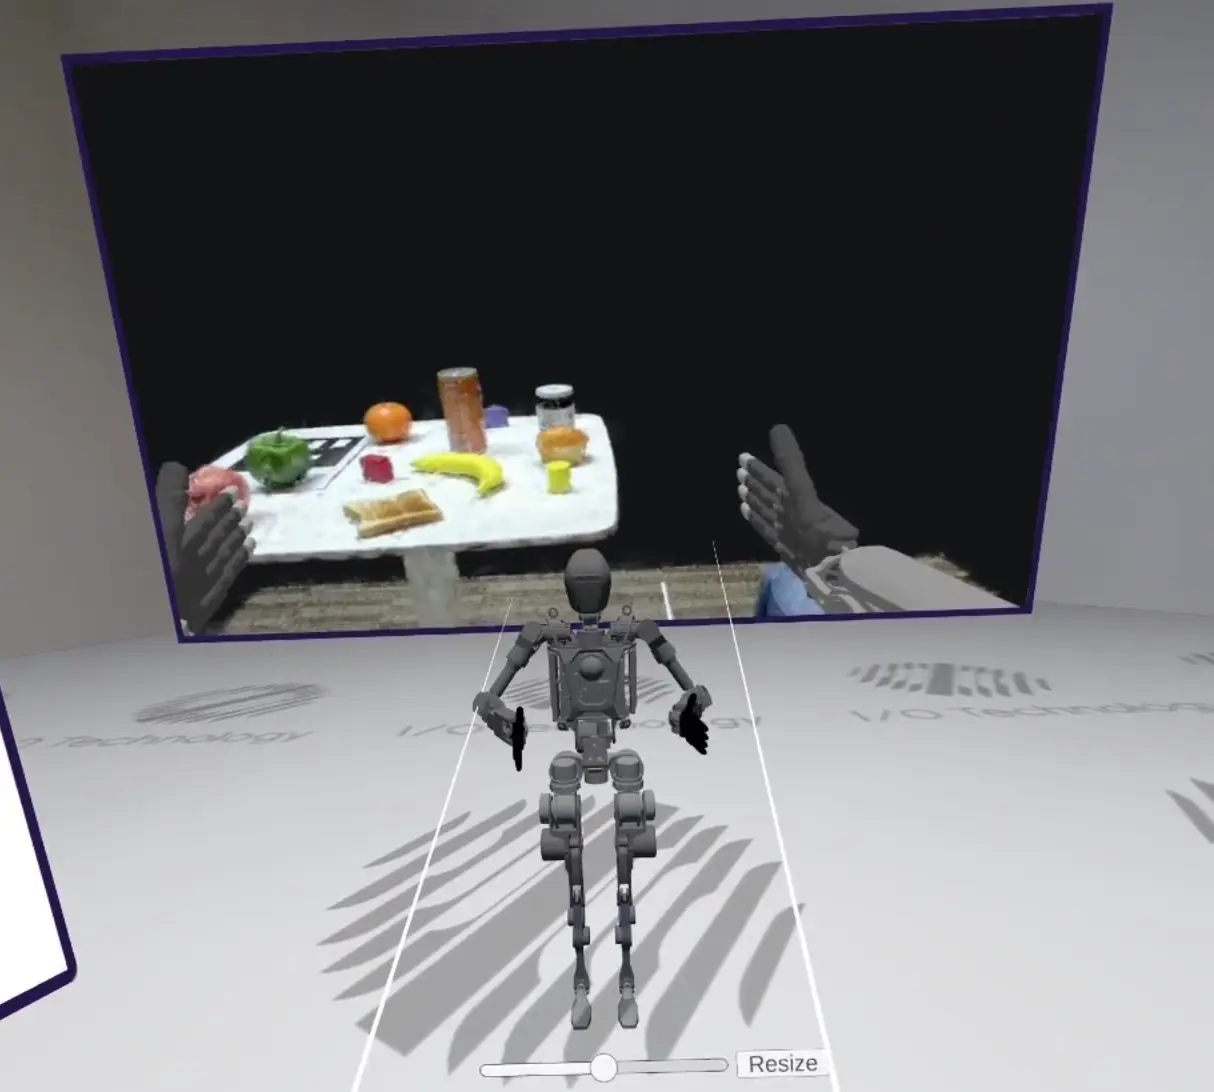
- Click "Settings" to open the robot selection page, browse and select robots, adjust model size with "Resize".
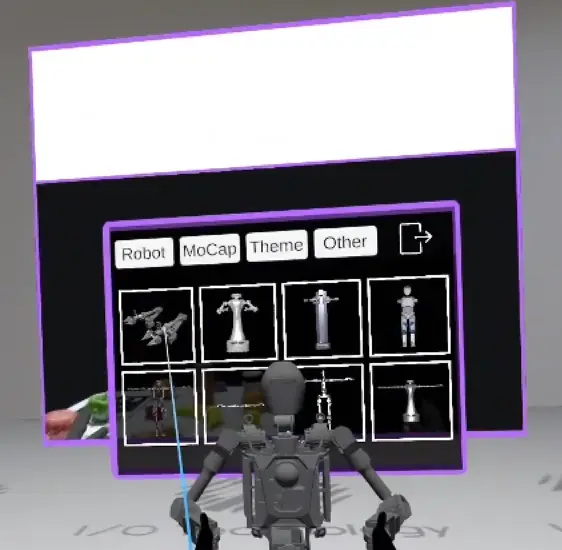
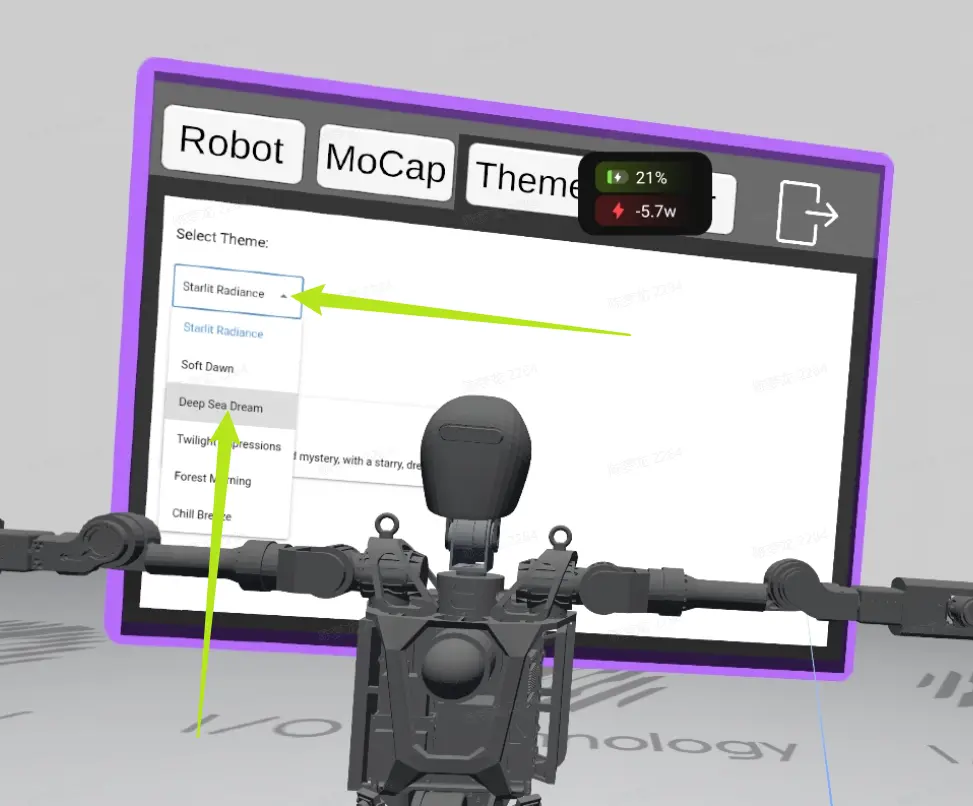
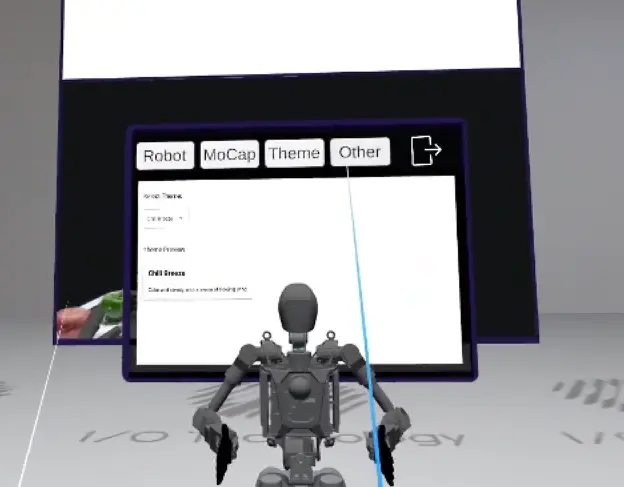
- Click "Theme" to select and apply a new theme.
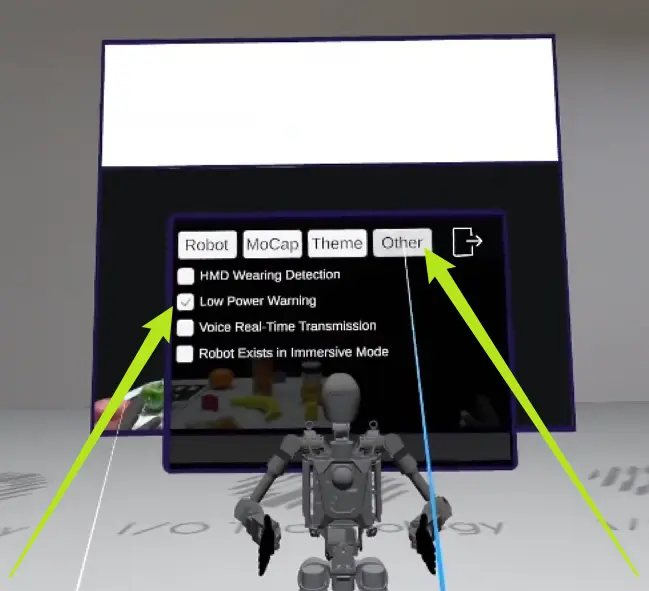
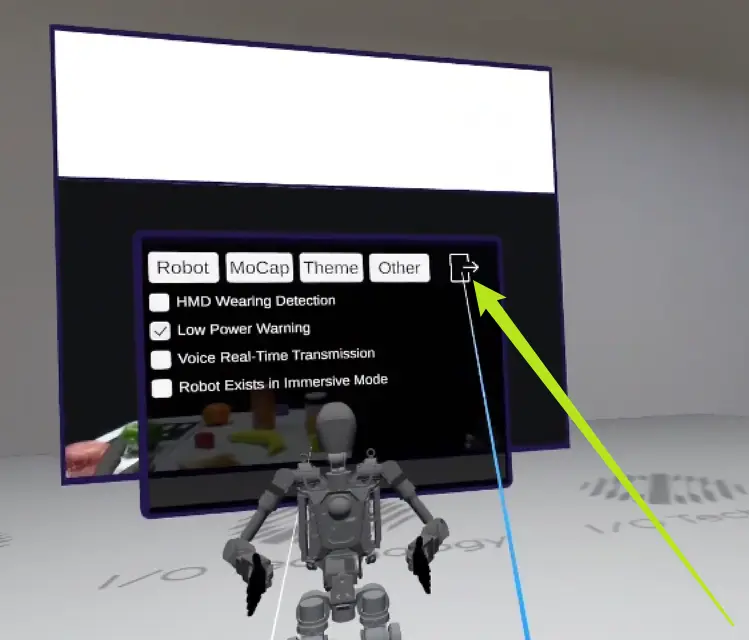
- Click "Other" for low power warning settings, enable/disable as needed, exit from the top right.
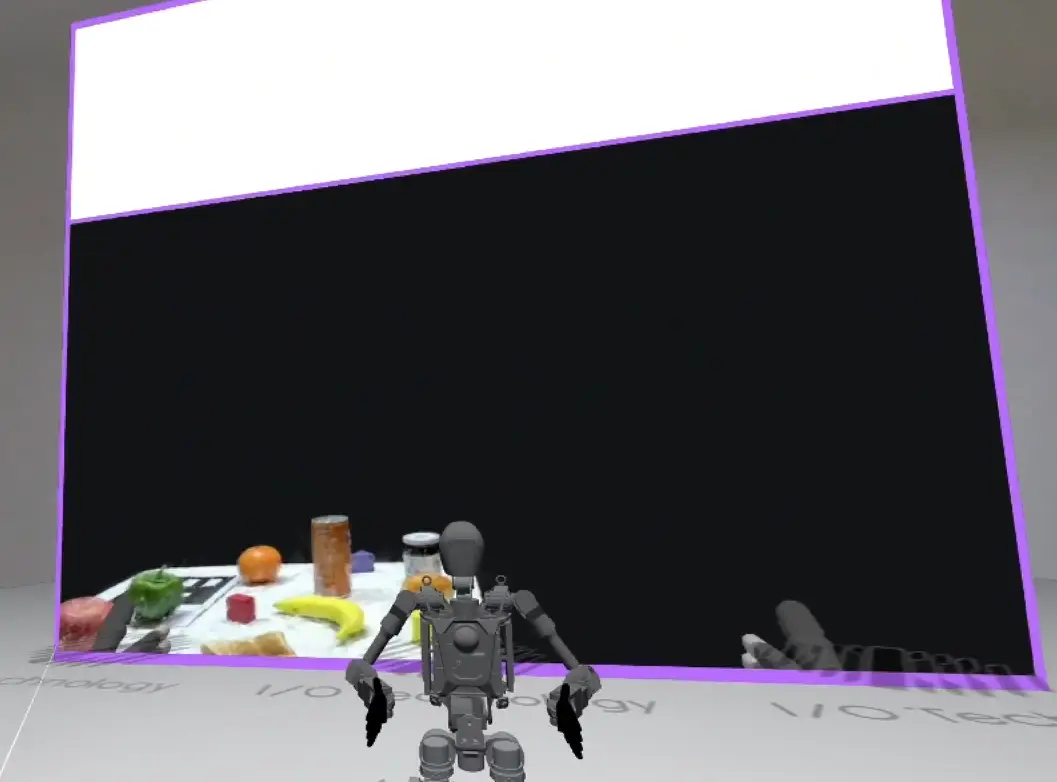
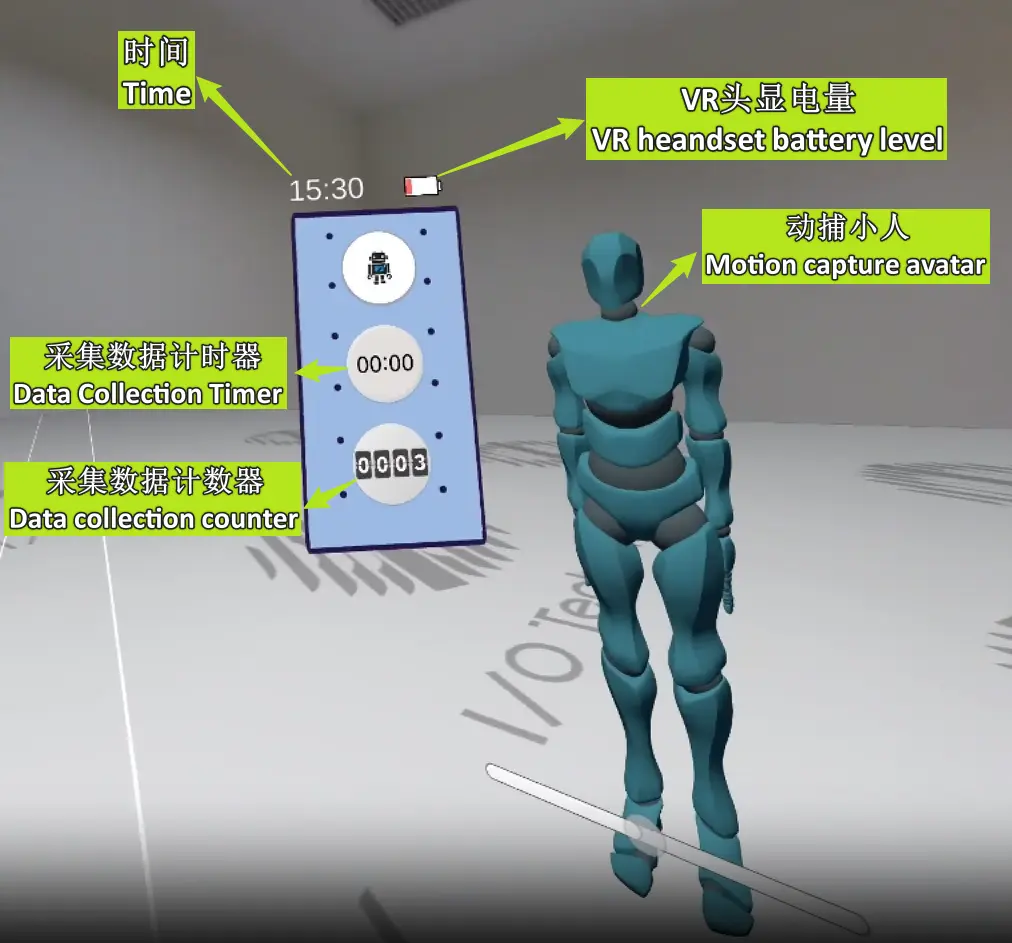
- Right-side view panel in VR:
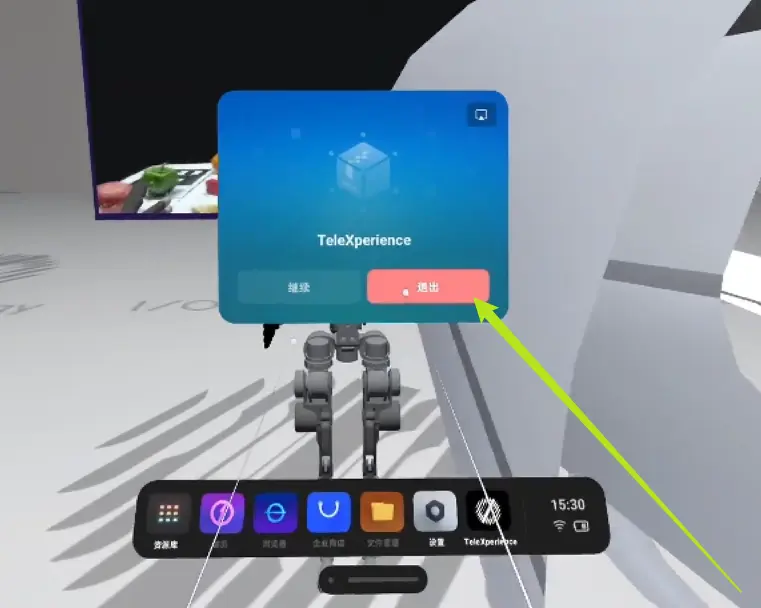
- To exit, press the index trigger, confirm in the popup.
- Click the Wi-Fi icon in the bottom right in VR to enter network settings and connect to the TeleSuit Wi-Fi.
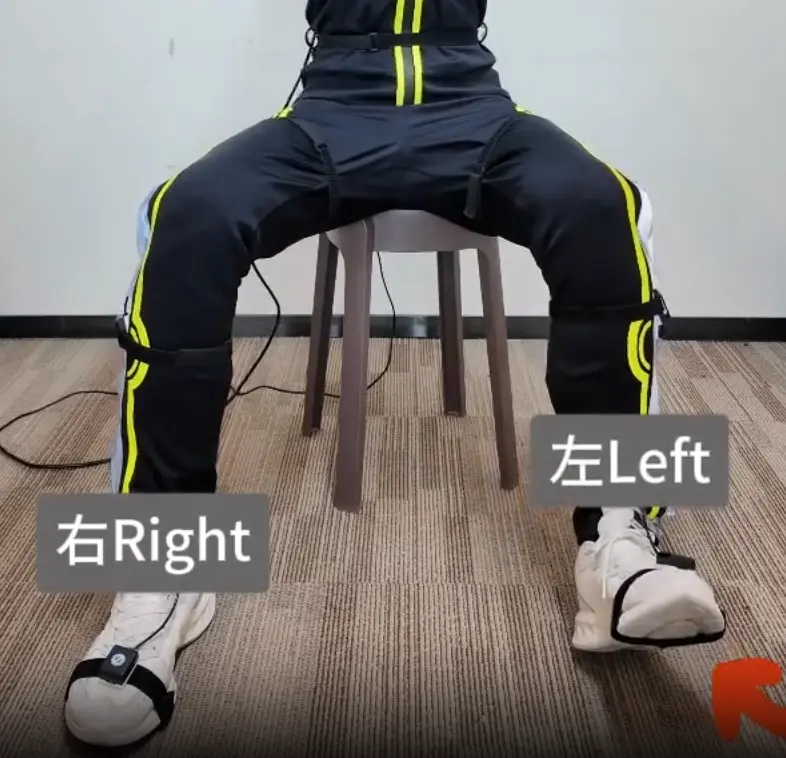
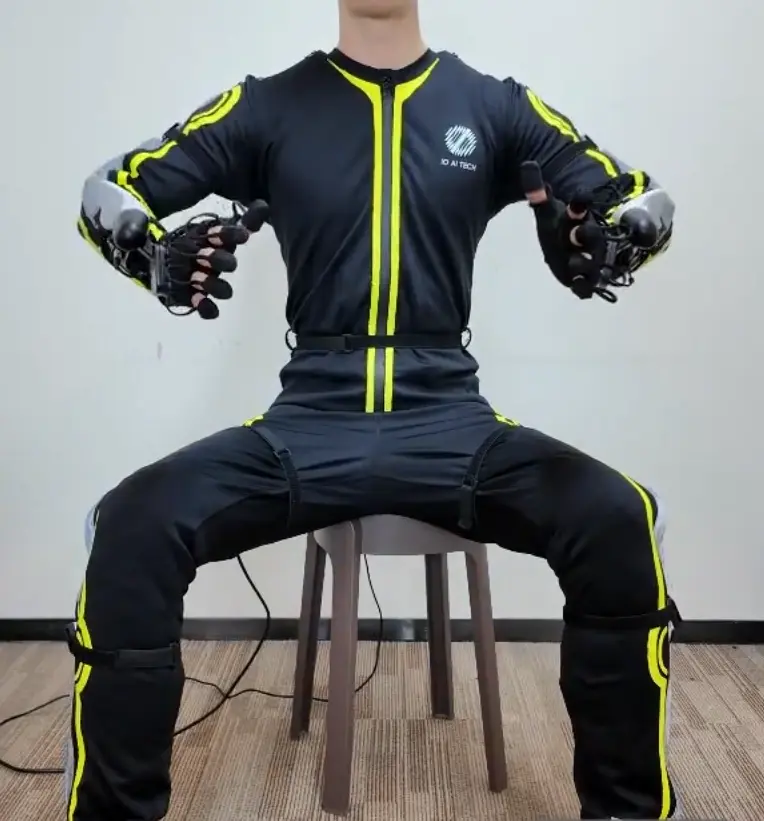
Motion Capture Suit Calibration & Usage
Motion capture is optional for running the demo, but enables advanced features like redundancy optimization for 7-DOF arms.
If your robot arm has 6 or fewer DOF, you may skip this section.
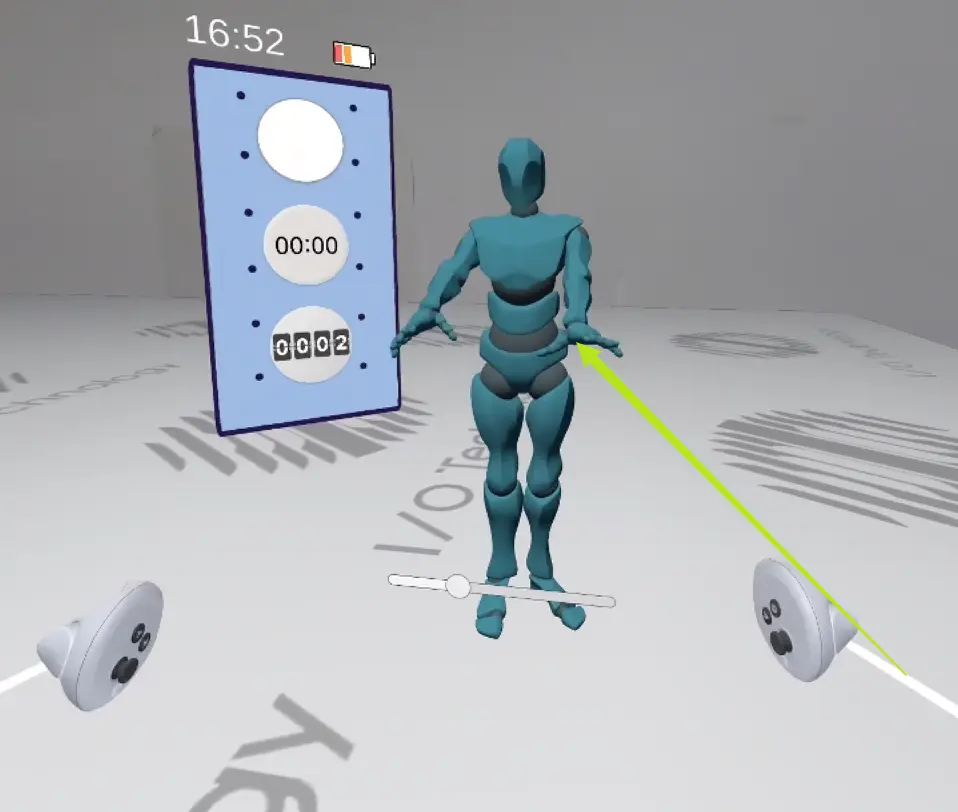
Start Motion Capture
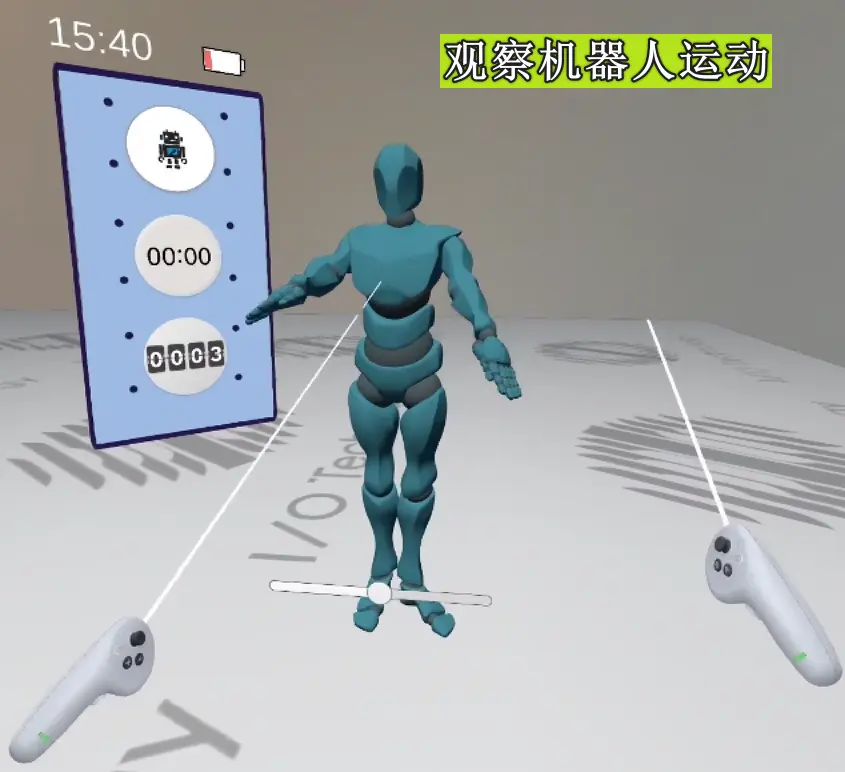
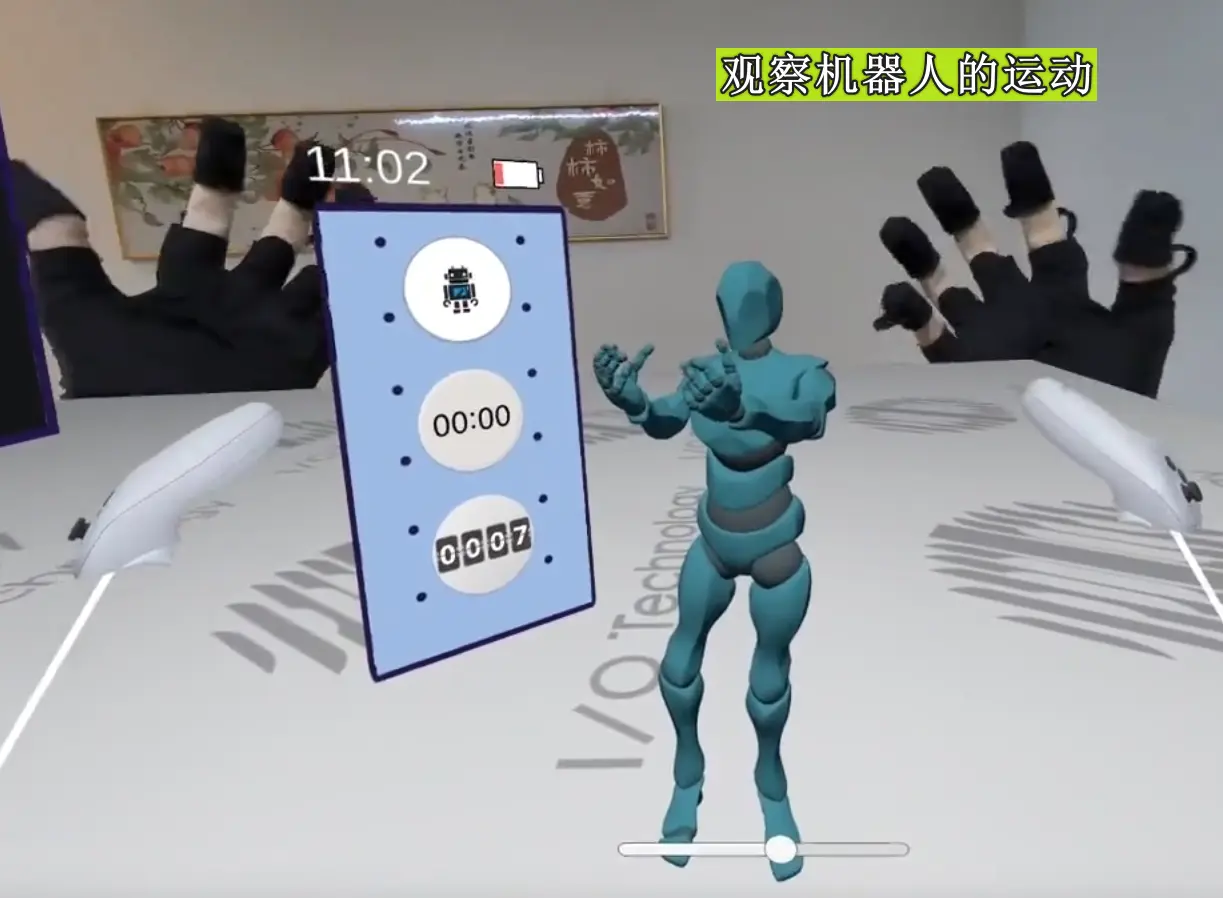
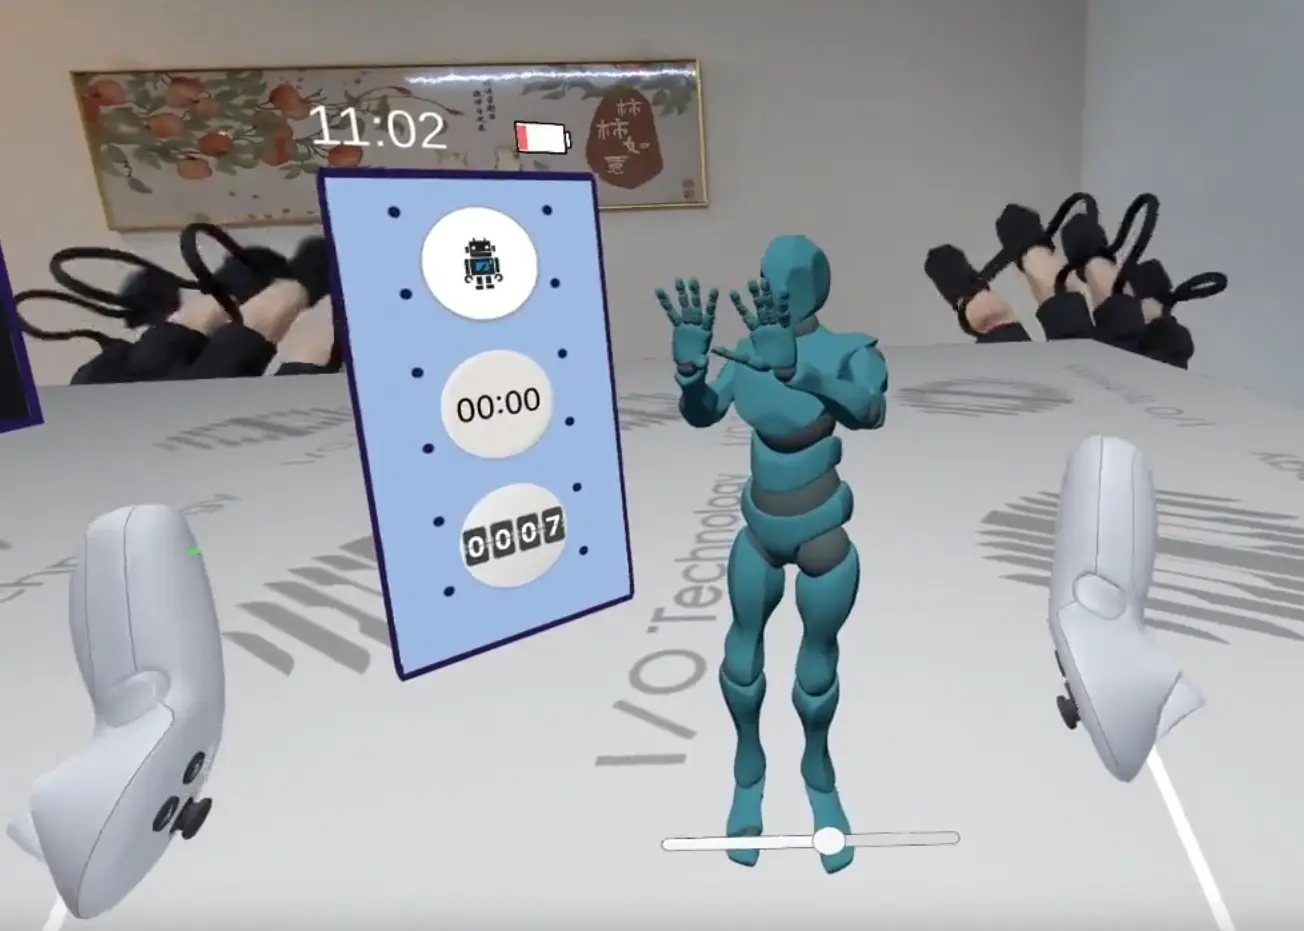
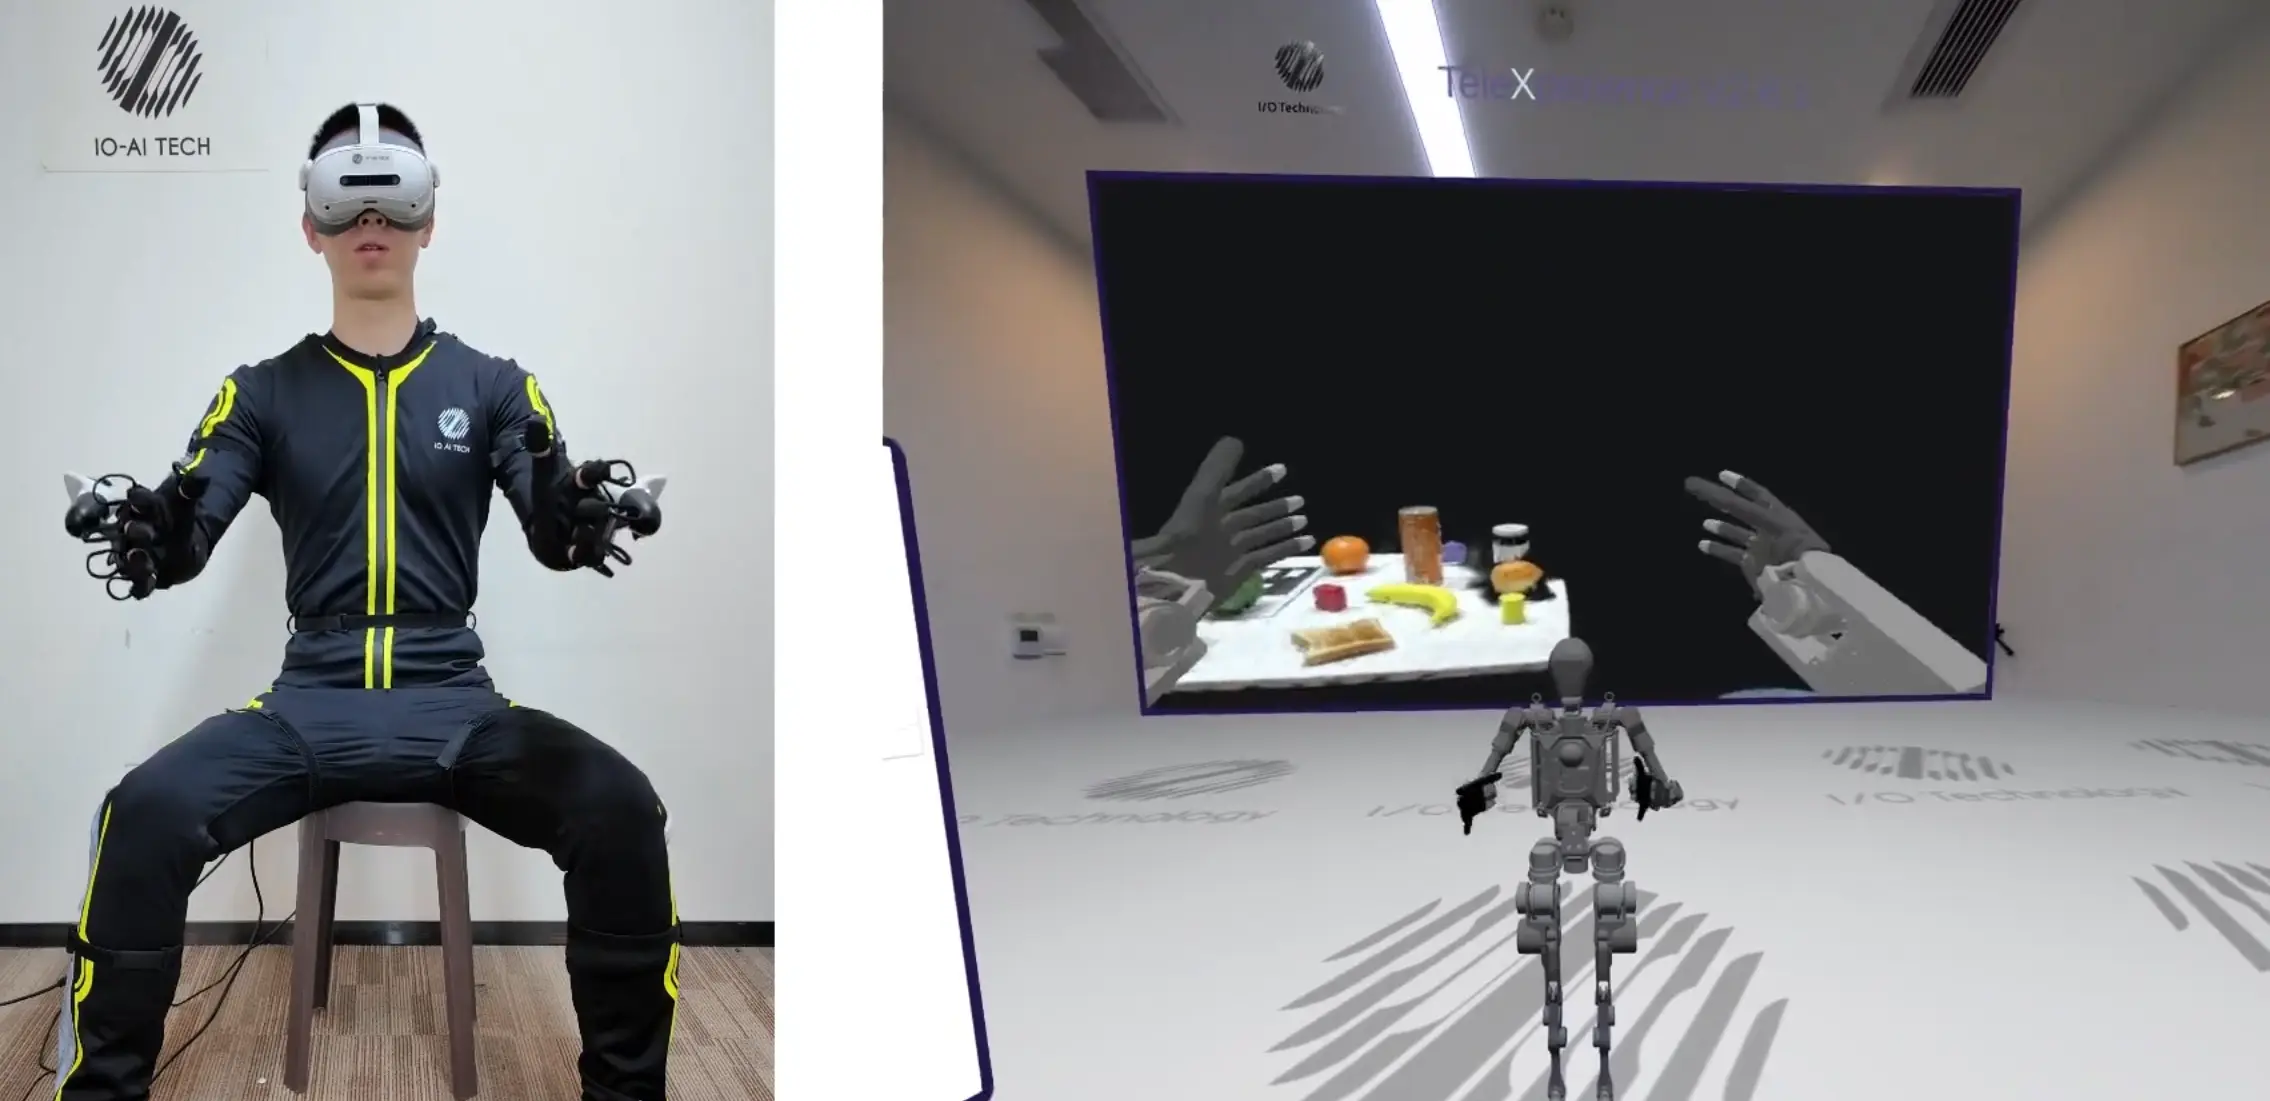
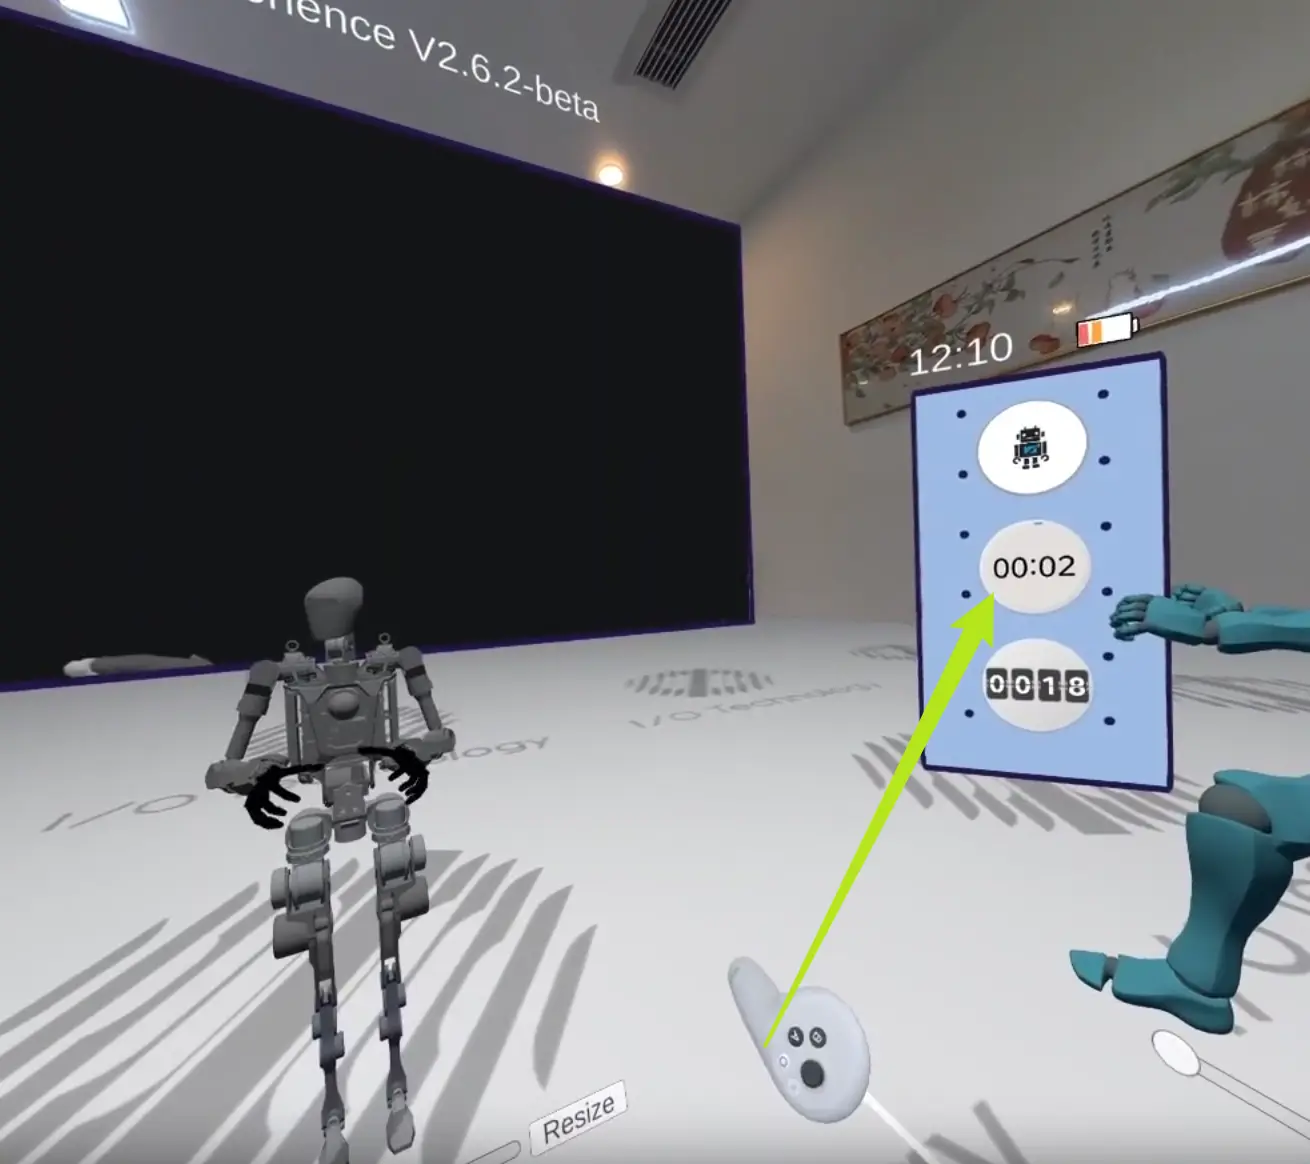
In VR, click START MOCAP. The blue avatar on the right should move if started correctly.
Step-by-step Guide
- Click START MOCAP to sync the avatar. If the avatar moves, mocap is active.
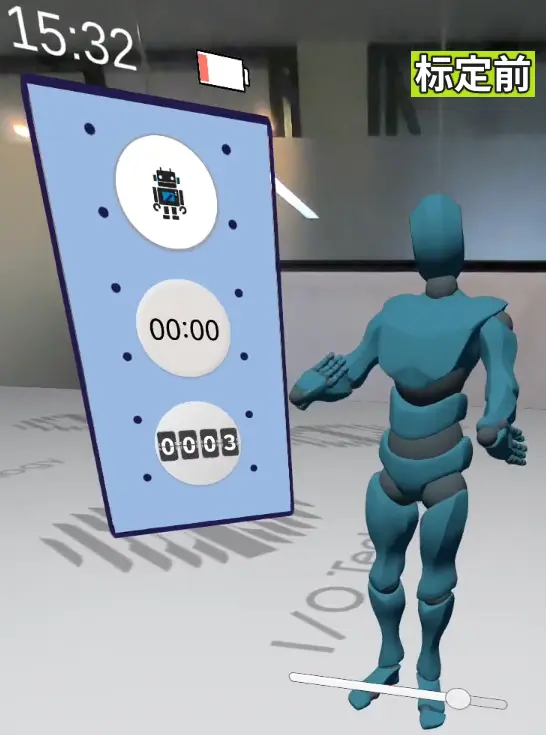
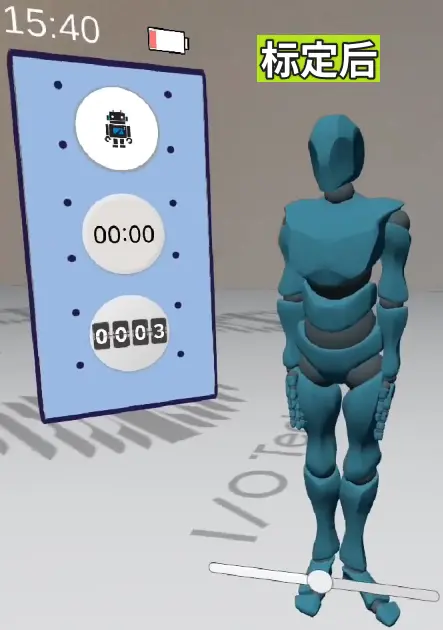
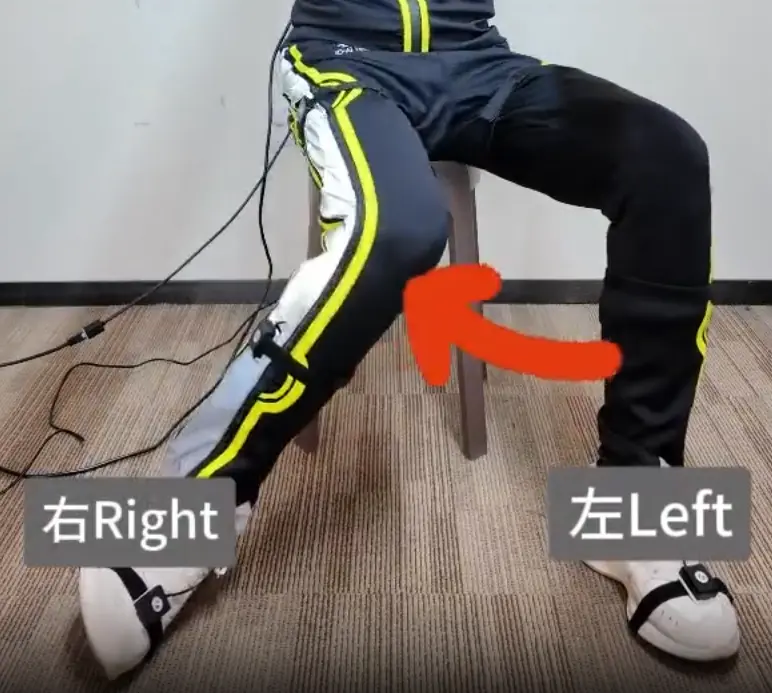
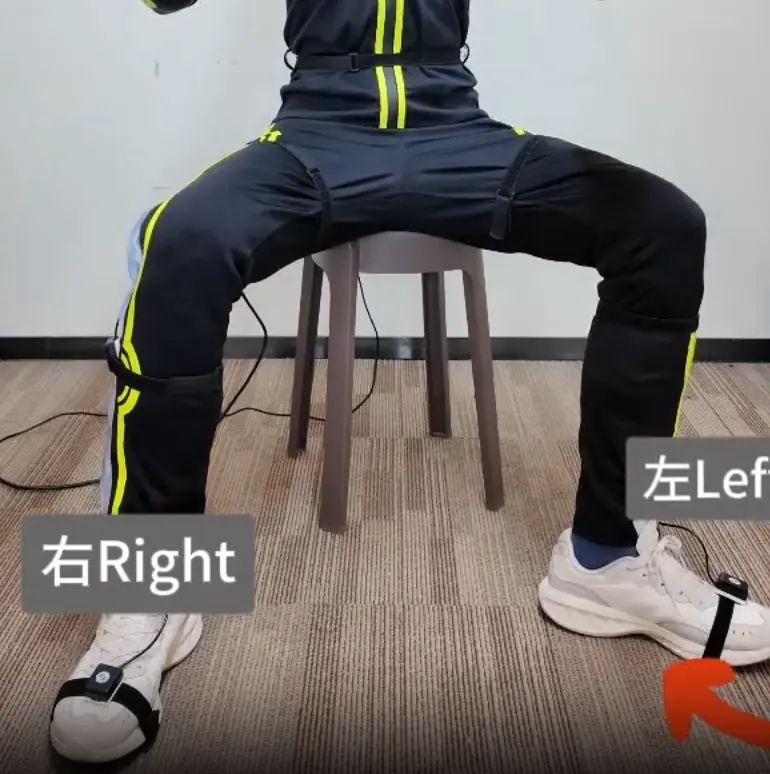
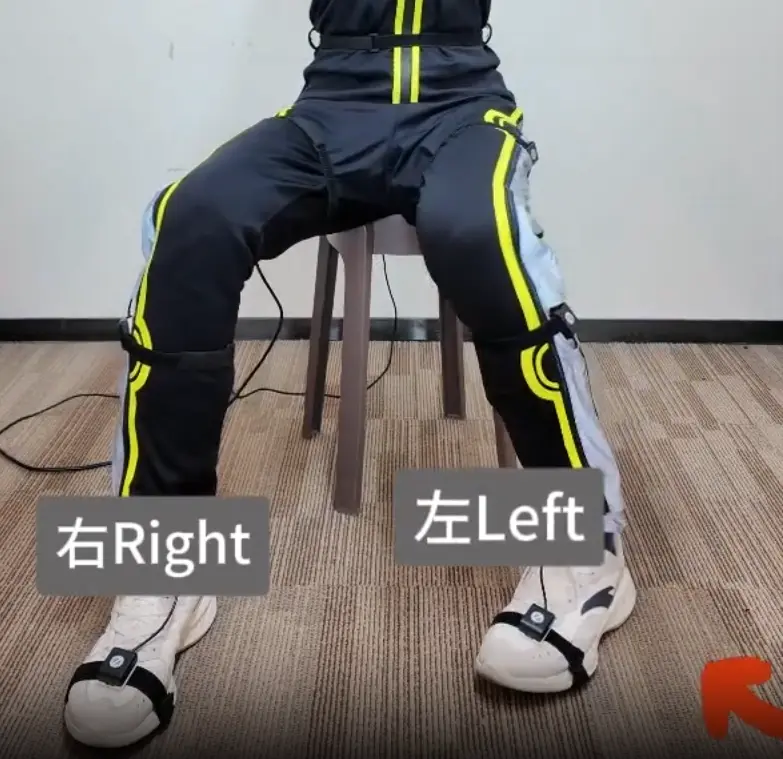
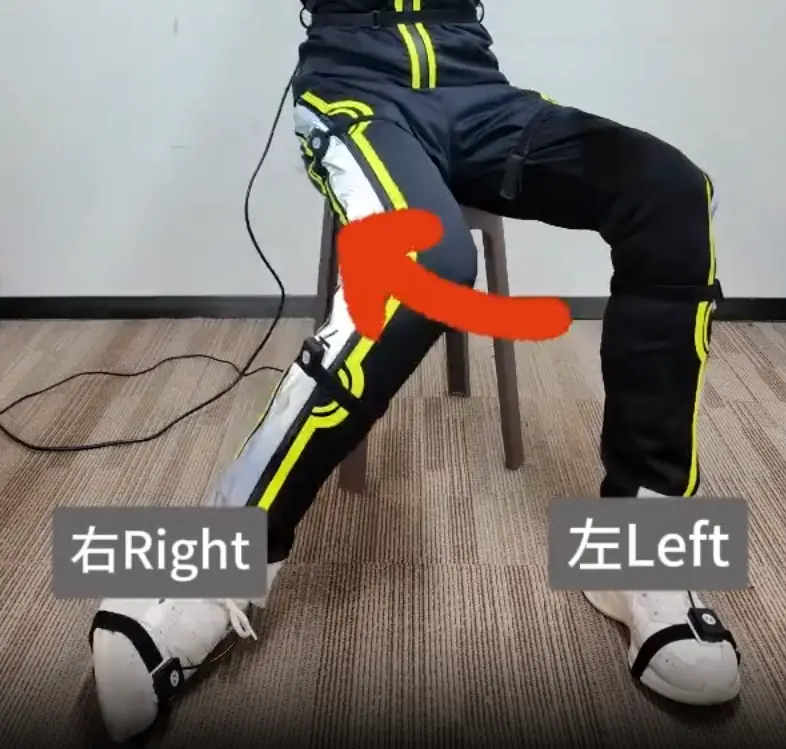
Suit Calibration
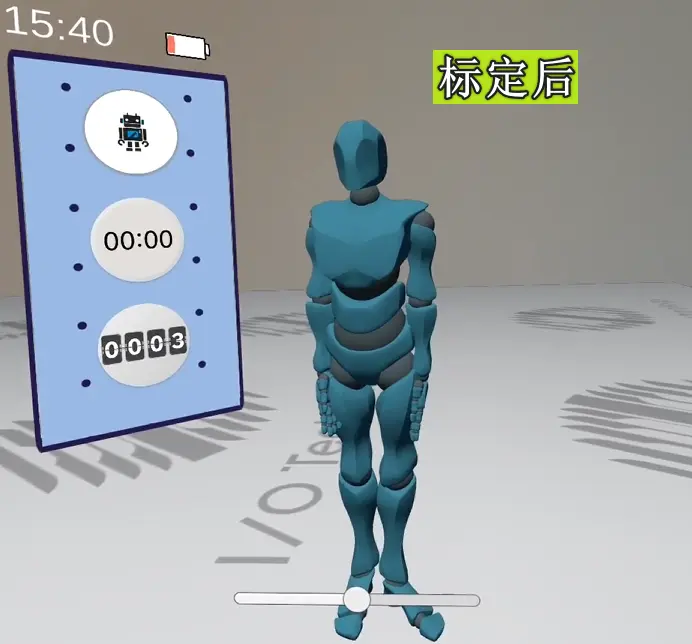
If the avatar's movement does not match your body, calibrate the suit.
Before calibration, turn on VR headset audio for voice prompts.
| Standard Calibration | Pro Calibration | ||||||||
|---|---|---|---|---|---|---|---|---|---|
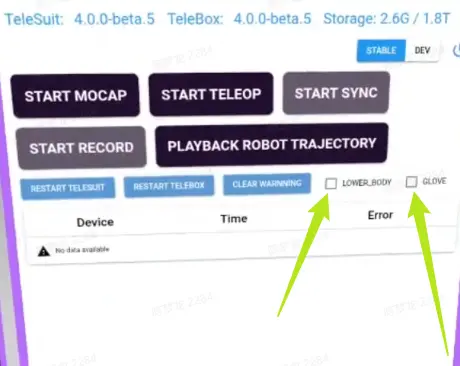
On the left panel, ensure LOWER BODY and GLOVE are unchecked. Click START MOCAP, then AUTO CALIB.
Follow the voice prompts and demo actions: | On the left panel, ensure LOWER BODY and GLOVE are checked. Click START MOCAP, then AUTO CALIB.
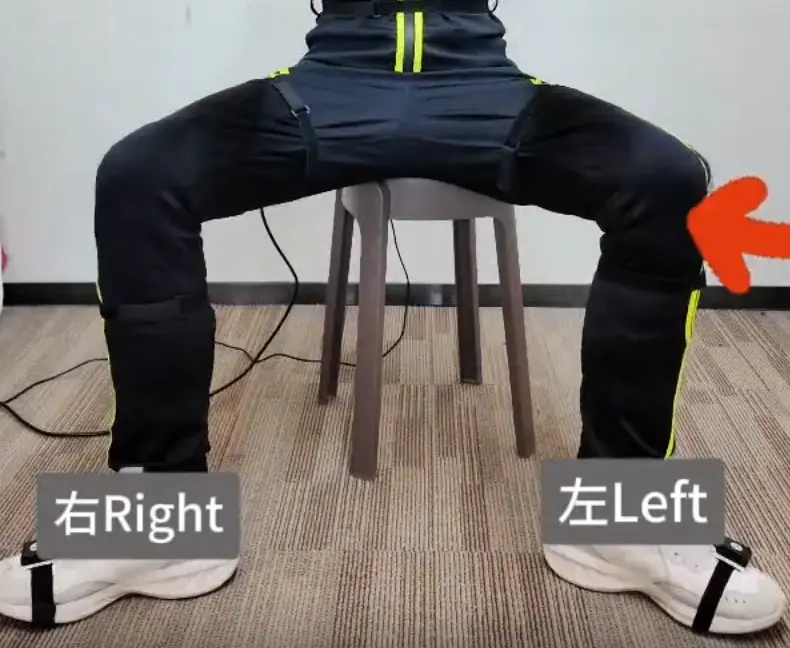
If not wearing the lower suit, you may leave LOWER BODY unchecked.
Follow the voice prompts and demo actions: | ||||||||
|
|


Step-by-step Guide
- Standard Version
- On the left panel, ensure "LOWER BODY" and "GLOVE" are unchecked. Click "START MOCAP", then "AUTO CALIB".
- Follow the voice prompts and demo actions:
Standard Steps:
Voice Prompt Action Please stand at attention Stand straight, arms at sides Begin vertical calibration Start standing calibration End vertical calibration End standing calibration Begin arm calibration Start arm calibration Please raise your hand Raise arms ~45°, then relax End arm calibration End arm calibration Begin Body calibration Start body calibration Please bend over Bend forward ~30°, then relax End body calibration End body calibration Calculating Calculating results Calibrated Calibration complete 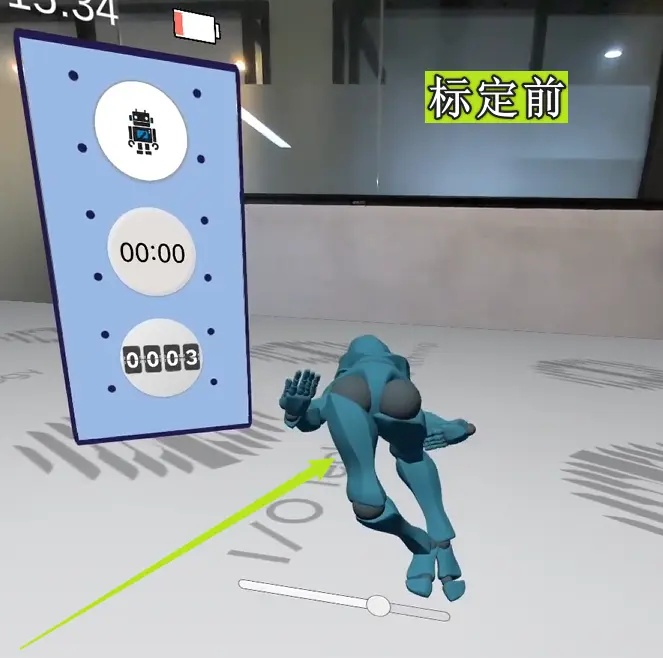
- On the left panel, ensure "LOWER BODY" and "GLOVE" are unchecked. Click "START MOCAP", then "AUTO CALIB".
- Pro Version
- On the left panel, ensure "LOWER BODY" and "GLOVE" are checked. Click "START MOCAP", then "AUTO CALIB". If not wearing lower suit, leave "LOWER BODY" unchecked.


- Follow the voice prompts and demo actions:
Pro Steps:
Voice Prompt Action Please stand at attention Stand straight, arms at sides Begin vertical calibration Start standing calibration End vertical calibration End standing calibration Begin arm calibration Start arm calibration Please raise your hand Raise arms ~45°, then relax End arm calibration End arm calibration Begin Body calibration Start body calibration Please bend over Bend forward ~30°, then relax End body calibration End body calibration Begin left leg calibration Start left leg calibration Please kick with your left leg Kick left leg forward ~30° End left leg calibration End left leg calibration Begin right leg calibration Start right leg calibration Please kick with your right leg Kick right leg forward ~30° End right leg calibration End right leg calibration Please put your hands together and hold Hold hands together at chest Begin hand calibration Start hand calibration End hand calibration End hand calibration Calculating Calculating results Calibrated Calibration complete 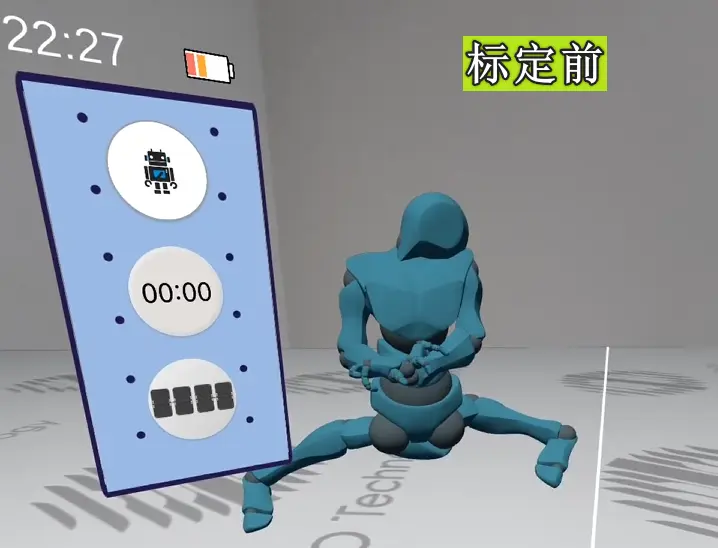

- On the left panel, ensure "LOWER BODY" and "GLOVE" are checked. Click "START MOCAP", then "AUTO CALIB". If not wearing lower suit, leave "LOWER BODY" unchecked.
VR Headset & Controller Joint Calibration (Optional)
Joint calibration of VR headset/controllers and mocap suit is optional. It improves visualization and is needed only for advanced development.
| Headset Calibration | Controller Calibration | ||||||||
|---|---|---|---|---|---|---|---|---|---|
After starting mocap, click CALIB VR HEAD. | After starting mocap, click CALIB VR CONTROLLER. | ||||||||
|
|
Step-by-step Guide
Headset Calibration
- Point controller at "START MOCAP", press trigger to start mocap, then click "CALIB VR HEAD".
Steps:
| Voice Prompt | Action |
|---|---|
| Please bend down and turn around | Bend forward in three directions: front, right, left (~30°) |
| Begin VR head calibration | Start calibration |
| End VR head calibration | End calibration |
Controller Calibration
- After starting mocap, click "CALIB VR CONTROLLER".
Steps:
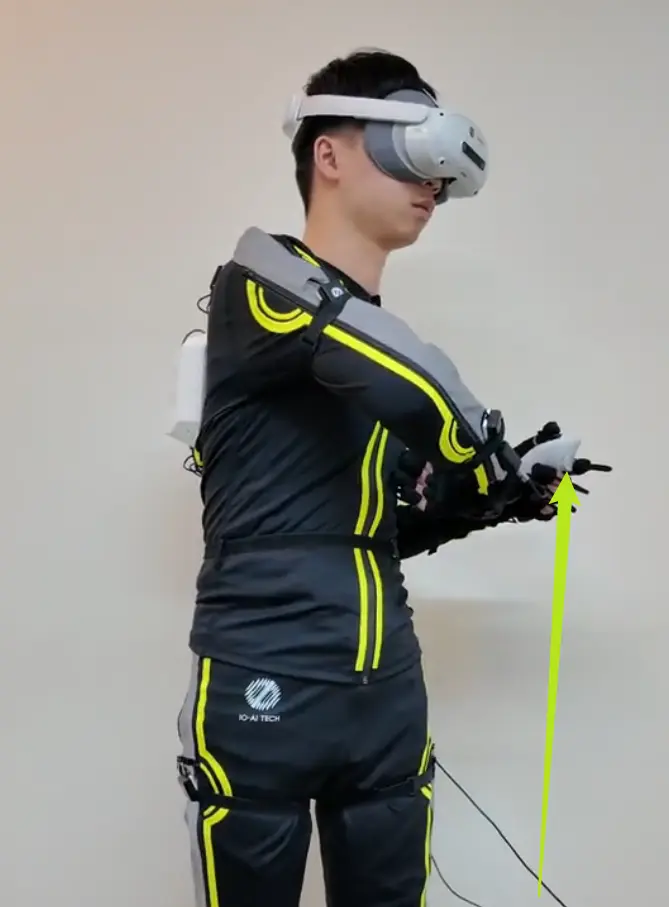
Voice Prompt Action Please hold the controller and move your hand Hold VR controllers, move arms freely for ~10s Begin VR controller calibration Start calibration End VR controller calibration End calibration 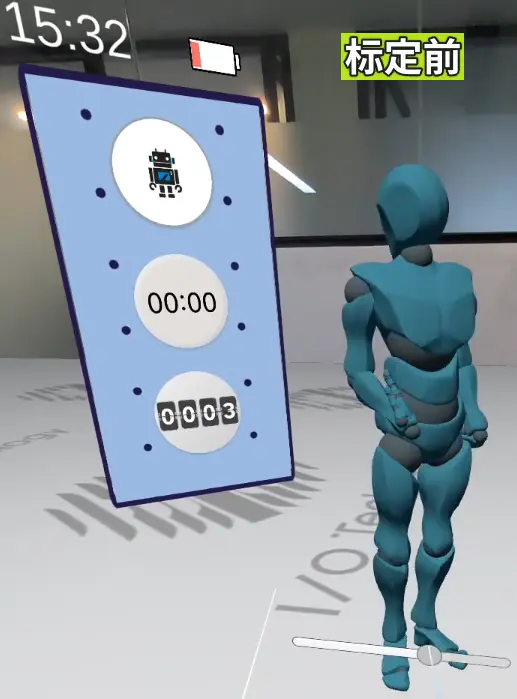

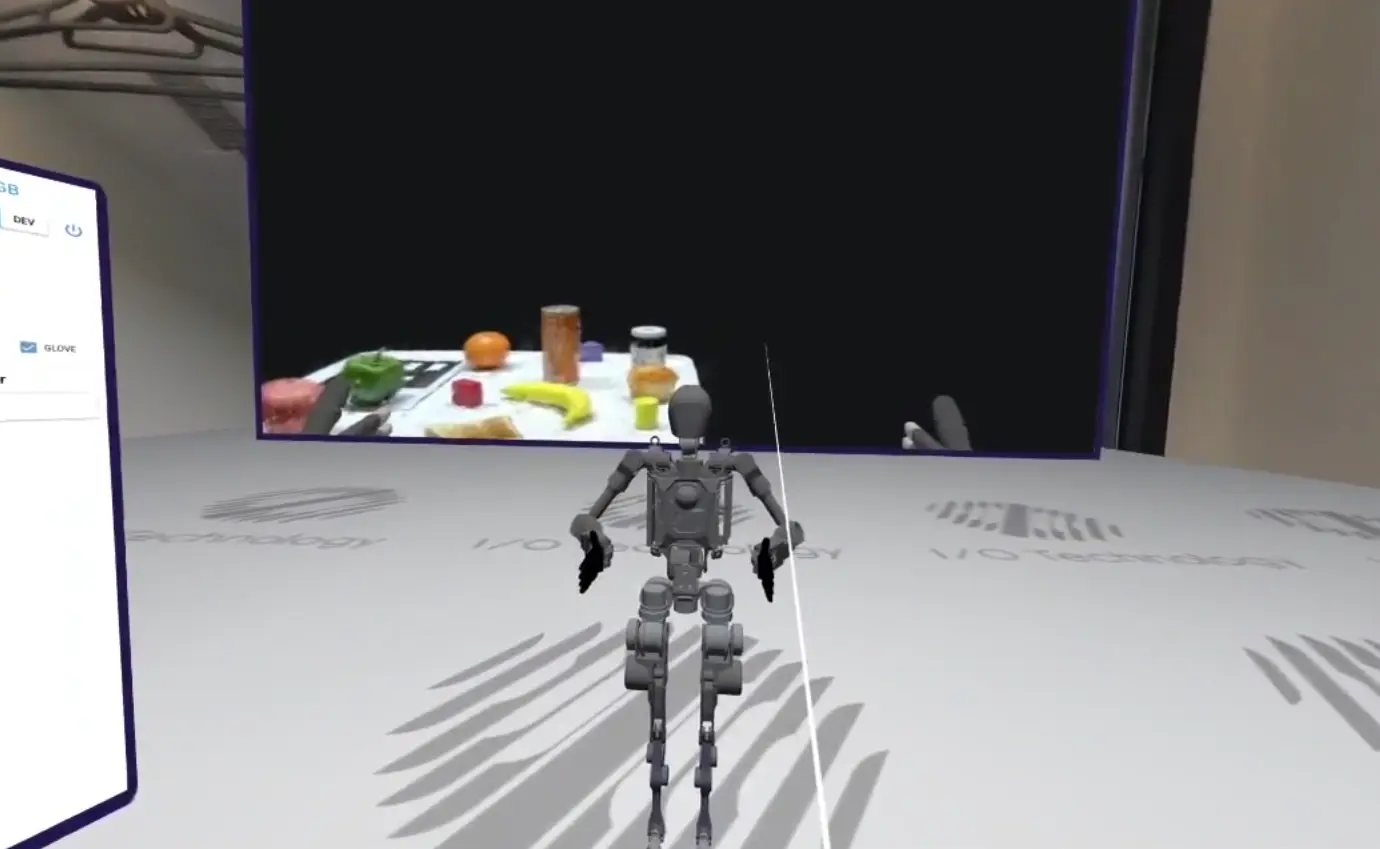
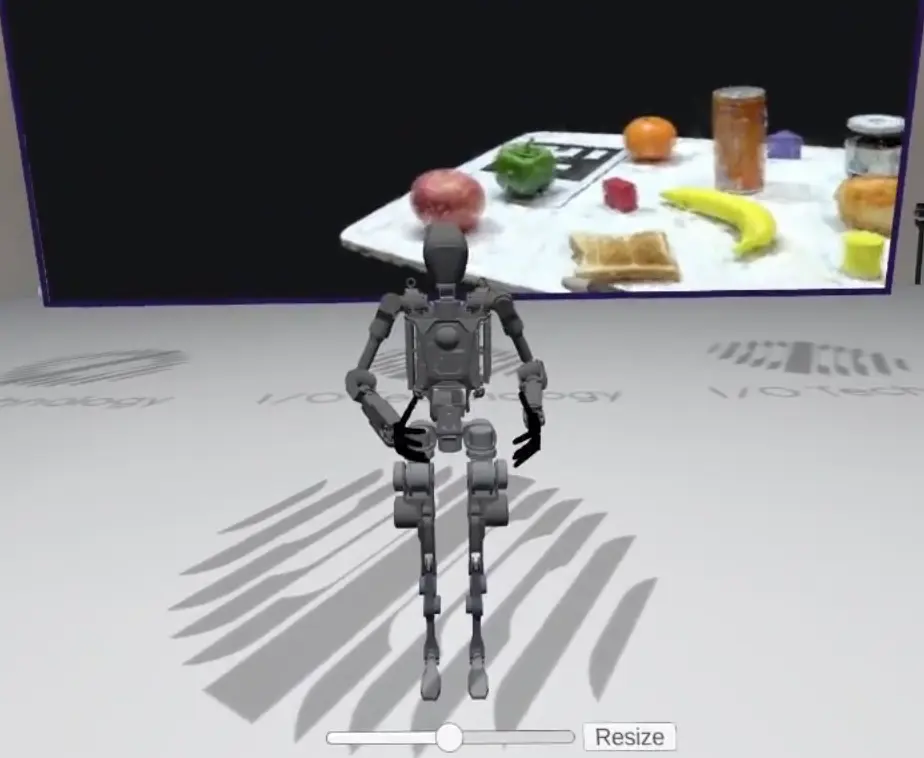
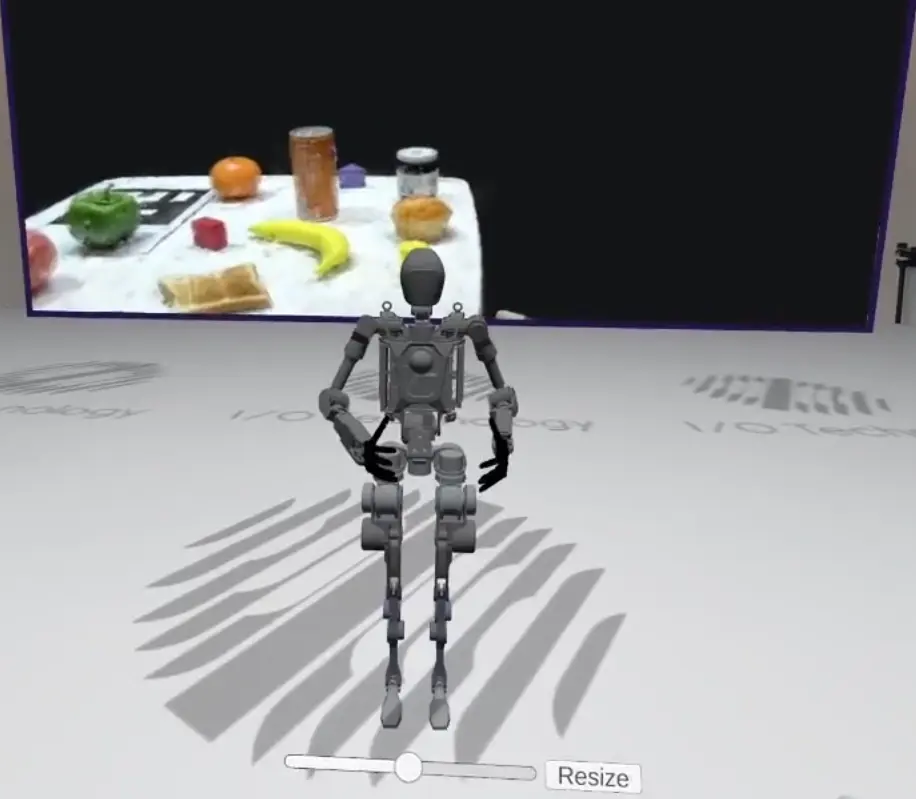
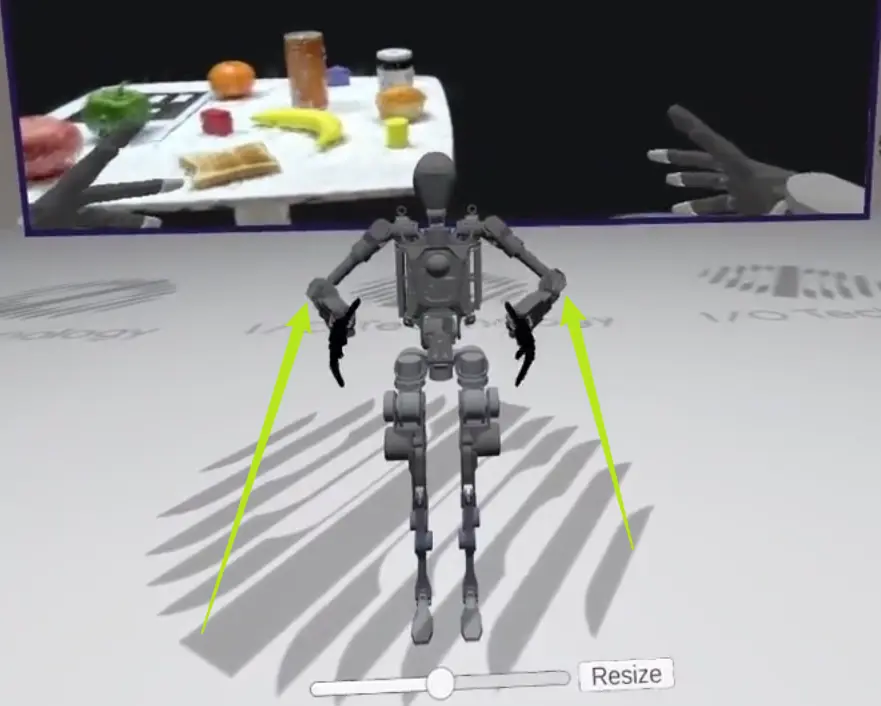
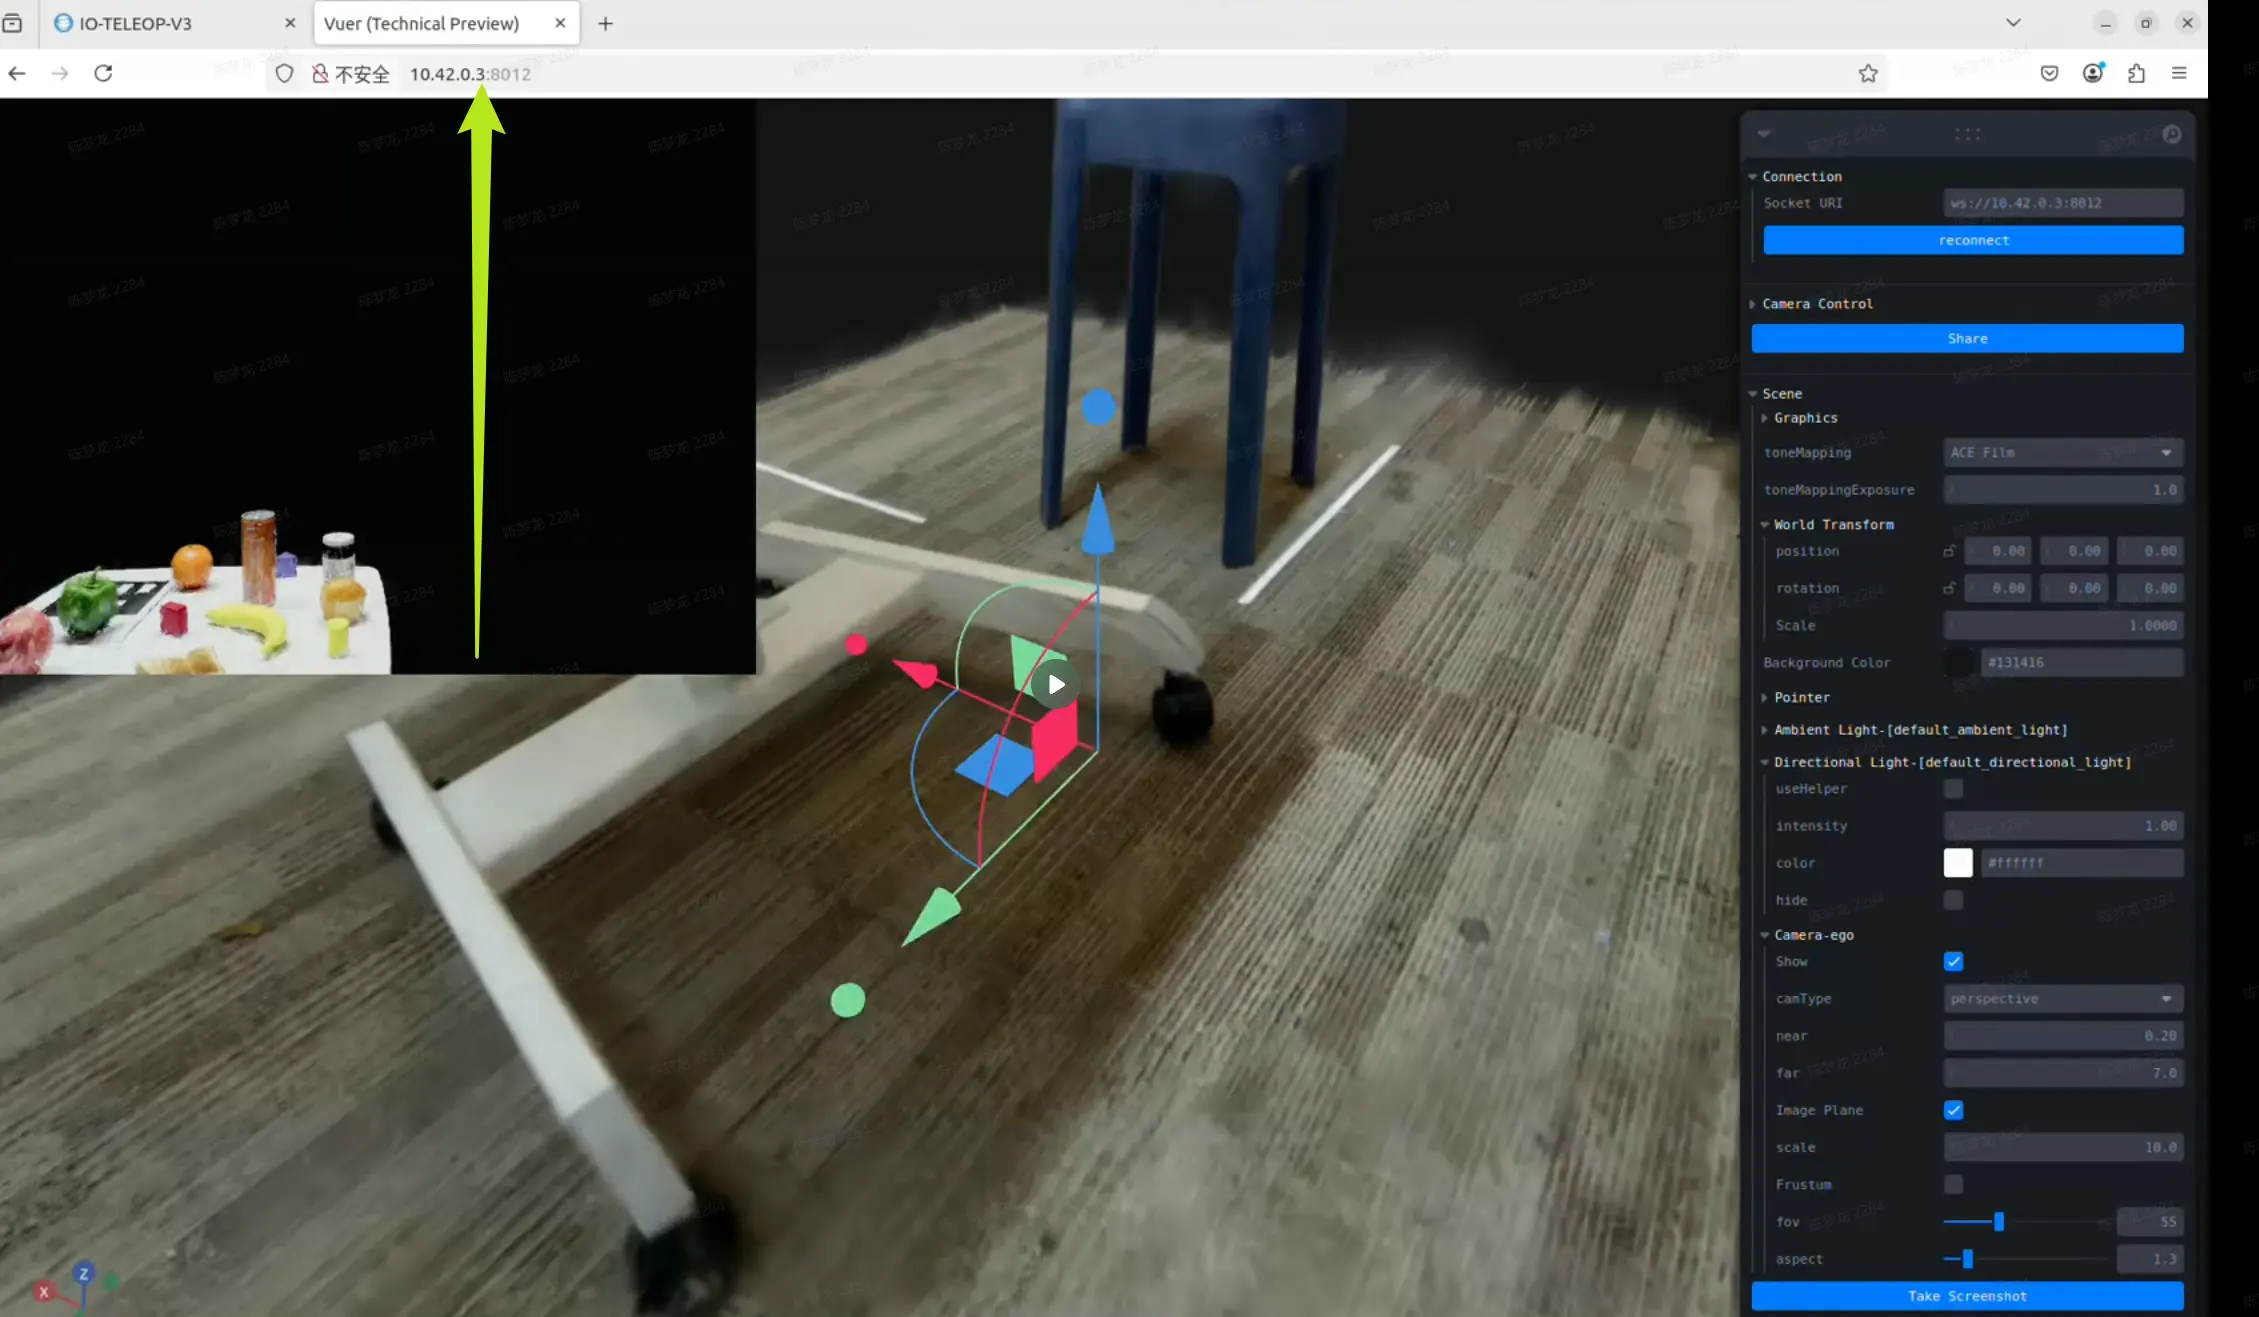
Out-of-the-box Demo: OpenLoongVuer
To let you experience teleoperation without a real robot, we provide a demo environment in Vuer with the OpenLoong robot.
Start Vuer
Prepare a laptop to open the Vuer web page. Any OS is fine as long as it can connect to Wi-Fi and open a browser.
- Connect the laptop to the device Wi-Fi.
- Open browser and go to http://10.42.0.3:8012
Step-by-step Guide

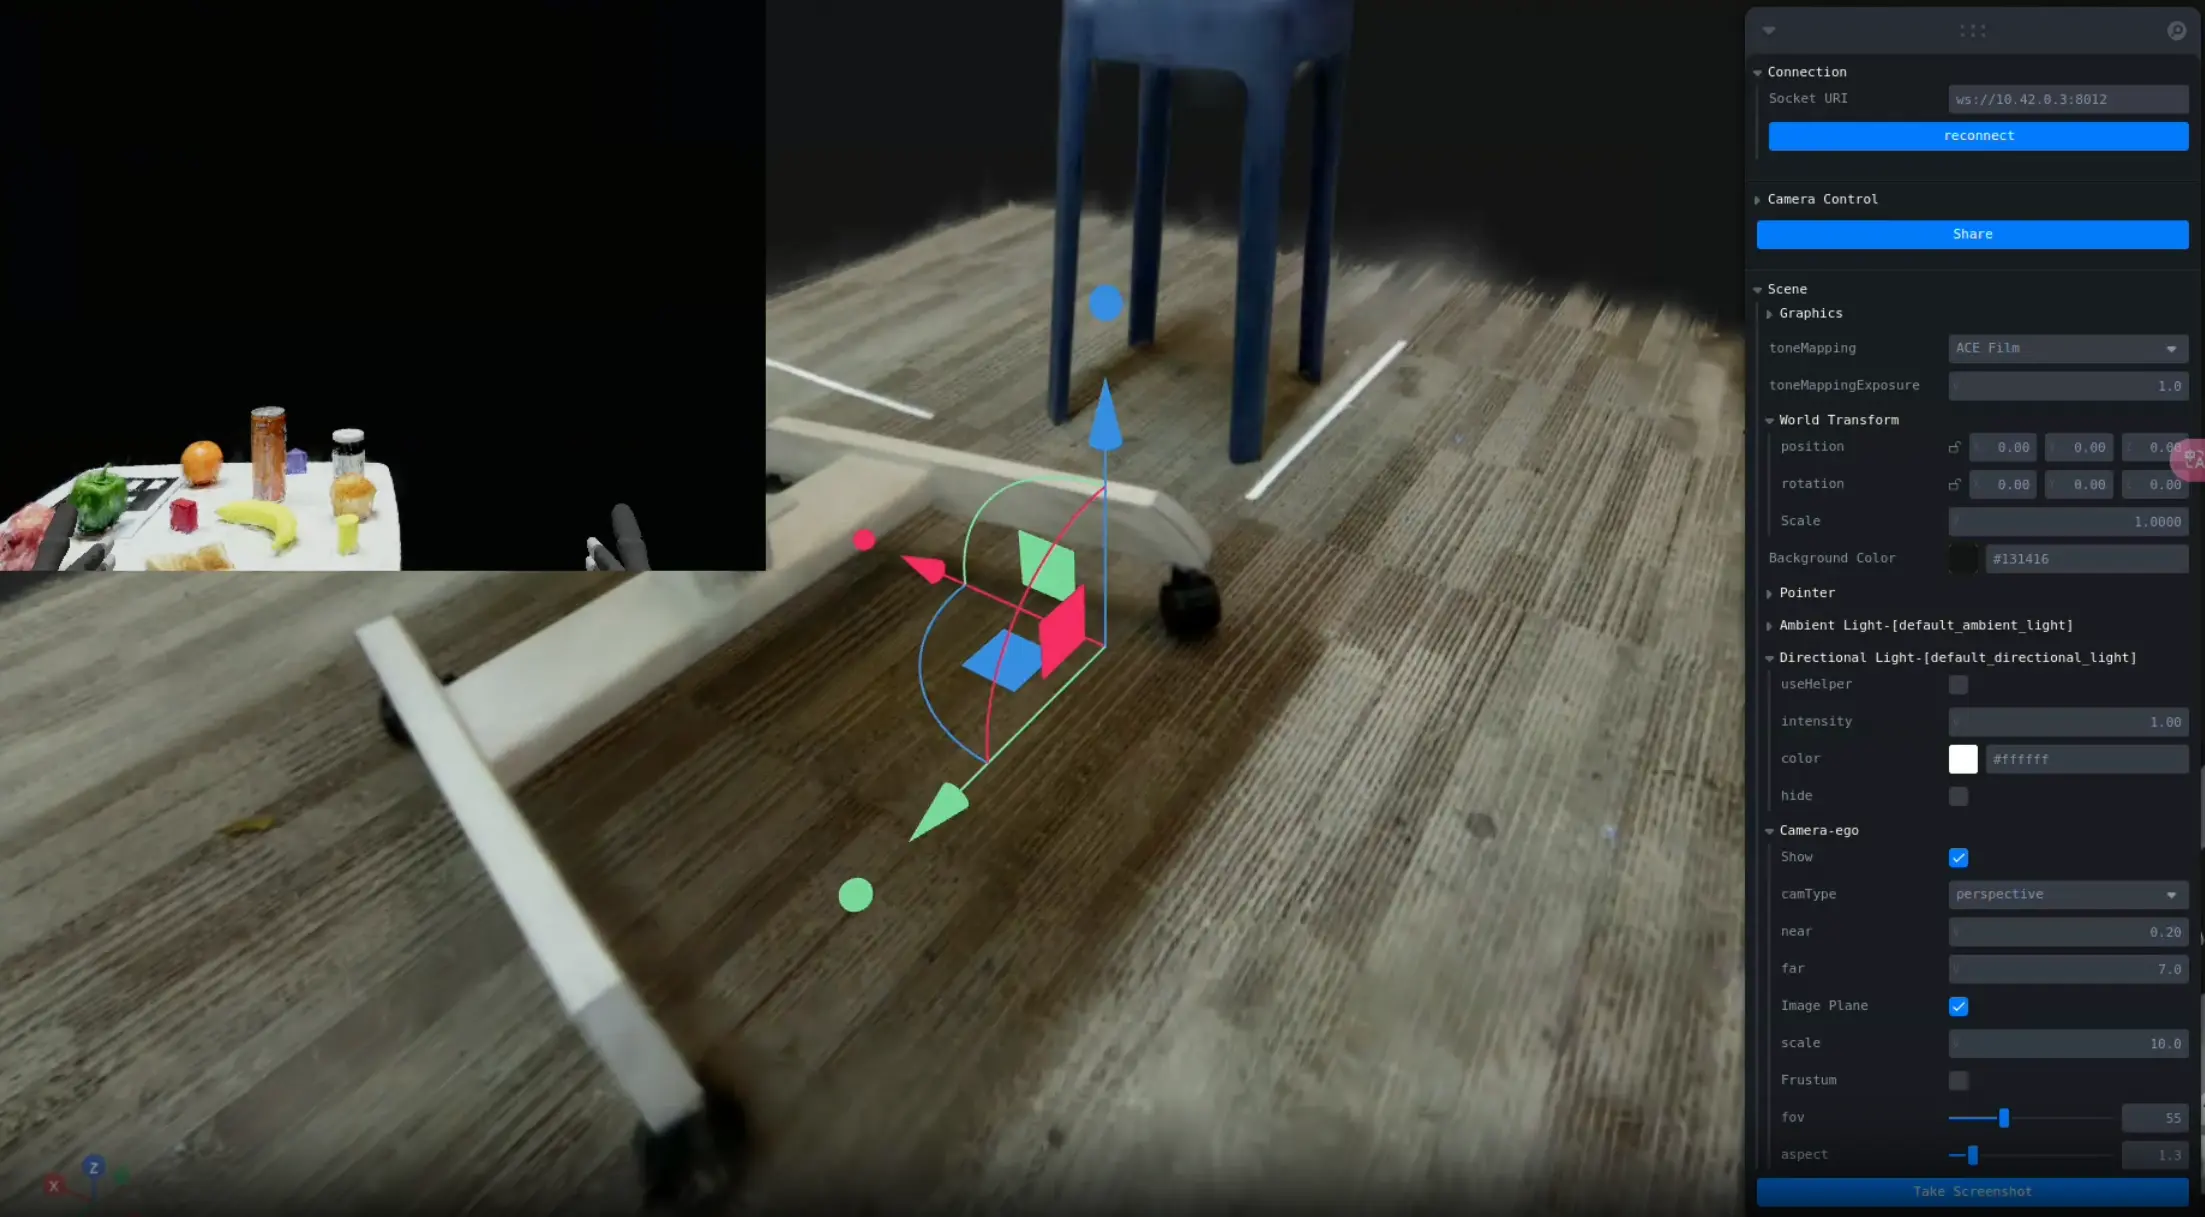
If Vuer lags, use a laptop with a better GPU.
Control the Robot
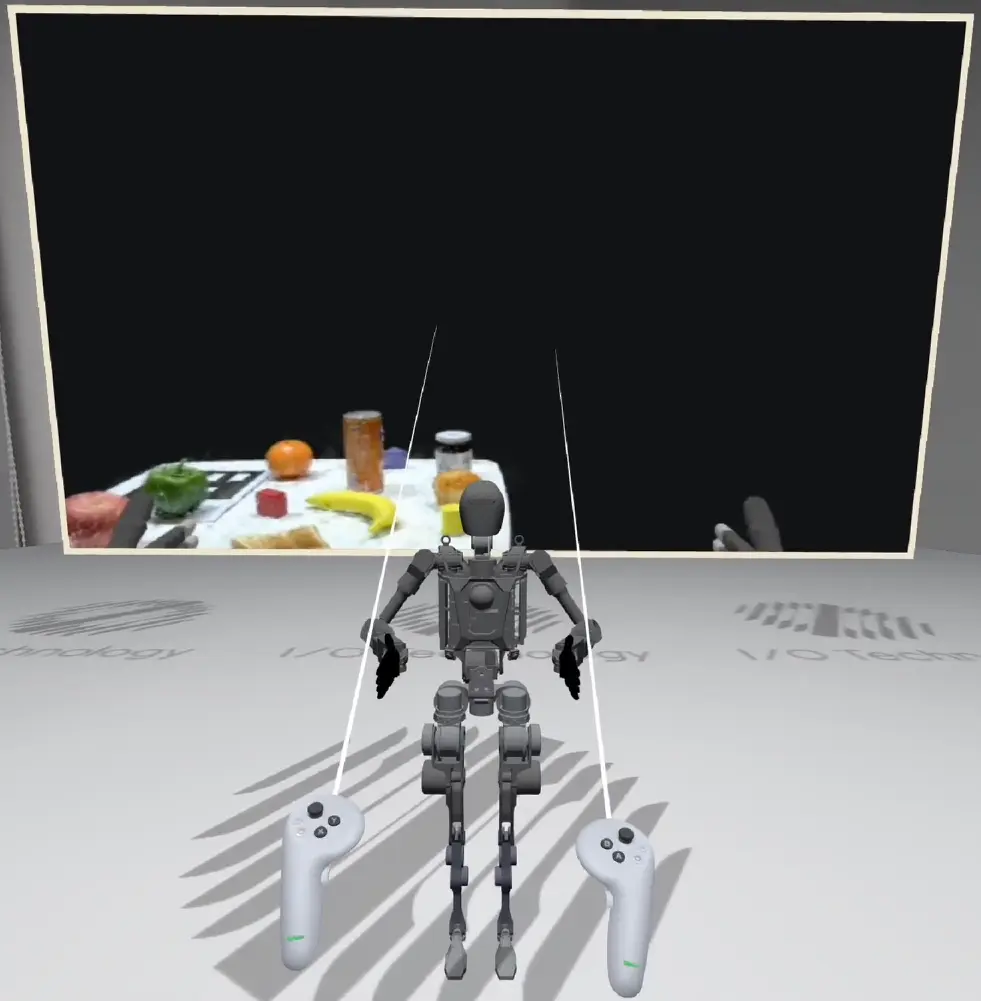
You can now control the OpenLoong robot in Vuer:
| Standard | Pro |
|---|---|
Step-by-step Guide
Standard:
- Connect to TeleSuit Wi-Fi, enter IO TeleXperience APP.
- Point controller at "START MOCAP", press trigger to start mocap. Check robot model movement.
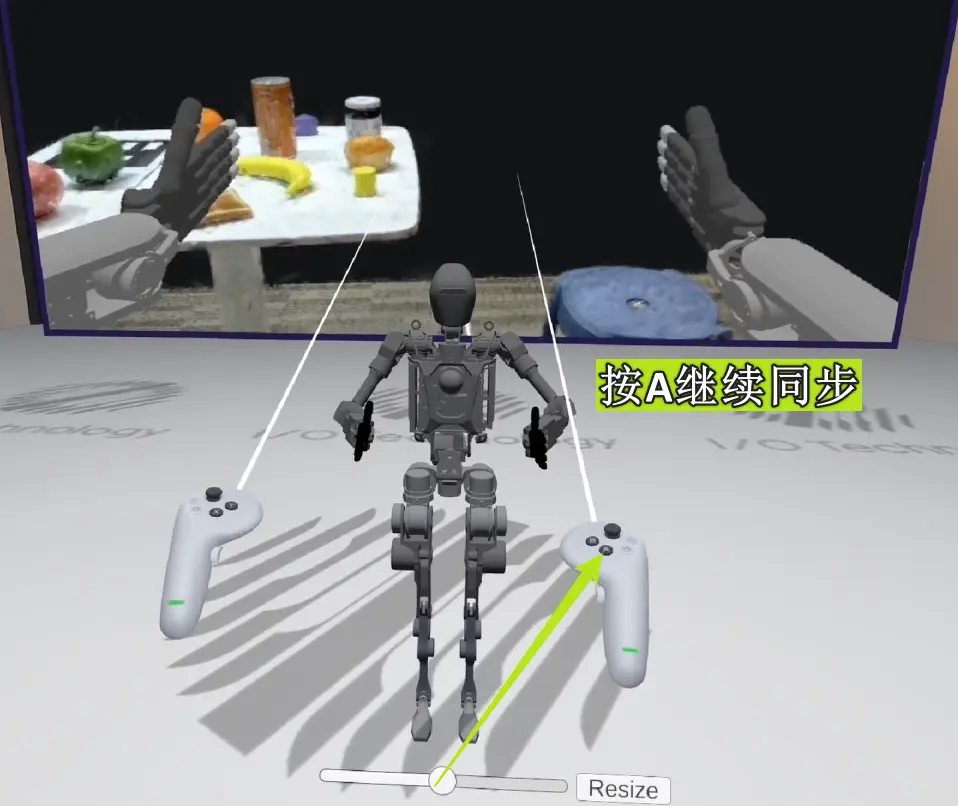
- Enable teleoperation. When button shows "STOP TELEOP", teleoperation is active. Before syncing, hold the home button to center VR view.
- Press right controller A to start sync. Robot follows your movement. To recalibrate view, stop sync first.
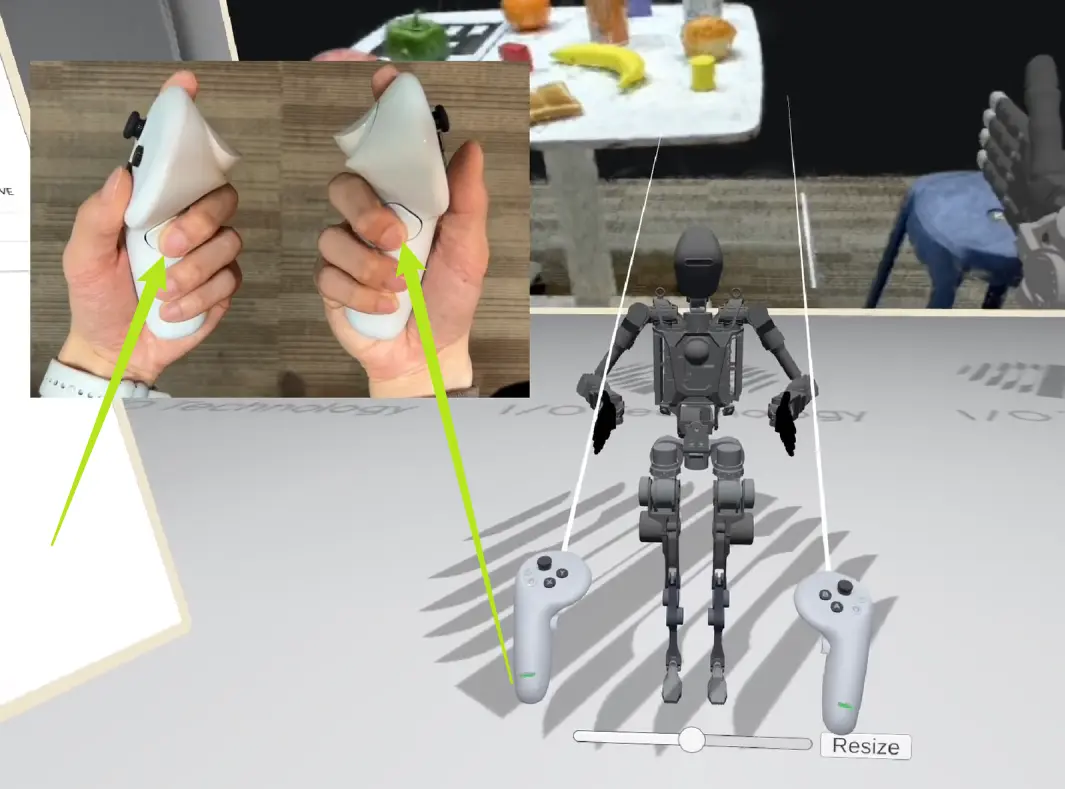
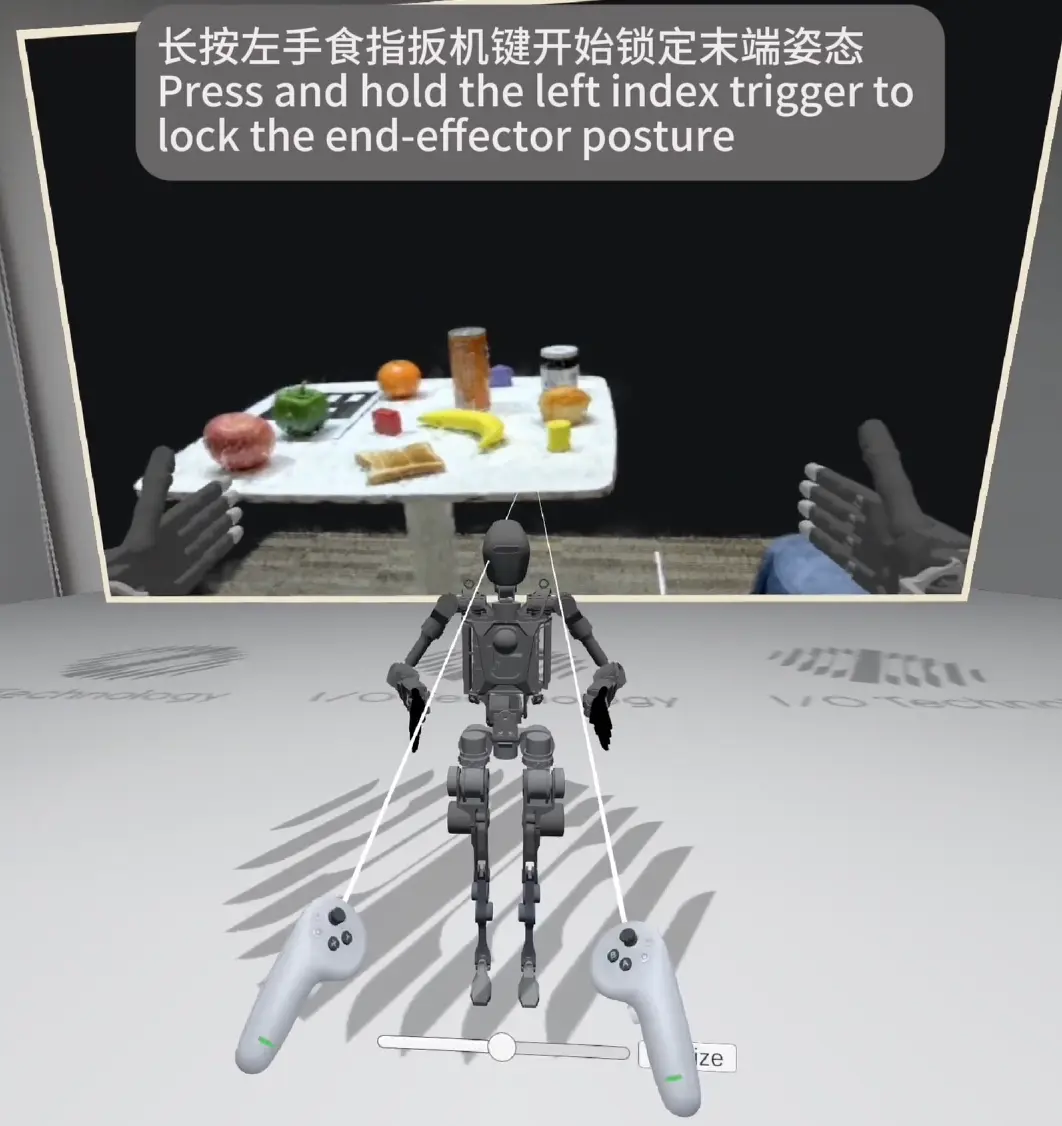
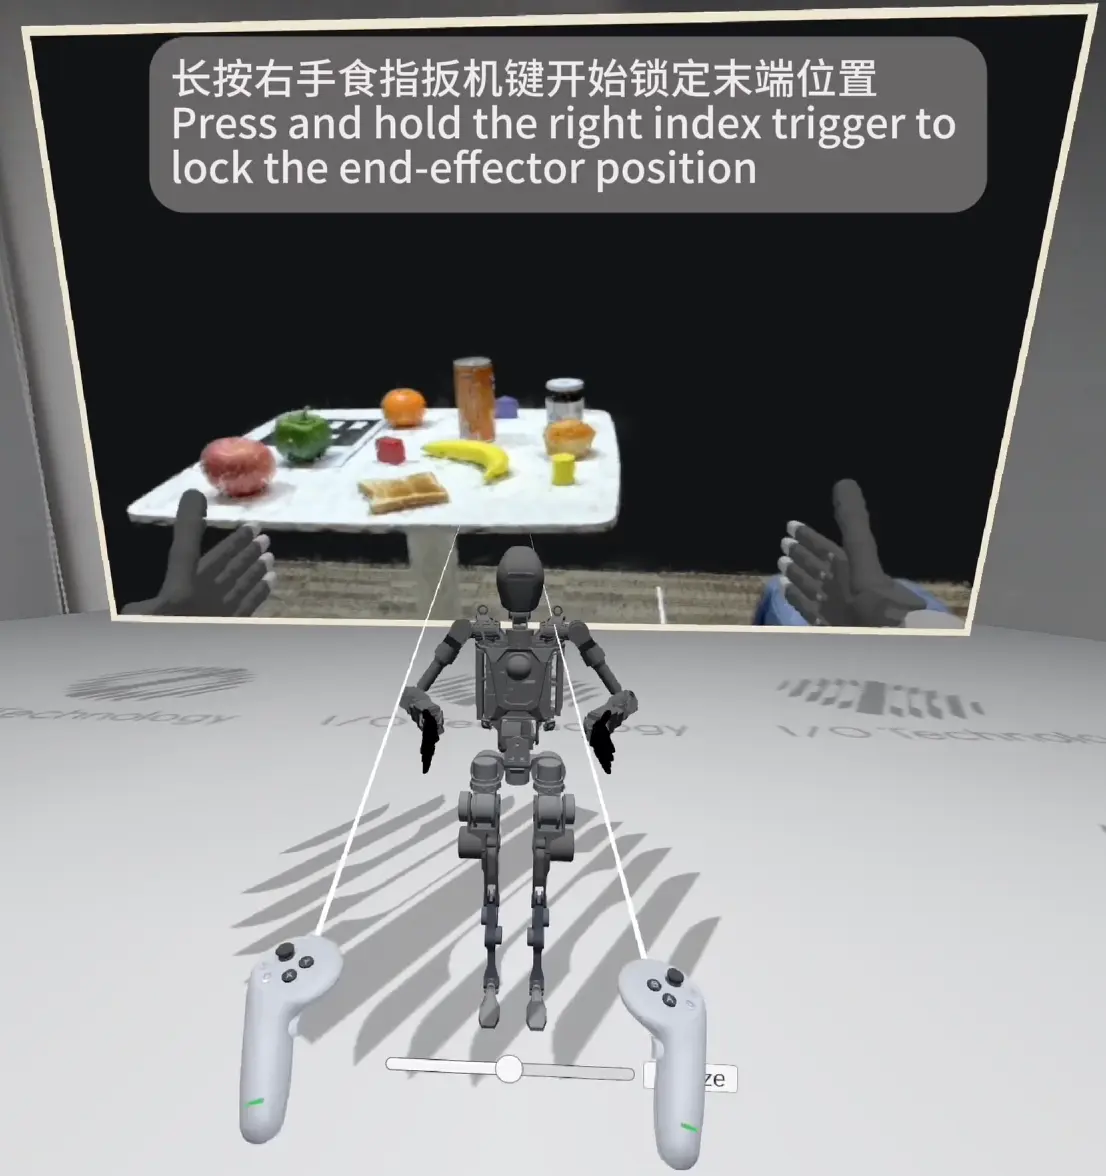
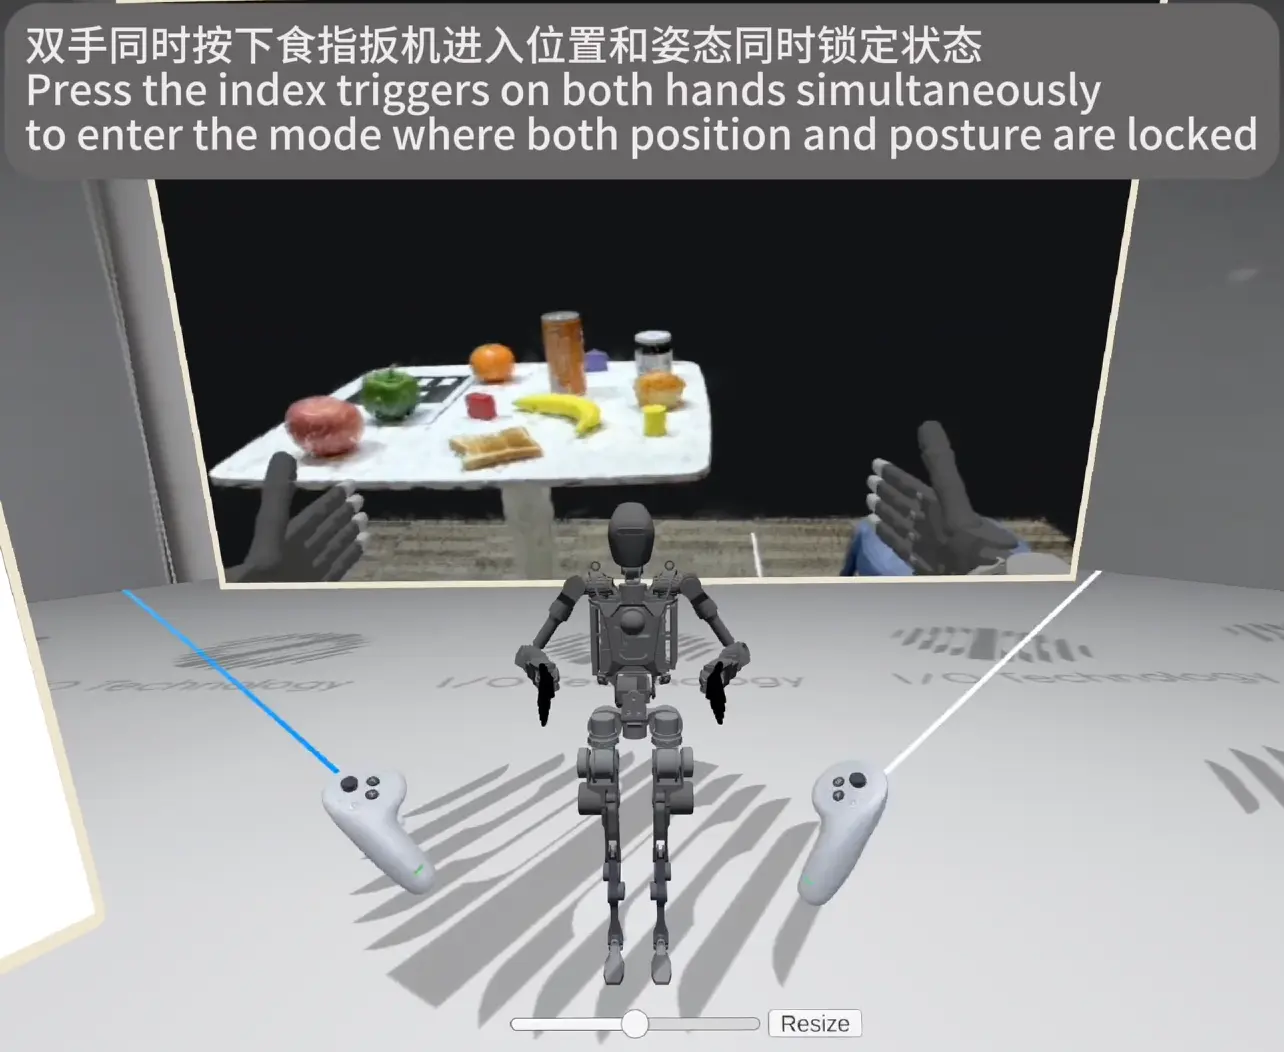
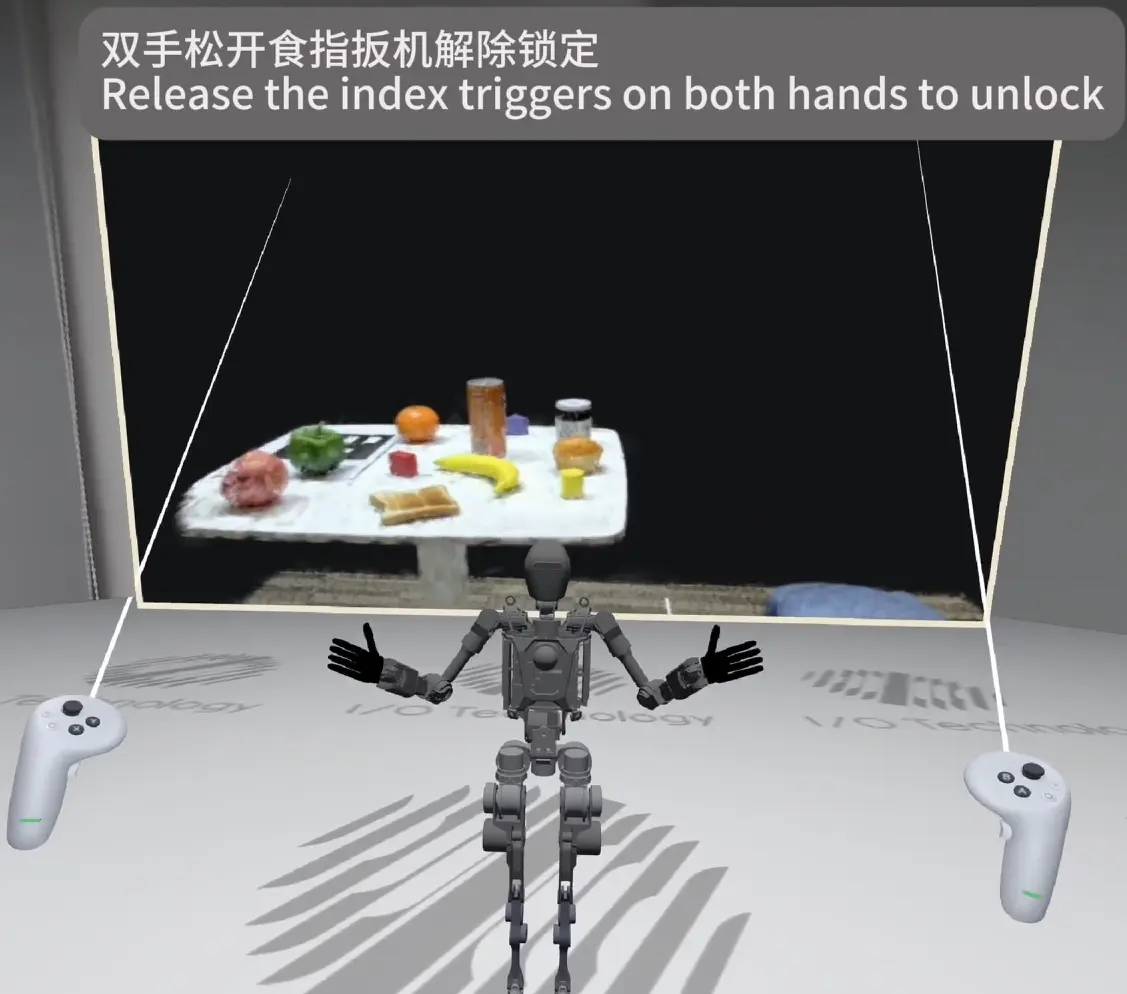
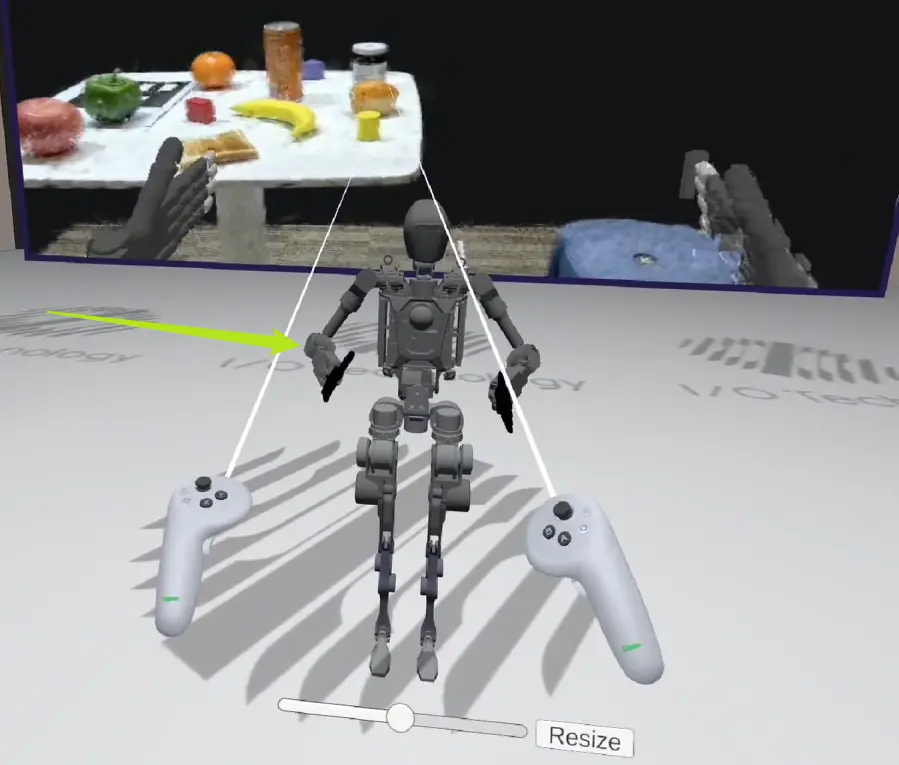
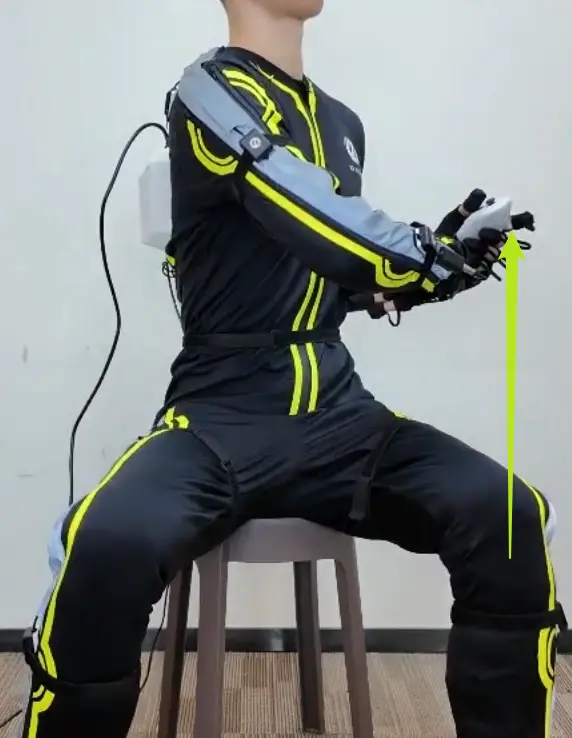
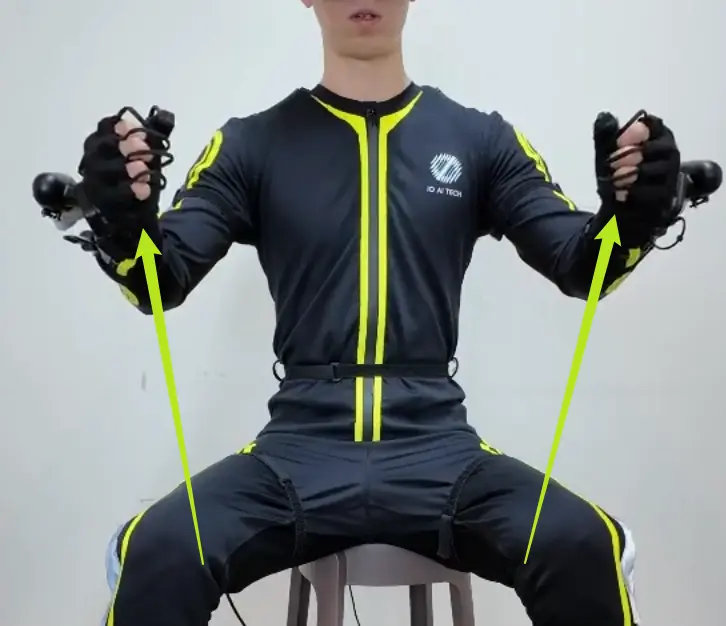
- Hold left trigger to lock end-effector orientation; hold right trigger to lock position; hold both to lock both; release to unlock.
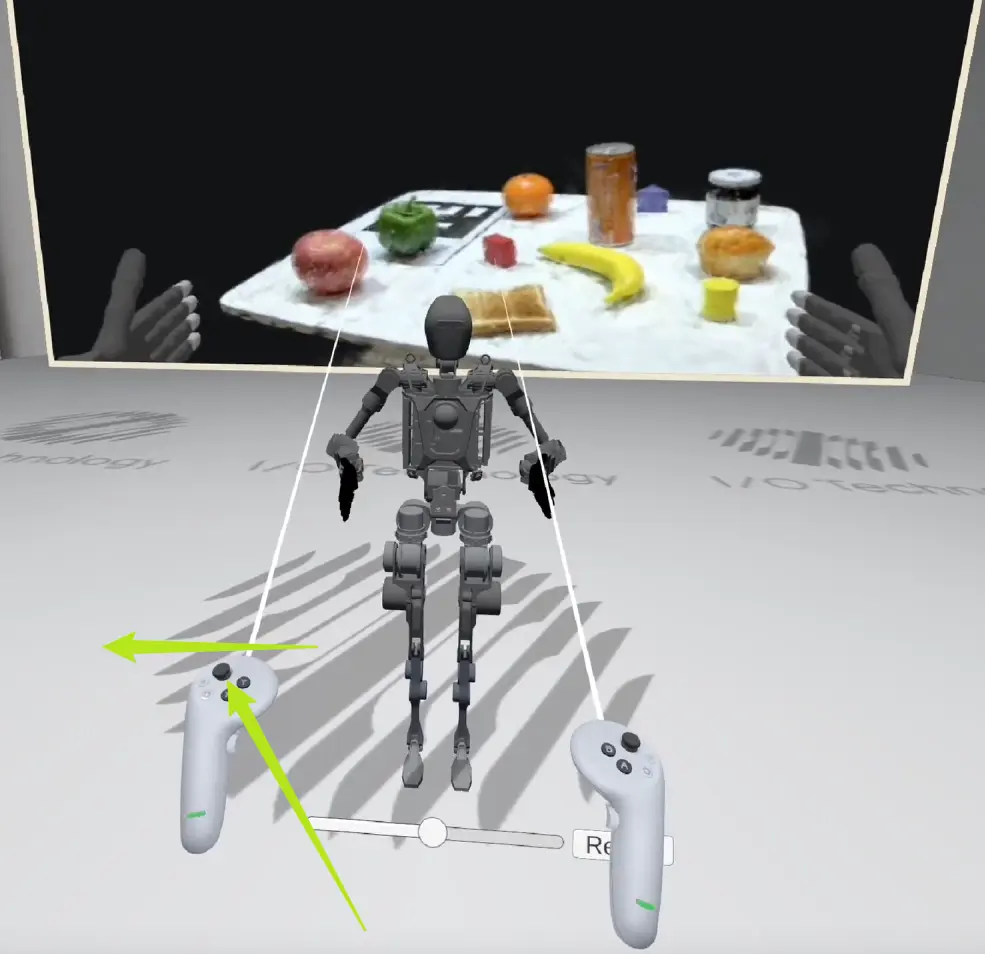
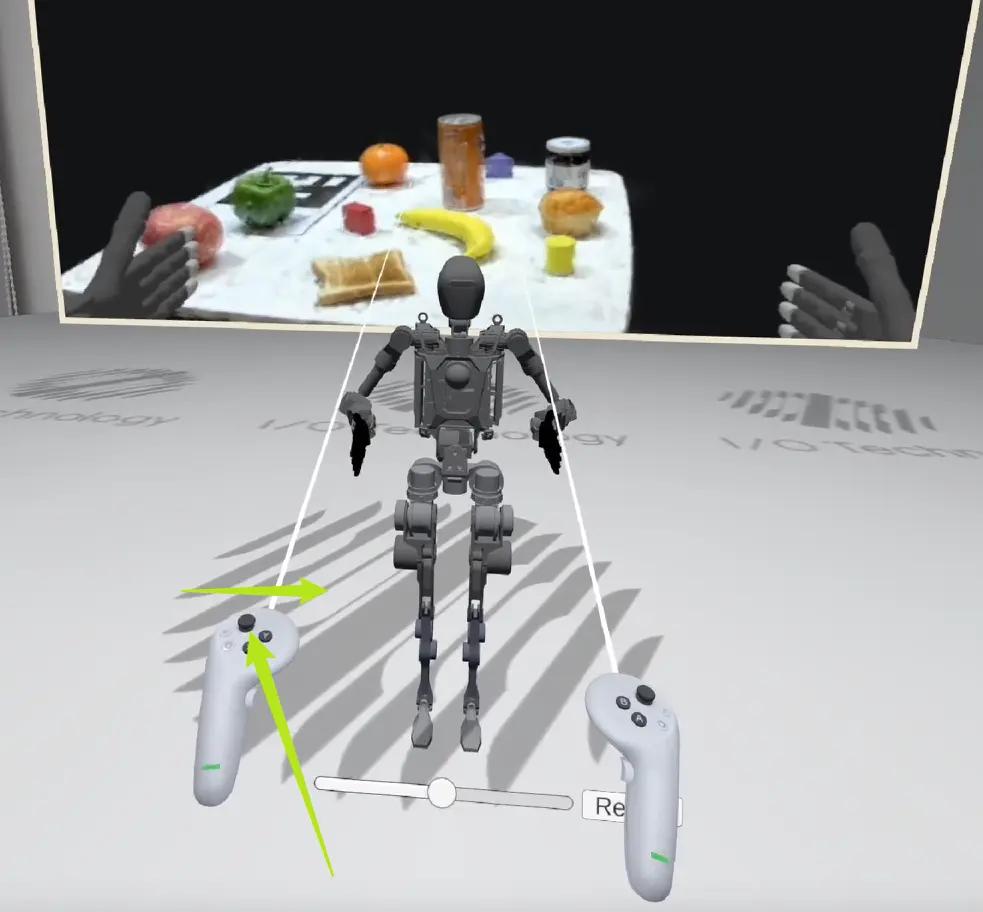
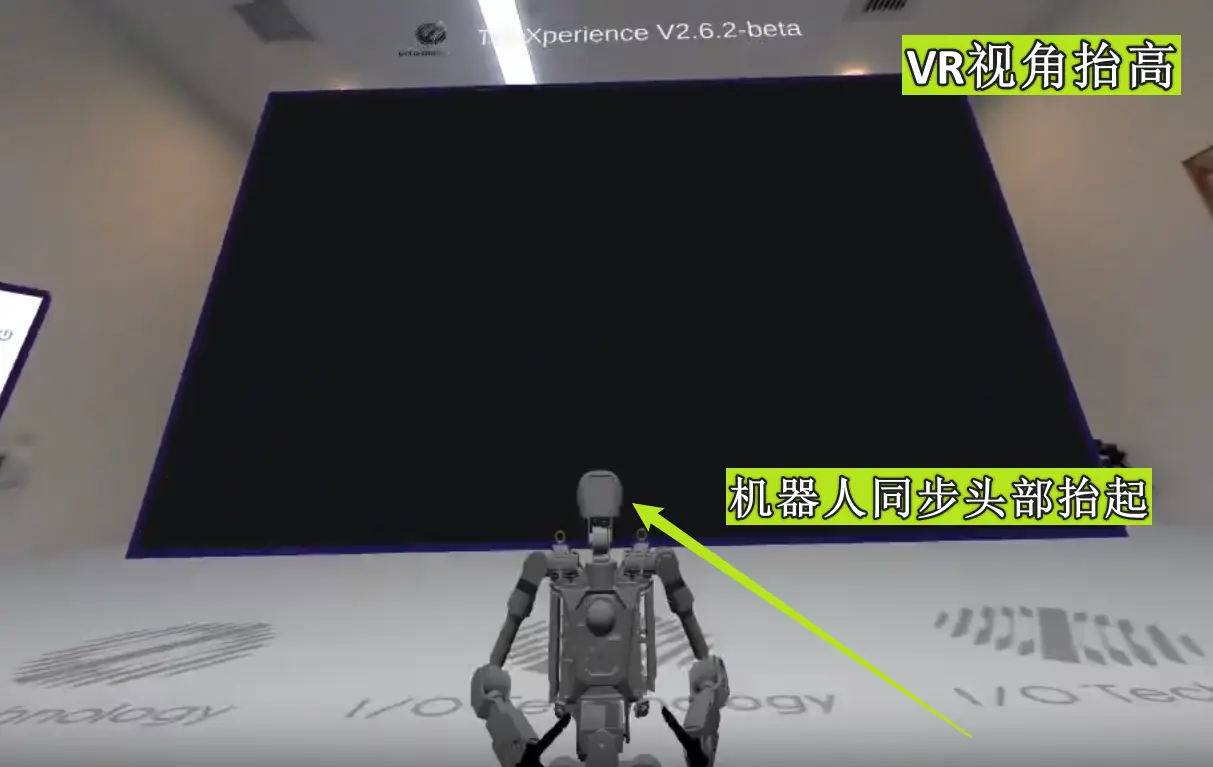
- Use left joystick: forward/back/left/right to move robot; move your head to control robot head.
- Press B to stop sync, A to resume.

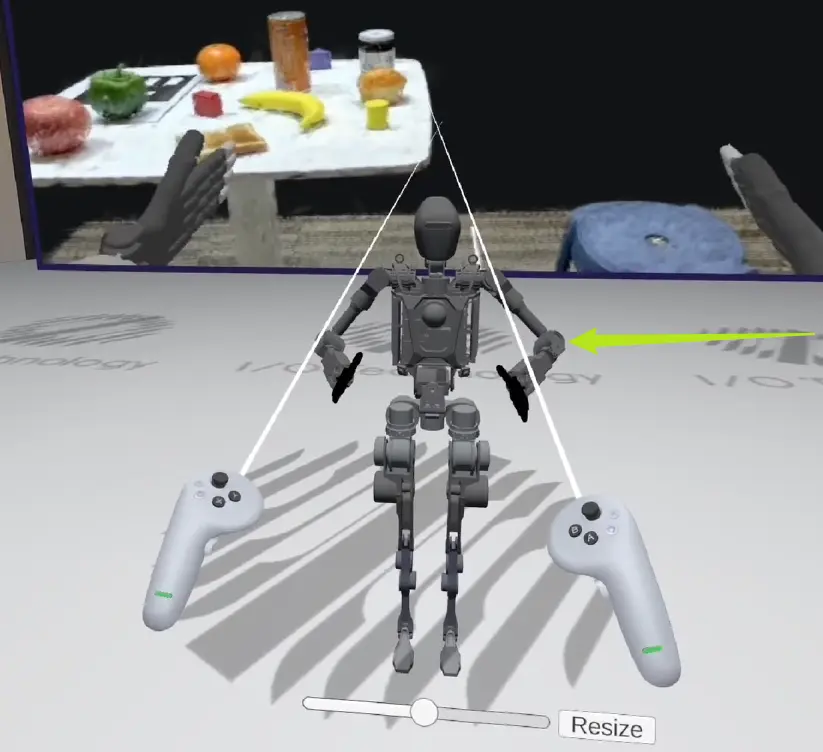
- After "START SYNC", move only elbows to feel redundancy optimization.
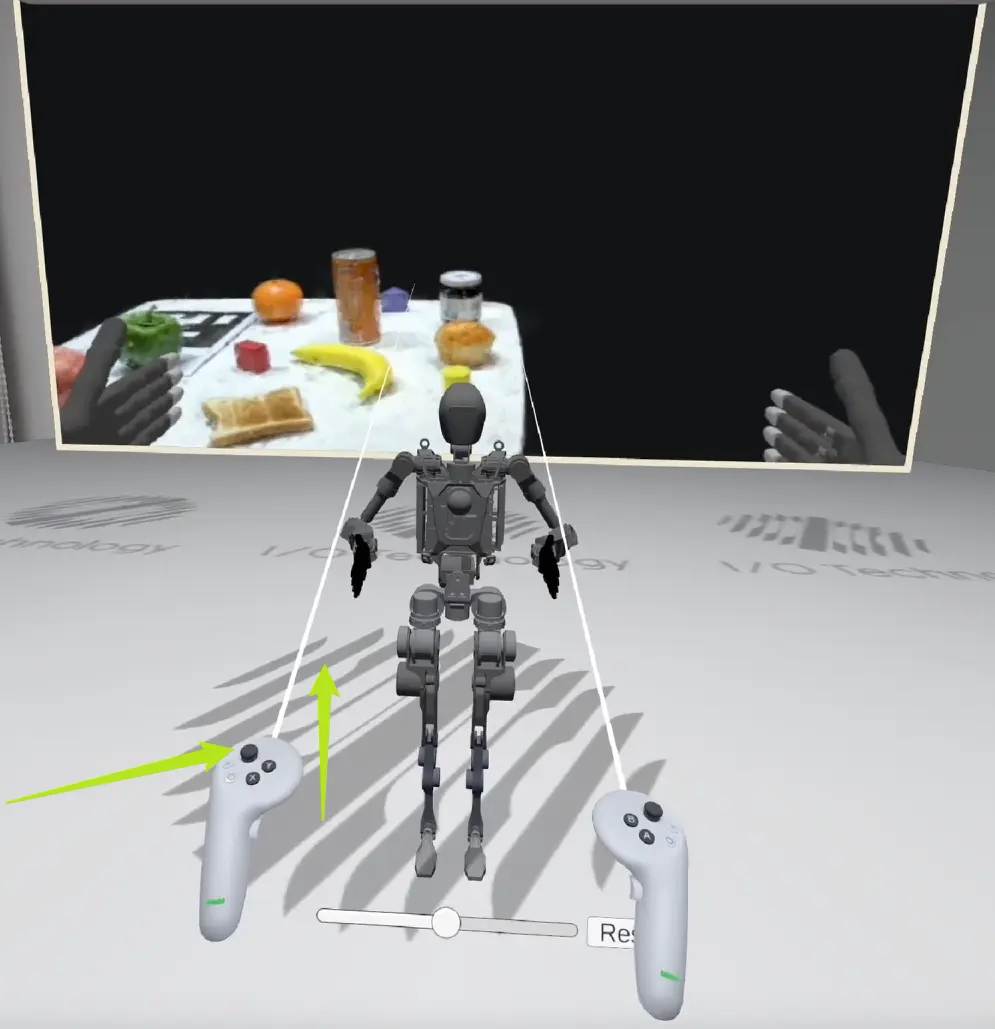
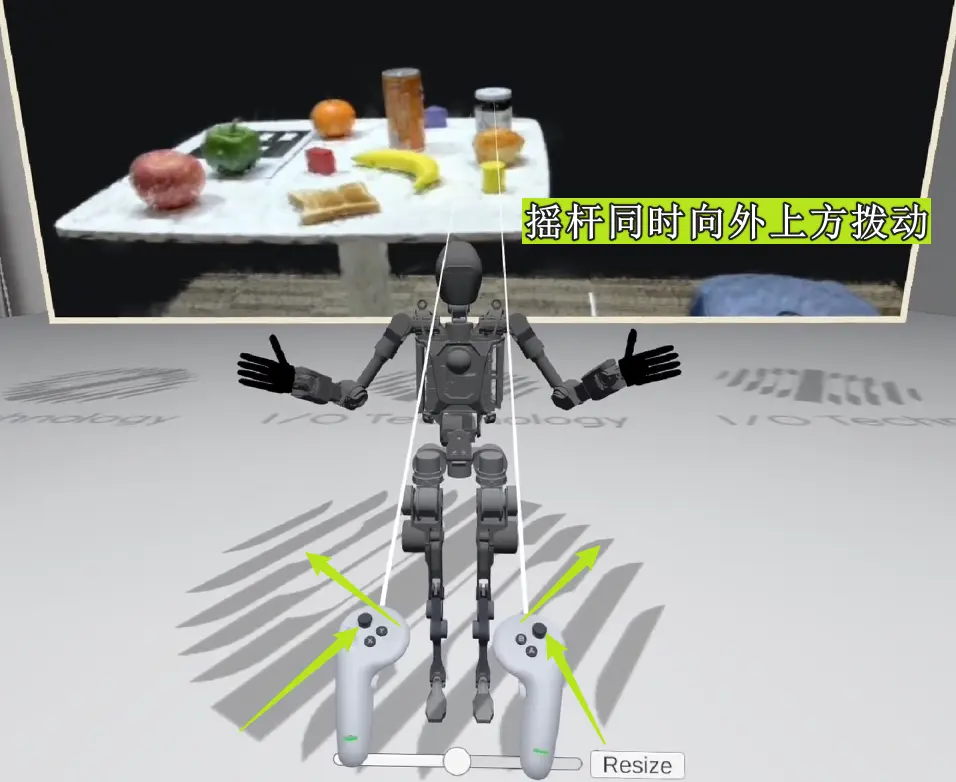
- After "STOP SYNC", reset robot by pushing both joysticks outward for ~2s.

Pro:
- Connect TeleSuit Wi-Fi, enter IO TeleXperience APP.
- Point controller at "START MOCAP", press trigger to start mocap.
- Observe robot model on right side for correct movement.
- Point controller at "START TELEOP" to enable teleoperation. When button shows "STOP TELEOP", teleoperation is active.
- Before syncing, hold right "home" button to center VR view. After syncing, recalibration is not allowed unless you stop sync first.
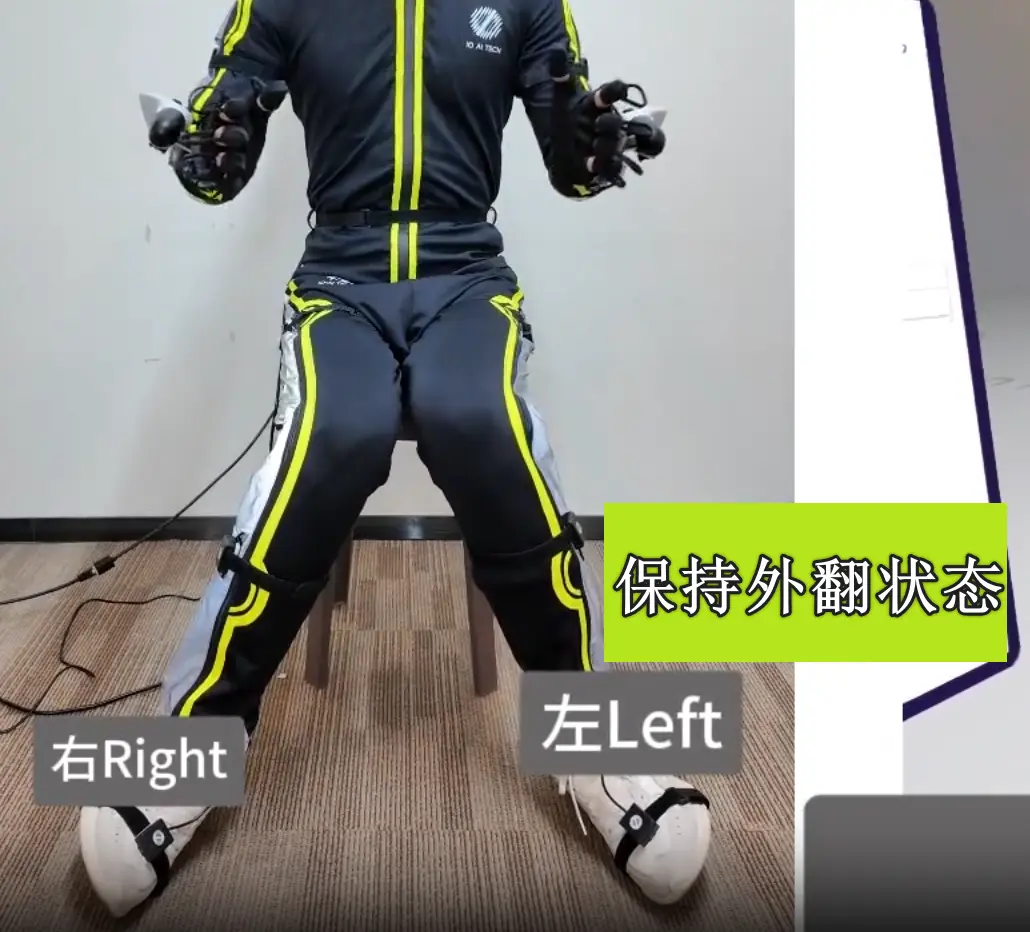
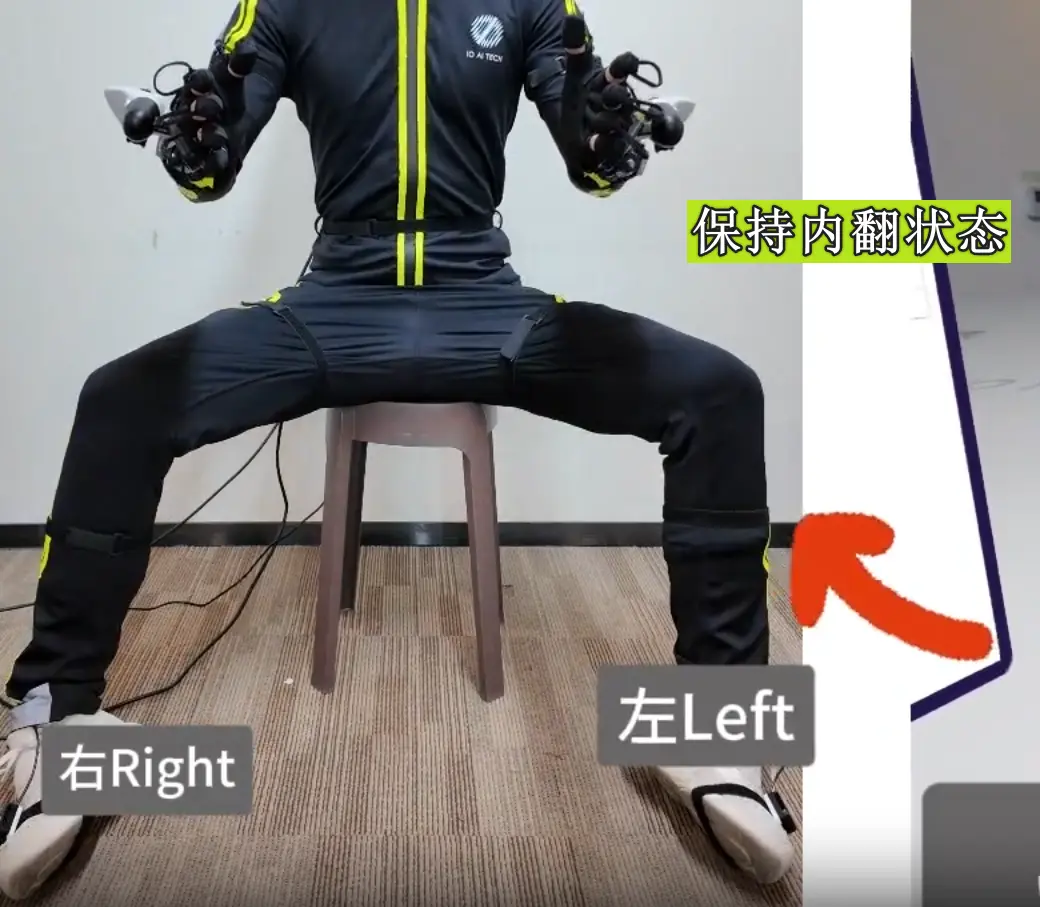
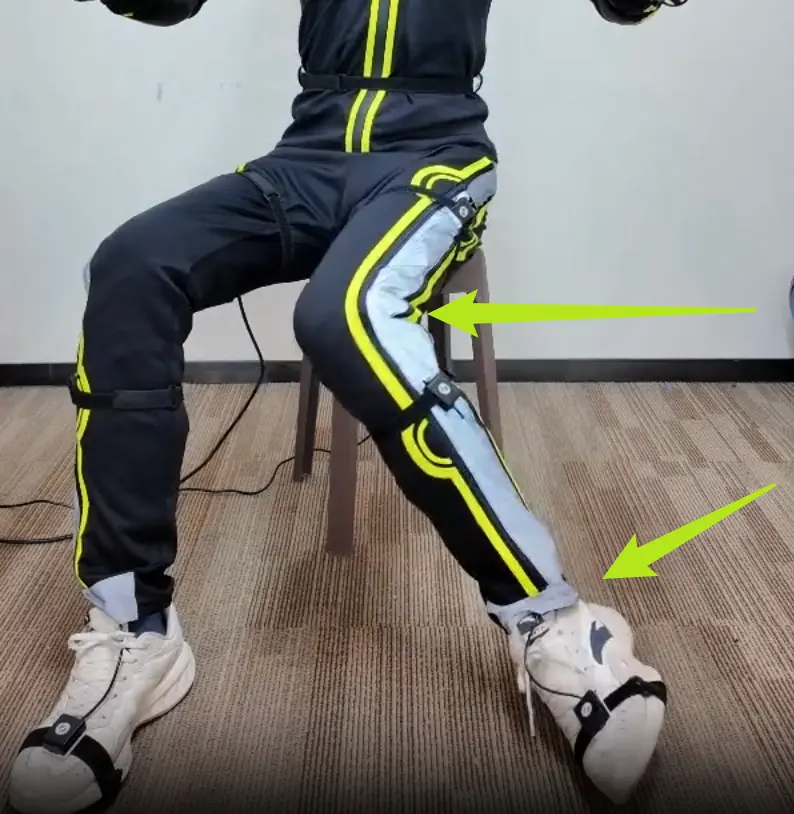
- After enabling teleoperation, right foot eversion resumes, robot arm syncs with your arm.
- After syncing:
-
- Both feet eversion and hold
- Both feet inversion and hold
-
- With VR headset on, robot head and dexterous hand follow your head and fingers.

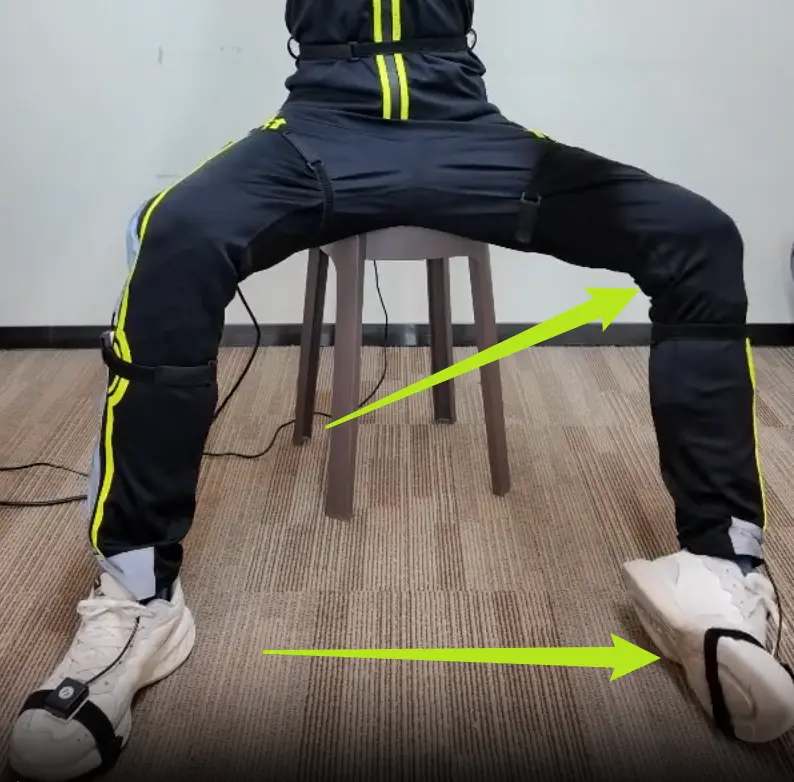
- Lift left heel to move forward.
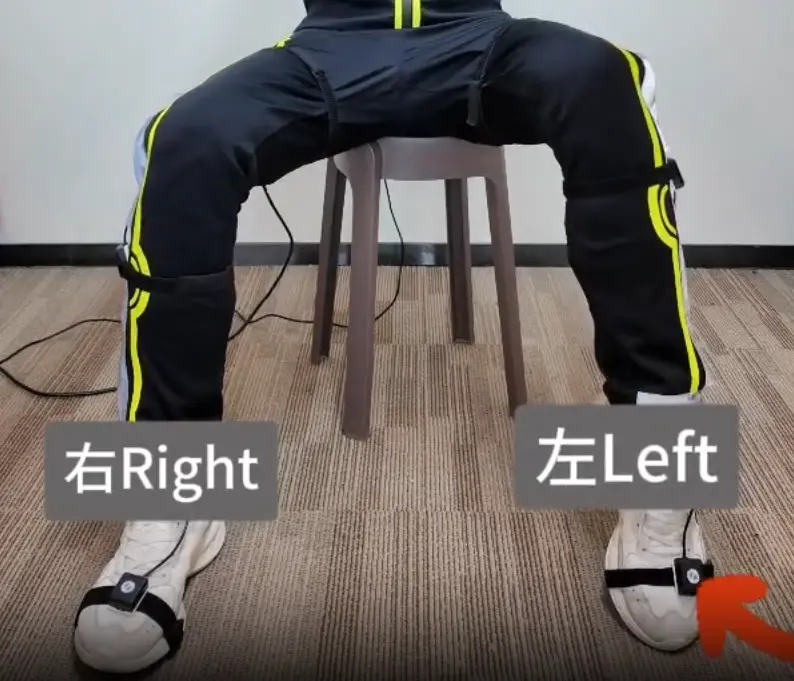
- Rotate left foot left/right to turn.
- Lift left toe to move backward.

- After enabling teleoperation, right foot inversion/eversion resumes.

- After "START SYNC", move only elbows to feel redundancy optimization.
- Rotate both feet outward for 1s to reset robot to initial pose.
Data Collection
| Standard | Pro |
|---|---|
Step-by-step Guide
Standard:
- Press X on left controller to start recording. Timer increases. Press Y to stop and save. Hold Y for 2s to cancel and delete.
Pro:
- After syncing, invert left foot to start recording. Timer increases.
- After syncing, evert left foot to stop and save. Hold eversion for 2s to cancel and delete.
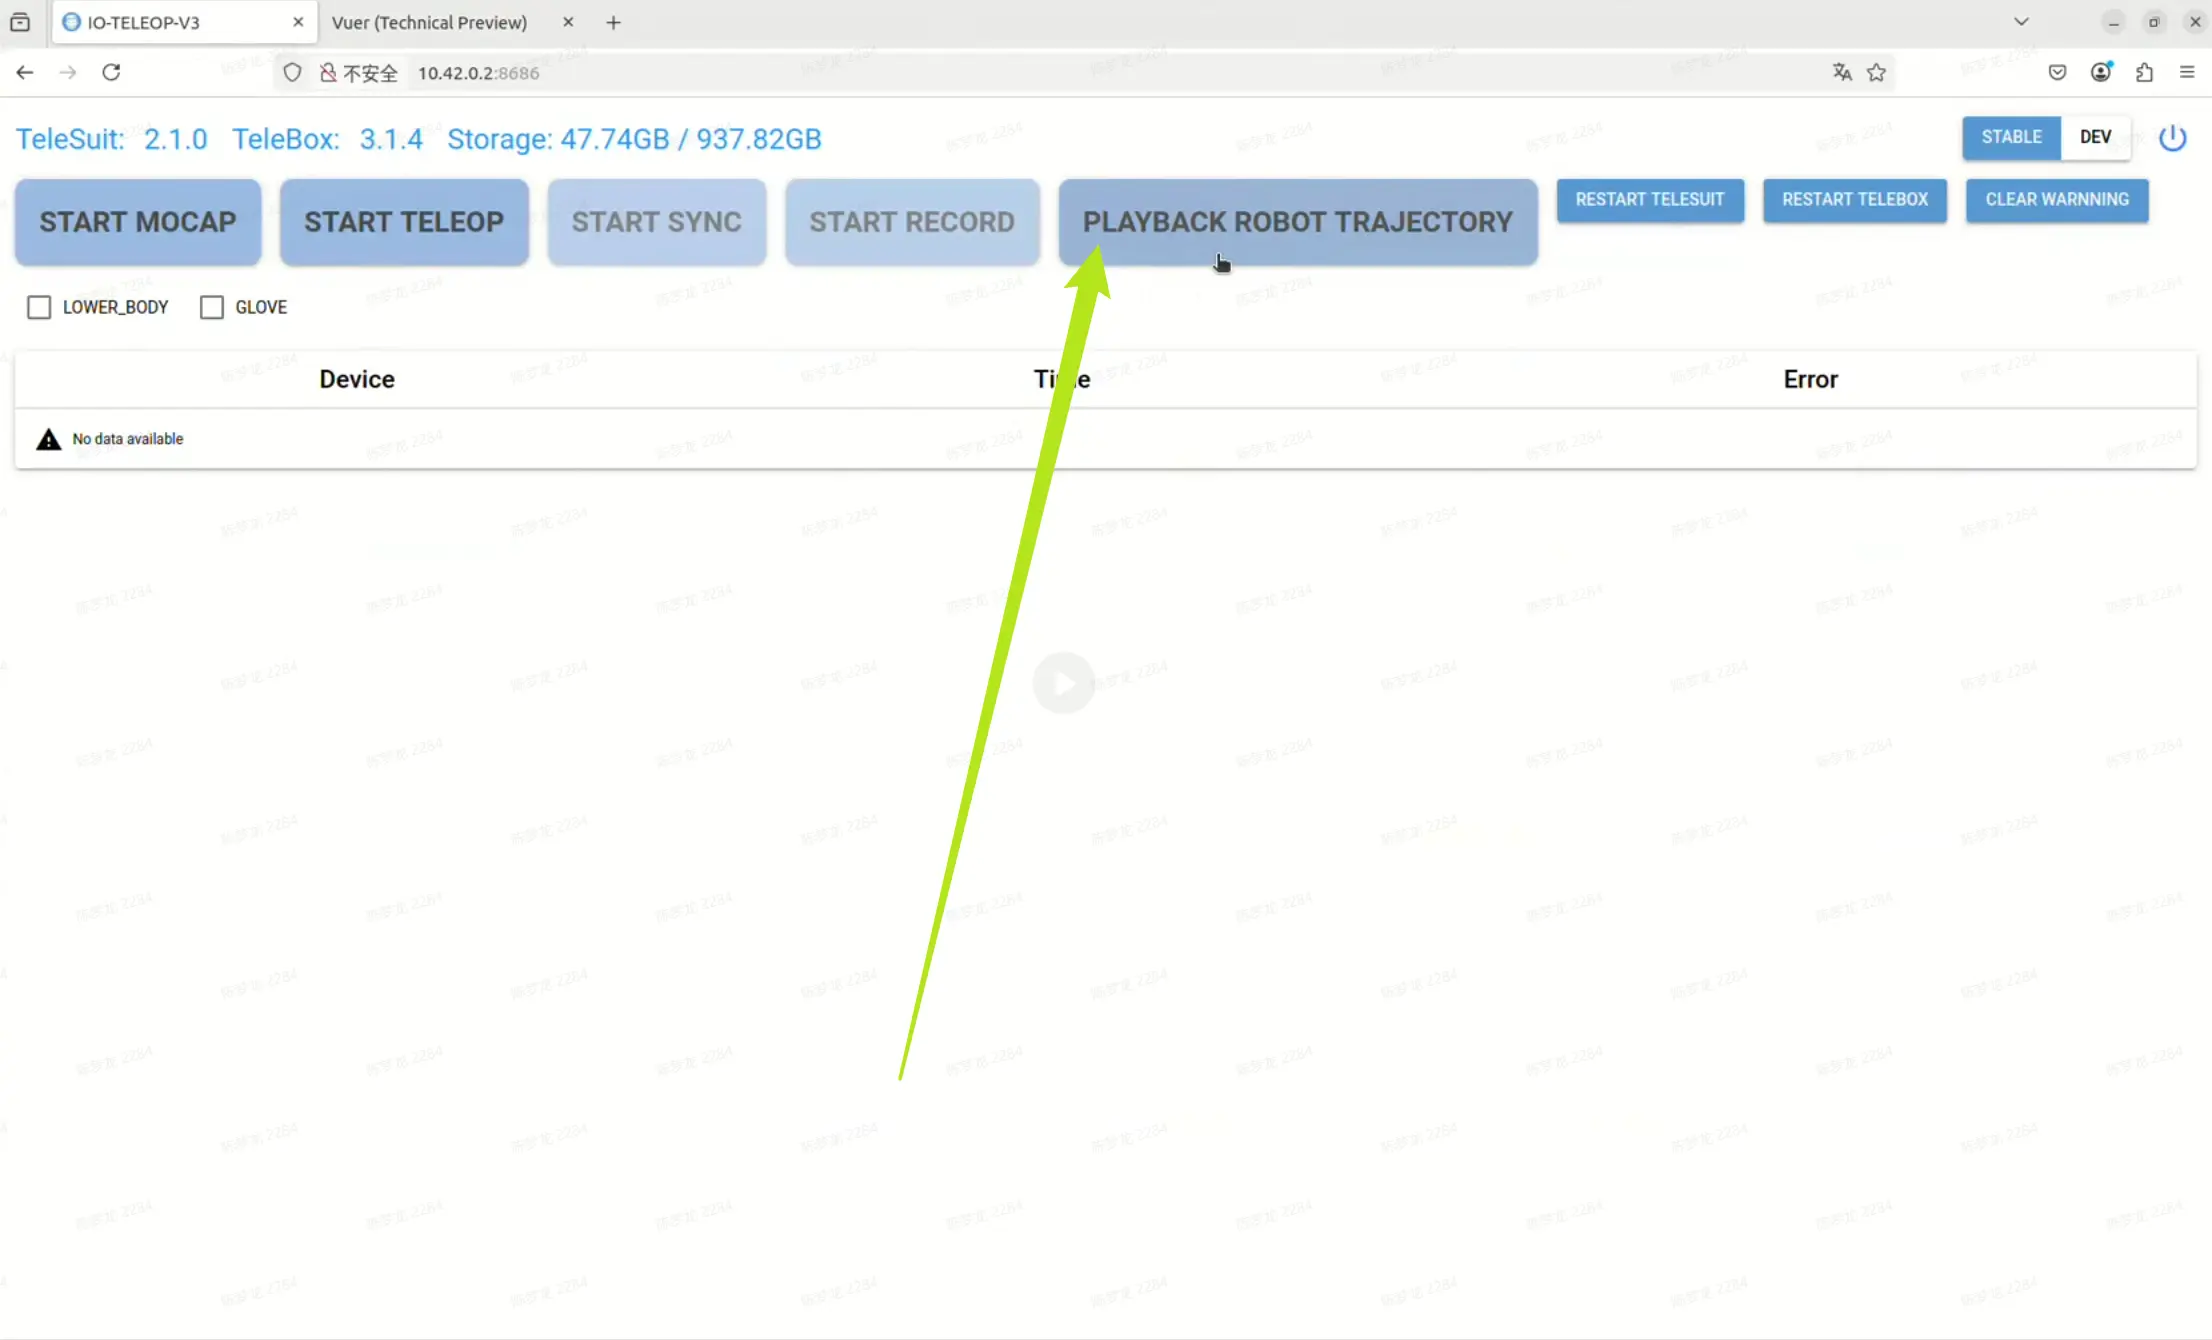
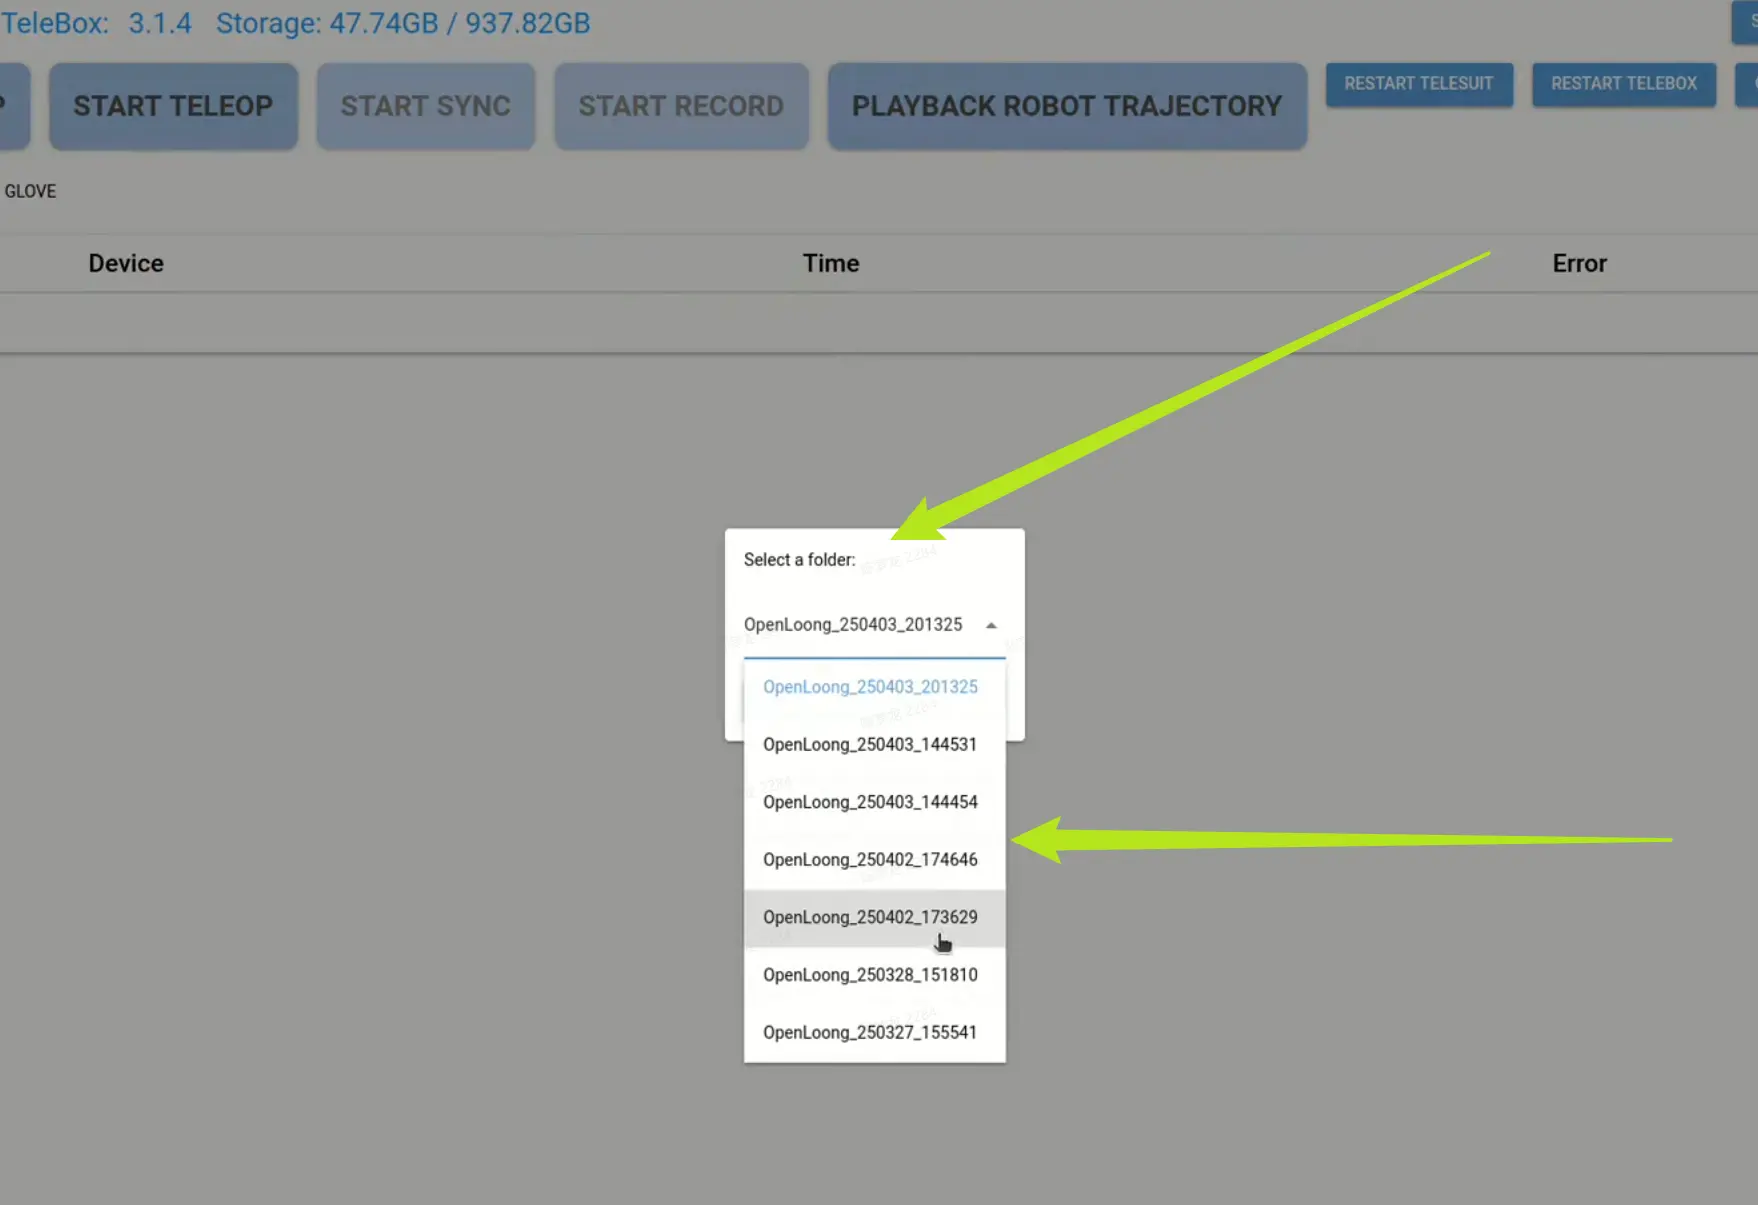
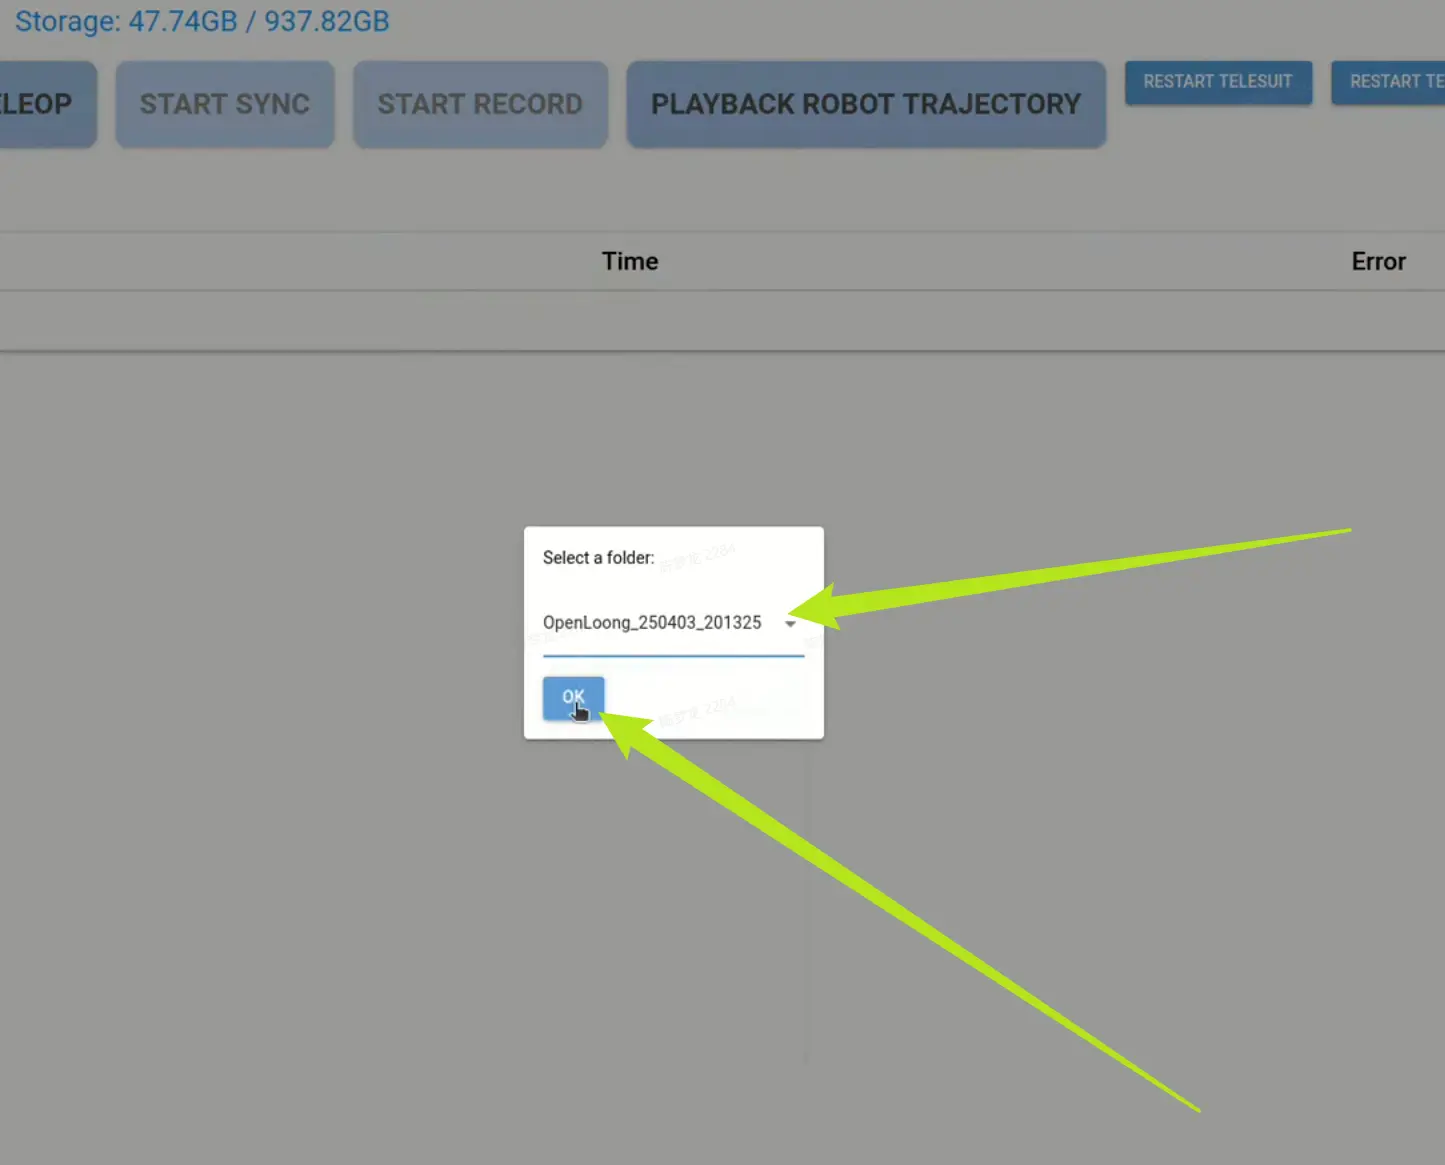
Trajectory Playback
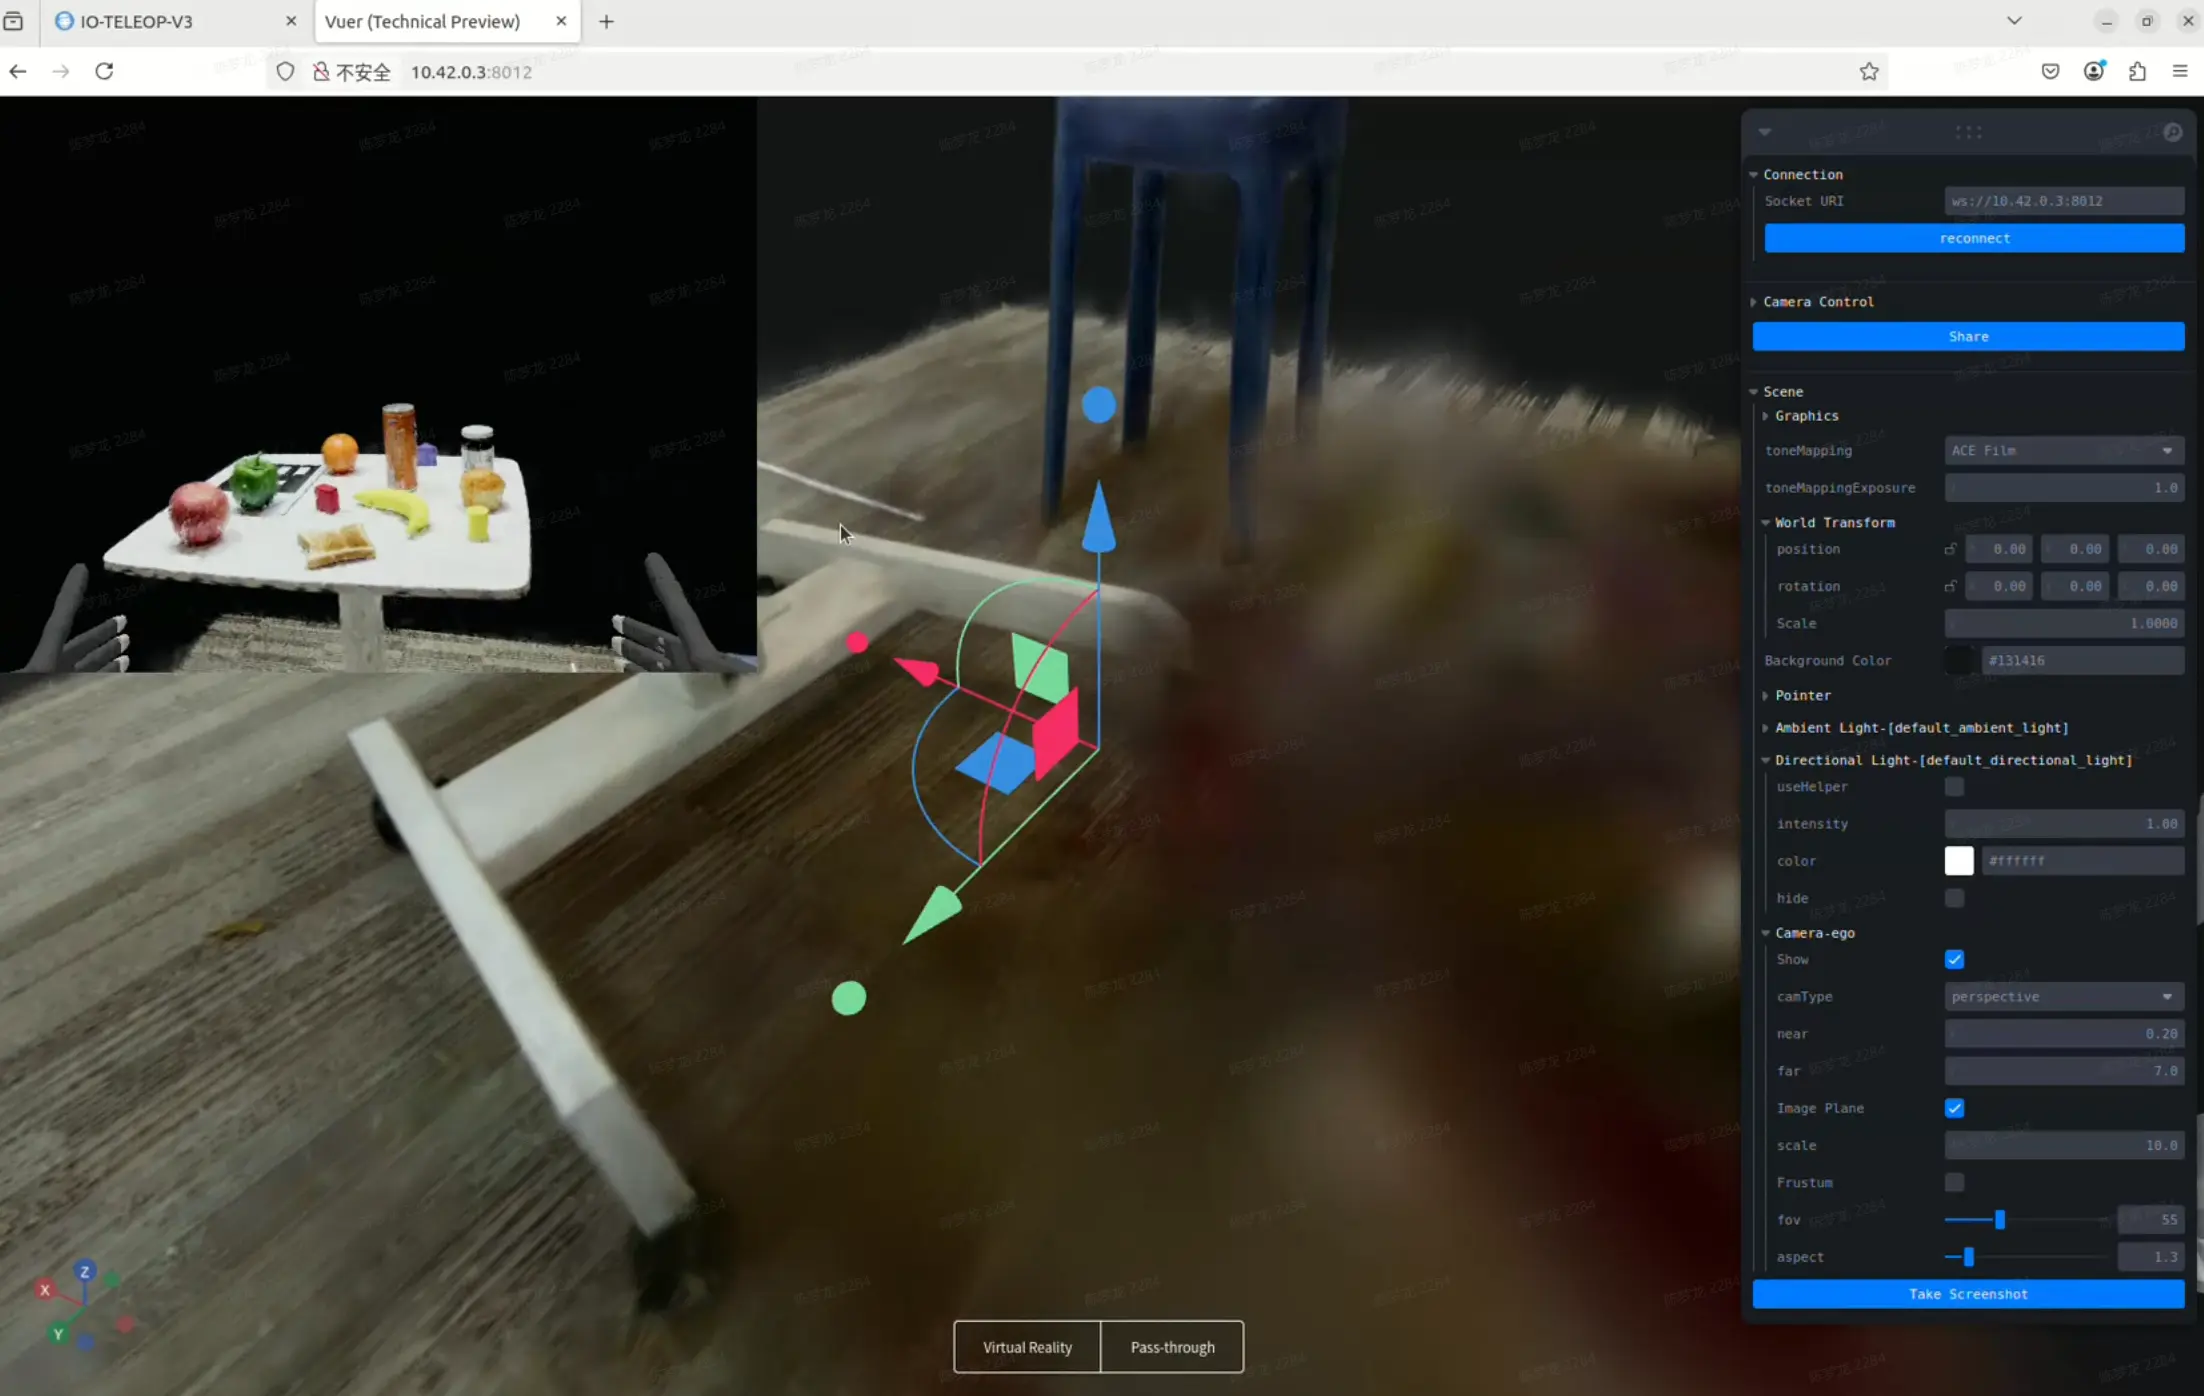
You can playback recorded robot trajectories. Note: playback does not sync robot in VR; view in Vuer web.
Step-by-step Guide
- Connect laptop to device Wi-Fi, open browser to http://10.42.0.2:8686 for IO-Teleop main page.
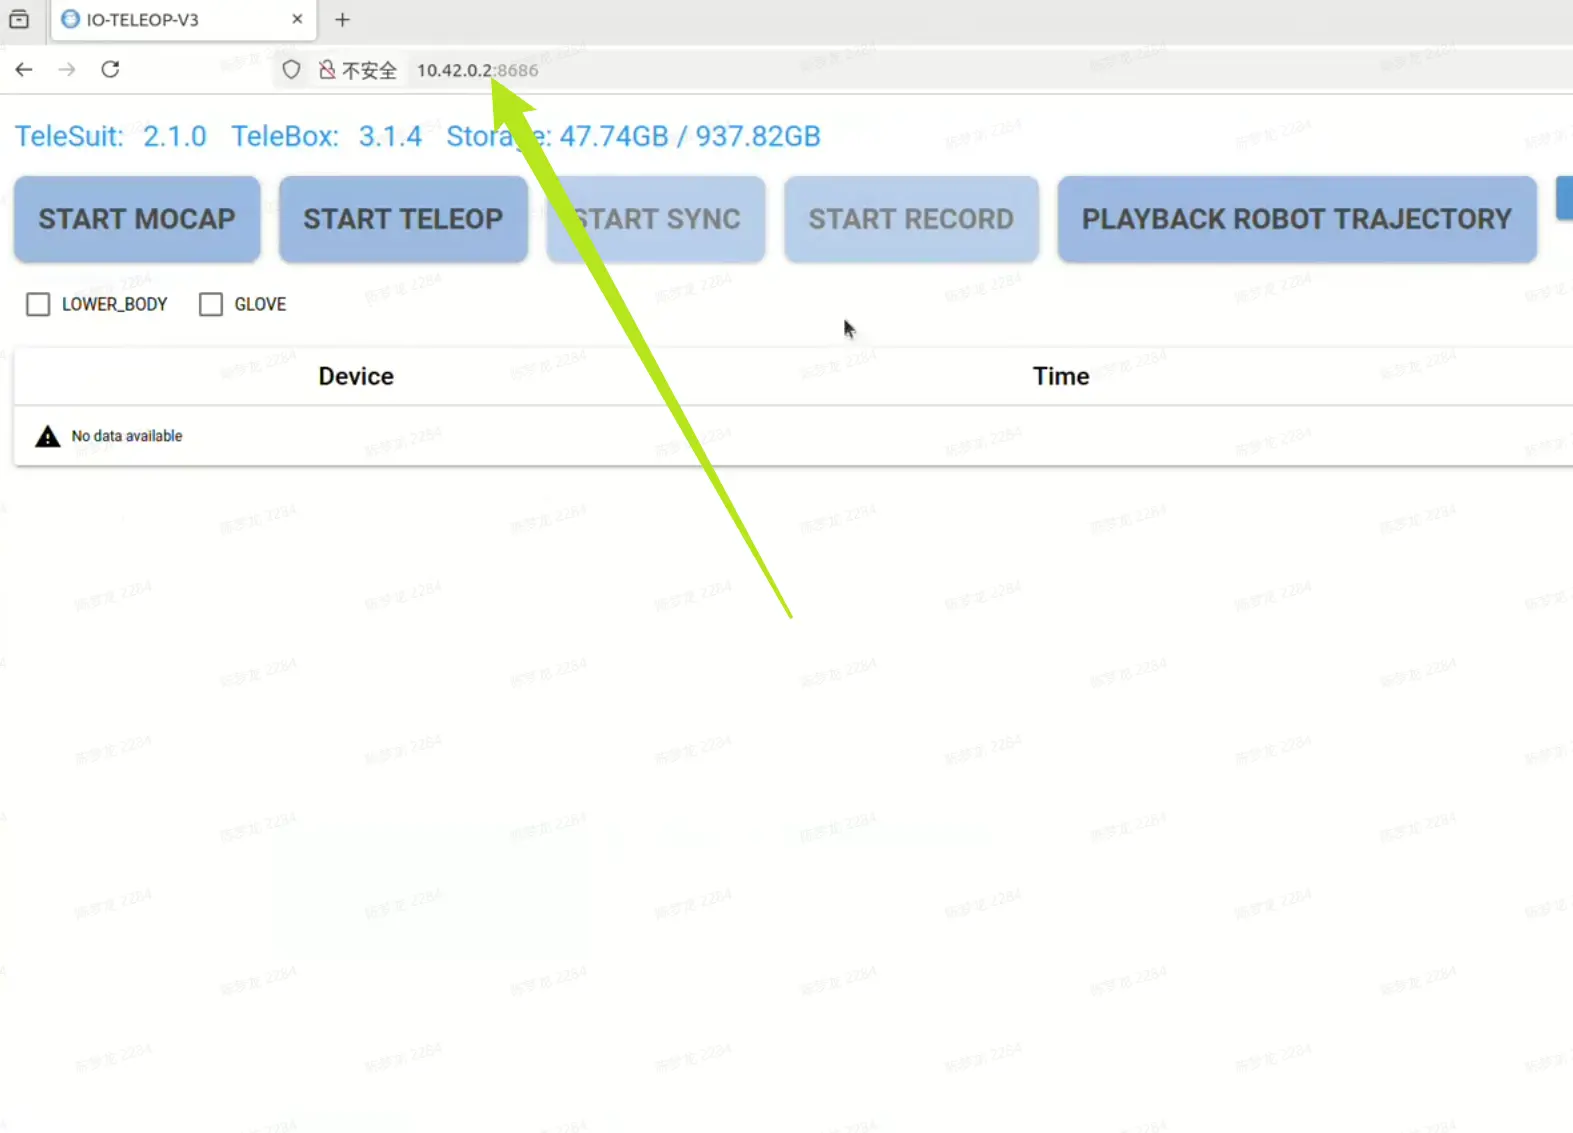
- Open another browser to http://10.42.0.3:8012 for Vuer.
- On IO-Teleop page, click "PLAYBACK ROBOT TRAJECTORY", select a folder, then "OK".
- View playback in Vuer web.
CheatSheet
| Command | Standard | Pro |
|---|---|---|
| Start Mocap | Press START MOCAP in VR | |
| Enable Teleop | Press START TELEOP in VR | |
| VR View Calibration | Hold calibration button Note: After syncing, recalibration is not allowed. Stop sync first, then recalibrate. | |
| Start Sync | After enabling teleop, short press right A | After enabling teleop, right foot eversion |
| Stop Sync | After enabling teleop, short press right B | After enabling teleop, right foot inversion |
| Control Arm | After sync, robot arm follows VR controller | After sync, robot arm follows your hand |
| For redundancy optimization, start mocap and match arm pose before syncing. | ||
| Lock End-effector Orientation | After sync, hold left trigger | After sync, both feet eversion and hold |
| Lock End-effector Position | After sync, hold right trigger | After sync, both feet inversion and hold |
| Control End-effector | After sync, hold controller grip | After sync, dexterous hand follows your fingers |
| Control Chassis | After sync, use left joystick | After sync, Left heel up: forward Left toe up: backward Left rotate left: turn left Left rotate right: turn right |
| Control Torso | After sync, use right joystick | After sync, Right toe up: up Right heel up: down |
| Control Head | After sync, robot head follows your head | |
| Reset Robot | Both joysticks outward for 1s | Both feet outward for 1s |
| Start Recording | After sync, short press left X | After sync, left foot inversion |
| Stop & Save Recording | After sync, short press left Y | After sync, left foot eversion |
| Cancel & Delete Recording | After sync, hold left Y for 2s | After sync, hold left foot eversion for 2s |
| Switch to Transparent Mode | Press both joysticks | |