TeleBox Usage Guide
System Configuration
Communication Settings
-
DDS Domain ID: Sets the DDS communication domain number the device belongs to, used to distinguish communication ranges between different systems.
-
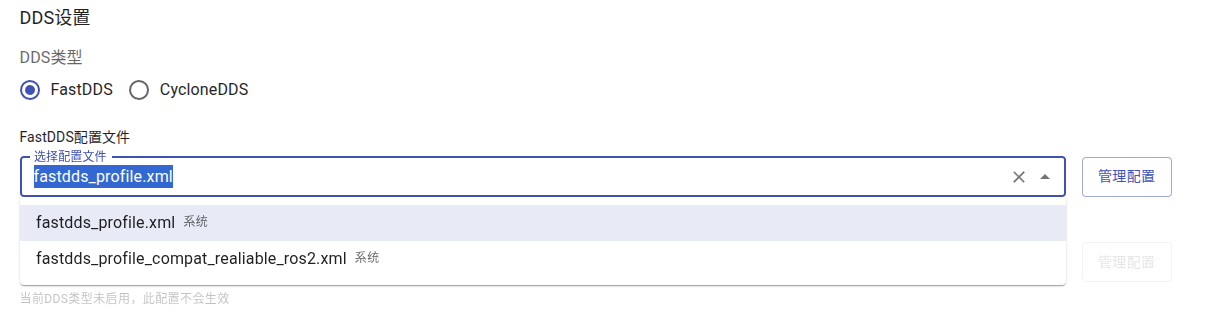
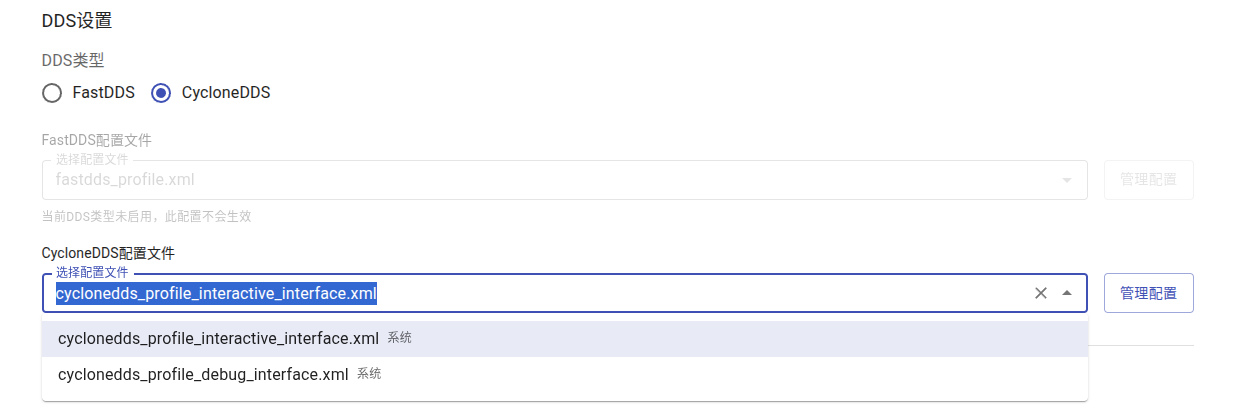
DDS Configuration File Selection: You can select FastDDS or CycloneDDS configuration files provided by the system as needed, or configure custom settings.
- Select System Configuration:
- System Configuration Description:
DDS Type Configuration File Applicable Scenario FastDDS fastdds_profile Default mode (requires discovery server) fastdds_profile_compat_realiable_ros2 Compatibility mode (no discovery server required) CycloneDDS cyclonedds_profile_debug_interface For ROS2 communication via device port cyclonedds_profile_interactive_interface For ROS2 communication via interactive port - Upload/Download Configuration:
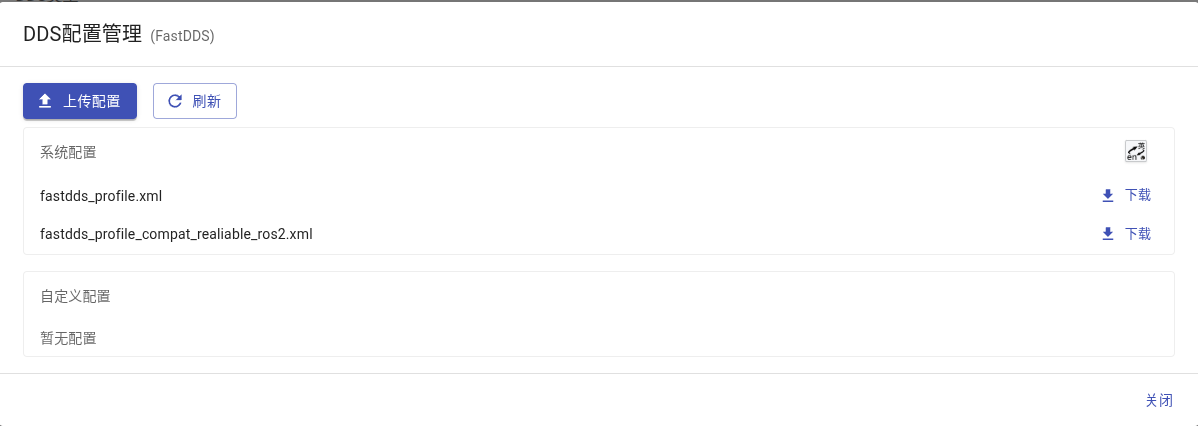
- Edit/Delete Uploaded Custom Configuration Files:

-
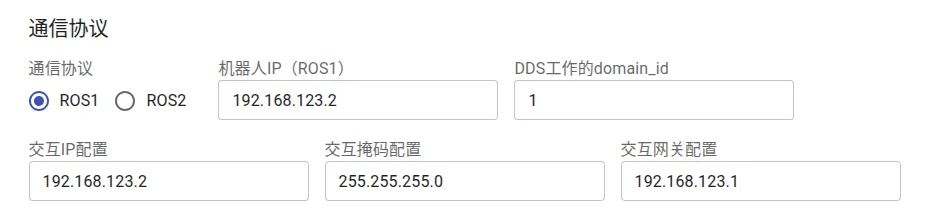
Robot IP (ROS1 Mode): Specifies the IP address of the robot industrial PC in ROS1 mode.
-
Interactive IP Configuration: Configures the interactive IP address for communication between TeleBox and the robot industrial PC.
-
Interactive Subnet Mask Configuration: Sets the subnet mask for the interactive network to ensure communication devices are on the same network segment.
-
Interactive Gateway Configuration: Used to specify the default gateway for the interactive network to enable cross-segment access.
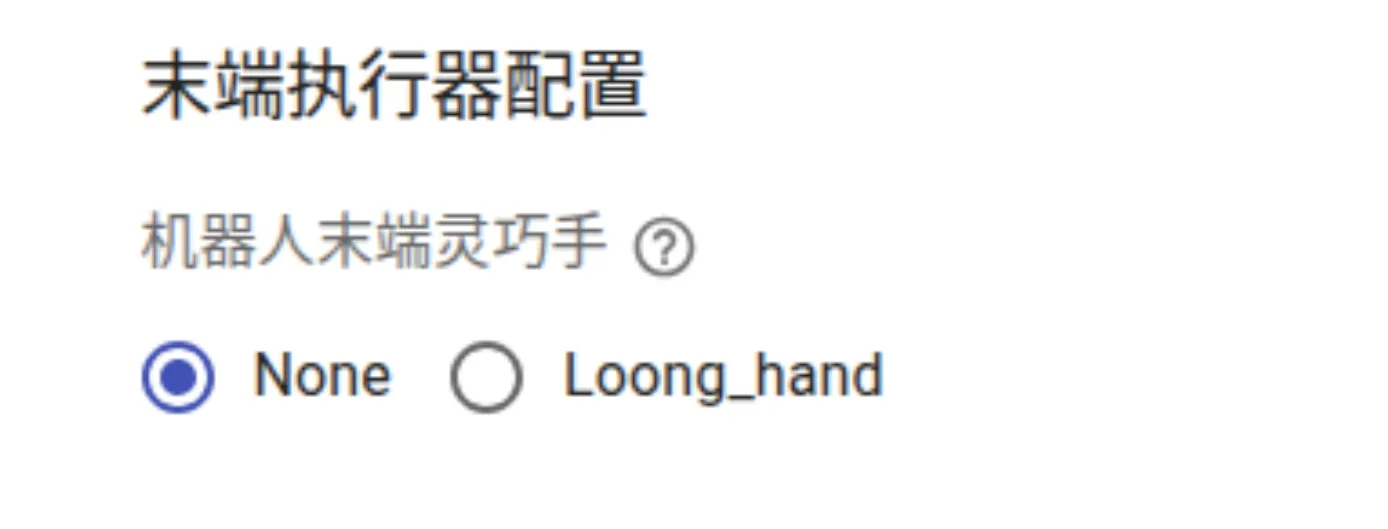
End-Effector Configuration
- If the device package includes motion capture gloves and the end-effector is a dexterous hand, please select the corresponding dexterous hand model according to the actual configuration to enable corresponding control functions.
- If the end-effector is non-dexterous hand (such as two-finger grippers, etc.), this function is not currently supported. Please select None in the options.
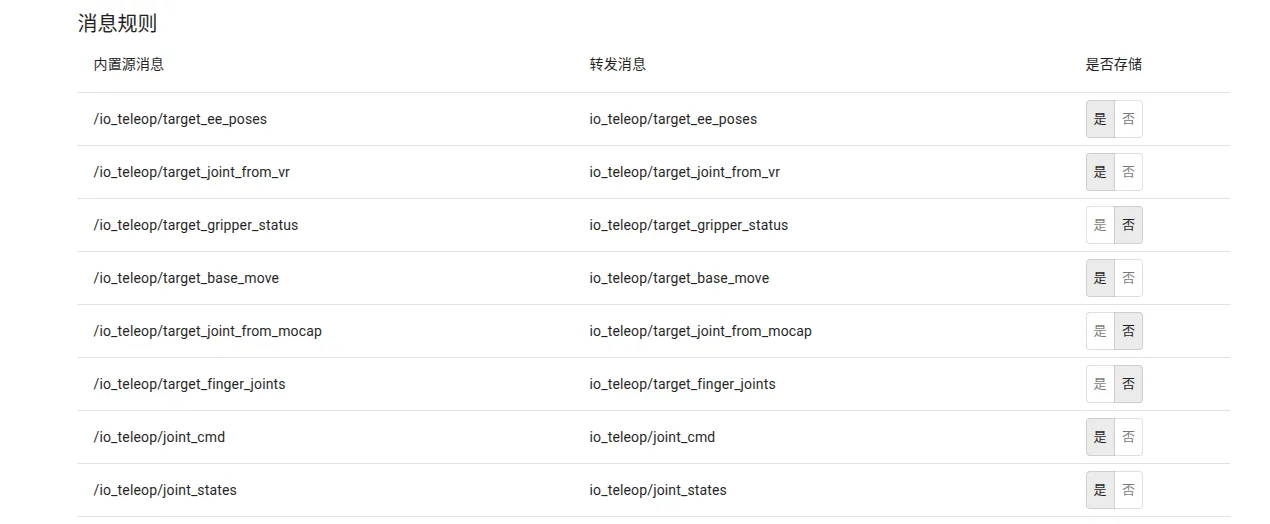
Message Management
Set Whether to Store Messages During Recording
Add Camera Messages
In the Custom Messages section, click Edit

Select the message type to add, fill in the original message name and mapped message name
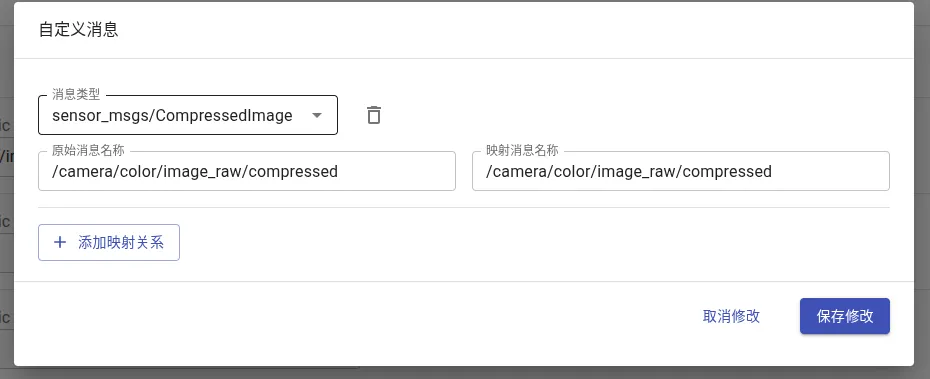
Click Save Changes to complete the addition.
After successful addition, you can select it in the Display Effect interface

Mode Switching
Switch via Web Interface
Select the desired mode and click Apply Configuration.
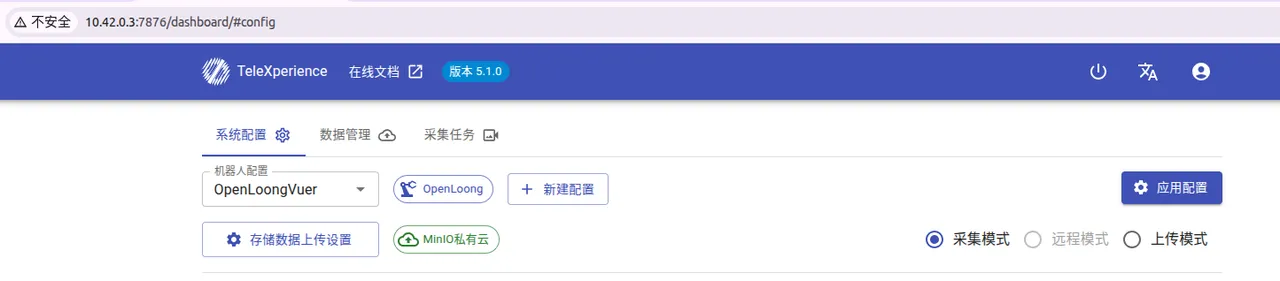
Switch via Physical Button
Long press the physical button on the box to switch between upload mode and collection mode. Before switching, please complete the network connection settings according to the relevant section.
Data Management
View Data List
Click the Data Management tab to view collected data.

Upload Data from BOX to Platform
Refer to TeleBox Standalone Internet Connection for network settings.
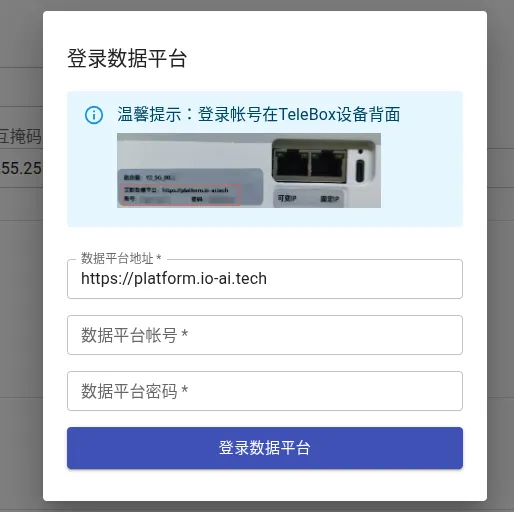
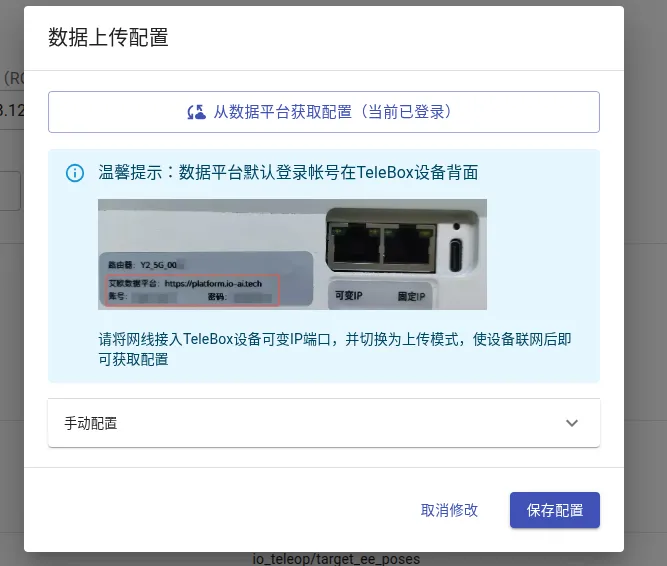
Login to Platform
Click Login in the upper right corner of the page, enter the account and password provided on the box device, and log in to the data platform.
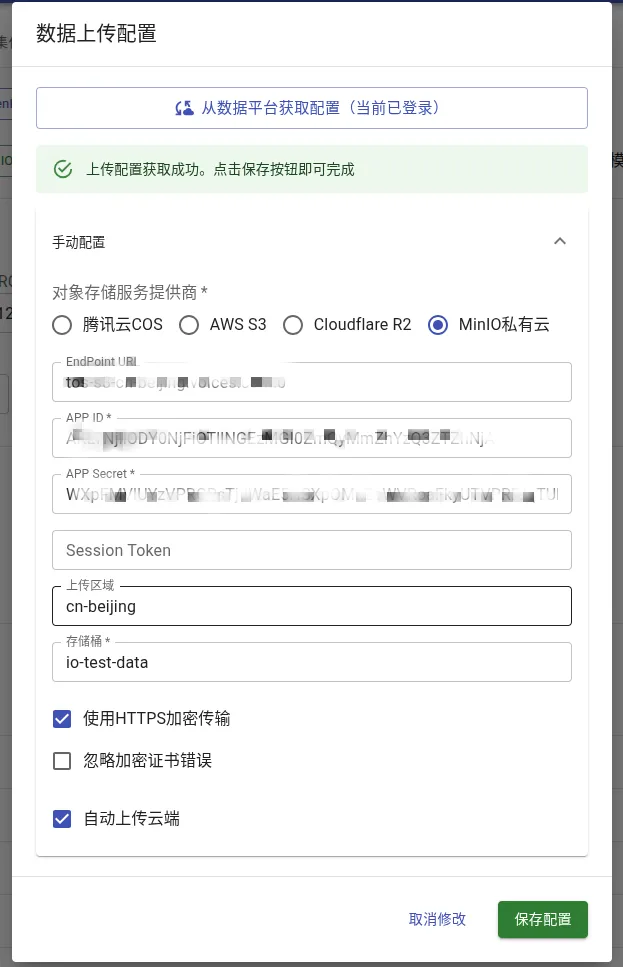
Click Get Configuration from Data Platform, then click Save Configuration to complete the setup.
Manual Upload
Check the data to upload, then click Upload, or directly click Upload All to upload to the data platform.
Automatic Upload
When getting platform configuration, check Auto Upload to Cloud. Next time you switch to upload mode, data will be uploaded automatically.
Download BOX Data to Local
Select the files to download and click Download to save the data files locally.
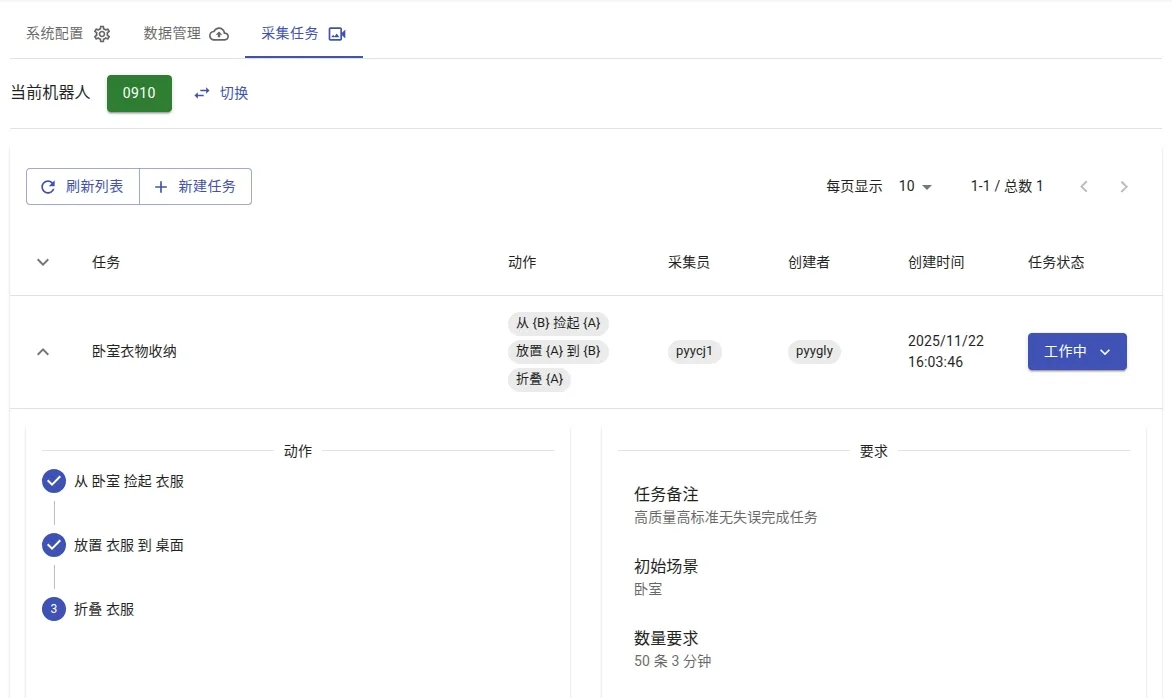
Collection Task Management
This feature is a customized service. Related operations need to be completed with the assistance of a professional team. We recommend contacting your sales representative to obtain a remote function account and receive specific guidance from the technical support team.