Create Collection Task
Overview
Project managers can quickly create new data collection tasks and flexibly set requirements.
How‑to
1) Open the dialog
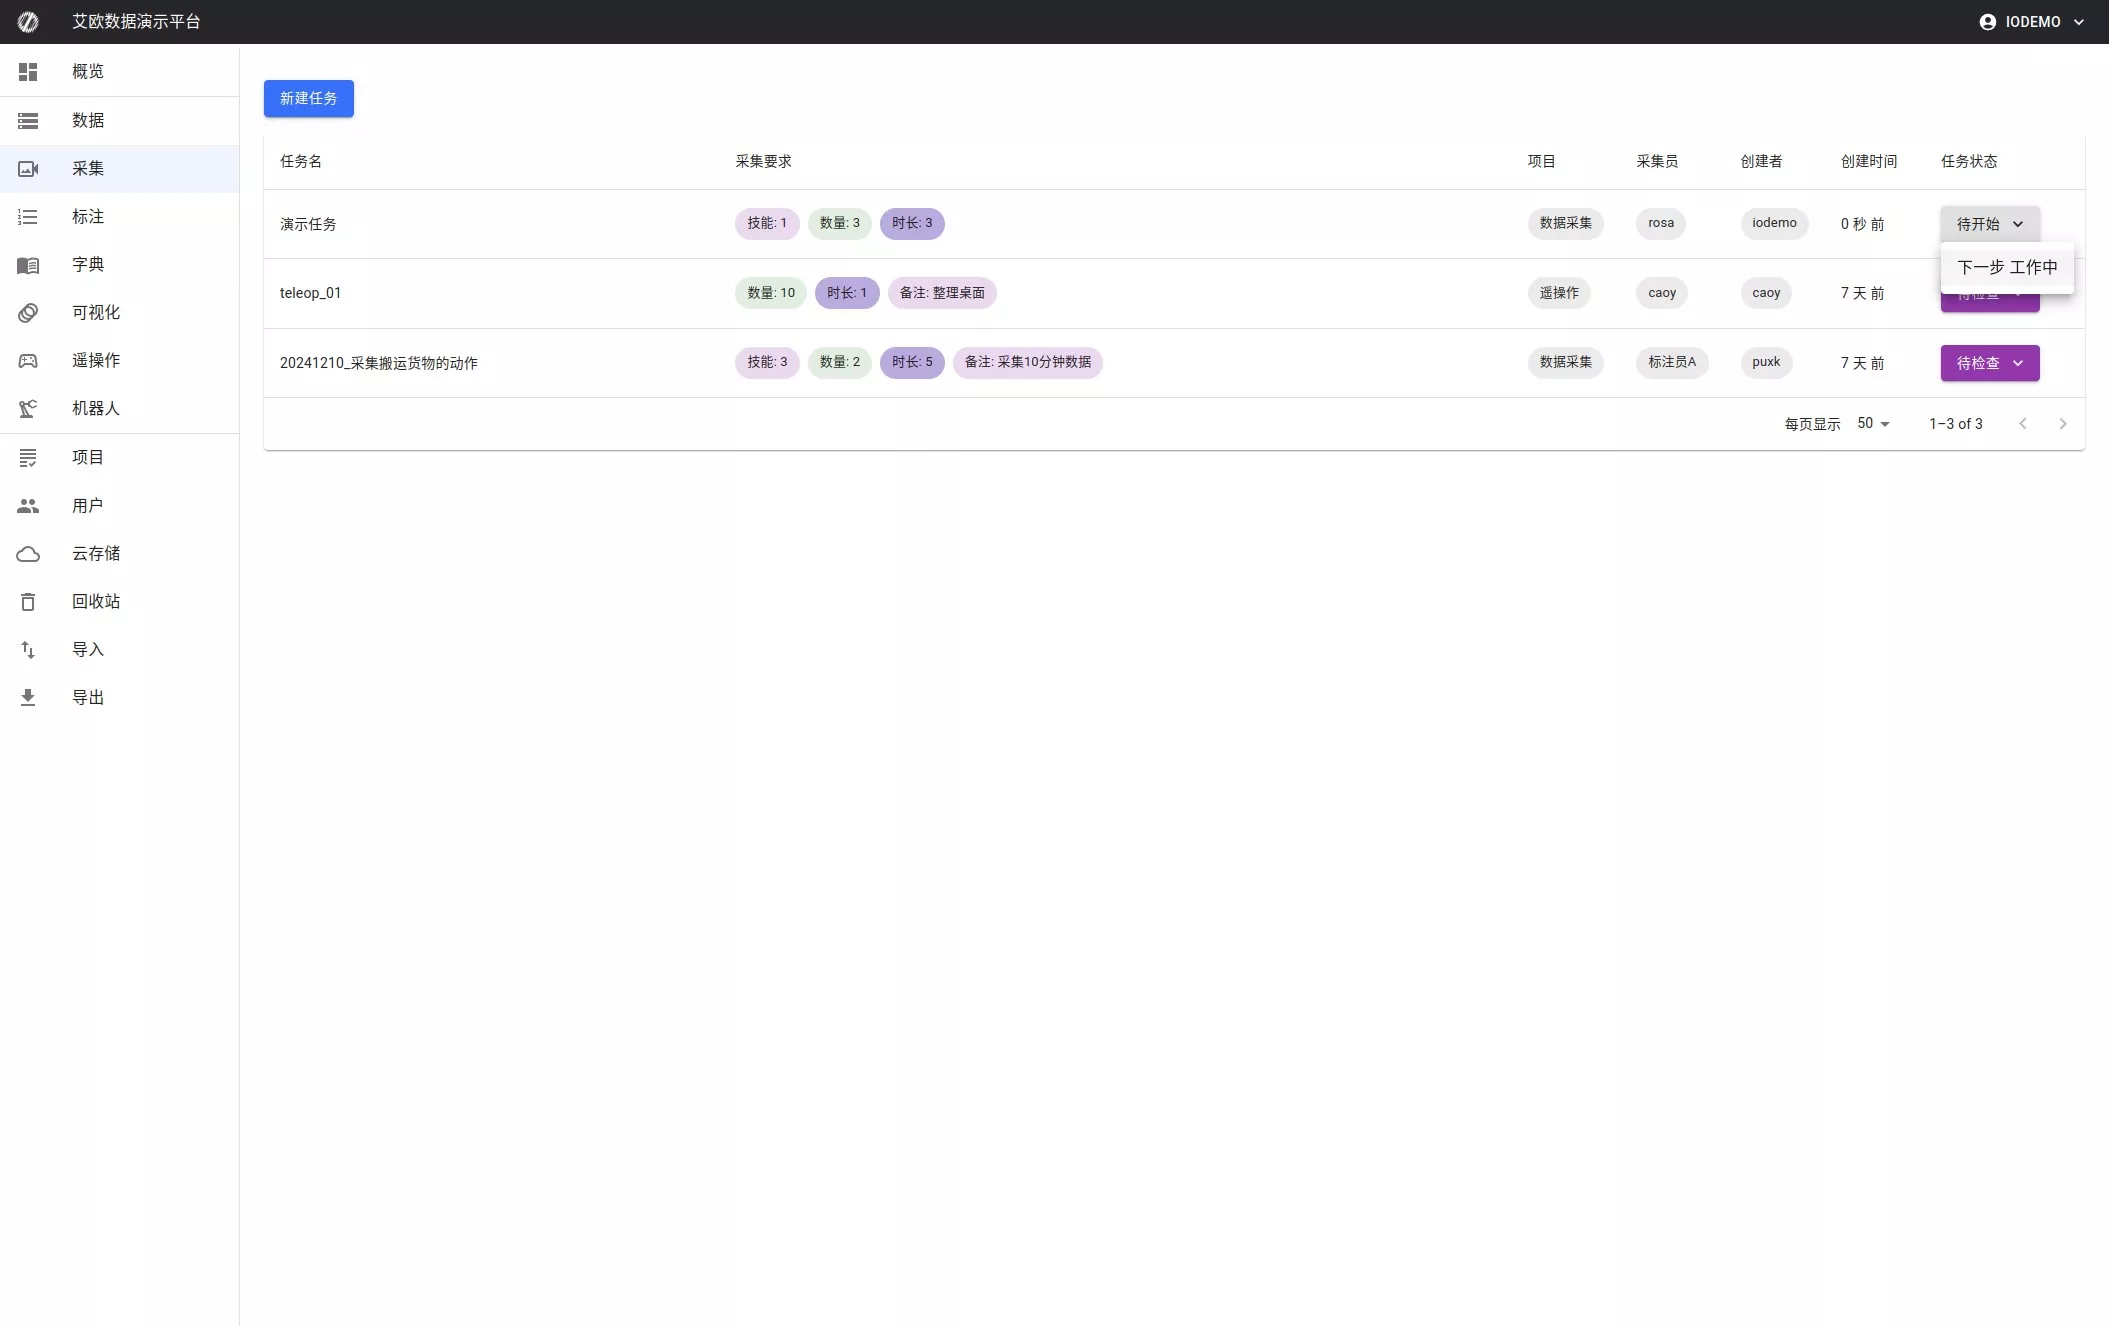
Open the Collection page (left menu), click "New Task" to open the dialog.
2) Configure fields
- Task name — unique identifier (e.g.,
Demo Task) - Data source — choose source (e.g.,
rosa) - Actions — choose one or more (e.g.,
pick (A) from (B)) - Quantity — total items to collect (e.g.,
3) - Subtasks — items per subtask (e.g.,
1) - Notes — optional description
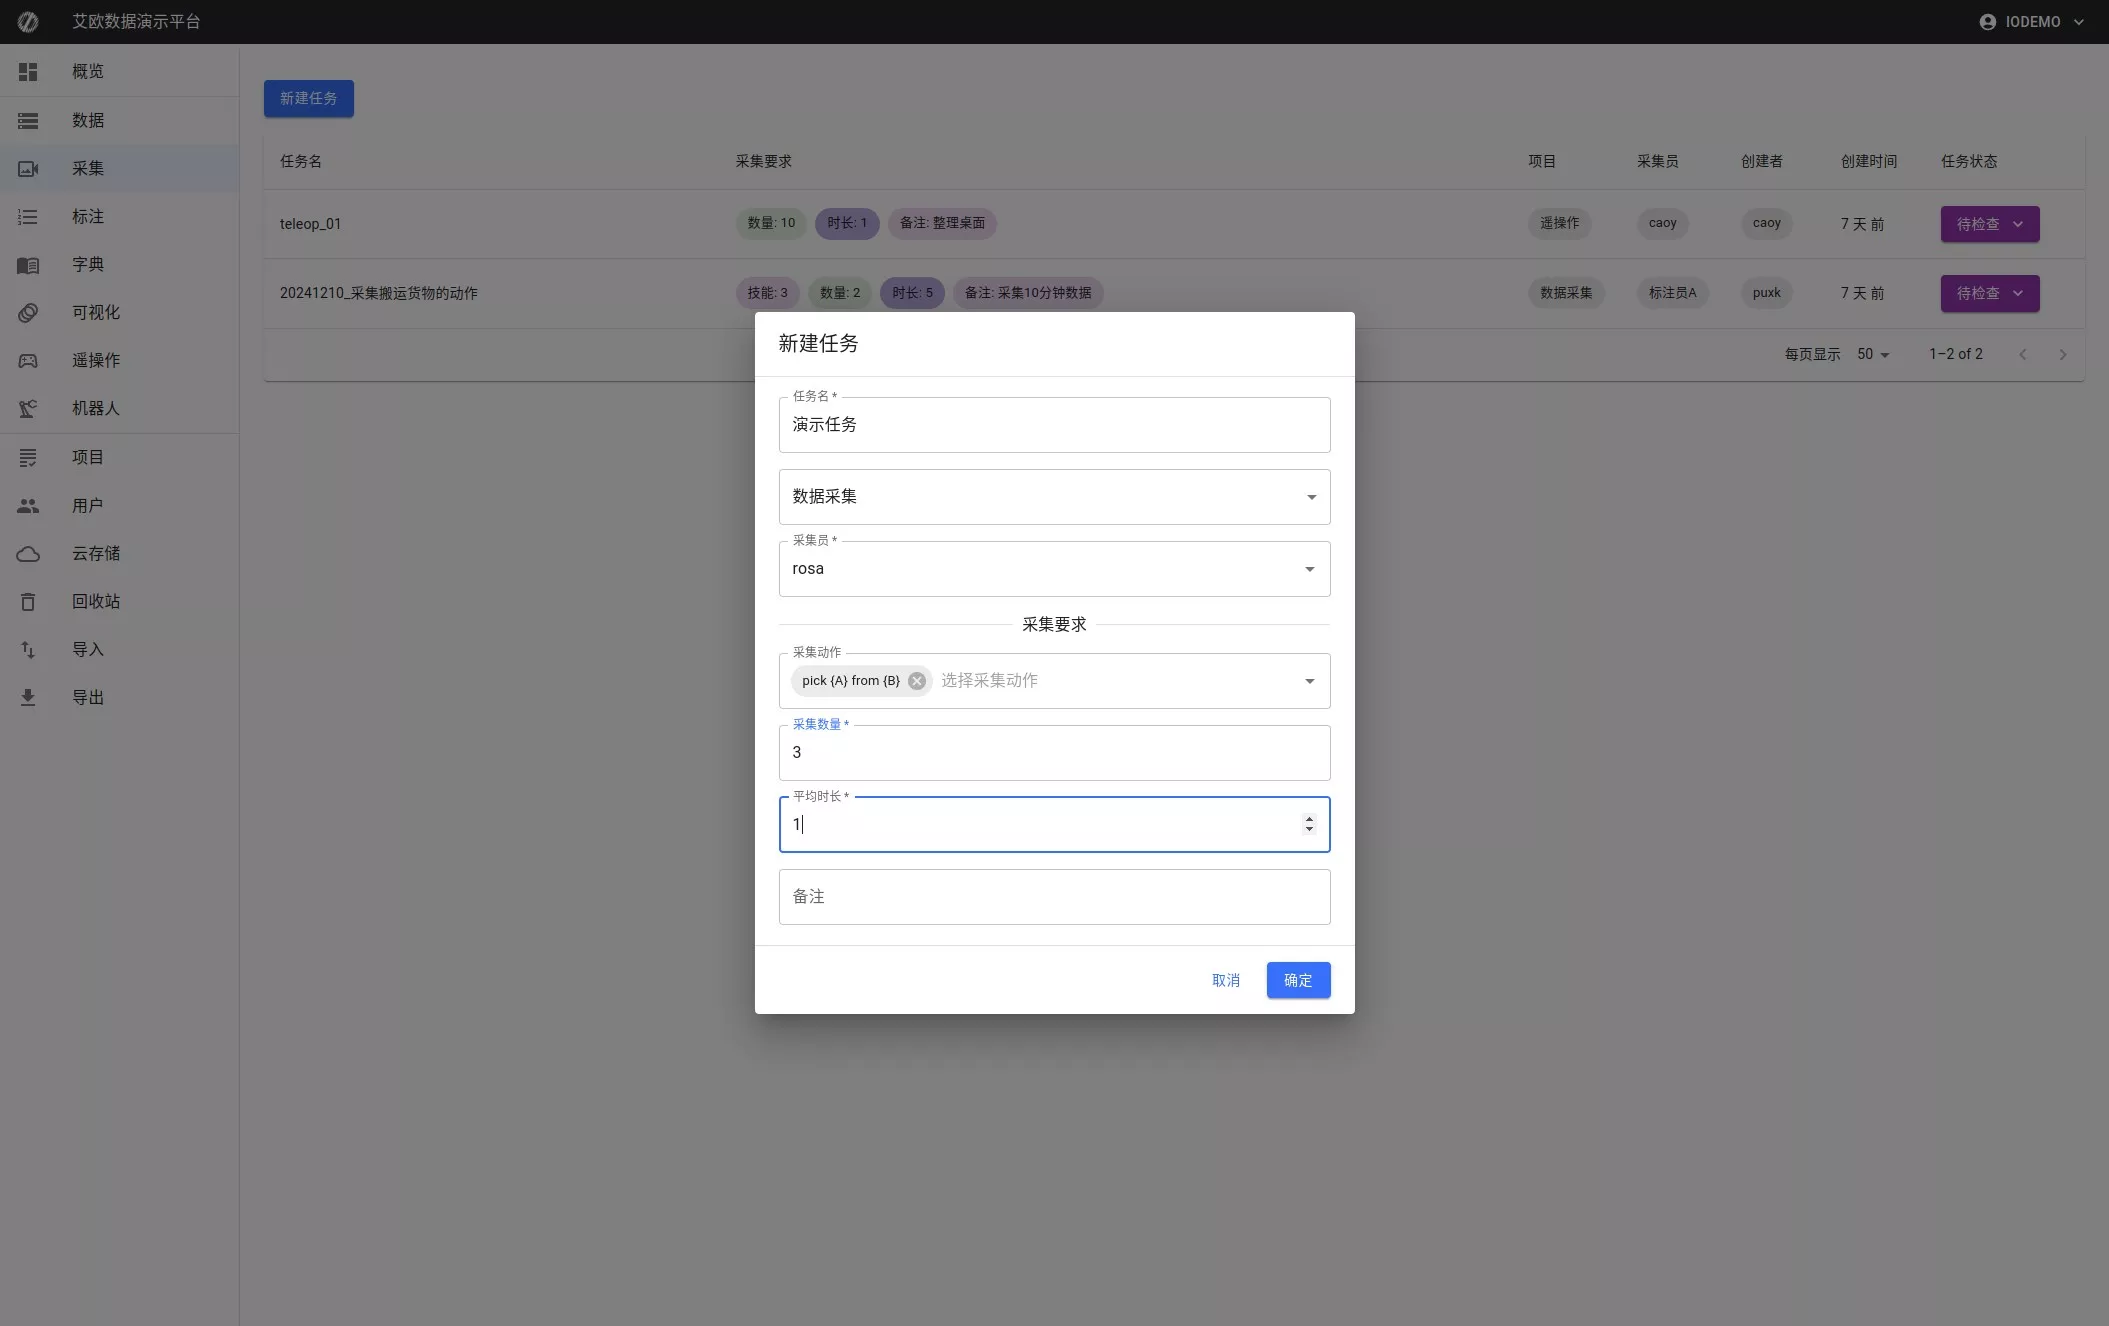
3) Create the task
Click "OK" to create or "Cancel" to abort.