Pi0 and Pi0.5 Model Fine-tuning: Official Workflow Based on OpenPI
Pi0 and Pi0.5 are Vision-Language-Action (VLA) models developed by Physical Intelligence. If you are planning to use data exported from the EmbodiFlow platform to fine-tune these models, this guide will walk you through the complete process based on the official OpenPI framework.
While LeRobot supports multiple mainstream models including Pi0, for the Pi0 series, we strongly recommend using the official OpenPI training framework.
It is developed based on JAX, natively supports multi-card high-performance training, and can better unleash the potential of Pi0.
1. Preparation: Exporting and Placing Data
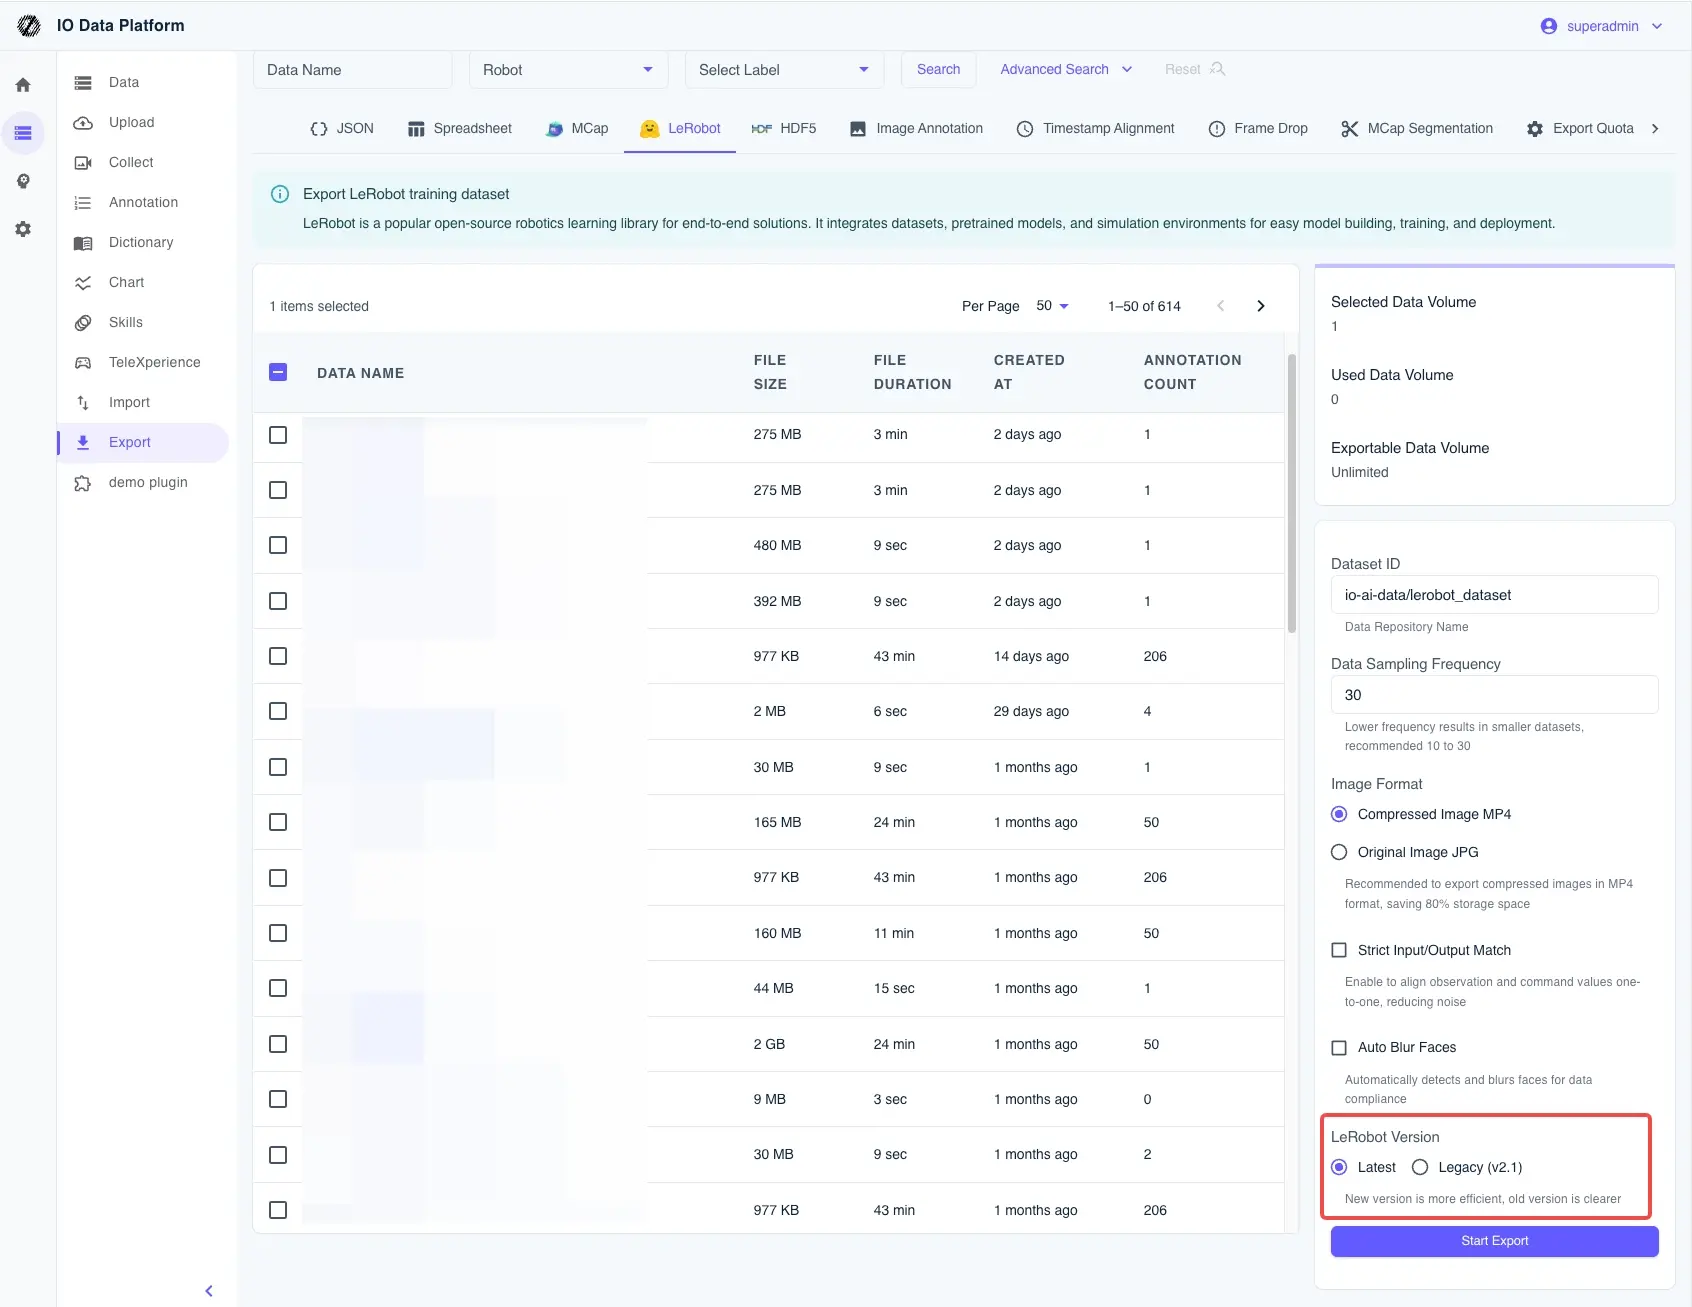
First, we need to convert the annotated data on the EmbodiFlow platform into a format that OpenPI can recognize.
Export Process
- Format Selection: On the export page, select the LeRobot v2.1 standard format.

- Local Extraction: Download the generated
.tar.gzfile and extract it. - Directory Convention: To allow OpenPI to find the data smoothly, please move it to the Hugging Face local cache directory. For example:
# Prepare directory
mkdir -p ~/.cache/huggingface/lerobot/local/mylerobot

# Move extracted files (containing meta.json, data/, etc.) into it
mv /path/to/extracted/data/* ~/.cache/huggingface/lerobot/local/mylerobot/
Field Mapping Reference (Taking Aloha Three-Camera as an example)
In subsequent configurations, you need to ensure that the keys in the code align with the fields in the data. By default, we recommend using:
cam_high: Top viewcam_left_wrist: Left wrist viewcam_right_wrist: Right wrist viewstate: Current robot stateaction: Target action (Note: ALOHA is 14-dimensional in the default OpenPI configuration. If your data dimensionality is different, be sure to refer to the "Deep Pitfalls" section below).
2. Core: How to Choose the Right Training Configuration?
OpenPI's training logic is highly templated. When choosing a configuration, you are essentially selecting a "policy template closest to your robot" and then fine-tuning it.
| Your Requirement Scenario | Recommended Path | Key Focus |
|---|---|---|
| Quick Validation / Linkage Troubleshooting | Simulation Path (LIBERO / ALOHA Sim) | Focus on quick alignment of Inputs/Outputs, lowest cost. |
| Real Robot Deployment (Dual-arm Aloha) | ALOHA Real | Must align camera keys, action dimensionality, and gripper control logic. |
| Single-arm / Industrial Robot | Refer to UR5 Example | Prioritize solving control interface compatibility, then consider training effectiveness. |
| Pursuing Extreme Generalization | Based on DROID Data Alignment | Learn DROID's normalization (Norm Stats) strategy. |
Simply put: If it's your first time, use the simulation configuration to troubleshoot the process; if you want to deploy on a real machine, choose ALOHA Real and strictly align state/action dimensions.
This is a very easy-to-overlook "pitfall." OpenPI's default ALOHA policy (aloha_policy.py) hard-codes a 14-dimensional structure:
- Default Structure:
[left_arm_6_joints, left_gripper_1, right_arm_6_joints, right_gripper_1]= 14 dimensions. - Common Problem: If you are using a 7-axis robotic arm (e.g.,
[7, 1, 7, 1]), the total dimension becomes 16. At this point, if the code is not modified, the extra dimensions will be silently truncated, causing the trained model to completely lose control of the last two joints.
Modification Suggestions:
- Check your
actionvector definition. - In
aloha_policy.py, change all:14slices to your actual dimension (e.g.,:16). - Simultaneously modify the length of
_joint_flip_maskto ensure the sign reversal logic matches your hardware.
3. Writing Training Configuration
Now, we need to define your fine-tuning task in openpi/src/openpi/training/config.py.
# Example: Adding a custom configuration for your robot
TrainConfig(
    name="pi0_aloha_mylerobot",
    model=pi0_config.Pi0Config(),
    data=LeRobotAlohaDataConfig(
        repo_id="local/mylerobot",  # Points to the directory where data was placed earlier
        assets=AssetsConfig(
            assets_dir="/home/user/code/openpi/assets/pi0_aloha_mylerobot",
        ),
        default_prompt="fold the clothes", # Task description, very important
        repack_transforms=_transforms.Group(
            inputs=[
                _transforms.RepackTransform(
                    {
                        "images": {
                            "cam_high": "observation.images.cam_high",
                            "cam_left_wrist": "observation.images.cam_left_wrist",
                            "cam_right_wrist": "observation.images.cam_right_wrist",
                        },
                        "state": "observation.state",
                        "actions": "action",
                    }
                )
            ]
        ),
    ),
    weight_loader=weight_loaders.CheckpointWeightLoader("gs://openpi-assets/checkpoints/pi0_base/params"),
    num_train_steps=20_000,
)
4. Starting Training: Computing Statistics and Running
Before starting training, be sure to perform normalization statistics. Otherwise, the range of values received by the model will be chaotic.
Step 1: Compute Norm Stats
uv run scripts/compute_norm_stats.py --config-name pi0_aloha_mylerobot
Step 2: Start Fine-tuning
We recommend using JAX mode for maximum performance.
Single GPU Mode:
export XLA_PYTHON_CLIENT_MEM_FRACTION=0.9
CUDA_VISIBLE_DEVICES=0 uv run scripts/train.py pi0_aloha_mylerobot \
    --exp-name=my_first_experiment \
    --overwrite
Multi-GPU Parallel (FSDP):
uv run scripts/train.py pi0_aloha_mylerobot --exp-name=multi_gpu_run --fsdp-devices 4
5. Inference and Deployment
After fine-tuning is complete, you can start the policy server to let the robot "run."
# Start inference server, default port 8000
uv run scripts/serve_policy.py policy:checkpoint \
    --policy.config=pi0_aloha_mylerobot \
    --policy.dir=experiments/my_first_experiment/checkpoints/last
6. FAQ
- Q: Out of Memory (OOM)?
- Decrease
batch_size, or confirm ifXLA_PYTHON_CLIENT_MEM_FRACTIONis set correctly. Multi-card FSDP is also an effective means to alleviate VRAM pressure.
- Decrease
- Q: Model movements are strange, or joints don't move at all?
- Check if the mapping in
RepackTransformis correct. - Highly recommend revisiting the 14-dim vs 16-dim deep pitfall section above and check if dimensions are being silently truncated.
- Check if the mapping in
- Q: Training Loss doesn't decrease at all?
- Check if
default_promptis accurate. - Confirm if the statistics file generated by
compute_norm_statsis taking effect.
- Check if