Internet and Router Settings
This section explains how to connect TeleSuit and TeleBox to the internet, and how to configure the router that comes with TeleSuit.
The IP addresses, Wi-Fi names and login passwords mentioned below are maintained in On-Site Network Reference.
An internet connection is only required for scenarios such as software upgrade and data upload. If your device does not need internet access, you can skip this section.
Connect to Internet Through TeleSuit Router
This mode is only applicable for network upgrade operations. It is not recommended to enable it in other scenarios to avoid abnormal network behavior.
Debug Computer with Wireless Network Card

- Please refer to the figure above for the wired network connection, where TeleBox uses the device port for connection.
- Connect the debug computer to the TeleSuit main control Wi-Fi (
IO_5G_*****orIO_2.4G_*****). The password isminnanoIO2023. - Refer to Enable Wireless Relay to complete the setup.
Debug Computer without Wireless Network Card

- Prepare a switch and connect according to the figure above, where TeleBox uses the device port.
- Set the wired network to DHCP for automatic IP assignment.
- Refer to Enable Wireless Relay to complete the setup.
Router Usage
Login to Management Platform
Prepare a laptop and connect it to the TeleSuit Wi-Fi. Use a browser to access 10.42.0.1, and log in to the router management platform with the password admin123.
If you cannot access the page, use the browser's incognito mode or try another browser (Chrome or Firefox recommended).

Enable Wireless Relay
Login to Management Platform, go to the Basic Settings tab, select Wireless Relay, and click Enable.

Click Scan and wait for scanning to complete.

In the scan results, select the Wi-Fi network to connect to, enter the password, and connect.

Wait for connection to succeed and confirm the network status shows Connected.

Finally, refer to Check if TeleSuit is Connected to Internet to confirm whether the setup takes effect.
Wireless relay may affect the teleoperation network. If teleoperation becomes sluggish after enabling it, or communication conflicts occur while multiple systems are in use, disable wireless relay and try again. Current guidance recommends enabling it only when needed for a network upgrade, and disabling it afterward.
Disable Wireless Relay
If TeleSuit does not need to connect to the internet, it is recommended to disable wireless relay to avoid affecting device performance and normal use.
Login to Management Platform, find the Basic Settings tab, select Wireless Relay, and click to disable Enable.

LAN/WAN Conversion
When the router connects to the internet via cable, it needs to be converted to a WAN port. When the router connects to TeleBox via cable, it needs to be converted to a LAN port.
Login to Management Platform, find the Advanced Settings tab, and click LAN/WAN Conversion under the network list.


TeleBox Standalone Internet Connection
This function is only available when TeleBox is in upload mode.

- Connect according to the figure above, where the Internet end uses TeleBox's interactive port, and the debug computer end uses TeleBox's device port.
- Manually set the debug computer's network address to
10.42.0.x(where x is a two-digit number, e.g.,10.42.0.20). - Refer to Mode Switching to switch TeleBox to upload mode.
- Refer to Check if TeleBox is Connected to Internet to confirm whether the setup takes effect.
Check if the Device is Connected to Internet
Check if TeleSuit is Connected to Internet
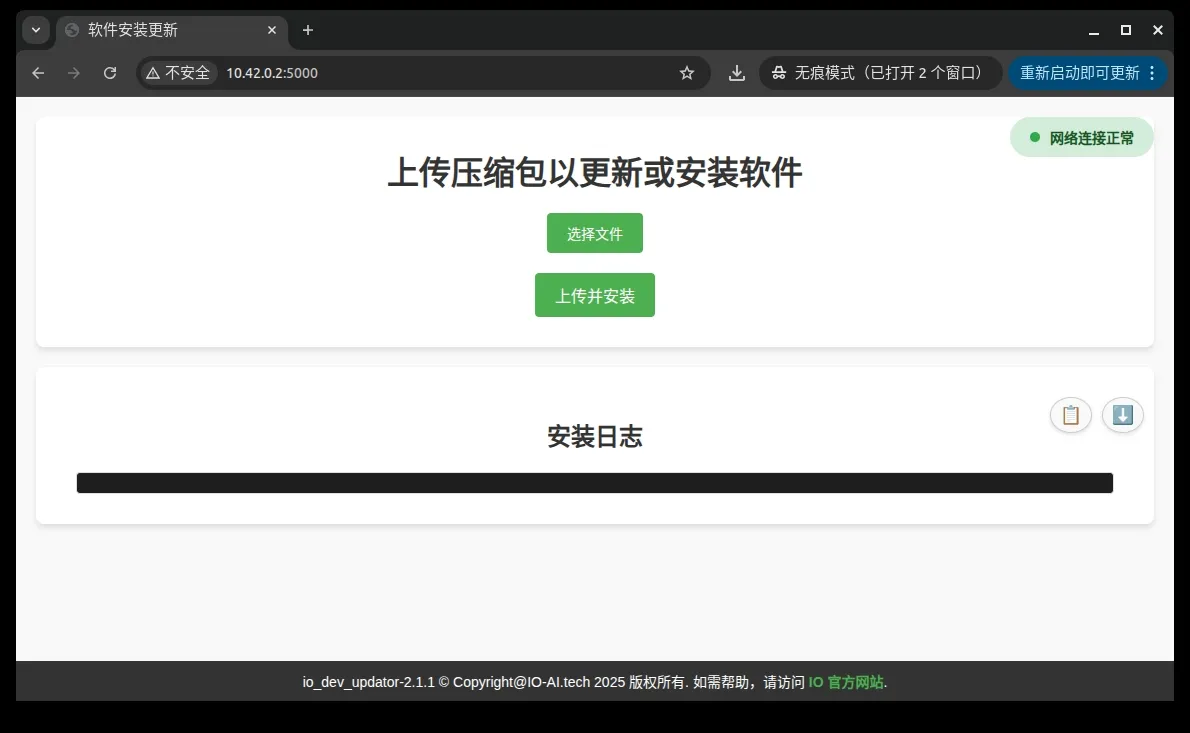
Open 10.42.0.2:5000 and check if Network Connection Normal is displayed in the upper right corner. If it is displayed, the setup is successful.
Check if TeleBox is Connected to Internet
Refer to Check if TeleSuit is Connected to Internet, and change the page address to 10.42.0.3:5000.
Network Connection for Multiple Devices on the Same Subnet

Refer to the figure above for the connection. Multiple devices can be used on the same subnet, but each device must be assigned a different domain_id to avoid communication conflicts.
TeleBox IP Assignment in Different Modes
| Mode | Wireless Network Card | Device Port IP | Interactive Port IP |
|---|---|---|---|
| Upload Mode | / | 10.42.0.3 | Auto-assigned, can connect to internet |
| Collection Mode | / | 10.42.0.3 | Web settings, same network segment as robot |
| Collection Mode (Wireless) | 10.42.0.3 | 10.42.0.4 | Web settings, same network segment as robot |
| Remote Mode | / | Auto-assigned, can connect to internet | Web settings, same network segment as robot |
TeleBox Wireless Connection to TeleSuit
Prepare a computer, connect it to TeleBox's device port via cable, and manually set the network address to 10.42.0.x (where x is a two-digit number, e.g., 10.42.0.20). Then Connect to TeleBox and start nmtui in TeleBox.
nmtui
Enter the graphical settings page, select Activate a connection, and press Enter.

Find the Wi-Fi of the paired TeleSuit and press Enter.

Enter the password minnanoIO2023, switch to OK, and press Enter to confirm.

Wait for the connection to succeed.

After the connection succeeds, switch to Back and press Enter to return.

Switch to Edit a connection and press Enter to confirm.

Select the Wi-Fi configuration that was just connected successfully, switch to Edit..., and press Enter to confirm.

Modify according to the following configuration. After completing the settings, switch to OK and press Enter to confirm.
- Configuration name: io_wifi
- IP address:
10.42.0.3/24 - Gateway:
10.42.0.1 - DNS server:
8.8.8.8and4.4.4.4
The configuration name is an important identification parameter. Please modify it to avoid system function abnormalities.

Switch to Back and press Enter to confirm.

Restart the teleoperation container service, then wait about 10s.
teleop-docker restart

Check whether the configuration matches the image. If it matches, the configuration is successful.
ifconfig

Cancel Wireless Network Configuration
Delete the io_wifi configuration in the graphical interface.
nmtui
Restart the teleoperation container service.
teleop-docker restart
Check whether the configuration matches the image. If it matches, the configuration is successful.
ifconfig
